Article Directory
Preface
Cifar-10 is a dataset collected by Hinton's two big disciples Alex Krizhevsky and Ilya Sutskever for common object recognition. The two cores of DL: data + model.
CIFAR-10 (DataSet) This data set contains a total of: 60000 pictures
1—Picture size: 32pixel*32pixel
2—Picture depth: three-channel RGB color picture
2—These 60,000 pictures are divided into 10 categories, and the specific classifications are shown in the following figure:

There are:
1–50,000 training samples in the 60000 pictures,
2–10,000 test samples (verification Set)
Remarks:
1—CIFAR-10: It is a data set for [Ordinary Object] Recognition
2—Therefore, the biggest feature of this data set and network model is that it can easily migrate [Object Recognition] to other ordinary objects
3— Moreover, the 10 classification problem can be extended to the classification of 100 categories of objects, and even the classification of objects of 1000 categories and more.
One thing to note is:
The data set in the example has an L
1-10000 numpy array of 3072 ------ 10000 pictures pixel array of each picture
2—The unit is uint8s
3-3072 stores a 32 32 color picture (3 32 32==3 1024==3072)
4—The first 1024 bits of numpy are the pixel value of the R component in RGB, the middle 1024 bits are the pixel value of the G component, and the last 1024 is the pixel value of the B component
5—The last point to note is: The
CIFAR-10 example can only be used for the classification of [small pictures], just like the Mnist example mentioned earlier, it is mainly used for the recognition of handwritten numbers.
Download data
First, there is a script file in the data/cifar10 directory: get_cifar10.sh, the source code is as follows
#!/usr/bin/env sh
# This scripts downloads the CIFAR10 (binary version) data and unzips it.

DIR="$( cd "$(dirname "$0")" ; pwd -P )"
cd "$DIR"

echo "Downloading..."

wget --no-check-certificate http://www.cs.toronto.edu/~kriz/cifar-10-binary.tar.gz

echo "Unzipping..."

tar -xf cifar-10-binary.tar.gz && rm -f cifar-10-binary.tar.gz
mv cifar-10-batches-bin/* . && rm -rf cifar-10-batches-bin

# Creation is split out because leveldb sometimes causes segfault
# and needs to be re-created.

echo "Done."
Where -no-check-certificate is to use the "Do not check certificate" option.
The download is complete as follows:

data processing
There is a create_cifar10.sh script under the Caffe root directory examples/cifar10/, which is a script for data conversion:
#!/usr/bin/env sh
# This script converts the cifar data into leveldb format.
set -e

EXAMPLE=examples/cifar10
DATA=data/cifar10
DBTYPE=lmdb

echo "Creating $DBTYPE..."

rm -rf $EXAMPLE/cifar10_train_$DBTYPE $EXAMPLE/cifar10_test_$DBTYPE

./build/examples/cifar10/convert_cifar_data.bin $DATA $EXAMPLE $DBTYPE

echo "Computing image mean..."

./build/tools/compute_image_mean -backend=$DBTYPE \
  $EXAMPLE/cifar10_train_$DBTYPE $EXAMPLE/mean.binaryproto

echo "Done."
In the above script, use the convert_cifar_data.bin executable program to convert the data in LMDB format, and use the compute_image_mean program to generate the mean file.
/examples/cifar10/create_cifar10.sh

To train

There are quick files under the cifar10 file, and there are also a bunch of full files. The main difference is that quick only trains 5000, and full is all trained, 50000.
Since I am training in a virtual machine, it is very slow, here I am doing quick training.
If you use Gpu, you can also perform full training.
vim train_quick.sh
#!/usr/bin/env sh
set -e

TOOLS=./build/tools

$TOOLS/caffe train \
  --solver=examples/cifar10/cifar10_quick_solver.prototxt $@

# reduce learning rate by factor of 10 after 8 epochs
$TOOLS/caffe train \
  --solver=examples/cifar10/cifar10_quick_solver_lr1.prototxt \
  --snapshot=examples/cifar10/cifar10_quick_iter_4000.solverstate $@
Continue to view the cifar10_quick_solver.prototxt file in the script,
# reduce the learning rate after 8 epochs (4000 iters) by a factor of 10

# The train/test net protocol buffer definition
net: "examples/cifar10/cifar10_quick_train_test.prototxt"
# test_iter specifies how many forward passes the test should carry out.
# In the case of MNIST, we have test batch size 100 and 100 test iterations,
# covering the full 10,000 testing images.
test_iter: 100
# Carry out testing every 500 training iterations.
test_interval: 500
# The base learning rate, momentum and the weight decay of the network.
base_lr: 0.001  #4000样本以下学习率是0.001
momentum: 0.9
weight_decay: 0.004
# The learning rate policy
lr_policy: "fixed"
# Display every 100 iterations
display: 100
# The maximum number of iterations
max_iter: 4000
# snapshot intermediate results
snapshot: 4000
snapshot_prefix: "examples/cifar10/cifar10_quick"
# solver mode: CPU or GPU
solver_mode: CPU
Continue to view the cifar10_quick_solver_lr1.prototxt file in the script,
# reduce the learning rate after 8 epochs (4000 iters) by a factor of 10

# The train/test net protocol buffer definition
net: "examples/cifar10/cifar10_quick_train_test.prototxt"
# test_iter specifies how many forward passes the test should carry out.
# In the case of MNIST, we have test batch size 100 and 100 test iterations,
# covering the full 10,000 testing images.
test_iter: 100
# Carry out testing every 500 training iterations.
test_interval: 500
# The base learning rate, momentum and the weight decay of the network.
base_lr: 0.0001  #4000-5000样本学习率是0.0001,降成原来的十分之一了
momentum: 0.9
weight_decay: 0.004
# The learning rate policy
lr_policy: "fixed"
# Display every 100 iterations
display: 100
# The maximum number of iterations
max_iter: 5000
# snapshot intermediate results
snapshot: 5000
snapshot_format: HDF5
snapshot_prefix: "examples/cifar10/cifar10_quick"
# solver mode: CPU or GPU
solver_mode: CPU
Continue to view the cifar10_quick_train_test.prototxt file
name: "CIFAR10_quick"
layer {
  name: "cifar"
  type: "Data"
  top: "data"
  top: "label"
  include {
    phase: TRAIN
  }
  transform_param {
    mean_file: "examples/cifar10/mean.binaryproto"
  }
  data_param {
    source: "examples/cifar10/cifar10_train_lmdb"
    batch_size: 100
    backend: LMDB
  }
}
layer {
  name: "cifar"
  type: "Data"
  top: "data"
  top: "label"
  include {
    phase: TEST
  }
  transform_param {
    mean_file: "examples/cifar10/mean.binaryproto"
  }
  data_param {
    source: "examples/cifar10/cifar10_test_lmdb"
    batch_size: 100
    backend: LMDB
  }
}
layer {
  name: "conv1"
  type: "Convolution"
  bottom: "data"
  top: "conv1"
  param {
    lr_mult: 1
  }
  param {
    lr_mult: 2
  }
  convolution_param {
    num_output: 32
    pad: 2
    kernel_size: 5
    stride: 1
    weight_filler {
      type: "gaussian"
      std: 0.0001
    }
    bias_filler {
      type: "constant"
    }
  }
}
layer {
  name: "pool1"
  type: "Pooling"
  bottom: "conv1"
  top: "pool1"
  pooling_param {
    pool: MAX
    kernel_size: 3
    stride: 2
  }
}
layer {
  name: "relu1"
  type: "ReLU"
  bottom: "pool1"
  top: "pool1"
}
layer {
  name: "conv2"
  type: "Convolution"
  bottom: "pool1"
  top: "conv2"
  param {
    lr_mult: 1
  }
  param {
    lr_mult: 2
  }
  convolution_param {
    num_output: 32
    pad: 2
    kernel_size: 5
    stride: 1
    weight_filler {
      type: "gaussian"
      std: 0.01
    }
    bias_filler {
      type: "constant"
    }
  }
}
layer {
  name: "relu2"
  type: "ReLU"
  bottom: "conv2"
  top: "conv2"
}
layer {
  name: "pool2"
  type: "Pooling"
  bottom: "conv2"
  top: "pool2"
  pooling_param {
    pool: AVE
    kernel_size: 3
    stride: 2
  }
}
layer {
  name: "conv3"
  type: "Convolution"
  bottom: "pool2"
  top: "conv3"
  param {
    lr_mult: 1
  }
  param {
    lr_mult: 2
  }
  convolution_param {
    num_output: 64
    pad: 2
    kernel_size: 5
    stride: 1
    weight_filler {
      type: "gaussian"
      std: 0.01
    }
    bias_filler {
      type: "constant"
    }
  }
}
layer {
  name: "relu3"
  type: "ReLU"
  bottom: "conv3"
  top: "conv3"
}
layer {
  name: "pool3"
  type: "Pooling"
  bottom: "conv3"
  top: "pool3"
  pooling_param {
    pool: AVE
    kernel_size: 3
    stride: 2
  }
}
layer {
  name: "ip1"
  type: "InnerProduct"
  bottom: "pool3"
  top: "ip1"
  param {
    lr_mult: 1
  }
  param {
    lr_mult: 2
  }
  inner_product_param {
    num_output: 64
    weight_filler {
      type: "gaussian"
      std: 0.1
    }
    bias_filler {
      type: "constant"
    }
  }
}
layer {
  name: "ip2"
  type: "InnerProduct"
  bottom: "ip1"
  top: "ip2"
  param {
    lr_mult: 1
  }
  param {
    lr_mult: 2
  }
  inner_product_param {
    num_output: 10
    weight_filler {
      type: "gaussian"
      std: 0.1
    }
    bias_filler {
      type: "constant"
    }
  }
}
layer {
  name: "accuracy"
  type: "Accuracy"
  bottom: "ip2"
  bottom: "label"
  top: "accuracy"
  include {
    phase: TEST
  }
}
layer {
  name: "loss"
  type: "SoftmaxWithLoss"
  bottom: "ip2"
  bottom: "label"
  top: "loss"
}
For the meaning of the above network files, please refer to the previous article: Portal .
In order to further analyze the network structure, draw a network diagram, which is more convenient for analysis.
python ./python/draw_net.py  ./examples/cifar10/cifar10_quick_train_test.prototxt ./examples/cifar10/cifar10_quick.png --rankdir=LR
eog /examples/cifar10/cifar10_quick.png
As follows:

start training, training with cpu is too slow. . . . . . .
./train_quick.sh

From the training results, accuracy=0.7595 and loss=0.72916 after training 5000 times.
Test or reasoning
The test can be classified using the classification.bin program that comes with caffe, or you can use the python program of Ppython/classify.py for testing to
prepare test pictures. There are pictures such as cat.jpg under CAFFE_ROOT/examples/images, or you can add others yourself category.
(1) Use classification.bin program for classification test
Usage: ./build/examples/cpp_classification/classification.bin deploy.prototxt network.caffemodel mean.binaryproto labels.txt img.jpg
./build/examples/cpp_classification/classification.bin \
examples/cifar10/cifar10_quick.prototxt \
examples/cifar10/cifar10_quick_iter_5000.caffemodel.h5 \
examples/cifar10/mean.binaryproto \
data/cifar10/batches.meta.txt \
examples/images/cat.jpg
Execution error: The output label is 11, which is inconsistent with the output 10 of the network.

Modify the batches.meta.txt file and delete the space on the last line of batches.meta.txt. Re-execute ok. The

test result turned out to be the highest probability of deer, and the probability of kitten is 0.0261. This accuracy rate is too low, sweat! ! ! !
(2) Use the python program of python/classify.py to test
View the source code of the classify.py file
#!/usr/bin/env python
"""
classify.py is an out-of-the-box image classifer callable from the command line.

By default it configures and runs the Caffe reference ImageNet model.
"""
import numpy as np
import os
import sys
import argparse
#argparse是python标准库里面用来处理命令行参数的库
#使用步骤:
#(1)import argparse    首先导入模块
#(2)parser = argparse.ArgumentParser()    创建一个解析对象
#(3)parser.add_argument()    向该对象中添加你要关注的命令行参数和选项
#(4)parser.parse_args()    进行解析
import glob
import time

import caffe


def main(argv):
    pycaffe_dir = os.path.dirname(__file__)

    parser = argparse.ArgumentParser()
    # Required arguments: input and output files.
    parser.add_argument(
        "input_file",
        help="Input image, directory, or npy."
    )
    parser.add_argument(
        "output_file",
        help="Output npy filename."
    )
    # Optional arguments.
    parser.add_argument(
        "--model_def",
        default=os.path.join(pycaffe_dir,
                "../models/bvlc_reference_caffenet/deploy.prototxt"),
        help="Model definition file."
    )
    parser.add_argument(
        "--pretrained_model",
        default=os.path.join(pycaffe_dir,
                "../models/bvlc_reference_caffenet/bvlc_reference_caffenet.caffemodel"),
        help="Trained model weights file."
    )
    parser.add_argument(
        "--gpu",
        action='store_true',
        help="Switch for gpu computation."
    )
    parser.add_argument(
        "--center_only",
        action='store_true',
        help="Switch for prediction from center crop alone instead of " +
             "averaging predictions across crops (default)."
    )
    parser.add_argument(
        "--images_dim",
        default='256,256',
        help="Canonical 'height,width' dimensions of input images."
    )
    parser.add_argument(
        "--mean_file",
        default=os.path.join(pycaffe_dir,
                             'caffe/imagenet/ilsvrc_2012_mean.npy'),
        help="Data set image mean of [Channels x Height x Width] dimensions " +
             "(numpy array). Set to '' for no mean subtraction."
    )
    parser.add_argument(
        "--input_scale",
        type=float,
        help="Multiply input features by this scale to finish preprocessing."
    )
    parser.add_argument(
        "--raw_scale",
        type=float,
        default=255.0,
        help="Multiply raw input by this scale before preprocessing."
    )
    parser.add_argument(
        "--channel_swap",
        default='2,1,0',
        help="Order to permute input channels. The default converts " +
             "RGB -> BGR since BGR is the Caffe default by way of OpenCV."
    )
    parser.add_argument(
        "--ext",
        default='jpg',
        help="Image file extension to take as input when a directory " +
             "is given as the input file."
    )
    args = parser.parse_args()

    image_dims = [int(s) for s in args.images_dim.split(',')]

    mean, channel_swap = None, None
    if args.mean_file:
        mean = np.load(args.mean_file)
    if args.channel_swap:
        channel_swap = [int(s) for s in args.channel_swap.split(',')]

    if args.gpu:
        caffe.set_mode_gpu()
        print("GPU mode")
    else:
        caffe.set_mode_cpu()
        print("CPU mode")

    # Make classifier.
    classifier = caffe.Classifier(args.model_def, args.pretrained_model,
            image_dims=image_dims, mean=mean,
            input_scale=args.input_scale, raw_scale=args.raw_scale,
            channel_swap=channel_swap)

    # Load numpy array (.npy), directory glob (*.jpg), or image file.
    args.input_file = os.path.expanduser(args.input_file)
    if args.input_file.endswith('npy'):
        print("Loading file: %s" % args.input_file)
        inputs = np.load(args.input_file)
    elif os.path.isdir(args.input_file):
        print("Loading folder: %s" % args.input_file)
        inputs =[caffe.io.load_image(im_f)
                 for im_f in glob.glob(args.input_file + '/*.' + args.ext)]
    else:
        print("Loading file: %s" % args.input_file)
        inputs = [caffe.io.load_image(args.input_file)]

    print("Classifying %d inputs." % len(inputs))

    # Classify.
    start = time.time()
    predictions = classifier.predict(inputs, not args.center_only)
    print("Done in %.2f s." % (time.time() - start))

    # Save
    print("Saving results into %s" % args.output_file)
    np.save(args.output_file, predictions)


if __name__ == '__main__':
    main(sys.argv)
Need to modify the mean calculation, this mean calculation is wrong.
Found in the classify.py file
mean = np.load(args.mean_file)
Add a line below:
mean=mean.mean(1).mean(1)

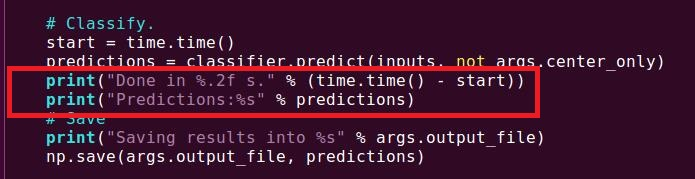
Add print to print the results of the test, add in python/classify.py:
print("Predictions:%s" % predictions)
Run test
python python/classify.py \
--model_def examples/cifar10/cifar10_quick.prototxt \
--pretrained_model  examples/cifar10/cifar10_quick_iter_5000.caffemodel.h5 \
examples/images/cat.jpg  save.file

The predicted fourth category has the highest probability, 0.243992. Check the data/cifar10/batches.meta.txt file. The fourth category is cat. From the

above results, the accuracy of the prediction results of the cifar10 data set is very low. This is only for experimental testing.