Detailed explanation of nginx docker container deployment and configuration files
The docker container can be played casually on your own PC, and you can play it as you want. If conditions permit, you can set up a server to play. I will take my PC as an example. There are two processes, one can be Install the nginx docker container and run it. The other is to explain the detailed configuration description of the nginx configuration file.
nginx docker deployment
1. Search nginx mirror
docker search nginx
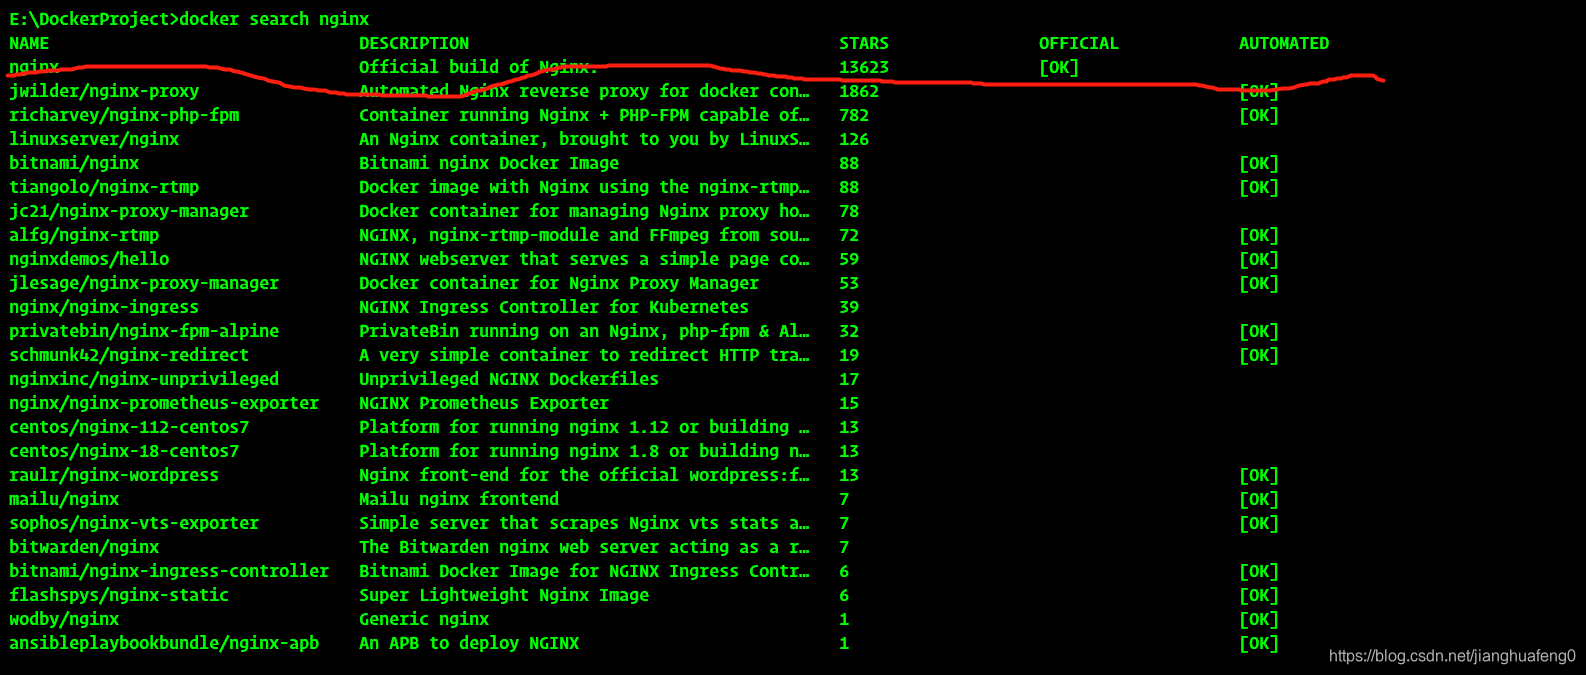
2. Pull nginx image
docker pull nginx
The image is not very large, only 133M, and it can be pulled quickly; I

prefer to use docker-compose to start the image. It is purely a personal hobby. You can also use the docker command to execute directly on the command line interface;
nginx-compose.yml:
version: '3'
services:
  nginx:
    restart: always
    image: nginx
    container_name: mynginx
    ports:
      - 8095:80
      - 443:443
    volumes:
      - /E/DockerData/nginx/nginx.conf:/etc/nginx/nginx.conf
      - /E/DockerData/nginx/conf.d:/etc/nginx/conf.d
      - /E/DockerData/nginx/log:/var/log/nginx
      - /E/DockerData/nginx/www:/var/www
      - /E/DockerData/nginx/etc:/etc/letsencrypt
docker command line (not so detailed, copy can be run directly):
docker run --name mynginx -p 8095:80 -p 443:443 -d nginx

The output log result information after the above startup is successful.
After entering localhost:8095 in the browser, the display result of the page is:

This content shows that I have modified it. If there is no modification, it will display the default English content of nginx.
Detailed nginx configuration file
After the installation is complete, the default configuration file content, nginx.conf
#user  nobody;
worker_processes  1;

#error_log  logs/error.log;
#error_log  logs/error.log  notice;
#error_log  logs/error.log  info;

#pid        logs/nginx.pid;


events {
    worker_connections  1024;
}


http {
    include       mime.types;
    default_type  application/octet-stream;

    #log_format  main  '$remote_addr - $remote_user [$time_local] "$request" '
    #                  '$status $body_bytes_sent "$http_referer" '
    #                  '"$http_user_agent" "$http_x_forwarded_for"';

    #access_log  logs/access.log  main;

    sendfile        on;
    #tcp_nopush     on;

    #keepalive_timeout  0;
    keepalive_timeout  65;

    #gzip  on;

    server {
        listen       80;
        server_name  localhost;

        #charset koi8-r;

        #access_log  logs/host.access.log  main;

        location / {
            root   html;
            index  index.html index.htm;
        }

        #error_page  404              /404.html;

        # redirect server error pages to the static page /50x.html
        #
        error_page   500 502 503 504  /50x.html;
        location = /50x.html {
            root   html;
        }

        # proxy the PHP scripts to Apache listening on 127.0.0.1:80
        #
        #location ~ \.php$ {
        #    proxy_pass   http://127.0.0.1;
        #}

        # pass the PHP scripts to FastCGI server listening on 127.0.0.1:9000
        #
        #location ~ \.php$ {
        #    root           html;
        #    fastcgi_pass   127.0.0.1:9000;
        #    fastcgi_index  index.php;
        #    fastcgi_param  SCRIPT_FILENAME  /scripts$fastcgi_script_name;
        #    include        fastcgi_params;
        #}

        # deny access to .htaccess files, if Apache's document root
        # concurs with nginx's one
        #
        #location ~ /\.ht {
        #    deny  all;
        #}
    }


    # another virtual host using mix of IP-, name-, and port-based configuration
    #
    #server {
    #    listen       8000;
    #    listen       somename:8080;
    #    server_name  somename  alias  another.alias;

    #    location / {
    #        root   html;
    #        index  index.html index.htm;
    #    }
    #}


    # HTTPS server
    #
    #server {
    #    listen       443 ssl;
    #    server_name  localhost;

    #    ssl_certificate      cert.pem;
    #    ssl_certificate_key  cert.key;

    #    ssl_session_cache    shared:SSL:1m;
    #    ssl_session_timeout  5m;

    #    ssl_ciphers  HIGH:!aNULL:!MD5;
    #    ssl_prefer_server_ciphers  on;

    #    location / {
    #        root   html;
    #        index  index.html index.htm;
    #    }
    #}

}
nginx.conf file structure
...              #全局块

events {         #events块
   ...
}

http      #http块
{
    ...   #http全局块
    server        #server块
    {
        ...       #server全局块
        location [PATTERN]   #location块
        {
            ...
        }
        location [PATTERN]
        {
            ...
        }
    }
    server
    {
      ...
    }
    ...     #http全局块
}
- 1. Global block : configure the instructions that affect the global nginx. Generally, there are user groups running nginx server, nginx process pid storage path, log storage path, configuration file introduction, number of worker processes allowed, etc.
- 2. Events block : The configuration affects the nginx server or the network connection with the user. There is the maximum number of connections for each process, which event-driven model is selected to process connection requests, whether to allow multiple network connections to be accepted at the same time, open multiple network connection serialization, etc.
- 3. http block : can nest multiple servers, configure proxy, cache, log definition and most of the functions and configuration of third-party modules. Such as file import, mime-type definition, log customization, whether to use sendfile to transfer files, connection timeout period, number of single connection requests, etc.
- 4. Server block : configure the relevant parameters of the virtual host, there can be multiple servers in one http.
- 5. Location block : Configure the routing of the request and the processing of various pages.
(1) The parameter that controls the maximum number of connections allowed by a single Nginx process is worker_connections. This parameter should be adjusted according to server performance and memory usage.
(2) The maximum number of connections for a process is limited by the maximum number of open files for the Linux system process, and only execute After "ulimit -HSn 65535" is set, worker_connections can take effect
(3) The number of connections includes proxy server connections, client connections, etc., Nginx total concurrent connections = number of workers * worker_connections, the total is kept at about 3w
cat /usr/local/ nginx/conf/nginx.conf
worker_processes 2;
worker_cpu_affinity 01 10;
user nginx nginx;
events {
use epoll;
worker_connections 15000;
}
Common instructions
main global configuration
Some parameters that have nothing to do with specific business functions (such as http service or email service proxy) when nginx is running, such as the number of work processes, running identity, etc.
- woker_processes 2
In the top-level main part of the configuration file , the number of worker processes in the worker role. The master process receives and allocates requests to workers for processing. This value is simpler and can be set to the number of cpu cores grep ^processor /proc/cpuinfo | wc -l, which is also an auto value. If ssl and gzip are turned on, it should be set to be the same as the number of logical CPUs or even twice, which can reduce I /O operation. If the nginx server has other services, consider reducing them appropriately. - worker_cpu_affinity
is also written in the main part. In the case of high concurrency, the CPU stickiness is set to reduce the performance loss caused by on-site reconstruction of registers caused by multi-CPU core switching. Such as worker_cpu_affinity 0001 0010 0100 1000; (quad core). - worker_connections 2048 is
written in the events section. The maximum number of connections that each worker process can process (initiate) concurrently (including all connections to the client or back-end proxy server). As a reverse proxy server, nginx calculates the maximum number of connections = worker_processes * worker_connections/4, so the maximum number of client connections here is 1024. It doesn't matter if this can be increased to 8192, it depends on the situation, but it cannot exceed the worker_rlimit_nofile. When nginx is used as an http server, the calculation formula is divided by 2. - worker_rlimit_nofile 10240 is
written in the main part. The default is not set, can be limited to 65535, the maximum limit of the operating system. - Use epoll is
written in the events section. Under the Linux operating system, nginx uses the epoll event model by default. Thanks to this, nginx is quite efficient under the Linux operating system. At the same time, Nginx uses kqueue, an efficient event model similar to epoll, on OpenBSD or FreeBSD operating systems. Use select only when the operating system does not support these efficient models.
http server
Some configuration parameters related to the provision of http services. For example: whether to use keepalive, whether to use gzip for compression, etc.
- sendfile on enables
efficient file transfer mode. The sendfile instruction specifies whether nginx calls the sendfile function to output files, reducing the context switch from user space to kernel space. For normal applications, set it to on. If it is used for downloading and other applications with heavy disk IO load, it can be set to off to balance the disk and network I/O processing speed and reduce the load of the system. - keepalive_timeout 65: Long connection timeout time, in seconds. This parameter is very sensitive, and it involves the type of browser, the timeout setting of the back-end server, and the setting of the operating system. A separate article can be made. When a large number of small files are requested for a long connection, the overhead of re-connection can be reduced. However, if a large file is uploaded, it will fail if the upload is not completed within 65s. If the setting time is too long and there are too many users, keeping the connection for a long time will consume a lot of resources.
- send_timeout: Used to specify the timeout period for responding to the client. This timeout is limited to the time between two connection activities. If it exceeds this time and the client has no activity, Nginx will close the connection.
- client_max_body_size 10m
The maximum number of single file bytes that the client can request. If you upload a large file, please set its limit - client_body_buffer_size 128k
buffer proxy buffer the maximum number of bytes requested by the client
Module http_proxy
This module realizes the function of nginx as a reverse proxy server, including caching function (see also article )
- proxy_connect_timeout 60
nginx connection timeout with the backend server (proxy connection timeout) - proxy_read_timeout 60
After a successful connection, the timeout period between two successful response operations with the back-end server (proxy receiving timeout) - proxy_buffer_size 4k
sets the buffer size for the proxy server (nginx) to read and save the user header information from the backend realserver . The default is the same as the proxy_buffers size. In fact, you can set the value of this command to be smaller - proxy_buffers 4 32k
proxy_buffers buffer, nginx caches the response from the back-end realserver for a single connection . If the average web page is below 32k, set this way - proxy_busy_buffers_size 64k
buffer size under high load (proxy_buffers*2) - proxy_max_temp_file_size
When proxy_buffers can't fit the back-end server's response content, it will save part of it in a temporary file on the hard disk. This value is used to set the maximum temporary file size. The default is 1024M. It has nothing to do with proxy_cache. Greater than this value will be returned from the upstream server. Set to 0 to disable. - proxy_temp_file_write_size 64k
When the cached server responds to a temporary file, this option limits the size of the temporary file written each time. proxy_temp_path (may be at compile time) specifies which directory to write to.
proxy_pass, proxy_redirect see location section.
Module http_gzip
- gzip on: Turn on gzip compression output to reduce network transmission.
- gzip_min_length 1k: Set the minimum number of bytes of the page allowed to be compressed. The number of page bytes is obtained from the content-length of the header. The default value is 20. It is recommended to set the number of bytes greater than 1k, less than 1k may increase the pressure.
- gzip_buffers 4 16k: Set the system to obtain several units of buffer for storing the data stream of gzip compression results. 4 16k means using 16k as the unit, and the installed original data size is 4 times of the 16k as the unit to apply for memory.
- gzip_http_version 1.0: Used to identify the version of the http protocol. Early browsers do not support Gzip compression, and users will see garbled characters. So in order to support the previous version, this option is added. If you use Nginx reverse proxy and expect If Gzip compression is enabled, since the end communication is http/1.0, please set it to 1.0.
- gzip_comp_level 6: gzip compression ratio, 1 compression ratio is the smallest and the processing speed is the fastest, 9 compression ratio is the largest but the processing speed is the slowest (fast transmission but more CPU consumption)
- gzip_types: match mime type for compression, whether specified or not, the "text/html" type will always be compressed.
- gzip_proxied any: When Nginx is used as a reverse proxy, it determines whether the result returned by the back-end server is compressed or not. The premise of matching is that the back-end server must return a header containing "Via".
- gzip_vary on: Related to the http header, Vary: Accept-Encoding will be added to the response header, allowing the front-end caching server to cache gzip-compressed pages, for example, using Squid to cache data compressed by Nginx. .
server virtual host
Several virtual hosts are supported on http service. Each virtual host has a corresponding server configuration item, which contains the configuration related to the virtual host. When providing mail service agents, several servers can also be established. Each server is distinguished by listening address or port.
- The listen
port is 80 by default. If it is less than 1024, it should be started as root. It can be in the form of listen *:80, listen 127.0.0.1:80, etc. - server_name
server name, such as localhost, www.example.com, can be matched by regular.
Module http_stream
This module implements load balancing from the client IP to the back-end server through a simple scheduling algorithm, upstream is followed by the name of the load balancer, and the back-end realserver is organized in {} in the form of host:port options;. If only one backend is proxied, it can also be written directly in proxy_pass.
location
In the http service, a series of configuration items corresponding to certain specific URLs.
-
root / var / www / html
Define the server's default website root directory location. If locationURL matches a subdirectory or file, root has no effect and is generally placed in or under the server command.
-
index index.jsp index.html index.htm
defines the name of the file accessed by default under the path, usually followed by root -
proxy_pass http:/backend
requests to go to the server list defined by backend, that is, reverse proxy, corresponding to the upstream load balancer. You can also proxy_pass http://ip:port. -
proxy_redirect off;
proxy_set_header Host $host;
proxy_set_header X-Real-IP $remote_addr;
proxy_set_header X-Forwarded-For $proxy_add_x_forwarded_for;
These four are temporarily set like this. If you go deeper, each of them involves very complicated content and will pass Another article to interpret.
Access control allow/deny
Nginx's access control module is installed by default, and the writing method is very simple. There can be multiple allow, deny, allow or prohibit access to a certain ip or ip segment, and stop matching when any one of the rules is met in turn. Such as:
location /nginx-status {
  stub_status on;
  access_log off;
#  auth_basic   "NginxStatus";
#  auth_basic_user_file   /usr/local/nginx-1.6/htpasswd;
  allow 192.168.10.100;
  allow 172.29.73.0/24;
  deny all;
}
We also use the httpd-devel tool htpasswd to set the login password for the access path:
# htpasswd -c htpasswd admin
New passwd:
Re-type new password:
Adding password for user admin
# htpasswd htpasswd admin    //修改admin密码
# htpasswd htpasswd sean    //多添加一个认证用户
In this way, a password file encrypted with CRYPT is generated by default. Open the two-line comment of nginx-status above and restart nginx to take effect.
List directory autoindex
Nginx does not allow listing the entire directory by default. If you need this function, open the nginx.conf file and add autoindex on; in the location, server or http section. It is best to add the other two parameters:
- autoindex_exact_size off; The default is on, which shows the exact size of the file in bytes. After changing to off, the approximate size of the file is displayed in kB or MB or GB
- autoindex_localtime on; The
default is off, and the displayed file time is GMT time. After changing to on, the displayed file time is the server time of the file
location /images {
  root   /var/www/nginx-default/images;
  autoindex on;
  autoindex_exact_size off;
  autoindex_localtime on;
}
reference
-
http://liuqunying.blog.51cto.com/3984207/1420556
-
http://nginx.org/en/docs/ngx_core_module.html#worker_cpu_affinity
-
http://wiki.nginx.org/HttpCoreModule#sendfile