definition
SonarQube is an open platform for managing code quality, which can quickly locate potential or obvious errors in the code. The installation, configuration and use of this tool will be introduced below.
Ready to work;
1. jdk (no longer introduced)
2、sonarqube:http://www.sonarqube.org/downloads/
3、SonarQube+Scanner:https://sonarsource.bintray.com/Distribution/sonar-scanner-cli/sonar-scanner-2.5.zip
4. mysql database (no longer introduced)
SonarQube download
sonar official website: https://www.sonarqube.org/
sonar download link: https://www.sonarqube.org/downloads/
SonarQube installation
Preset conditions:
1. Java environment (1.8+)
2. MySql database (5.6+)
3.
After downloading and decompressing SonarQube 7.6 , the rendering is as follows:
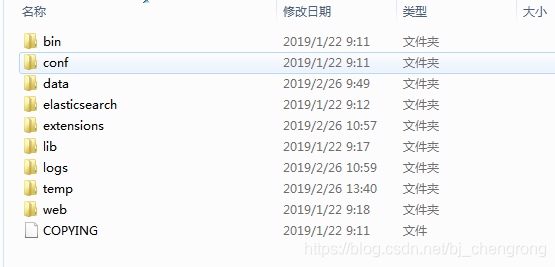
Enter the conf file, configure sonar.properties, the parameter information is as follows:
1.打开mysql,新建一个数据库。

2.打开sonarqube安装目录下的D:\sonar\sonarqube-5.3\sonarqube-5.3\conf\sonar.properties文件

3.在mysql5.X节点下输入以下信息

4.重启sonarqube服务,再次访问http://localhost:9000,会稍微有点慢,因为要初始化数据库信息

5.数据库初始化成功后,登录
sonar.jdbc.username=root
sonar.jdbc.password=123123
sonar.jdbc.url=jdbc:mysql://localhost:3307/sonar?useUnicode=true&characterEncoding=utf8&rewriteBatchedStatements=true&useConfigs=maxPerformance&useSSL=false
sonar.web.port=9000
url是数据库连接地址,username是数据库用户名,jdbc.password是数据库密码,login是sonarqube的登录名,sonar.password是sonarqube的密码
Enter the bin folder, the effect is as follows:
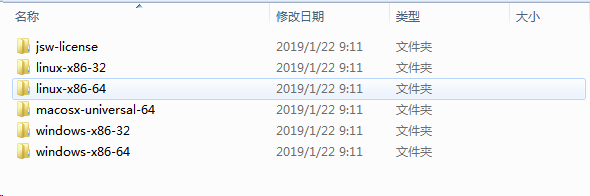
It supports various operating systems, choose your own current operating system, the renderings are as follows:

Execute in order, InstallNTService.bat, StartNTService.bat, StartSonar.bat files, if there are no errors, visit: http://localhost:9000 after successful startup, the effect is as follows:

So far, SonarQube is installed successfully
SonarQube Chinese Settings
Follow the click sequence in the figure below to enter the plug-in installation page

Search Chinese Pack, install Chinese language pack


After the installation is successful, restart the sonarqube service and visit http://localhost:9000/ again to see the Chinese interface
 Sonar-Scanner installation and use
The sonar-scanner plug-in is used to analyze the software and used in conjunction with SonarQube
Sonar-Scanner download
Download link: https://sonarsource.bintray.com/Distribution/sonar-scanner-cli/sonar-scanner-cli-3.0.3.778-windows.zip
Unzip and use
Sonar-Scanner configuration and use
1、打开D:\sonar\sonar-scanner-2.5\conf\sonar-runner.properties文件

2、mysql节点下输入以下信息

--------------------------------------------------------------
sonar.jdbc.url=jdbc:mysql://172.16.30.228:3306/qjfsonar?useUnicode=true&characterEncoding=utf8&rewriteBatchedStatements=true&useConfigs=maxPerformance
sonar.jdbc.username=gmsd
sonar.jdbc.password=gmsdtrade
--------------------------------------------------------------

注意:如果测试项目与服务器不在同一台机子,则需要添加服务器的IP:

--------------------------------------------------------------
#----- Default SonarQube server
sonar.host.url=http://XXX.XXX.XXX.XXX:9000
--------------------------------------------------------------
Configure environment variables:
1、新建变量,name=SONAR_RUNNER_HOME。value=D:\sonar\sonar-scanner-2.5

2、打开path,输入%SONAR_RUNNER_HOME%\bin;

3、sonar-runner -version,出现以下信息,则表示环境变量设置成功
The database configuration is above, introduce again ---" ""
Modify sonar-scanner.properties under conf and configure as follows:
sonar.host.url=http://localhost:9000(sonar地址)
sonar.sourceEncoding=UTF-8
sonar.jdbc.url=jdbc:mysql://localhost:3307/sonarqube?useUnicode=true&characterEncoding=utf8&rewriteBatchedStatements=true&useConfigs=maxPerformance&useSSL=false
sonar.jdbc.username=******
sonar.jdbc.password=*******
Create a new sonar-project.properties in the root directory of the project to be detected, with the following content:
sonar.projectKey=your_project(自己定义)
sonar.projectName=your_project(自己定义)
sonar.projectVersion=1.0
sonar.sources=src(代码目录)
sonar.java.binaries=target(classes文件目录,不加会报错)
sonar.language=java
sonar.sourceEncoding=UTF-8
or
# must be unique in a given SonarQube instance
sonar.projectKey=my:project
# this is the name displayed in the SonarQube UI
sonar.projectName=apiautocore
sonar.projectVersion=1.0

# Path is relative to the sonar-project.properties file. Replace "\" by "/" on Windows.
# Since SonarQube 4.2, this property is optional if sonar.modules is set.
# If not set, SonarQube starts looking for source code from the directory containing
# the sonar-project.properties file.
sonar.sources=src

# Encoding of the source code. Default is default system encoding
#sonar.sourceEncoding=UTF-8
Among them: projectName is the name of the project, sources is the directory where the source files are located
After the setting is successful, start the sonarqube service and start cmd
Enter the root directory of the project in cmd, enter the command: sonar-runner, the following picture will appear after the analysis is successful

Open http://localhost:9000/, we will see a summary diagram of the analysis project on the home page

We click on the project, select the problem link, and we will see the analysis code bug

Choose one of the most serious bugs and see

Then, open the command line in the project root directory, enter sonar-scanner to run, and you can see that the detection is successful, and you can see the detection results on the sonar homepage. The effect diagram is as follows:
