Build Git Server on Windows
Git has more flexibility than SVN in terms of version control. For open source projects, we can host them on Github, which is very convenient, but closed source projects will charge expensive fees.
So for private projects, how to use Git for code version control? We can build the Git server ourselves. Generally speaking, there are many tutorials for setting up Git on Linux, but how to set up a Git server under the Windows Server platform?
For many .NET users, the tool for writing code is Visual Studio. The tool does not support the SSH protocol. Through searching and comparing, it is found that Gitblit can easily build services. He is written in Java, and all premises for installation Java runtime environment is installed.
Step 1 : Download Java and install Java. I downloaded jdk1.7.0_79 here
Step 2 : Configure Java environment variables
Step 3 : Verify that Java is installed successfully.
In the command window, enter javac, press Enter. If the following message appears, the installation is successful.
Step 4 : Download Gitblit. Download address: http://www.gitblit.com/

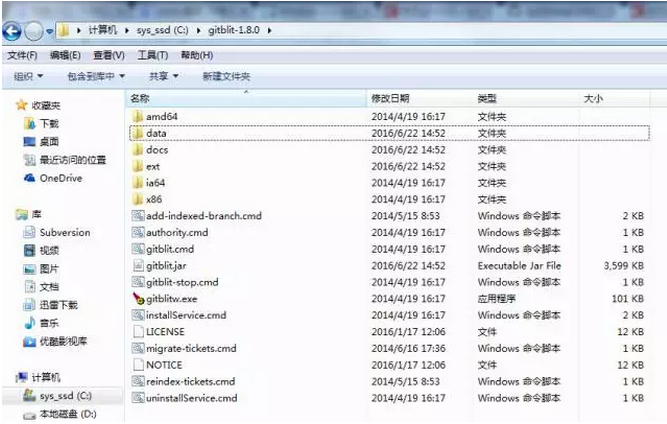
Step 5 : Unzip the downloaded compressed package, no need to install. The path is C: \ gitblit-1.8.0
Step 6 : Create a folder for storing project codes. Here is G: \ GitProject \ webui
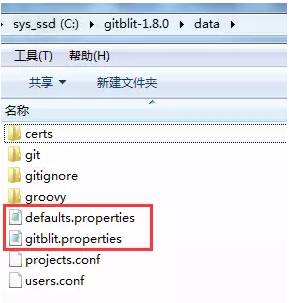
Step 7 : Configure gitblit, the file is under C: \ gitblit-1.8.0 \ data, open gitblit.properties, which contains include = defaults.properties, indicating that the configuration information is in defaults.properties
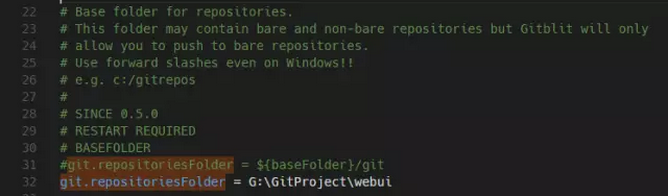
2. Find git.repositoriesFolder (database path) and assign the value to G: \ GitProject \ webui.
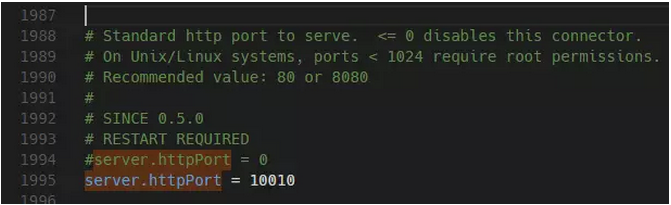
3. Find server.httpPort and set the port number of http protocol
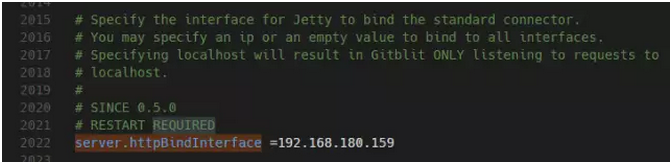
4. Find server.httpBindInterface and set the server's IP address. Set your server IP here.
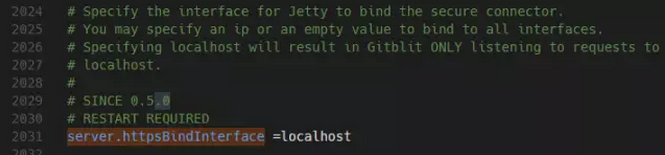
5. Find server.httpsBindInterface, set to localhost
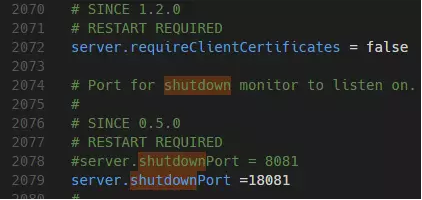
Also take a look at server.shutdownPort, its default value is 8081, whether it is occupied, please modify it if it is occupied.
6. Save and close the file.
Step 8 : Run the gitblit.cmd batch file. The results are as follows, and the operation is successful.

Enter in the browser: http://192.168.180.159:10010/, by default you can log in with admin and admin, and then change the password.

Of course, if you register the startup of gitblit in the windows service in windows, you can save gitblit.cmd every time you save.
Set up
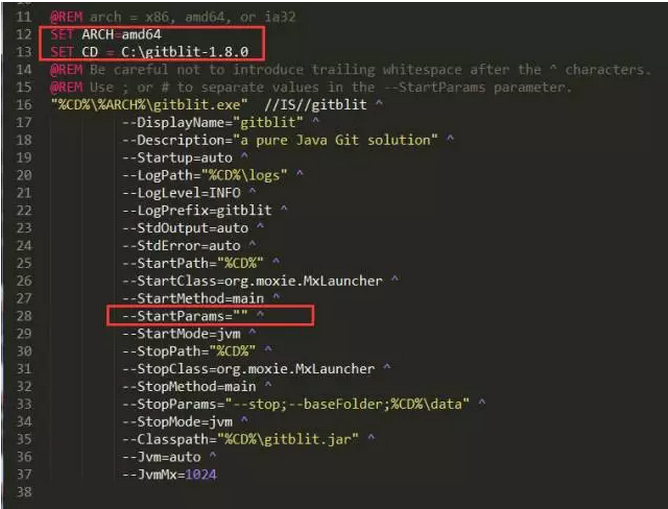
SET ARCH = amd64 (64-bit, x86 for 32-bit machines)
Set up
Set CD = C: \ gitblit-1.8.0, the value of CD is the path of gitblit, set the startup parameter to an empty value, and use the default parameter, --StartParams = "" ^
Then, open the CMD as an administrator and run the batch file installService.cmd.
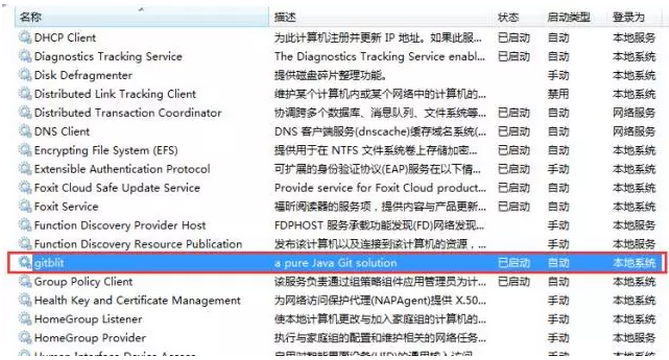
If there is no exception, you can find the "gitblit" service in the "service" component.
You can start the gitblib service without executing gitblit.cmd batch processing
Enter in the browser: http://192.168.180.159:10010/, after logging in with the administrator, you can create teams and users, and configure permissions


Then you can create a webui version library, click the Git drop-down list, you can view ssh, http and other network addresses:
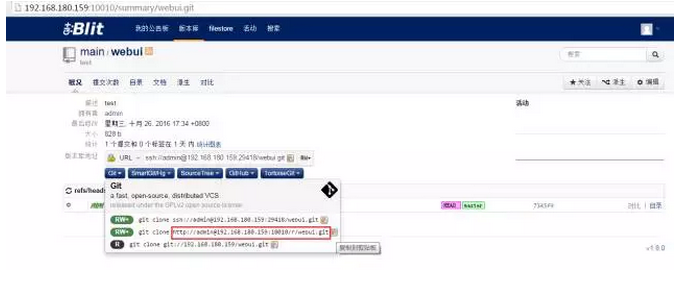
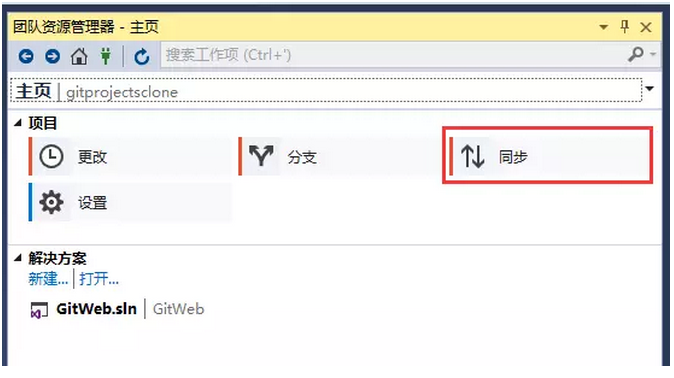
Since visual studio 2015 Git does not support ssh, use http protocol here to open the team resource manager of vs2015
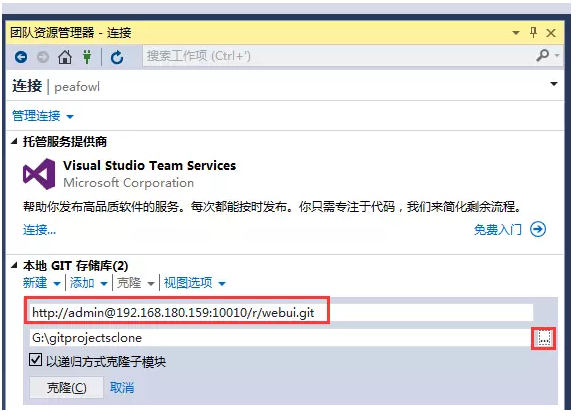
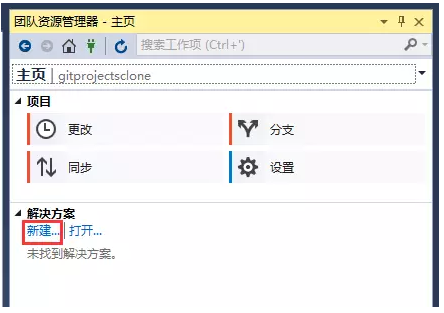
Click the [Clone] button, and then click [New] under the solution
Create a web site, as shown below:


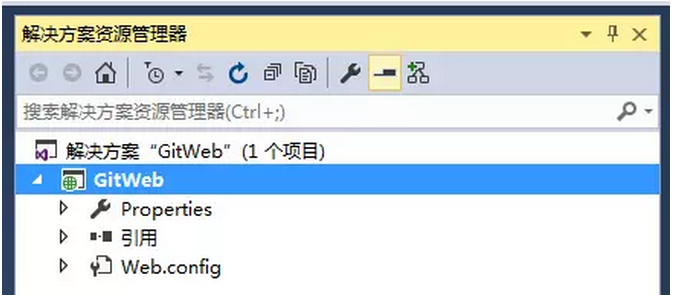
Switch to the solution explorer, you can see the project file structure:
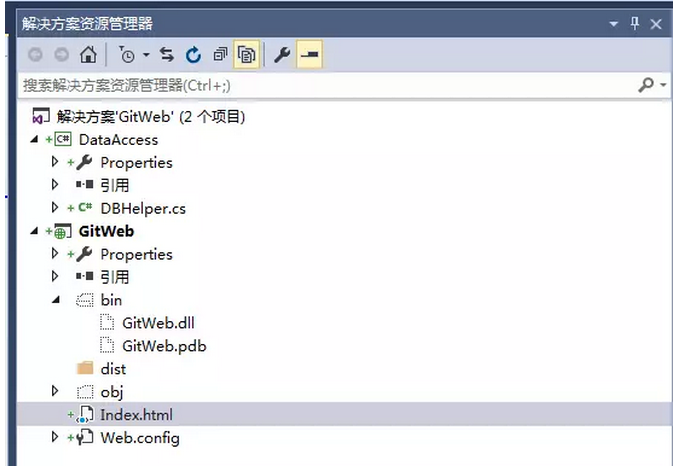
We can add and edit this project file:
The following needs to submit the project to the server

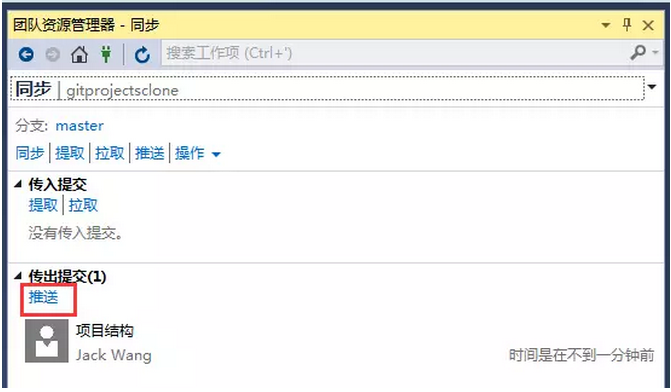

At this point, you can refresh http://192.168.180.159:10010/tree/webui.git to view the server directory structure:

The first time I used Git in VS2013 and the first time I used Git, I was not familiar with it. Most of Baidu ’s various experiences have been disdain to use Git integrated with VS2013. I suggest downloading this and downloading it. I also learned from it. It can indeed achieve the work of project submission, synchronization, and merge, but it ca n’t work seamlessly with VS2013. I always feel awkward.
After trying to find out, I finally found that the Git integrated with VS2013 has actually been integrated very well, and the work of building projects, configuring remote synchronization addresses, submitting, synchronizing, merging, etc. can be done in one go. Share it here, hoping to help the latecomers.
1. Use SCM Manager to create an empty Repositories on the remote Git server, named GitTest here.
2. Open VS2013, create a new project GitTestProject, right-click the solution, select "Add solution to source code manager", select Git
2. Switch to Team Explorer ([Menu] View-> Team Explorer), select the home icon at the top, you can see options such as changes and branches If you are using it for the first time, you will be prompted to "install a third-party Git command prompt tool" and click "Install".
3. Select "Change" in the figure above, which means you want to view the changed files. All documents have not been submitted yet, so all documents are changed. Then enter the label (required entry) of the change submission. Here I entered "I created", click the submit button, that is, submit the current changes to the local.
4. The interface shows that it has been submitted, and then it can be synchronized (Push). Click "Sync" or "Unsynchronized Submission" in the figure below, or switch to the homepage and select "Unsynchronized Submission" to enter the synchronization interface.
5. For the first synchronization, you need to set the address of the remote repository, copy and fill in the URL of the Repositories created in the first step, and then click the "Publish" button. If a username and password are required, a window will pop up for you to enter. Note: If the system is Win7, and the wrong username and password are entered, it will be a tragedy, and it will not be reentered next time. The solution is to delete or modify the corresponding credentials in the "credential manager" of the control panel.
At this point, the solution was successfully added to remote source control. If the code is modified afterwards, after submitting the changes, click "Sync" on the interface in step 5 to upload to Remote. If someone else has uploaded the same file, you will be prompted to upload after you merge. To obtain the Remote version, click "Pull" on the interface in step 5.
If you want to participate in a project that has been built by others, open VS2013, switch to "Team Explorer", click the drop-down triangle to the right of "Home" above, select Project-> Connect to Team Project, then select "Clone", fill in Enter Git's Remote Url and the local directory to be cloned (the directory must be empty), and then click the clone button to clone the project to the local.
You can also use the third-party Git command-line tool installed in step 2 to clone the project locally. Add the installation directory of the third-party Git command-line tool (C: \ Program Files (x86) \ Git \ bin) to the system Path, open the command line window, switch to the directory where you want to install the project, run the Clone command, the project is possible Reach the specified directory, and then open it with VS2013 to work.
Clone command
---------------------
Original: https://blog.csdn.net/bodybo/article/details/38976549/
Copyright statement: This article is an original article of blogger , Please attach a link to the blog post!
