table of Contents
Fixed IP
The IP automatically acquired by the system will change, so a fixed IP address is required for convenient use
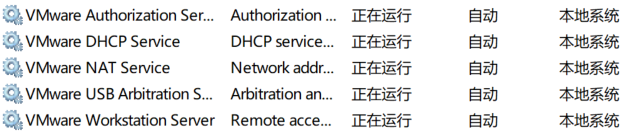
1. The search bar opens: services.msc
Confirm that all services related to Vmware are enabled
2. Change the Vmware network configuration
Open the Vmware homepage and click "Edit" ==> 虚拟网络编辑器

Step instructions :
Step 4: Set the subnet IP, set the network segment to 25
Step 5: Subnet mask, this is the value.
Set Gateway: 
Click OK to save the settings after completion.
3. Configure the network segment of the VMware Network Adapter VMnet8
1. Open the control panel
2. "Network and Internet" ==> "Network Connection"

3. Perform the following configuration 
3. Manually configure the network
in the virtual machine Enter the virtual machine and enter:
vim /etc/sysconfig/network-scripts/ifcfg-eth0
Exit and save, restart the service:
service network estart;
After completion, ifconfigcheck whether the IP has changed to 192.168.25.123, and: ping www.baidu.comCheck whether the network is connected.
Copy VM
Copy two virtual machines, build a cluster of three machines, modify the physical address and ip address of the virtual machine after copying: after


generating a new IP, copy and save it.
Change the NIC of linux we copied (start the virtual machine, select I have copied the virtual machine).
Ifconfig: eth0 is now unavailable.
It needs to be changed according to the following steps.
// An highlighted block
vim /etc/udev/rules.d/70-persistent-net.rules
Modify the physical address:
vim /etc/sysconfig/netwoek-script/ifcfg-eth0
- Change IPADDR to the IP you want
- At the same time copy the physical address just obtained
- Modify HWADDR to the physical address
- Restart the computer
Turn off the firewall
1. Only close individual ports
vim /etc/sysconfig/iptables
Let a certain port number not be blocked by the firewall, suitable for tomcat,nginxsoftware such as deployment : After

setting, restart the firewall:
// An highlighted block
service iptables restart
Check the firewall status:
// An highlighted block
service iptables status
2. Turn off all firewalls
Turn off all firewalls
service iptables stop
Turn off the firewall automatic restart function
chkconfig iptables off
View ip status list
chkconfig iptables --list
Change linux hostname
vim /etc/sysconfig/network
HOSTNAME=seasion02
Restart the virtual machine after the change: reboot -h now
Add IP address to host name mapping
After adding, you can directly access the host name instead of accessing the IP address
vim /etc/hosts
192.168.52.250 seasion01
192.168.52.251 seasion02
192.168.52.252 seasion
Close selinux
I.e. close another higher order firewall
vim /etc/selinux/config

Then restart the virtual machine
ssh password-free login
1. Generate public key and secret key
Generate public and secret keys on three machines:
ssh -keygen -t rsa

Copy the public keys of machine 2 and machine 3 on machine 1:
ssh-copy-id seasion01

Check the authorization file on the machine (to see if there are public keys of seasion02 and seasion03)
ls -al
cd .ssh
ll
more authorized_keys

Copy the public key of machine 1 to the authorization file
ssh-copy-id seasion01
Copy the authorization file to the other two machines
scp authorized_keys seasion02:$PWD

