Introduction
Common configuration centers: SpringBoot + git, zookeeper, redis, etc.
In addition to implementing the registration center , Nacos also combines the configuration center. Through the configuration management function of Nacos, we can concentrate all the configurations within the entire architecture system in Nacos storage.
The benefits of doing this:
- Separate multi-environment configuration allows more flexible management authority and higher security
- The packaging of the application is more pure, in order to achieve the characteristics of packaging once, running at multiple
locations Positioning configuration: Nacos configuration management model uses DataId and Group to locate the configuration content, in addition to many other management functions.
Quick start
Through a simple example to introduce how to create configuration content in Nacos and how to load Nacos configuration information in Spring Cloud application.
Create configuration
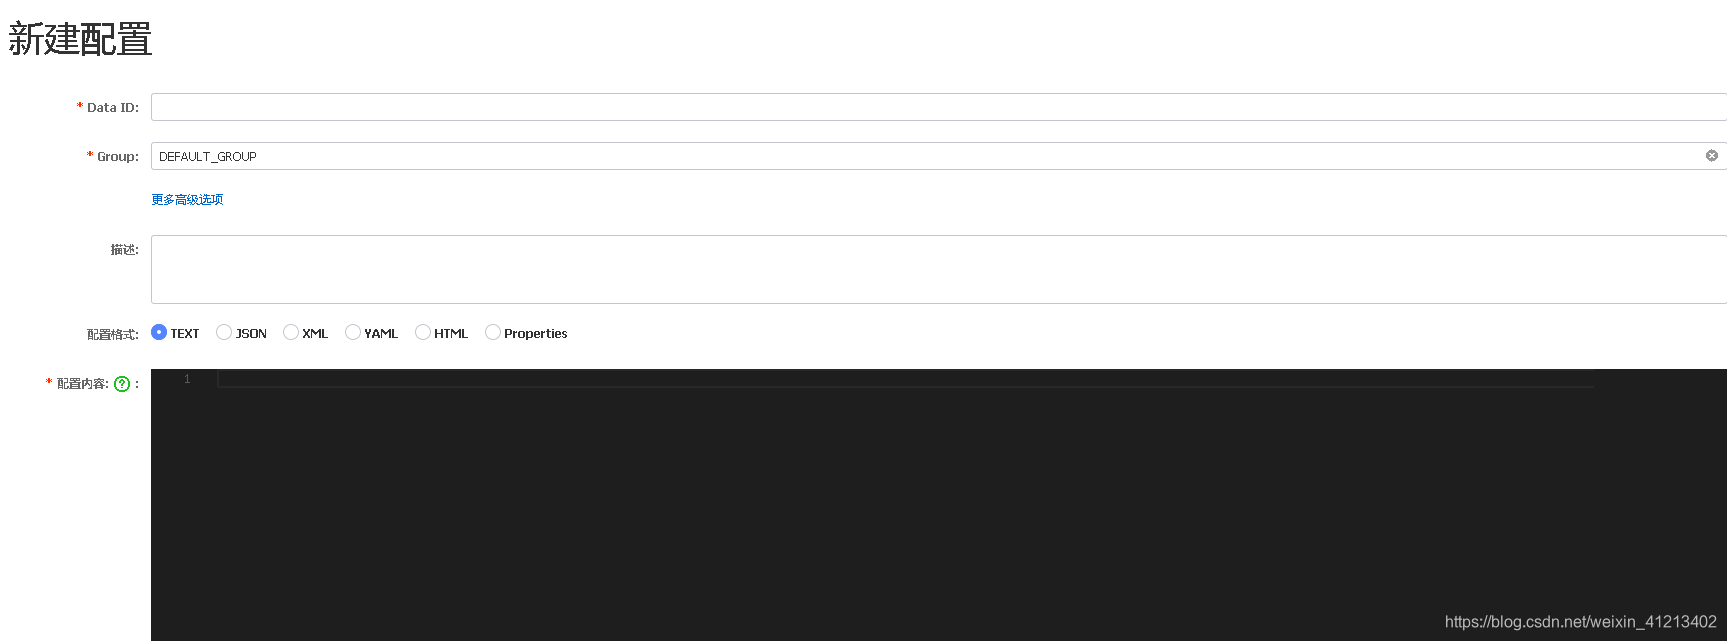
The first step: enter the Nacos control page, in the configuration list function page, click the "+" button in the upper right corner to enter the "new configuration" page, fill in the content as follows:
 Remarks
Data ID: Fill inalibaba-nacos-config-client.propertiesGroup: No modification, use default valueDEFAULT_GROUP- Configuration format: select Properties
- Configuration content: The configuration content to be loaded by the application, here is only used as an example, to do simple configuration, such as: didispace.title = spring-cloud-alibaba-learning
Create application
Step 1: Create a Spring Boot application, which can be named: alibaba-nacos-config-client.
Step 2: Edit pom.xml and add necessary dependency configuration, such as:
<parent>
    <groupId>org.springframework.boot</groupId>
    <artifactId>spring-boot-starter-parent</artifactId>
    <version>2.0.5.RELEASE</version>
    <relativePath/> <!-- lookup parent from repository -->
</parent>

<dependencyManagement>
    <dependencies>
        <dependency>
            <groupId>org.springframework.cloud</groupId>
            <artifactId>spring-cloud-dependencies</artifactId>
            <version>Finchley.SR1</version>
            <type>pom</type>
            <scope>import</scope>
        </dependency>
        <dependency>
            <groupId>org.springframework.cloud</groupId>
            <artifactId>spring-cloud-alibaba-dependencies</artifactId>
            <version>0.2.2.RELEASE</version>
            <type>pom</type>
            <scope>import</scope>
        </dependency>
    </dependencies>
</dependencyManagement>

<dependencies>
    <dependency>
        <groupId>org.springframework.boot</groupId>
        <artifactId>spring-boot-starter-web</artifactId>
    </dependency>
    <dependency>
        <groupId>org.springframework.cloud</groupId>
        <artifactId>spring-cloud-starter-alibaba-nacos-config</artifactId>
    </dependency>
    <dependency>
        <groupId>org.projectlombok</groupId>
        <artifactId>lombok</artifactId>
        <version>1.18.2</version>
        <optional>true</optional>
    </dependency>
</dependencies>
There is no service discovery module added to nacos, so these two contents can be used independently
parent: Define the version of spring boot
dependencyManagement: the version of spring cloud and the version of spring cloud alibaba. Since spring cloud alibaba has not been included in the main version management of spring cloud, you need to add yourself
dependencies: dependent content to be used by the current application. Here mainly new Nacos configuration client module is added: spring-cloud-starter-alibaba-nacos-config. Since the version has been introduced in dependencyManagement, there is no need to specify a specific version here.
Step 3: Create the main application class and implement an HTTP interface:
@SpringBootApplication
public class TestApplication {

    public static void main(String[] args) {
        SpringApplication.run(TestApplication.class, args);
    }

    @Slf4j
    @RestController
    @RefreshScope
    static class TestController {

        @Value("${didispace.title:}")
        private String title;

        @GetMapping("/test")
        public String hello() {
            return title;
        }

    }

}
@RefreshScope Annotation explanation: Let the configuration content under this class support dynamic refresh, that is, after our application starts, after modifying the configuration content in Nacos, it will take effect immediately here.
Step 4: Create a configuration file bootstrap.properties, and configure the service name and Nacos address
spring.application.name=alibaba-nacos-config-client
server.port=8001

spring.cloud.nacos.config.server-addr=127.0.0.1:8848
Note: You must use bootstrap.properties, and the
spring.application.name value must match the configuration Data Id created in the previous stage of Nacos (except for the .properties or .yaml suffix).
Step 5: Verify configuration acquisition and verify dynamic refresh
Use tools such as curl or postman to access the interface: localhost: 8001 / test. If everything is normal, the spring-cloud-alibaba-learning configured in Nacos will be returned. Then, through the Nacos page, modify this content, click on the release, and then access the interface, you can see that the return result has changed.
At the same time, on the client side of the application, we can also see the following logs:
2019-01-27 18:39:14.162 INFO 93597 --- [-127.0.0.1_8848] o.s.c.e.event.RefreshEventListener : Refresh keys changed: [didispace.title]
Configured loading rules
Nacos default configuration::
Data IDalibaba-nacos-config-client.properties
Group: DEFAULT_GROUP
explain the configuration here and the configuration of the files in the corresponding project
- In Data ID
alibaba-nacos-config-client: corresponding to the configuration of the clientspring.cloud.nacos.config.prefix, the default valuespring.cloud.nacos.config.prefixis: service name - Data ID
properties: corresponding to the client configurationspring.cloud.nacos.config.file-extension, the default value isproperties - Group value
DEFAULT_GROUP: corresponds to the configuration of the clientspring.cloud.nacos.config.group, the default value isDEFAULT_GROUP
Note: The application adopts the default way of loading the configuration:Data ID=${spring.application.name}.properties
Group=DEFAULT_GROUP
Example 1: How to change the configuration without loading the default application name, such as Data ID=example.properties,Group=DEFAULT_GROUP
spring.cloud.nacos.config.prefix=example
Example 2: If you want to load content in yaml format instead of content in Properties format Data ID=example.yaml,Group=DEFAULT_GROUP
spring.cloud.nacos.config.prefix=example
spring.cloud.nacos.config.file-extension=yaml
Example 3: If the configuration of the group management, such as loading: Data ID=example.yaml,Group=DEV_GROUP
spring.cloud.nacos.config.prefix=example
spring.cloud.nacos.config.file-extension=yaml
spring.cloud.nacos.config.group=DEV_GROUP
Thinking
Three kinds of correspondence Nacos configuration, on the first two spring.cloud.nacos.config.prefixand spring.cloud.nacos.config.file-extensionmost of the default configuration used
but for spring.cloud.nacos.config.groupit: You can refer to the role Namespace, such as: use it to distinguish between different product groups configuration content of each application (application name may resolve Conflicting issues), or use it to distinguish the configuration content of different uses, or use it to distinguish the configuration of different environments
