Web streaming media solution based on FFMPEG + JSMPEG + Nodejs
This time we introduce a solution: web streaming media solution based on FFMPEG + JSMPEG + Nodejs.
Through this solution, web display of camera surveillance video can be easily achieved. This article takes the Hikvision camera as an example, the model is DS-2CD2055, and the real-time image of this camera needs to be displayed on the web page in real time.
1 Introduction
- FFMPEG
FFmpeg is an open source computer program that can be used to record, convert digital audio, and video, and convert it into a stream. It includes the current leading audio / video encoding library libavcodec . FFmpeg was developed under Linux , but it can be compiled in most operating systems including Windows .
In this solution, ffmpeg is used to convert the RTSP stream of Hikvision cameras into mpegts streams, and encode H.264 as mpeg1video.
- JSMPEG
JSMpeg is a video player written in JavaScript. It includes MPEG-TS decoder, MPEG 1 video and MP2 audio decoder, WebGL and Canvas2D renderer and WebAudio sound output. JSMpeg can load still video via Ajax and allow low latency streaming (~ 50 ms) via WebSocket.
JSMpeg can decode 720p video at 30 fps on iPhone5S, which can be used in any modern browser (Chrome, Firefox, Safari, Edge), and the compression speed is only 20 kb.
In this solution, JSMpeg receives the video stream pushed by ffmpeg, and provides a websocket port to receive the video stream request from the web browser.
- Nodejs
Everyone is familiar.
Node.js is a JavaScript running environment based on Chrome V8 engine. Node.js uses an event-driven, non-blocking I / O model. [1]
Node is a development platform that allows JavaScript to run on the server side. It makes JavaScript a scripting language on par with server-side languages such as PHP, Python, Perl, Ruby, etc.
In this solution, Node.js provides a JSMPEG operating environment and provides a web access interface as an http server.
2 Installation and configuration
2.1 FFMPEG installation and configuration
download
Ffmpeg official website only provides download of source code:
http://www.ffmpeg.org/download.html
Download the compiled binary package, which can be downloaded from zeranoe
https://ffmpeg.zeranoe.com/builds/
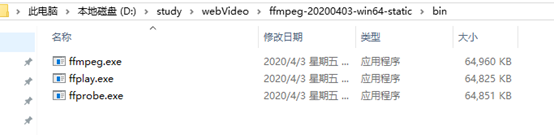
installation
After downloading, unzip directly, the executable file is in the bin directory, I am in
D:\study\webVideo\ffmpeg-20200403-win64-static\bin
Add this directory to the path environment variable, this need not be taught, if not, baidu.
Enter ffmpeg in the command line, if the following information is output, the installation is successful:

2.2 Node.js installation and configuration
download
Download the installation package on the official website https://nodejs.org/en/
Double-click the installation package directly to install.
After the installation is complete, enter node -v on the command line, the version number is displayed correctly, indicating that the installation was successful

Later, you need to add the node_modules directory to the path environment variable, otherwise there will be an error that the package cannot be found later.
The default node_modules is in the user directory, for example, my own is in C: \ Users \ Administrator \ node_modules
Websocket and http-server installation
Enter in the cmd console:
npm install ws -g
npm install http-server -g
2.3 JSMPEG installation and configuration
Download: https://codeload.github.com/phoboslab/jsmpeg/zip/master
Just unzip it directly
There will be a websocket-relay.js file in the unzipped directory
3 Start
3.1 Start websocket-relay.js
Open the command line, enter the directory where the websocket-relay.js file is located, and run:
- node websocket-relay.js passwd 8081 8082
passwd: set password
8081: ffmpeg push port
8082: is the front-end webSocket port
The output is as follows:
D:\study\webVideo\jsmpeg-master>node websocket-relay.js foa123456 8081 8082
Listening for incomming MPEG-TS Stream on http://127.0.0.1:8081/<secret>
Awaiting WebSocket connections on ws://127.0.0.1:8082/
Stream Connected: ::ffff:127.0.0.1:51321
3.2 Start and run ffmpeg
Open the command line and enter:
ffmpeg -i "rtsp://admin:[email protected]:554/h264/ch1/main/av_stream" -r 30 -q 0 -f mpegts -codec:v mpeg1video -s 1366x768 http://127.0.0.1:8081/foa123456
among them,
- "rtsp: // admin: [email protected]: 554 / h264 / ch1 / main / av_stream" is the RTSP URL address of the Haikang camera. For the specific format, please refer to section 5.3.
- http://127.0.0.1:8081/foa123456 is the address to which ffmpeg needs to push the video stream, and foa123456 is the push stream password
- For other parameters, please refer to the manual of ffmpeg.
The output is as follows:
C:\Users\Administrator> ffmpeg -i "rtsp://admin:[email protected]:554/h264/ch1/main/av_stream" -r 30 -q 0 -f mpegts -codec:v mpeg1video -s 1366x768 http://127.0.0.1:8081/foa123456
ffmpeg version git-2020-04-03-52523b6 Copyright (c) 2000-2020 the FFmpeg developers
built with gcc 9.3.1 (GCC) 20200328
configuration: --enable-gpl --enable-version3 --enable-sdl2 --enable-fontconfig --enable-gnutls --enable-iconv --enable-libass --enable-libdav1d --enable-libbluray --enable-libfreetype --enable-libmp3lame --enable-libopencore-amrnb --enable-libopencore-amrwb --enable-libopenjpeg --enable-libopus --enable-libshine --enable-libsnappy --enable-libsoxr --enable-libsrt --enable-libtheora --enable-libtwolame --enable-libvpx --enable-libwavpack --enable-libwebp --enable-libx264 --enable-libx265 --enable-libxml2 --enable-libzimg --enable-lzma --enable-zlib --enable-gmp --enable-libvidstab --enable-libvmaf --enable-libvorbis --enable-libvo-amrwbenc --enable-libmysofa --enable-libspeex --enable-libxvid --enable-libaom --enable-libmfx --enable-ffnvcodec --enable-cuda-llvm --enable-cuvid --enable-d3d11va --enable-nvenc --enable-nvdec --enable-dxva2 --enable-avisynth --enable-libopenmpt --enable-amf
libavutil 56. 42.102 / 56. 42.102
libavcodec 58. 77.101 / 58. 77.101
libavformat 58. 42.100 / 58. 42.100
libavdevice 58. 9.103 / 58. 9.103
libavfilter 7. 77.101 / 7. 77.101
libswscale 5. 6.101 / 5. 6.101
libswresample 3. 6.100 / 3. 6.100
libpostproc 55. 6.100 / 55. 6.100
Input #0, rtsp, from 'rtsp://admin:[email protected]:554/h264/ch1/main/av_stream':
Metadata:
title : Media Presentation
Duration: N/A, start: 0.160000, bitrate: N/A
Stream #0:0: Video: h264 (Main), yuvj420p(pc, bt709, progressive), 2560x1920, 12.50 tbr, 90k tbn, 180k tbc
Stream mapping:
Stream #0:0 -> #0:0 (h264 (native) -> mpeg1video (native))
Press [q] to stop, [?] for help
[swscaler @ 0000027854e58100] deprecated pixel format used, make sure you did set range correctly
Output #0, mpegts, to 'http://127.0.0.1:8081/foa123456':
Metadata:
title : Media Presentation
encoder : Lavf58.42.100
Stream #0:0: Video: mpeg1video, yuv420p, 1366x768, q=2-31, 200 kb/s, 30 fps, 90k tbn, 30 tbc
Metadata:
encoder : Lavc58.77.101 mpeg1video
Side data:
cpb: bitrate max/min/avg: 0/0/200000 buffer size: 0 vbv_delay: N/A
3.3 Start http-server
Open a command line to enter the jsmpeg directory, enter: http-server
The output is as follows:
D:\study\webVideo\jsmpeg-master>http-server
Starting up http-server, serving ./
Available on:
http://192.168.56.1:8080
http://192.168.1.109:8080
http://192.168.1.2:8080
http://127.0.0.1:8080
Hit CTRL-C to stop the server
4 View the video screen
Open your browser and enter: http: // localhost: 8080 / view-stream.html
You can see the video screen.
5 Trouble shooting
5.1 MPEG-1/2 does not support 12/1 fps
Run the command: ffmpeg -i "rtsp: // admin: [email protected]: 554 / h264 / ch1 / main / av_stream" -q 0 -f mpegts -codec: v mpeg1video -s 1366x768 http://127.0.0.1 : 8081 / foa123456
Report the following error:
[mpeg1video @ 0000017a40cd0700] MPEG-1/2 does not support 12/1 fps
Error initializing output stream 0:0 -- Error while opening encoder for output stream #0:0 - maybe incorrect parameters such as bit_rate, rate, width or height
Conversion failed!
This means that mpeg1 / 2 is not compatible with 12fps frame rate, mpeg does not support such a low frame rate.
Add the -r 30 parameter to the command line
改为: ffmpeg -i "rtsp://admin:[email protected]:554/h264/ch1/main/av_stream" -r 30 -q 0 -f mpegts -codec:v mpeg1video -s 1366x768 http://127.0.0.1:8081/foa123456
problem solved
5.2 Error: Cannot find module 'ws'
Run> node websocket-relay.js passwd 8081 8082
Report the following error:
Error: Cannot find module 'ws'
This is a hint that the websocket module cannot be found, but the websocket module has been installed.
At this time, you need to add the node module directory to the path environment variable
The default directory is C: \ Users \ Administrator \ node_modules. If the configuration has been changed, the configuration will prevail.
5.3 URL format of Haikang camera RTSP streaming
1) Preview streaming URL
Hikvision camera main stream:
rtsp: // admin: [email protected]: 554 / h264 / ch1 / main / av_stream
Substream streaming:
rtsp: // admin: [email protected]: 554 / h264 / ch1 / sub / av_stream
If the camera password is foa123456, the IP is 192.168.1.135, and the RTSP port defaults to 554 unchanged, it is H.264 encoded, then
Main stream:
rtsp:// admin:[email protected]:554/h264/ch1/main/av_stream
Substream streaming:
rtsp:// admin:[email protected]:554/h264/ch1/sub/av_stream
If it is H.265 encoded, then replace H.264 with H.265
2) Playback streaming URL
RTSP playback URL regulations:
rtsp://username:password@:/Streaming/tracks/(?parm1=value1&parm2-=value2…)
for example:
Analog channel 01 of DS-9016HF-ST:
rtsp://admin:[email protected]:554/Streaming/tracks/101?starttime=20120802t063812z&endtime=20120802t064816z
IP channel 01 of DS-9016HF-ST:
rtsp://admin:[email protected]:554/Streaming/tracks/1701?starttime=20131013t093812z&endtime=20131013t104816z
Indicates that the video files in the channel of the specified device are played back in unicast, and the time range is starttime to endtime, where the format of starttime and endtime must conform to ISO
8601. The specific format is YYYYMMDD "T" HHmmSS.fraction "Z"
, Y is the year, M is the month, D is the day, T is the time grid, H is the hour, M is the minute, S is the second, Z is optional and represents Zulu (GMT) time.
For NVRs with 32 and 32 channels, the IP channel number starts from 33. But the processing is done in the fetch address, starting from 1.
3) Use VLC to verify the format
To verify that the rtsp url is correct, you can use the VLC player to verify. The VLC player can be downloaded and installed at https://www.videolan.org/ .
Click Media-> Open Network Streaming ...
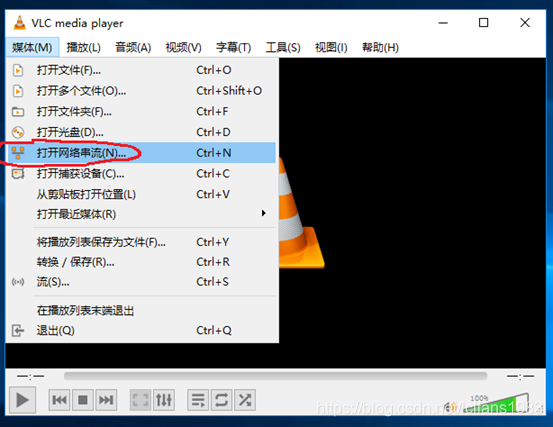
In the dialog box that pops up, enter the RTSP URL, for example
rtsp://admin:[email protected]:554/h264/ch1/main/av_stream
Then click play. If the format is correct, you can see the camera monitoring screen in VLC

6 Reference
https://blog.csdn.net/u014535295/article/details/99303890
https://blog.csdn.net/xundh/article/details/94605598
