VS2019 Opencv3 configure extended library
Paper VS2019 + OpenCV3.4.9 + Opencv Contrib 3.4.9, for example, be configured Opencv expansion module, and the recording process in which it occurs, may be desirable to provide a reference to others
Article Directory
- VS2019 Opencv3 configure extended library
- 1. Preparation Tools
- 2. Download extensions
- 3. Compile source code
- 3.1 Create a folder
- 3.2 Cmake compiled for the first time
- 3.3 pairs for the first time to compile the results configuration
- 3.4 second compilation
- 3.4.1Cmake error
- 3.4.2 View CMakeDownloadLog.txt file
- 3.4.3 script error Meaning
- 3.4.4 Manual Solution
- 3.4.5 completion of the second compilation
- 3.5 Build Solution
- 3.6 generation required libraries
- 4. Configure generate project files
- 4.1 new project file
- 4.2 Adding path path
- 4.3 Adding header and library files path
- 4.4 add additional dependent libraries
- 4.5 Copy the dll files to the windows system library
- A small problem encountered during 4.6
- 5. Run the test code
- Reference material
1. Preparation Tools
- VS2019
- Opencv3.4.9 https://opencv.org/
- 下载Opencv Contrib 3.4.9:https://github.com/opencv/opencv_contrib/
- Download Cmake tools: https://cmake.org/download/
to note here is that, Opencv and its expansion pack version of it must be the same, otherwise there will be problems
2. Download extensions
Because the code base Opencv official offer on github, because the server in a foreign country, the download speed is very slow, for example, about 50M extension library download takes about an hour, and often failed to download, offers two solutions here, you can code to cloud ( gitee) to download.
2.1 direct search method
For example, you can download Opencv Contrib to https://gitee.com/mirrors/opencv_contrib?_from=gitee_search download.
Method 2.2 was cloned into the cloud code
The library fork on github to their warehouse below, using the function gitee github with each other directly imported, you can clone the github repository to gitee, then download much faster, you can see the supplied reference [1]
3. Compile source code
Compiling the source code using Opencv3.4.9, Opencv Contrib 3.4.9 and for Cmake
3.1 Create a folder
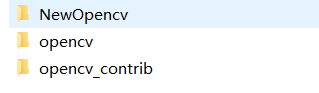
First created in the three files in the directory folder, which is opencv download the source code, opencv_contrib downloaded extensions, NewOpencv after recompiling the code is generated
3.2 Cmake compiled for the first time
The first compilation only Opencv source code, select the location where the source code in the source code inside Opencv3.4.9 that source file directory, binaries inside the source code should choose which files to compile directories, where choice is NewOpencv

First compile time, the compiler will choose to use, because I'm using VS2019, so the choice is Visual Studio 16 2019 this option. After clicking finish, began to compile the first time, probably need to wait a few minutes to complete the first compilation

3.3 pairs for the first time to compile the results configuration
After compiling the first end, Cmake red interface will be a lot of things, this time we add an additional library to use nonfree library, library files are packaged output three operations.

- Add Contrib library
in search search inside OPENCV_EXTRA_MODULES_PATH, find additional module library, add the library to come modules path opencv_contrib
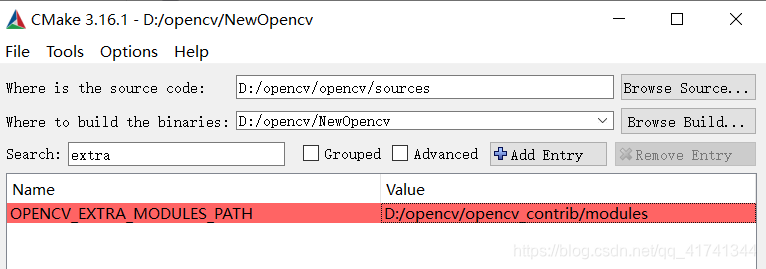
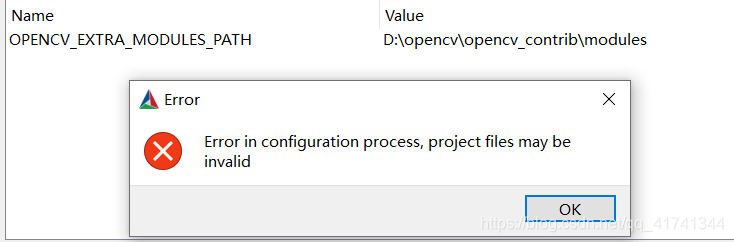
It should be noted that, Cmake file format which is the path forward slash /, file system directory windows are right diagonal \, if the direct copying of files windows directory, make a diagonal direction changed a bit, otherwise it will appear Error in configuration progress this error
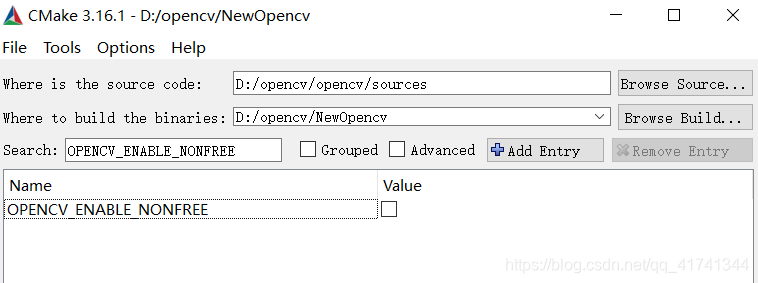
- nonfree library using
as a nonfree the Opencv patent library, to be used, then, to be provided which enable CMake
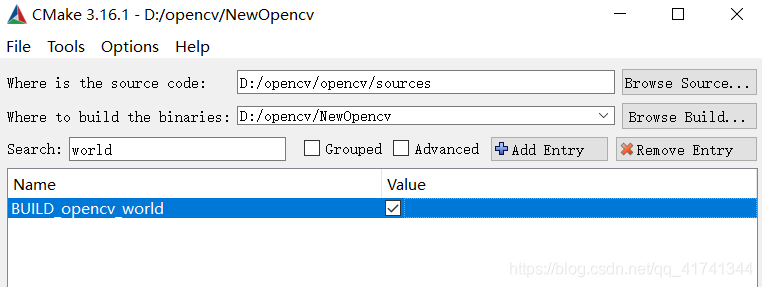
- Library files are packaged output settings
as particularly Opencv each library module, we can set options so that all modules packaged together, and finally generate only a lib library files for easy configuration behind our project file. Behind BUILD_opencv_world tick this option can be.
3.4 second compilation
3.4.1Cmake error
After completing the three steps above configuration, you can click on the configure option, a second configuration.
When configuring the second time, Cmake there will be some script statements, online download some dependent libraries, such as ffmpeg, ippicv, boostdesc and vgg and so on. But is likely to occur can not be downloaded, the system error problem. This time we need to download their own files. So we should download the files from where they should copy these files to the area? This requires us to look at Cake's error

This time CMake prompted us to open CMakeDownloadLog.txt folder to view detailed error content
3.4.2 View CMakeDownloadLog.txt file
We CMakeDownloadLog.txt Open folder to view the error description inside, you will see a similar statement:

3.4.3 script error Meaning
The meaning of these statements is as follows:
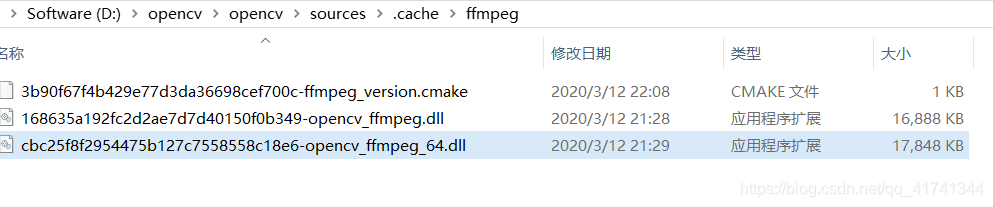
(1) using the D: /opencv/opencv/sources/.cache in the folder as a buffer
(2) from the site
https://raw.githubusercontent.com/opencv/opencv_3rdparty/548e3c997a80d65f710b9048f1d33371e3a203ac/ffmpeg/opencv_ffmpeg.dll download ffmpeg /opencv_ffmpeg.dll file
(3) MD5 value of the file (file ID equivalent) is 168635a192fc2d2ae7d7d40150f0b349
(. 4) to the last copy of the file downloaded to D: / OpenCV / NewOpencv / 3rdParty / FFmpeg
(. 5) and then the final result is download failed.
Because it is a failed download, so under the corresponding .chche path, although it will generate this file, but the file size is 0KB.

3.4.4 Manual Solution
Know the meaning of these scripts later, we can be manually resolved. We write to a file to download sites and other documents opencv_ffmpeg.dll
Here to download ffmpeg_version.cmake introduces an example.
- Copy the wrong location CMakeDownloadLog.txt mentioned, open the Web page or file

-
Right Save As to save the file to your computer
Be careful not to directly copy the page content, create your own folders, files, so produced, although the name is the same, but different MD5 value, problems may arise because MD5 values do not match, still can not be used -
Be copied to the corresponding directory of .cache name of the file to the original name + MD5 value of
the name can be found directly from CMakeDownloadLog.txt error prompt.

Like this to change the name of the file after .cache copied into the corresponding file folder directory
-
NewOpencv to the corresponding directory replication
manually copy the appropriate files to the file folders NewOpencv go inside. Here the file name does not need to add MD5 value

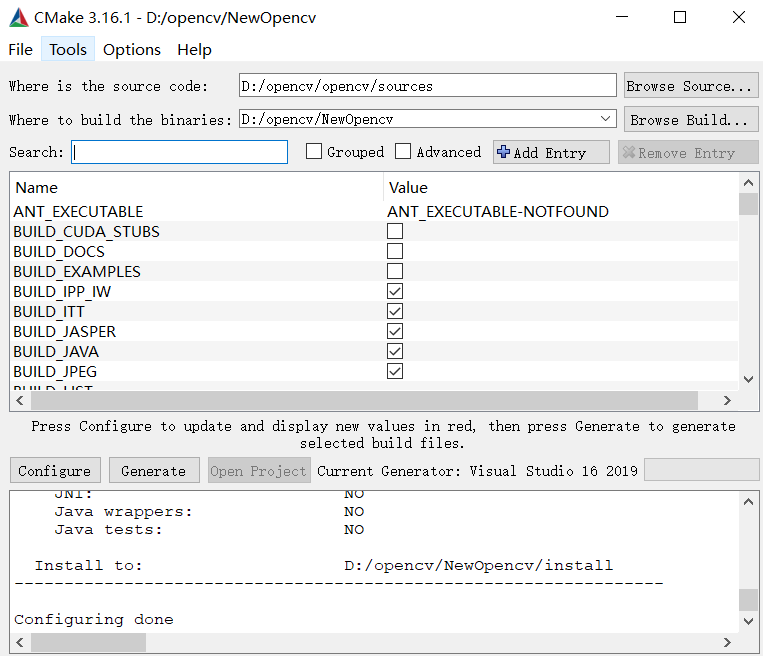
- After the download is complete copy of all lost files, click on CMake configure, there will be no error occurred.
3.4.5 completion of the second compilation
3.5 Build Solution
Click CMake generate interface to generate Opnecv compile the project file with the amplified library. Finally, click Open project Open the solution, and continues to generate Opencv amplified library header files, libraries, dynamic link library files.
3.6 generation required libraries
In VS project's interface, menu bar, select generation - "Batch generated
in batch generation interface to find INSTALL, select Debug x64, and then click Generate. If you modify the 32-bit x86.

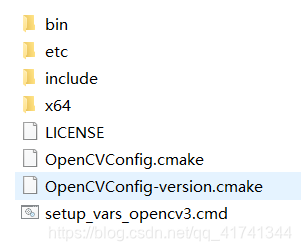
Install file generation process is relatively long. After the end of the generation, in NewOpencv you can find the install folder, and which placed its expansion opencv library header files, library files and dynamic link library files, install folder contains the following:
4. Configure generate project files
4.1 new project file
Create a new file to an empty VS2019
4.2 Adding path path
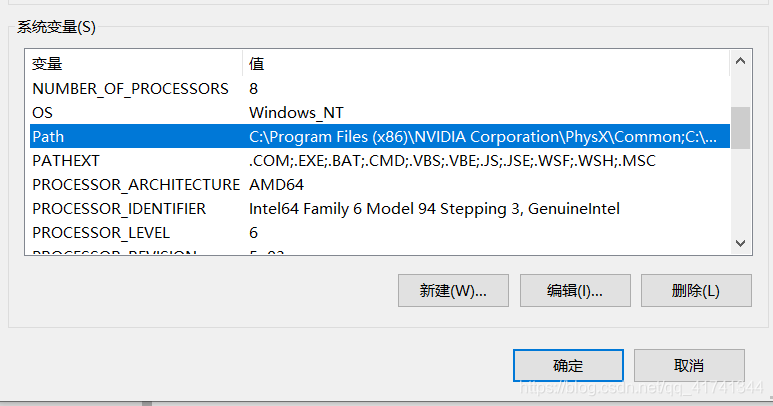
In My Computer -> Properties -> Advanced System Configuration -> Environment Variables -> Path add the path where the dynamic link library, dynamic link library path is located is in install-> x64-> vc16-> bin in
as: D : \ opencv \ NewOpencv \ install \ x64 \ vc16 \ bin
4.3 Adding header and library files path
Header file path D: \ opencv \ NewOpencv \ install
\ include libraries plus the path to D: \ opencv \ NewOpencv \ install \ x64 \ vc16 \ lib

4.4 add additional dependent libraries

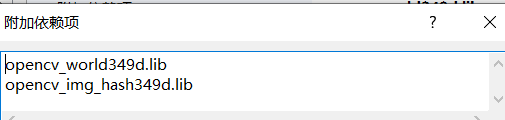
In Linker -> Input -> Additional Dependencies added library files lib directory included. Because we have chosen to compile the package in front of CMake, so in the end you can only add a lib that opencv_world349d.lib.
Library file should have another lib, extensive library of Opencv run does not seem necessary, but I also came to join him.
4.5 Copy the dll files to the windows system library
The install-> x64-> vc16-> bin replication opencv_world349d.dll windows corresponding to the runtime system.
The system 32 copied to: C: \ the Windows \ System32
replication system to a 64-bit: C: \ the Windows \ SysWOW64
This completes the compilation Opencv and additional libraries and configuration process
A small problem encountered during 4.6
After configuring finished so the library, wrote some extensions of code to run, but the system has been an error, error name can not locate the procedure entry point - in the dynamic link library
Like this:
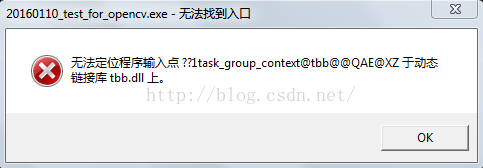
this is the reason the system can not find the location of the matching opencv_world349d.dll, in general, the PATH path configured, and copy the files to the opencv_world349d.dll after SysWOW64 folder, there should not be this problem.
Even more amazing is that if the NewOpencv in this folder, and copy the exe file to your program in the same path, the program will be able to extend the normal operation of the library.
References [6] proposed ideas to solve the problem, the original, the system searches dll file is searched in this order:
A executable file directory;
B processes the current directory;
C system directory,% SystemRoot% / system32
D 16-bit system directory;,% SystemRoot% / System
E Windows directory,% SystemRoot% /
F PATH environment variable in the directory;
So, for this problem is due, not previously installed Opencv time extensions, the path to the system32 copy a file opencv_world349d.dll, this dynamic link library does not contain extensive library, and I wrote the program calls opencv_world349d.dll when, in the order written above, no read dll file system and path path 64, but read dll file system 32, so there will be problems dll files do not match. When the system32 in opencv_world349d.dll deleted, the program will be able to normal operation.
5. Run the test code
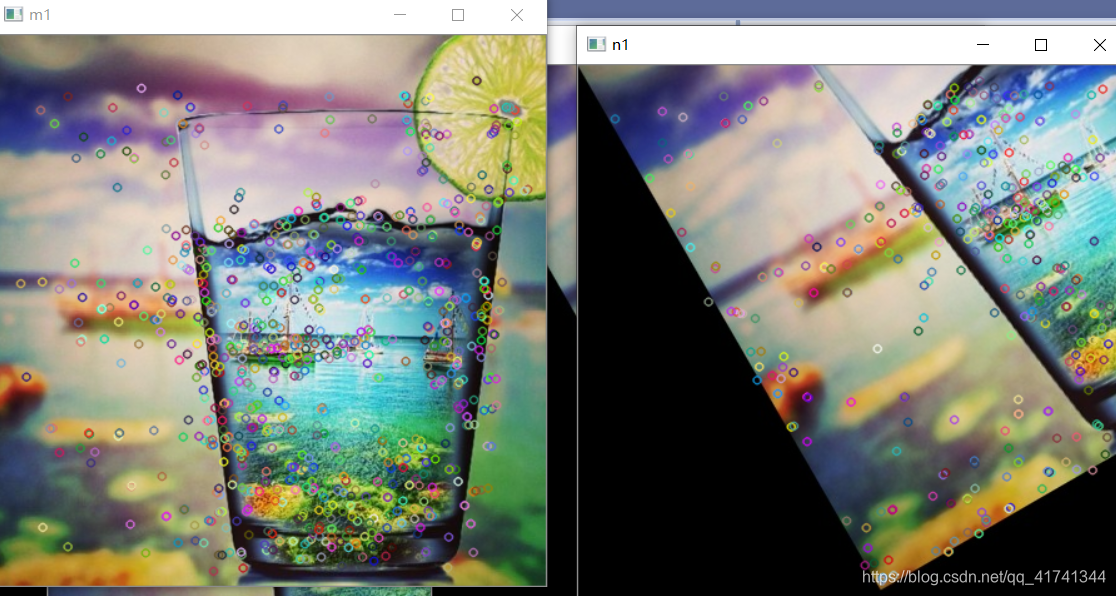
Here SURF feature detection code to run tests Example
#include<iostream>
#include<opencv2/opencv.hpp>
#include<opencv2/xfeatures2d/nonfree.hpp>
#include<opencv2/features2d/features2d.hpp>
#include <opencv2/xfeatures2d.hpp>
using namespace std;
using namespace cv;

int main()
{
	Mat m = imread("1.jpg");
	Mat n = imread("3.jpg");
	imshow("m", m);
	imshow("n", n);
	int minHessian = 400;


	Ptr<Feature2D>detector = xfeatures2d::SURF::create(minHessian);

	std::vector<KeyPoint> keyPoint1, keyPoint2;

	detector->detect(m, keyPoint1);
	detector->detect(n, keyPoint2);

	Mat mp1, np2;
	drawKeypoints(m, keyPoint1, mp1, Scalar::all(-1), DrawMatchesFlags::DEFAULT);
	drawKeypoints(n, keyPoint2, np2, Scalar::all(-1), DrawMatchesFlags::DEFAULT);

	imshow("m1", mp1);
	imshow("n1", np2);


	waitKey(0);


	return 0;
}
Results are as follows:
Reference material
[1] perfect solution to the problem or failure of the project on Github download speed is too slow
[2] vs2019 + opencv3.4.6 + contrib3.4.6 source compiler
[3] VS2017 + OpenCV SURF 3.x + operator use
[4] when CMake opencv Download: failure opencv_ffmpeg.dll, ippicv and other solutions
[5] Cmake error: Invalid Escape Sequence \ U
[6] [solve] the problem can not locate the procedure entry point ~ (the procedure entry point ~ could not be a dynamic link library located block)
[. 7] opencv3 surfDetector used in
[8] in opencv3.4.0 operator using SURF
