Material preparation:
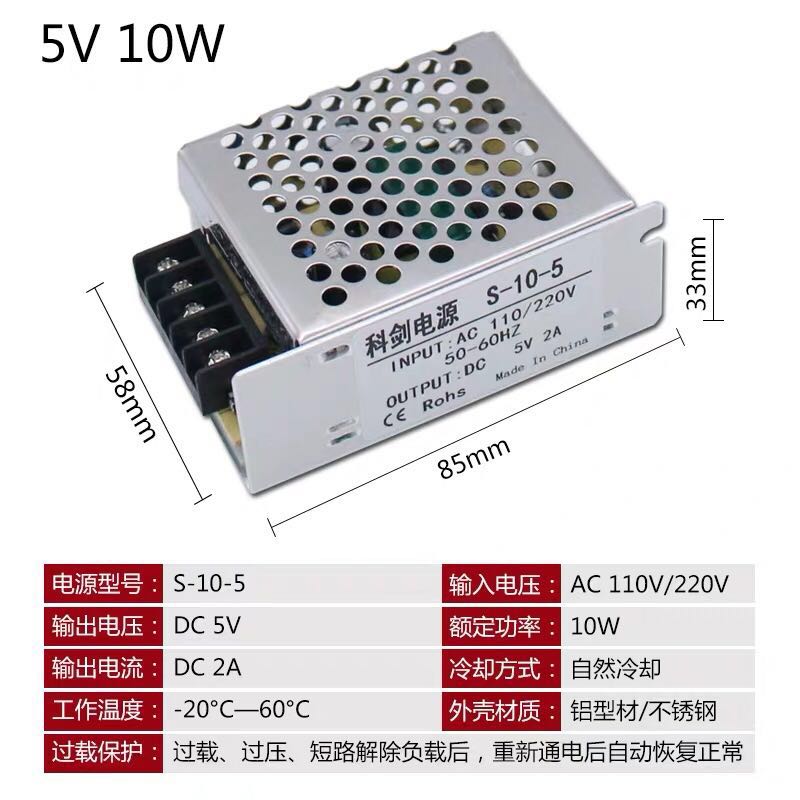
1.220v turn 5v transformer
2.Esp8266 relay module (optocoupler must be a tape, printed with three bars of white, below)

3.Esp01

4.220v domestic power, 5v learning lamp, esp01 burner and a small amount Dupont line
Physical map:
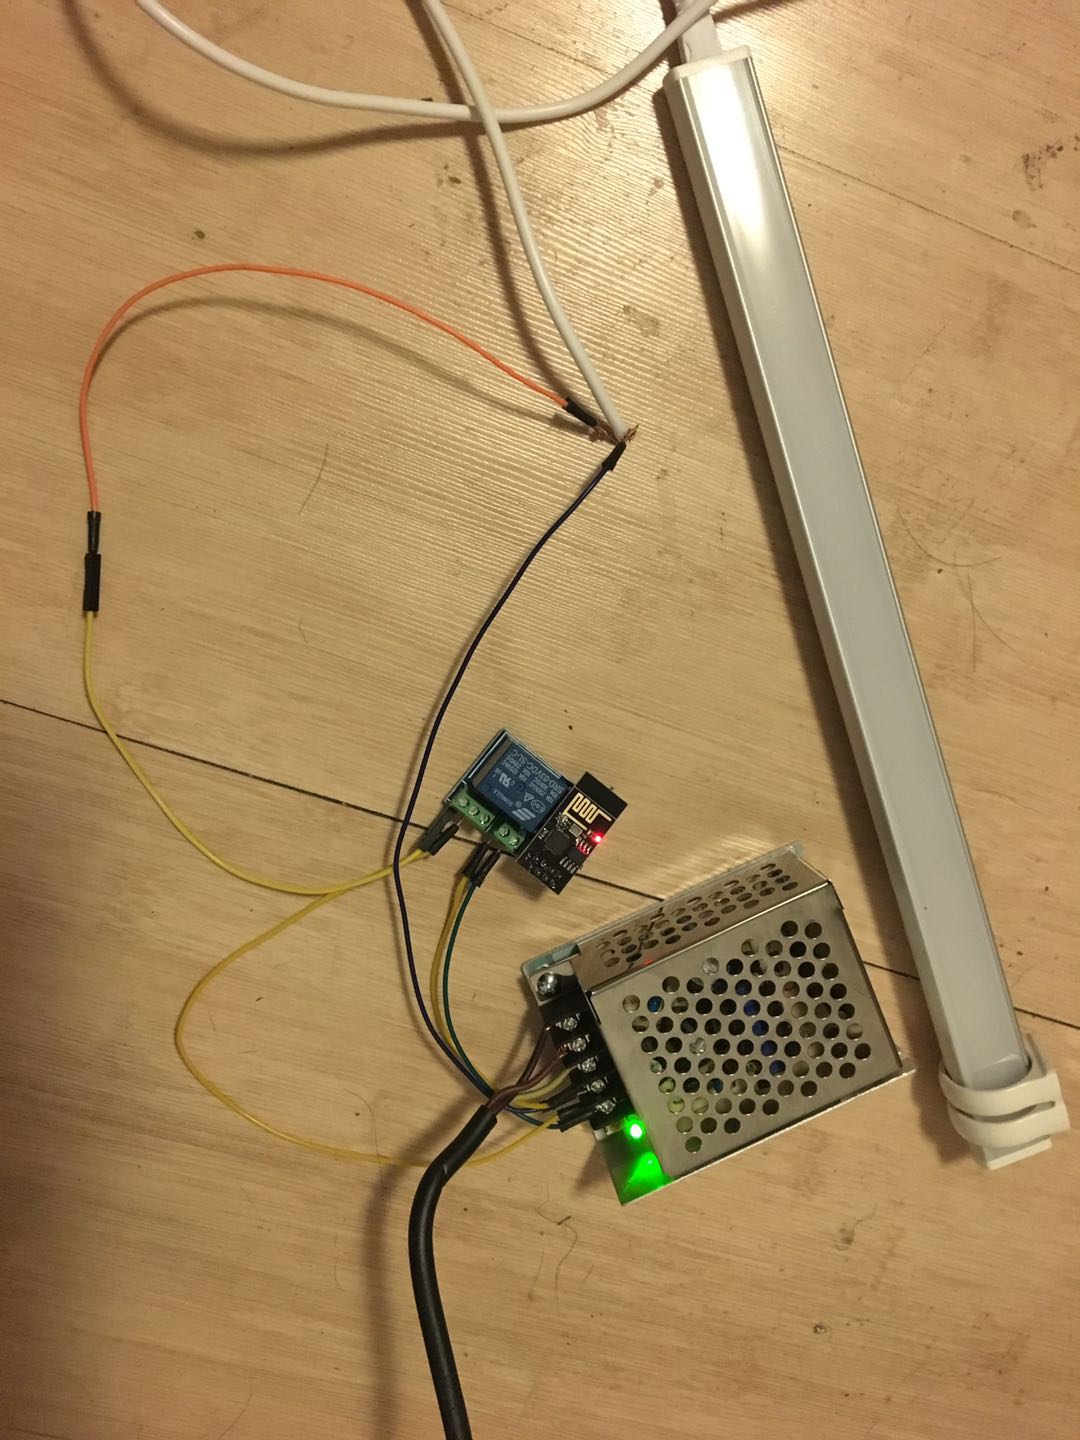
Specific Wiring:
(1) 220v transformer has the above subject, three plug has two colors of the ground, the ground connection of the transformer, the zero line, regardless of the line of fire, can be
(2) Relay Connection
Relay Power Supply
A transformer connected to the positive electrode 1.VCC 5v
2.GND tapped transformer 5v negative
Power relay control
A transformer connected to the positive electrode 1.COM 5v
2.NO cathode lamp or NC contact Learning
Learning Light negative electrode connected to a transformer 5v
Programming code:
#include <ESP8266WiFi.h>
#include <PubSubClient.h>
 int Deng = 0 ;   // IO14 (D5)
const  char * SSID = "name of the WIFI " ;
 const  char * password = "Password the WIFI " ;
 const  char * = mqtt_server "IP address " ; // use HIVEMQ information transfer service
const  char * tOPIC = "theme " ;               // subscribe to the message subject
const  char * client_id = "No " ;      //Identifying the current client device ID

WiFiClient espClient;                                                          // define wifiClient example
PubSubClient Client (espClient);                                          // define PubSubClient Examples
Long lastMsg = 0 ;                                                                // once the transmission information recorded on long

void Setup () {
  the pinMode (Deng, the oUTPUT);                                // define an onboard LED output mode
  Serial.begin ( 115200 );
  setup_wifi ();                                                                     // perform initialization Wifi, there are specifically described below
  client.setServer (mqtt_server, 1883 );                               // set port MQTT server and use port 1883 is the default MQTT
  client.setCallback (callback);                                           // set callbacks when ESP8266 receive the subscription message calls this method
}

void setup_wifi () {

  Delay ( 10 );
   // after the power board to start, wait a little so that the board lighting
  Serial.println ();
  Serial.print ( " Connecting to " );
  Serial.println (SSID);

  WiFi.begin (SSID, password);
  WiFi.mode (WIFI_STA);
  the while (! WiFi.status () = WL_CONNECTED) {
    Delay ( 500 );
    Serial.print(".");
  }

  Serial.println("");
  Serial.println("WiFi connected");
  Serial.println("IP address: ");
  Serial.println(WiFi.localIP());
}

void callback(char* topic, byte* payload, unsigned int length) {
  Serial.print("Message arrived [");
  Serial.print(topic);   // 打印主题信息
  Serial.print("] ");
   For ( int I = 0 ; I <length; I ++ ) {
    Serial.print (( char ) payload [I]); // print subject matter
  }
  Serial.println ();

  IF (( char ) payload [ 0 ] == ' 0 ' ) {
    digitalWrite (Deng, 0 );    // lighting
    Serial.println ( " have lights " );
  } the else {
    digitalWrite (Deng, . 1 );    // lights
    Serial.println ( "Has lights " );
  }
}

void the Reconnect () {
   the while (! Client.connected ()) {
    Serial.print ( " Attempting the MQTT Connection ... " );
     // Attempt to Connect
    IF (the client.connect (client_id) ) {
      Serial.println ( " connected " );
       // subscribe topic successful connection
      client.subscribe (tOPIC);
    } the else {
      Serial.print ( " failed, RC = " );
      Serial.print (client.state ()) ;
      Serial.println ( " try again in 5 seconds");
      // Wait 5 seconds before retrying
      delay(5000);
    }
  }
}

void loop() {

  if (!client.connected()) {
    reconnect();
  }
  client.loop();

  long now = millis();
  if (now - lastMsg > 2000) {
    lastMsg = now;
    client.publish("home/status/", "{device:client_id,'status':'on'}");
  }
}
After successfully burning Esp01 inserted in the relay module can be powered with a micro-channel control applet (a small micro-channel program code check out my other blog)