SpringBoot integration MyBatis allows operation of the database has become very convenient
both ways available annotations and profiles to achieve
comment will be relatively more simple way
First, the introduction of dependency:

use when creating SpringBoot Initializer program may rely on being able to bring automatic configuration JDBC Data Source
If it is to create a project shall depend on the introduction of a manual with the Wizard:
<!-- Druid数据源 -->
<dependency>
    <groupId>com.alibaba</groupId>
    <artifactId>druid</artifactId>
    <version>1.1.10</version>
</dependency>

<!-- 日志转换包 -->
<dependency>
    <groupId>org.slf4j</groupId>
    <artifactId>log4j-over-slf4j</artifactId>
    <version>1.7.25</version>
</dependency>

<dependency>
    <groupId>org.springframework.boot</groupId>
    <artifactId>spring-boot-starter-jdbc</artifactId>
</dependency>
<dependency>
    <groupId>org.springframework.boot</groupId>
    <artifactId>spring-boot-starter-web</artifactId>
</dependency>
<dependency>
    <groupId>org.mybatis.spring.boot</groupId>
    <artifactId>mybatis-spring-boot-starter</artifactId>
    <version>2.1.2</version>
</dependency>

<dependency>
    <groupId>mysql</groupId>
    <artifactId>mysql-connector-java</artifactId>
    <scope>runtime</scope>
</dependency>
<dependency>
    <groupId>org.springframework.boot</groupId>
    <artifactId>spring-boot-starter-test</artifactId>
    <scope>test</scope>
    <exclusions>
        <exclusion>
            <groupId>org.junit.vintage</groupId>
            <artifactId>junit-vintage-engine</artifactId>
        </exclusion>
    </exclusions>
</dependency>
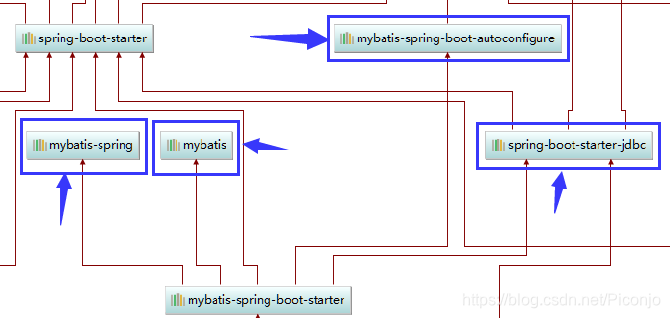
Of course, may not be incorporated because the underlying springboot mybatis also introduced springboot jdbc
You then need to configure the data source
I use is Druid data source
yml profile:
spring:
  datasource:
    driver-class-name: com.mysql.cj.jdbc.Driver
    url: jdbc:mysql://127.0.0.1:3306/springboot_mybatis?useUnicode=true&useJDBCCompliantTimezoneShift=true&useLegacyDatetimeCode=false&serverTimezone=UTC
    username: root
    password: 123456
    initialization-mode: always
    type: com.alibaba.druid.pool.DruidDataSource
    #   数据源其他配置
    initialSize: 5
    minIdle: 5
    maxActive: 20
    maxWait: 60000
    timeBetweenEvictionRunsMillis: 60000
    minEvictableIdleTimeMillis: 300000
    validationQuery: SELECT 1 FROM DUAL
    testWhileIdle: true
    testOnBorrow: false
    testOnReturn: false
    poolPreparedStatements: true
    #   配置监控统计拦截的filters,去掉后监控界面sql无法统计,'wall'用于防火墙
    filters: stat,wall,log4j
    maxPoolPreparedStatementPerConnectionSize: 20
    useGlobalDataSourceStat: true
    connectionProperties: druid.stat.mergeSql=true;druid.stat.slowSqlMillis=500
Then create a configuration category to configure Druid:
@Configuration
public class DruidConfig {

    @ConfigurationProperties(prefix = "spring.datasource")
    @Bean
    public DataSource druid()
    {
        return new DruidDataSource();
    }

    @Bean
    public ServletRegistrationBean statViewServlet()
    {
        ServletRegistrationBean<StatViewServlet> srb = new ServletRegistrationBean<>(new StatViewServlet(), "/druid/*");
        // 设置初始化参数
        Map<String,String> initParams=new HashMap<>();
        // 登录后台的用户名
        initParams.put("loginUsername","admin");
        // 登录后台的密码
        initParams.put("loginPassword","123456");
        // 允许访问的ip 默认或为空代表允许所有
        initParams.put("allow","");
        // 不允许访问的ip
        initParams.put("deny","111.111.111.111");
        srb.setInitParameters(initParams);
        return srb;
    }

    @Bean
    public FilterRegistrationBean webStatFilter()
    {
        FilterRegistrationBean<Filter> frb = new FilterRegistrationBean<>();
        // 传入Druid的监控Filter
        frb.setFilter(new WebStatFilter());
        // 设置初始化参数
        Map<String,String> initParams=new HashMap<>();
        // 设置哪些路径不进行拦截
        initParams.put("exclusions","*.js,*.css,/druid/*");
        frb.setInitParameters(initParams);
        // 设置拦截的请求
        frb.setUrlPatterns(Arrays.asList("/*"));
        return frb;
    }
}
Create a data table and a corresponding bean class
Finally, you can start using MyBatis annotations is very simple:
Mapper class
// @Mapper注解 用于指定该接口类是一个操作数据库的mapper
@Mapper
public interface DepartmentMapper {

    // 单查询
    @Select("select * from department where id=#{id}")
    public Department getDeptmentById(Integer id);

    // 删除
    @Delete("delete from department where id=#{id}")
    public int deleteDeptmentById(Integer id);

    // 插入
    // @Options注解:配置是否使用自增主键 并指定自增主键 如此 当插入完成后 主键又会重新封装 就不会返回主键null了
    @Options(useGeneratedKeys = true,keyProperty = "id")
    @Insert("insert into department (departmentName) values(#{departmentName})")
    public int insertDepartment(Department department);

    // 更新
    @Update("update department set departmentName=#{departmentName} where id=#{id}")
    public int updateDepartment(Department department);
}
Use @Optionsannotation specified increment primary key may well prevent the insertion of non-manual display to null primary key
direct injection come very convenient to use
test:
@RestController
public class DepartmentController {

    @Autowired
    DepartmentMapper departmentMapper;

    @GetMapping("/dept/{id}")
    public Department getDepartment(@PathVariable("id") Integer id)
    {
        return departmentMapper.getDeptmentById(id);
    }

    @GetMapping("/dept")
    public Department insertDepartment(Department department)
    {
        departmentMapper.insertDepartment(department);
        return department;
    }
}

Test success
When the field names of the database and the bean property names not on the field does not match the corresponding data will not lead to inquiries
and notes no way xml configuration file and therefore can not open the hump mapping xml file
At this point you can self-configure MyBatis-defined rules of
their own to create a MyBatis configuration class added to the Spring container
open hump mapping configuration class
@org.springframework.context.annotation.Configuration
public class MyBatisConfig {

    // 给容器中添加一个ConfigurationCustomizer定制配置
    @Bean
    public ConfigurationCustomizer configurationCustomizer()
    {
        return new ConfigurationCustomizer()
        {
            @Override
            public void customize(Configuration configuration) {
                configuration.setMapUnderscoreToCamelCase(true);
            }
        };
    }
}
Finally, also batch scanning Mapper interfaces
or add on MyBatis arranged on the boot class class @MapperScanannotation scan parameters passed to the packet code scan path
so that it is no need to add the Mapper classes annotated @Mapper
// 扫描mapper包 这样 指定包下所有接口都相当于添加了@Mapper注解
@MapperScan(value = "net.zjitc.springboot.mapper")
@SpringBootApplication
public class SpringbootMybatisApplication {

    public static void main(String[] args) {
        SpringApplication.run(SpringbootMybatisApplication.class, args);
    }
}
