系列电子书:传送门
在大多数情况下,测试挂起函数与测试正常函数没有什么不同。看看下面的 FetchUserUseCase.fetchUserData。通过伪造Fake(或模拟Mock)和简单的断言,我们可以很容易地测试它是否按预期显示数据:
class FetchUserUseCase(
    private val repo: UserDataRepository,
) {


    suspend fun fetchUserData(): User = coroutineScope {


        val name = async {

     repo.getName() }
        val friends = async {

     repo.getFriends() }
        val profile = async {

     repo.getProfile() }
        User(
            name = name.await(),
            friends = friends.await(),
            profile = profile.await()
        )
    }
}

class FetchUserDataTest {


    @Test
    fun `should construct user`() = runBlocking {


        // given
        val repo = FakeUserDataRepository()
        val useCase = FetchUserUseCase(repo)

        // when
        val result = useCase.fetchUserData()

        // then
        val expectedUser = User(
            name = "Ben",
            friends = listOf(Friend("some-friend-id-1")),
            profile = Profile("Example description")
        )

        assertEquals(expectedUser, result)
    }

    class FakeUserDataRepository : UserDataRepository {


        override suspend fun getName(): String = "Ben"

        override suspend fun getFriends(): List<Friend> =
            listOf(Friend("some-friend-id-1"))

        override suspend fun getProfile(): Profile =
            Profile("Example description")
    }
}
上面的测试函数不应该作为参考标准。对于单元测试的表达有多种多样的方式。我在这里使用了 伪造fake 而不是 模拟mock,这样就不会引入任何三方库(我个人也更喜欢这种方式)。我还尝试让所有的测试都尽量简化,以使它们更容易阅读。
类似的,在许多情况下,如果我们需要测试挂起函数,实际上只需使用 runBlocking 和一些经典的断言工具。这就是单元测试在许多项目中的样子,下面是 Kt.Academy 后台项目的一个单元测试用例:
class UserTests : KtAcademyFacadeTest() {


    @Test
    fun `should modify user details`() = runBlocking {


        // given
        thereIsUser(aUserToken, aUserId)

        // when
        facade.updateUserSelf(
            aUserToken,
            PatchUserSelfRequest(
                bio = aUserBio,
                bioPl = aUserBioPl,
                publicKey = aUserPublicKey,
                customImageUrl = aCustomImageUrl
            )
        )

        // then
        with(findUser(aUserId)) {


            assertEquals(aUserBio, bio)
            assertEquals(aUserBioPl, bioPl)
            assertEquals(aUserPublicKey, publicKey)
            assertEquals(aCustomImageUrl, customImageUrl)
        }
    }
    //...
}
我们只使用 runBlocking,测试挂起函数和阻塞函数的行为几乎没有区别。
测试时间依赖性
但是当我们想要测试函数对时间依赖性时,差异就出现了。例如,请思考一下下面这个函数:
suspend fun produceCurrentUserSeq(): User {


    val profile = repo.getProfile()
    val friends = repo.getFriends()
    return User(profile, friends)
}

suspend fun produceCurrentUserSym(): User = coroutineScope {


    val profile = async {

     repo.getProfile() }
    val friends = async {

     repo.getFriends() }
    User(profile.await(), friends.await())
}
两个函数将会产生相同的结果,但不同的是:第一个是按顺序产生的,而第二个是同时进行的。如果获取配置文件和好友列表各需要1秒, 那么第一个函数需要大概2秒,而第二个函数只需要1秒,你将如何测试这种差异?
请注意,只有 getProfile 和 getFriends 执行确实是需要一些时间才会产生差异。如果它们都是即时的,两种产生用户信息的方式是无法区分的,因此,我们可以通过伪造耗时函数来模拟数据加载的场景:
class FakeDelayedUserDataRepository : UserDataRepository {


    override suspend fun getProfile(): Profile {


        delay(1000)
        return Profile("Example description")
    }

    override suspend fun getFriends(): List<Friend> {


        delay(1000)
        return listOf(Friend("some-friend-id-1"))
    }
}
现在,在单元测试中可以看到区别:调用 produceCurrentUserSeq 将花费大约1秒的时间,而调用 produceCurrentUserSym 则需要大约2秒的时间。问题是我们不希望单元测试花费这么多时间,我们的项目中通常有数千个单元测试,我们希望所有的测试都尽可能快的执行。如何兼得鱼和熊掌呢?答案是使用虚拟的时间。下面我们将介绍 kotln-coroutines-test 及其 StandardTestDispatcher。
本章介绍了1.6版本中引入的 kotlin-coroutines-test 功能和类。如果你使用的是这个库的旧版本。在大多数情况下,用 runBlockingTest 代替 runTest,用 TestCoroutinesDispatcher 代替 StandardTestDispatcher ,用 TestCoroutineScope 代替 TestScope 就足够了。另外,旧版本中的 advanceTimeBy 类似于1.6以上版本中的 advanceTimeBy 和 runCurrent。
TestCoroutineScheduler 和 StandardTestDispatcher
当我们调用 delay 时,我们的协程被挂起并在一段时间后恢复。kotlinx-coroutines-test 中的 TestCoroutineScheduler 可以改变这种行为,它使得 delay 在虚拟时间上操作,这是完全模拟的,不依赖于实时。
fun main() {


    val scheduler = TestCoroutineScheduler()

    println(scheduler.currentTime) // 0
    scheduler.advanceTimeBy(1_000)
    println(scheduler.currentTime) // 1000
    scheduler.advanceTimeBy(1_000)
    println(scheduler.currentTime) // 2000
}
TestCoroutineScheduler 以及 StandardTestDispatcher、TestScope 和 runTest 仍然是实验性的。
要在协程上使用 TestCoroutineScheduler ,我们应该使用一个调度器来协助它。标准的选择是 StandardTestDispatcher。与大多数调度器不同,它不仅仅用于决定协程在哪个线程上运行。除非我们不提前时间,否则它启动的协程不会运行。提前时间使用的最典型的方式是调用 advanceUntilIdle 函数,它会提前虚拟时间,并调用在此间的所有操作:
fun main() {


    val scheduler = TestCoroutineScheduler()
    val testDispatcher = StandardTestDispatcher(scheduler)

    CoroutineScope(testDispatcher).launch {


        println("Some work 1")
        delay(1000)
        println("Some work 2")
        delay(1000)
        println("Coroutine done")
    }

    println("[${

      scheduler.currentTime}] Before")
    scheduler.advanceUntilIdle()
    println("[${

      scheduler.currentTime}] After")
}
// [0] Before
// Some work 1
// Some work 2
// Coroutine done
// [2000] After
StandardTestDispatcher 会默认创建一个 TestCoroutineScheduler ,所以我们不需要显式的创建它。我们可以通过 scheduler 属性来访问它。
fun main() {


    val dispatcher = StandardTestDispatcher()

    CoroutineScope(dispatcher).launch {


        println("Some work 1")
        delay(1000)
        println("Some work 2")
        delay(1000)
        println("Coroutine done")
    }

    println("[${

      dispatcher.scheduler.currentTime}] Before")
    dispatcher.scheduler.advanceUntilIdle()
    println("[${

      dispatcher.scheduler.currentTime}] After")
}
// [0] Before
// Some work 1
// Some work 2
// Coroutine done
// [2000] After
重要的是,要注意 StandardTestDispatcher 本身不会提前时间,如果我们不额外操作,协程将永远不会恢复。
fun main() {


    val testDispatcher = StandardTestDispatcher()

    runBlocking(testDispatcher) {


        delay(1)
        println("Coroutine done")
    }
}
// (代码永远运行下去)
另一种延迟的方式是使用 advanceTimeBy 和具体的毫秒数。该函数提前具体时间并执行在此期间发生的所有操作。这意味着如果我们延迟2ms,所有延迟小于2ms的内容都将被恢复。为了恢复恰好在第二毫秒调度的操作,我们需要额外调用 runCurrent 函数:
fun main() {


    val testDispatcher = StandardTestDispatcher()

    CoroutineScope(testDispatcher).launch {


        delay(1)
        println("Done1")
    }

    CoroutineScope(testDispatcher).launch {


        delay(2)
        println("Done2")
    }

    testDispatcher.scheduler.advanceTimeBy(2) // Done
    testDispatcher.scheduler.runCurrent() // Done2
}
下面是使用 advanceTimeBy 和 runCurrent 的更大一点的例子。
fun main() {


    val testDispatcher = StandardTestDispatcher()

    CoroutineScope(testDispatcher).launch {


        delay(2)
        print("Done")
    }

    CoroutineScope(testDispatcher).launch {


        delay(4)
        print("Done2")
    }

    CoroutineScope(testDispatcher).launch {


        delay(6)
        print("Done3")
    }

    for (i in 1..5) {


       print(".")
       testDispatcher.scheduler.advanceTimeBy(1)
       testDispatcher.scheduler.runCurrent()
    }
}
// ..Done..Done2.
它的底层是如何工作的?当调用 delay 时,它检查 dispatcher(带有 CoroutinuationInterceptor 的键)是否实现了 Delay 接口(StandardTestDispatcher 实现了)。对于这样的调度器,将会调用它们的 scheduleResumeAfterDelay 函数,而不是实时等待的 DefaultDelay 。
为了了解虚拟时间真正独立于实时时间,请参见下面的示例。添加 Thread.sleep 并不会影响到 StandardTestDispatcher 的协程。还需注意,对 advanceUntilIdle 的调用只需要几毫秒。因此它不需要等待任何实时时间。它会立即推送虚拟时间并执行协程操作。
fun main() {


    val dispatcher = StandardTestDispatcher()

    CoroutineScope(dispatcher).launch {


        delay(1000)
        println("Coroutine done")
    }

    Thread.sleep(Random.nextLong(2000)) // 这里睡眠多少秒都没有关系
    // 它不会影响结果

    val time = measureTimeMillis {


        println("[${

      dispatcher.scheduler.currentTime}] Before")
        dispatcher.scheduler.advanceUntilIdle()
        println("[${

      dispatcher.scheduler.currentTime}] After")
    }
    println("Took $time ms")
}
// [0] Before
// Coroutine done
// [1000] After
// Took 15 ms (或者一个更小的数字)
在上面的例子中,我们使用 StandardTestDispatcher 并用一个作用域来包装它。作为替代,我们可以使用 TestScope,它做了同样的事情(它用 CoroutineExceptionHander 来收集所有异常)。关键在于,在这个作用域上,我们还可以使用 advanceUntileIdle、 advanceTimeBy 或 currentTime 等属性和函数,所有这些函数都被委托给这个作用域使用的调度器。这样就更加便利了。
fun main() {


    val scope = TestScope()

    scope.launch {


       delay(1000)
       println("First done")
       delay(1000)
       println("Coroutine done")
    }

    println("[${

      scope.currentTime}] Before") // [0] Before
    scope.advanceTimeBy(1000)
    scope.runCurrent() // First done
    println("[${

      scope.currentTime}] Middle") // [1000] Middle
    scope.advanceUntilIdle() // Coroutine done
    println("[${

      scope.currentTime}] After") // [2000] After
}
稍后我们将了解到 StandardTestDispatcher 经常直接在 Android 上用于测试 ViewModels 、 Presenter、Fragments 等。我们还可以用它来测试 produceCurrentUserSeq 和 produceCurrentUserSym 函数,方法是在协程中启动它们,将时间推到空闲,并检查它们花费了多少虚拟时间。然而,这相当复杂。相反,我们应该使用 runTest,它就是为了解决这个问题而设计的。
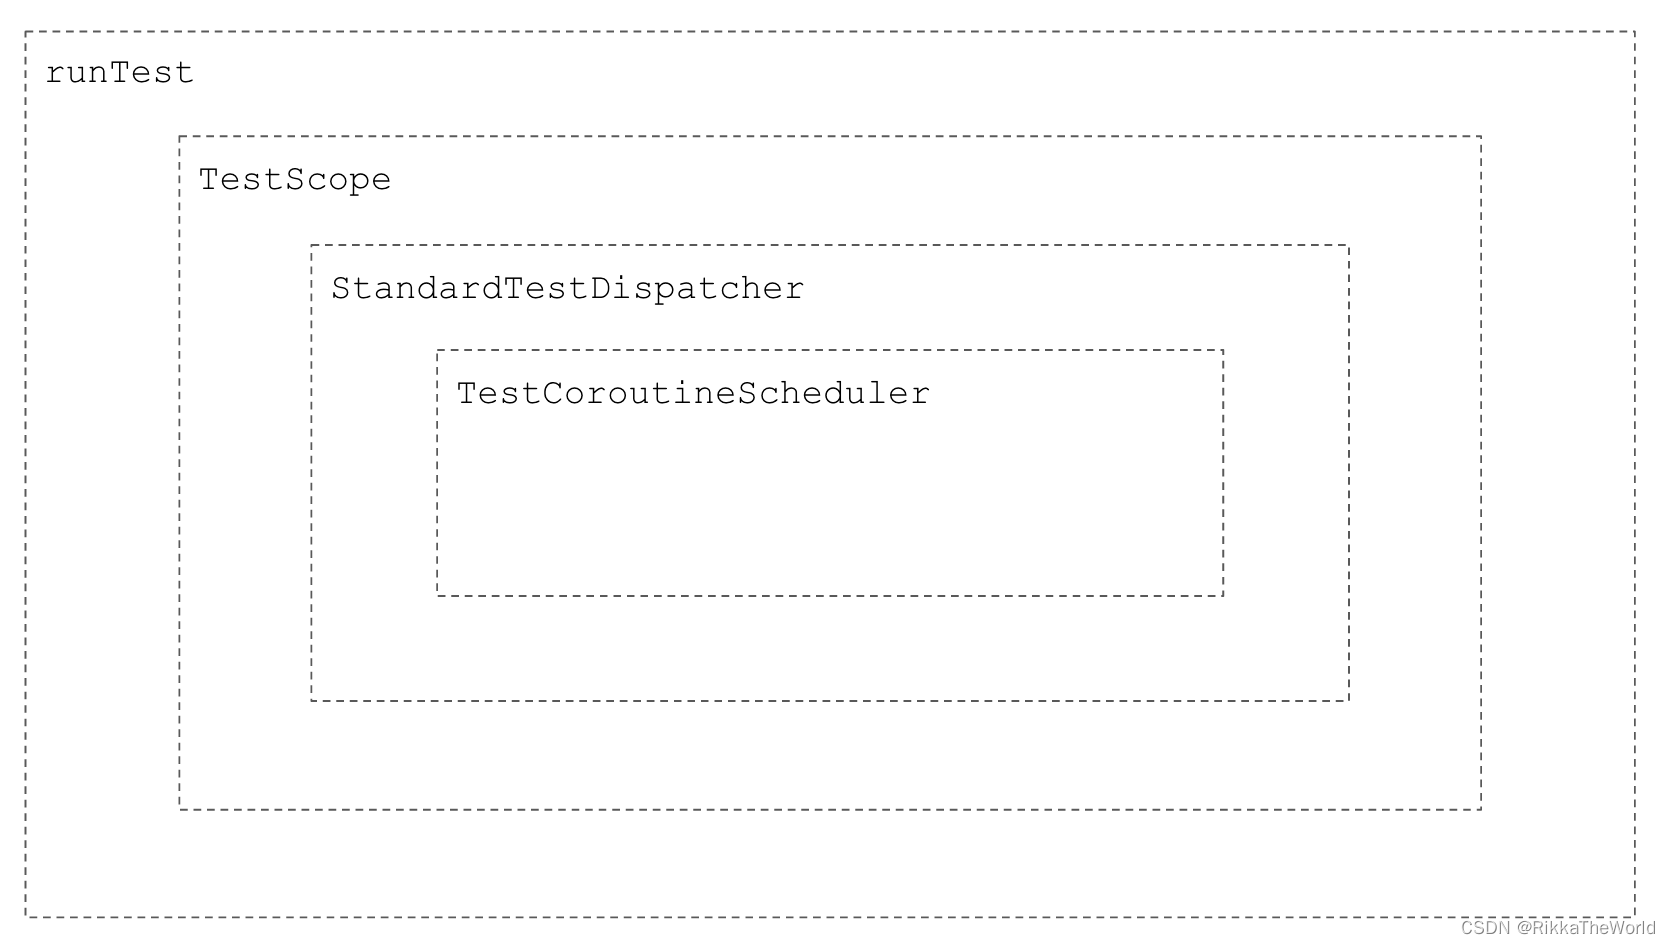
runTest
runTest 是 kotlinx-coroutines-test 中最常用的函数。它用 TestScope 来启动一个协程,并立即推进它直到空闲。包装其的作用域类型是 TestScope,因此我们可以在任意点检查 currentTime。
class TestTest {


    @Test
    fun test1() = runTest {


        assertEquals(0, currentTime)
        delay(1000)
        assertEquals(1000, currentTime)
    }

    @Test
    fun test2() = runTest {


        assertEquals(0, currentTime)
        coroutineScope {


            launch {

     delay(1000) }
            launch {

     delay(1500) }
            launch {

     delay(2000) }
        }
        assertEquals(2000, currentTime)
    }
}
让我们回到函数,在函数中,我们依次或同时加载用户数据。使用 runTest,测试它们很容易。假设我们的伪造存储库对每个函数调用需要1秒,那么顺序处理应该需要2秒,而同时处理应该只需要1秒。由于我们使用的是虚拟时间,所以测试是即使的,currentTime 的值是精确的。
@Test
fun `Should produce user sequentially`() = runTest {


     // given
     val userDataRepository = FakeDelayedUserDataRepository()
     val useCase = ProduceUserUseCase(userDataRepository)

     // when
     useCase.produceCurrentUserSeq()

     // then
     assertEquals(2000, currentTime)
}

@Test
fun `Should produce user simultaneously`() = runTest {


    // given
    val userDataRepository = FakeDelayedUserDataRepository()
    val useCase = ProduceUserUseCase(userDataRepository)

    // when
    useCase.produceCurrentUserSym()

    // then
    assertEquals(1000, currentTime)
}
由于它是一个重要的用例,所以让我们来看一下完整示例:
class FetchUserUseCase(
    private val repo: UserDataRepository,
) {


    suspend fun fetchUserData(): User = coroutineScope {


        val name = async {

     repo.getName() }
        val friends = async {

     repo.getFriends() }
        val profile = async {

     repo.getProfile() }

        User(
            name = name.await(),
            friends = friends.await(),
            profile = profile.await()
        )
    }
}

class FetchUserDataTest {


    @Test
    fun `should load data concurrently`() = runTest {


        // given
        val userRepo = FakeUserDataRepository()
        val useCase = FetchUserUseCase(userRepo)

        // when
        useCase.fetchUserData()

        // then
        assertEquals(1000, currentTime)
    }

    @Test
    fun `should construct user`() = runTest {


        // given
        val userRepo = FakeUserDataRepository()
        val useCase = FetchUserUseCase(userRepo)

        // when
        val result = useCase.fetchUserData()

        // then
        val expectedUser = User(
            name = "Ben",
            friends = listOf(Friend("some-friend-id-1")),
            profile = Profile("Example description")
        )

        assertEquals(expectedUser, result)
    }

    class FakeUserDataRepository : UserDataRepository {


        override suspend fun getName(): String {


            delay(1000)
            return "Ben"
        }

        override suspend fun getFriends(): List<Friend> {


            delay(1000)
            return listOf(Friend("some-friend-id-1"))
        }

        override suspend fun getProfile(): Profile {


            delay(1000)
            return Profile("Example description")
        }
    }
}

interface UserDataRepository {


    suspend fun getName(): String
    suspend fun getFriends(): List<Friend>
    suspend fun getProfile(): Profile
}

data class User(
    val name: String,
    val friends: List<Friend>,
    val profile: Profile
)

data class Friend(val id: String)
data class Profile(val description: String)
UnconfinedTestDispatcher
除了 StandardTestDispatcher,我们还有 UnconfinedTestDispatcher。它们最大的区别是前者在我们使用它的调度器前它不会执行任何操作。而后者会立即执行在启动协程的第一次延迟之前的所有操作,这就是下面到的代码打印 “C” 的原因:
fun main() {


    CoroutineScope(StandardTestDispatcher()).launch {


        print("A")
        delay(1)
        print("B")
    }

    CoroutineScope(UnconfinedTestDispatcher()).launch {


        print("C")
        delay(1)
        print("D")
    }
}
// C
在 1.6 版本的 kotlinx-coroutines-test 中引入了 runTest 函数,该版本之前,我们使用 runBlockingTest,它的行为更接近于使用 UnconfinedTestDispatcher.runTest,所以,如果要想直接从 runBlockingTest 迁移到 runTest,代码需要像下面这样:
@Test
fun testName() = runTest(UnconfinedTestDispatcher()) {


   //...
}
使用模拟
在伪造对象中使用 delay 很简单但不够直接。许多开发人员喜欢直接在测试函数中调用 delay。其中一种方式是使用 mock 模拟:
@Test
fun `should load data concurrently`() = runTest {


    // given
    val userRepo = mockk<UserDataRepository>()

    coEvery {

     userRepo.getName() } coAnswers {


        delay(600)
        aName
    }

    coEvery {

     userRepo.getFriends() } coAnswers {


        delay(700)
        someFriends
    }

    coEvery {

     userRepo.getProfile() } coAnswers {


        delay(800)
        aProfile
    }

    val useCase = FetchUserUseCase(userRepo)

    // when
    useCase.fetchUserData()

    // then
    assertEquals(800, currentTime)
}
在上面的例子中,我使用了 MockK 库。
测试函数改变调度器
在Dispatchers协程调度器一章中,我们介绍了设置具体 Dispatchers 的典型案例。例如,我们使用 Dispachers.IO (或者自定义调度器)来调用阻塞函数,使用 Dispachers.Default 来执行 CPU 密集型操作。这样的函数很少需要同时执行,所以通常使用 runBlocking 测试它们就足够了。这种情况很简单,实际上与测试阻塞函数没有什么区别。例如,思考下面函数:
suspend fun readSave(name: String): GameState =
    withContext(Dispatchers.IO) {


        reader.readCsvBlocking(name, GameState::class.java)
    }

suspend fun calculateModel() =
    withContext(Dispatchers.Default) {


        model.fit(
            dataset = newTrain,
            epochs = 10,
            batchSize = 100,
            verbose = false
        )
    }
我们可以使用 runBlocking 包装这些函数的行为,但是如何检查这些函数是否真的使用了调度器呢?如果我们模拟所调用的函数,并在内部捕获所使用线程的名称,可以做到这一点。
@Test
fun `should change dispatcher`() = runBlocking {


    // given
    val csvReader = mockk<CsvReader>()
    val startThreadName = "MyName"
    var usedThreadName: String? = null

    every {


        csvReader.readCsvBlocking(
            aFileName,
            GameState::class.java
        )
    } coAnswers {


        usedThreadName = Thread.currentThread().name
        aGameState
    }

    val saveReader = SaveReader(csvReader)

    // when
    withContext(newSingleThreadContext(startThreadName)) {


        saveReader.readSave(aFileName)
    }

    // then
    assertNotNull(usedThreadName)
    val expectedPrefix = "DefaultDispatcher-worker-"
    assert(usedThreadName!!.startsWith(expectedPrefix))
}
在上面的函数中,我不能使用伪造,因为 CsvReader 是一个类而非接口,所以我使用了 mock。记住,调度器 Dispachers.Default 和 Dispatchers.IO 是共享同一个线程池的。
然而,在极少数情况下,我们可能希望测试函数中的时间依赖关系。这是一个棘手的情况,因为新的调度器取代了我们的 StandardTestDispatcher,所以我们停止在虚拟时间上操作,为了更清楚的说明这一点,让我们使用 withContext(Disptachers.IO) 包装 fetchUserData 函数。
suspend fun fetchUserData() = withContext(Dispatchers.IO) {


    val name = async {

     userRepo.getName() }
    val friends = async {

     userRepo.getFriends() }
    val profile = async {

     userRepo.getProfile() }
    User(
        name = name.await(),
        friends = friends.await(),
        profile = profile.await()
    )
}
现在,我们之前实现的所有测试都将实时等待, currentTime 将一直为0。为了防止这种情况发生,最简单的方法就是通过构造函数来注入调度器,并在单元测试中替换它。
class FetchUserUseCase(
    private val userRepo: UserDataRepository,
    private val ioDispatcher: CoroutineDispatcher =
        Dispatchers.IO
) {


    suspend fun fetchUserData() = withContext(ioDispatcher) {


        val name = async {

     userRepo.getName() }
        val friends = async {

     userRepo.getFriends() }
        val profile = async {

     userRepo.getProfile() }
        User(
            name = name.await(),
            friends = friends.await(),
            profile = profile.await()
        )
    }
}
现在,我们不应该在在单元测试中提供 Disptachers.IO,而是应该使用 runTest 中的 StandardTestDispatcher。我们可以使用 ContinuationInterceptor 键从 coroutineContext 获取它。
val testDispatcher = this
    .coroutineContext[ContinuationInterceptor]
    as CoroutineDispatcher

val useCase = FetchUserUseCase(
    userRepo = userRepo,
    ioDispatcher = testDispatcher,
)
另一种可能是将 ioDispacher 转换为 CoroutineContext,并在单元测试中用 EmptyCoroutineContext 替换它:
val useCase = FetchUserUseCase(
    userRepo = userRepo,
    ioDispatcher = EmptyCoroutineContext,
)
测试函数执行期间发生的情况
请想象有这么一个函数:它在执行过程中先展示一个进度条,之后会隐藏它:
suspend fun sendUserData() {


    val userData = database.getUserData()
    progressBarVisible.value = true
    userRepository.sendUserData(userData)
    progressBarVisible.value = false
}
如果我们只检查最终结果,我们就无法验证进度条是否在执行期间改变了它的状态。在这种情况下,技巧是在一个新的协程中启动这个函数,并在外部控制虚拟时间。注意,runTest 使用 StandardTestDispatcher 调度器创建一个协程,并将其时间提前到空闲(使用 advanceUntilIde函数)。这意味着一旦父协程开始等待子协程,子进程的时间就会开始。
@Test
fun `should show progress bar when sending data`() = runTest {


    // given
    val database = FakeDatabase()
    val vm = UserViewModel(database)

    // when
    launch {


        vm.sendUserData()
    }

    // then
    assertEquals(false, vm.progressBarVisible.value)
    // when
    advanceTimeBy(1000)
    // then
    assertEquals(false, vm.progressBarVisible.value)
    // when
    runCurrent()
    // then
    assertEquals(true, vm.progressBarVisible.value)
    // when
    advanceUntilIdle()
    // then
    assertEquals(false, vm.progressBarVisible.value)
}
多亏有了 runCurrent,我们可以精确地检查某些值的变化。
如果我们使用 delay,也可以达到类似的效果。这就像有两个独立的进程:一个在做任务,而另一个在检查第一个的行为是否正常。
@Test
fun `should show progress bar when sending data`() =
    runTest {


        val database = FakeDatabase()
        val vm = UserViewModel(database)
        launch {


            vm.showUserData()
        }

        // then
        assertEquals(false, vm.progressBarVisible.value)
        delay(1000)
        assertEquals(true, vm.progressBarVisible.value)
        delay(1000)
        assertEquals(false, vm.progressBarVisible.value)
    }
使用 advanceTimeBy 这样的显式函数被认为比使用 delay 具有更高的可读性。
测试启动新的协程的函数
协程需要从某个地方开始。在后端,它们通常由我们使用的框架(例如 Spring 或 Ktor)启动,但有时我们可能还需要自己构造一个作用域,并在上面启动协程。
@Scheduled(fixedRate = 5000)
fun sendNotifications() {


    notificationsScope.launch {


        val notifications = notificationsRepository
            .notificationsToSend()

        for (notification in notifications) {


            launch {


                notificationsService.send(notification)
                notificationsRepository
                    .markAsSent(notification.id)
            }
        }
    }
}
如果通知是并发发送的,我们该如何测试 sendNotification ? 同样,在单元测试中,我们需要使用 StandardTestDispatcher 作为作用域的一部分。我们还应该添加一些延迟来调用 send 和 markAsSent。
@Test
fun testSendNotifications() {


    // given
    val notifications = List(100) {

     Notification(it) }

    val repo = FakeNotificationsRepository(
        delayMillis = 200,
        notifications = notifications,
    )

    val service = FakeNotificationsService(
        delayMillis = 300,
    )
    val testScope = TestScope()

    val sender = NotificationsSender(
        notificationsRepository = repo,
        notificationsService = service,
        notificationsScope = testScope
    )

    // when
    sender.sendNotifications()

    testScope.advanceUntilIdle()
    // 然后所有的通知都会被发送和标记
    assertEquals(
        notifications.toSet(),
        service.notificationsSent.toSet()
    )
    assertEquals(
        notifications.map {

     it.id }.toSet(),
        repo.notificationsMarkedAsSent.toSet()
    )
    // 所有的通知都会并发的发送
    assertEquals(700, testScope.currentTime)
}
注意,上面的代码中不需要使用 runBlocking。 sendNotifications 和 advanceUntilIdle 都是常规函数。
替换主调度器
单元测试中没有主函数。这意味着,如果我们试图去使用它,我们的测试将会失败。出现“Module with the Main dispatcher is missing”异常。另一方面,每次注入主线程都会很吃力,因此 kotlinx-coroutines-test 库在 Dispatchers 上提供了 setMain 扩展函数。
class MainPresenter(
    private val mainView: MainView,
    private val dataRepository: DataRepo
) {


    suspend fun onCreate() = coroutineScope {


        launch(Dispatchers.Main) {


            val data = dataRepository.fetchData()
            mainView.show(data)
        }
    }
}

class FakeMainView : MainView {


    var dispatchersUsedToShow: List<CoroutineContext?> =
        emptyList()

    override suspend fun show(data: Data) {


        dispatchersUsedToShow +=
            coroutineContext[ContinuationInterceptor]
    }
}

class FakeDataRepo : DataRepo {


    override suspend fun fetchData(): Data {


        delay(1000)
        return Data()
    }
}

class SomeTest {


    private val mainDispatcher = Executors
        .newSingleThreadExecutor()
        .asCoroutineDispatcher()

    @Before
    fun setup() {


        Dispatchers.setMain(mainDispatcher)
    }

    @After
    fun tearDown() {


        Dispatchers.resetMain()
    }

    @Test
    fun testSomeUI() = runBlocking {


        // given
        val view = FakeMainView()
        val repo = FakeDataRepo()
        val presenter = MainPresenter(view, repo)

        // when
        presenter.onCreate()

        // show 在 Dispatchers.Main 上被调用了
        assertEquals(
            listOf(Dispatchers.Main),
            view.dispatchersUsedToShow
        )
    }
}
注意上面的例子。在 assertEquals 中,我比较了 dispatrchersUsedToShow 和 Dispatchers.Main。这样做的原因是 mainDispatcher 被设置为委托 Dispatchers.Main 。
我们经常在是所有单元测试扩展的基类上的 setup 函数(带有 @Before 或 @BeforeEach 的函数)上定义主调度器。因此,我们总是确信可以在 Dispatcher.Main 上运行协程。我们还应该使用 Dispatchers.resetMain() 重置为初始状态。
测试启动协程的 Android 函数
在 Android 上,我们通常在 ViewModels、Presenters、Fragments 或 Activities 上启动协程。这些都是非常重要的类,我们应该对其进行测试。看看下面的 MainViewModel 实现:
class MainViewModel(
    private val userRepo: UserRepository,
    private val newsRepo: NewsRepository,
) : BaseViewModel() {


    private val _userName: MutableLiveData<String> =
        MutableLiveData()
    val userName: LiveData<String> = _userName

    private val _news: MutableLiveData<List<News>> = MutableLiveData()
    val news: LiveData<List<News>> = _news

    private val _progressVisible: MutableLiveData<Boolean> =
       MutableLiveData()
    val progressVisible: LiveData<Boolean> = _progressVisible

    fun onCreate() {


        viewModelScope.launch {


            val user = userRepo.getUser()
            _userName.value = user.name
        }
        viewModelScope.launch {


            _progressVisible.value = true
            val news = newsRepo.getNews()
                .sortedByDescending {

     it.date }
            _news.value = news
            _progressVisible.value = false
        }
    }
}
很有可能,我们会创建自己的作用域去替换 viewModelScope,也有可能我们使用的 Presenter、 Activity 或其它类而非 ViewModel。这与我们的例子无关,在测试每个启动协程的类中,我们应该使用 StandardTestDispatcher 作为作用域的一部分,以前,我们可以通过依赖注入来注入一个不同的作用域,但现在有一个更简单的方法:在 Android 上,我们使用 Dispatcher.Main 作为默认的调度器,并且我们可以使用 StandardTestDispatcher 替换它,这要感谢 Dispatchers.setMain 函数。
private val testDispatcher = StandardTestDispatcher()

@Before
fun setUp() {


    Dispatchers.setMain(testDispatcher)
}

@After
fun tearDown() {


    Dispatchers.resetMain()
}
通过这种方式设置主调度器后, onCreate 协程将在 testDispatcher 上运行,因此我们可以控制它们的时间。我们可以使用 advanceTimeBy 函数来假装已经经过了一段时间。我们也可以使用 advanceUntilIdle 来恢复所有的协程,直到它们完成。
class MainViewModelTests {


    private lateinit var scheduler: TestCoroutineScheduler
    private lateinit var viewModel: MainViewModel

    @BeforeEach
    fun setUp() {


        scheduler = TestCoroutineScheduler()
        Dispatchers.setMain(StandardTestDispatcher(scheduler))
        viewModel = MainViewModel(
            userRepo = FakeUserRepository(aName),
            newsRepo = FakeNewsRepository(someNews)
        )
    }

    @AfterEach
    fun tearDown() {


        Dispatchers.resetMain()
        viewModel.onCleared()
    }

    @Test
    fun `should show user name and sorted news`() {


        // when
        viewModel.onCreate()
        scheduler.advanceUntilIdle()

        // then
        assertEquals(aName, viewModel.userName.value)

        val someNewsSorted = listOf(News(date1), News(date2), News(date3))
        assertEquals(someNewsSorted, viewModel.news.value)
    }

    @Test
    fun `should show progress bar when loading news`() {


        // given
        assertEquals(null, viewModel.progressVisible.value)
        // when
        viewModel.onCreate()
        // then
        assertEquals(false, viewModel.progressVisible.value)
        // when
        scheduler.advanceTimeBy(200)
        // then
        assertEquals(true, viewModel.progressVisible.value)
        // when
        scheduler.runCurrent()
        // then
        assertEquals(false, viewModel.progressVisible.value)
    }

    @Test
    fun `user and news are called concurrently`() {


        // when
        viewModel.onCreate()
        scheduler.advanceUntilIdle()
        // then
        assertEquals(300, testDispatcher.currentTime)
    }

    class FakeUserRepository(
        private val name: String
    ) : UserRepository {


        override suspend fun getUser(): UserData {


            delay(300)
            return UserData(name)
        }
    }

    class FakeNewsRepository(
        private val news: List<News>
    ) : NewsRepository {


        override suspend fun getNews(): List<News> {


            delay(200)
            return news
        }
    }
}
使用规则设置调度器
JUnit 4允许我们定义一些规则。这些类包含了应该在一些测试类生命周期事件上调用的逻辑。例如,一个规则可以定义在所有测试之前和之后需要做什么,因此在我们的案例中可以使用它来设置我们的调度器,并在之后清理它。以下是这种规则的一个良好实现:
class MainCoroutineRule : TestWatcher() {


    lateinit var scheduler: TestCoroutineScheduler
        private set

    lateinit var dispatcher: TestDispatcher
         private set

    override fun starting(description: Description) {


        scheduler = TestCoroutineScheduler()
        dispatcher = StandardTestDispatcher(scheduler)
        Dispatchers.setMain(dispatcher)
    }

    override fun finished(description: Description) {


        Dispatchers.resetMain()
    }
}
该规则需要扩展 TestWatcher,它提供了测试生命周期的方法,比如我们可以重写 starting 和 finished。它组合了 TestCoroutineScheduler 和 TestDispatcher,在使用该规则的类中每次测试之前, TestDispatcher 都将设置为 Main,每次测试之后,主调度器都会被重置。我们可以通过该规则接口的 scheduler 属性访问调度器。
class MainViewModelTests {


    @get:Rule
    var mainCoroutineRule = MainCoroutineRule()

    // ...
    @Test
    fun `should show user name and sorted news`() {


        // when
        viewModel.onCreate()

        mainCoroutineRule.scheduler.advanceUntilIdle()
        // then
        assertEquals(aName, viewModel.userName.value)
        val someNewsSorted =
            listOf(News(date1), News(date2), News(date3))
        assertEquals(someNewsSorted, viewModel.news.value)
    }

    @Test
    fun `should show progress bar when loading news`() {


        // given
        assertEquals(null, viewModel.progressVisible.value)
        // when
        viewModel.onCreate()
        // then
        assertEquals(true, viewModel.progressVisible.value)
        // when
        mainCoroutineRule.scheduler.advanceTimeBy(200)
        // then
        assertEquals(false, viewModel.progressVisible.value)
    }

    @Test
    fun `user and news are called concurrently`() {


        // when
        viewModel.onCreate()

        mainCoroutineRule.scheduler.advanceUntilIdle()
        // then
        assertEquals(300, mainCoroutineRule.currentTime)
    }
}
如果你想直接在 MainCoroutineRule 上调用 advanceUntileIdle 、advanceTimeBy 、runCurrent和 currentTime,你可以将它们定义为扩展函数和属性。
这种测试 Kotlin 协程的方法在 Android 上相当常见。它甚至在谷歌的 Codelabs 中被推荐使用(Android测试协程)(目前是基于旧的 kotlinx-coroutines-test API),它与 JUnit5 类似,我们可以定义一个扩展:
@ExperimentalCoroutinesApi
class MainCoroutineExtension:
    BeforeEachCallback, AfterEachCallback {


    lateinit var scheduler: TestCoroutineScheduler
        private set

    lateinit var dispatcher: TestDispatcher
        private set

    override fun beforeEach(context: ExtensionContext?) {


        scheduler = TestCoroutineScheduler()
        dispatcher = StandardTestDispatcher(scheduler)
        Dispatchers.setMain(dispatcher)
    }

    override fun afterEach(context: ExtensionContext?) {


        Dispatchers.resetMain()
    }
}
使用 MainCoroutineExtension 与使用 MainCoroutineRule 的规则几乎相同。不同的是,我们需要使用 @JvmField 和 @RegisterExtension 来代替 @get:Rule 注释。
@JvmField
@RegisterExtension
var mainCoroutineExtension = MainCoroutineExtension()
总结
在本章中,我们讨论了 Kotlin 协程单元测试的最重要用例。有一些技巧是我们需要知道的,但最终我们的测试可以非常优雅,一切都可以很容易的测试。我希望你在使用 Kotlin Coroutines 在应用程序中编写好的测试时能受到本章的启发。