文章目录
一、LightingColorFilter滤镜(颜色+颜色创建的滤镜效果)
构造:
public LightingColorFilter(int mul, int add)
参数:
mul和add都是和颜色值格式相同的int值,mul是和目标像素相乘,add是和目标像素相加:
其中,若传入0x00ffff,对R而言,colorMultiply.R表示的就是:00;colorAdd.R表示:00
- R’ = R * colorMultiply.R + colorAdd.R
- G’ = G * colorMultiply.G + colorAdd.G
- B’ = B * colorMultiply.B + colorAdd.B
使用:
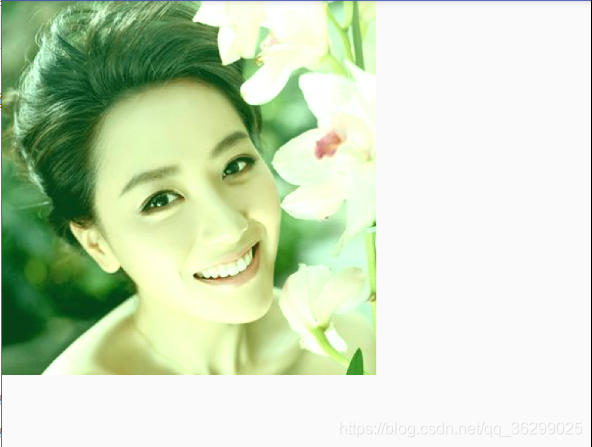
LightingColorFilter lightingColorFilter = new LightingColorFilter(0x00ffff, 0x000000);
mPaint.setColorFilter(lightingColorFilter);
canvas.drawBitmap(mBitmap,0,0,mPaint);
效果:

如果想保留图片的原始效果,只需将mul改成0xffffff即可:
//保留原始效果
LightingColorFilter lightingColorFilter = new LightingColorFilter(0xffffff, 0x000000);
mPaint.setColorFilter(lightingColorFilter);
canvas.drawBitmap(mBitmap,0,0,mPaint);
效果:

想要绿色更亮:
//增大add的值,让绿色更亮
LightingColorFilter lightingColorFilter = new LightingColorFilter(0xffffff, 0x003000);
mPaint.setColorFilter(lightingColorFilter);
canvas.drawBitmap(mBitmap,0,0,mPaint);
二、PorterDuffColorFilter滤镜(颜色+图片)
构造方法:
public PorterDuffColorFilter(@ColorInt int color, @NonNull PorterDuff.Mode mode)
参数:
color:具体的颜色值,例如Color.RED
mode:指定PorterDuff.mode混合模式
使用:
//PorterDuffColorFilter
PorterDuffColorFilter porterDuffColorFilter = new PorterDuffColorFilter(Color.RED, PorterDuff.Mode.DARKEN);
mPaint.setColorFilter(porterDuffColorFilter);
canvas.drawBitmap(mBitmap,100,0,mPaint);
运行效果:
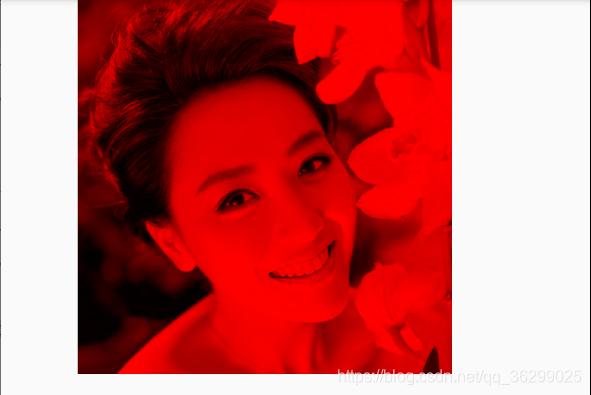
不仅变红,而且变暗了。传入的是Color.RED,创建新的图层,图层颜色为红色。而原图片就可以看做为第二个图层。两个图层叠合在一起,就有了这个效果。PorterDuff.Mode.DARKEN模式表示在之前红色图片上,进一步将其调为暗色。这里是颜色和图片产生的滤镜效果
三、ColorMatrixColorFilter滤镜(颜色数组、颜色矩阵)
构造方法:
//传入数组,长度20。 第5列表示颜色的偏移量
public ColorMatrixColorFilter(float[] array)
参数:
array:矩阵数组
使用:
//ColorMatrixColorFilter
float[] colorMatrix={
        1,0,0,0,0, //red
        0,1,0,0,0, //green
        0,0,1,0,0, //blue
        0,0,0,1,0 //alpha 新颜色值的透明度
};
ColorMatrixColorFilter colorMatrixColorFilter = new ColorMatrixColorFilter(colorMatrix);
mPaint.setColorFilter(colorMatrixColorFilter);
canvas.drawBitmap(mBitmap,100,0,mPaint);
运行效果:

原图像效果。究其原因,我们要了解一下颜色矩阵-色彩矩阵分析。
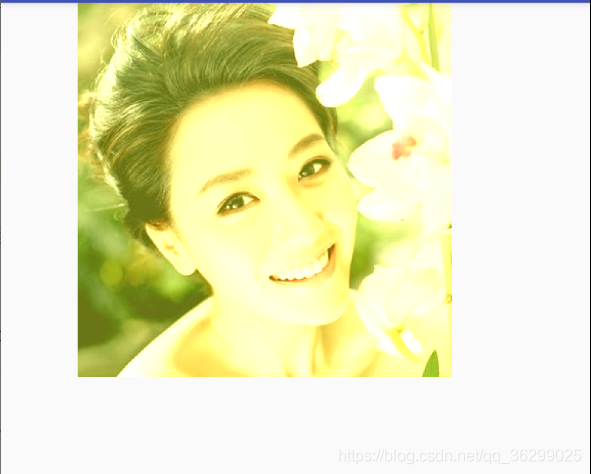
下面我们将颜色矩阵的值做修改再运行,红色和绿色的偏移量,得到黄色的效果。:
float[] colorMatrix={
        1,0,0,0,100, //red
        0,1,0,0,100, //green
        0,0,1,0,0, //blue
        0,0,0,1,0 //alpha 新颜色值的透明度
};
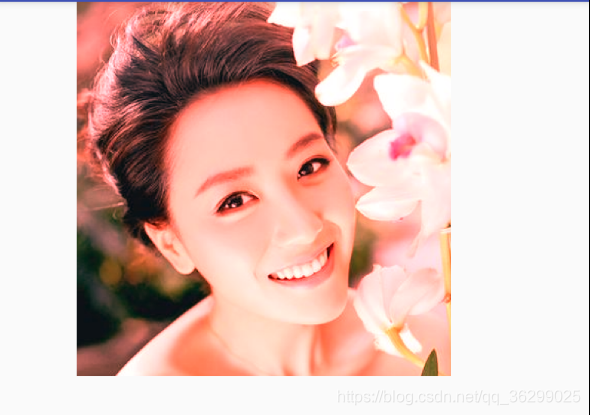
通过修改RGB中系数a的值,红色更亮:
float[] colorMatrix={
        2,0,0,0,0, //red
        0,1,0,0,0, //green
        0,0,1,0,0, //blue
        0,0,0,1,0 //alpha 新颜色值的透明度
};
修改一张图片的彩色效果,有2种方式:
- ①修改偏移量
- ②RGBA的系数值
四、常见滤镜效果
 // 黑白
    public static final float colormatrix_heibai[] = {
            0.8f, 1.6f, 0.2f, 0, -163.9f,
            0.8f, 1.6f, 0.2f, 0, -163.9f,
            0.8f, 1.6f, 0.2f, 0, -163.9f,
            0, 0, 0, 1.0f, 0};
    // 怀旧
    public static final float colormatrix_huajiu[] = {
            0.2f, 0.5f, 0.1f, 0, 40.8f,
            0.2f, 0.5f, 0.1f, 0, 40.8f,
            0.2f, 0.5f, 0.1f, 0, 40.8f,
            0, 0, 0, 1, 0};
    // 哥特
    public static final float colormatrix_gete[] = {
            1.9f, -0.3f, -0.2f, 0, -87.0f,
            -0.2f, 1.7f, -0.1f, 0, -87.0f,
            -0.1f, -0.6f, 2.0f, 0, -87.0f,
            0, 0, 0, 1.0f, 0};
    // 淡雅
    public static final float colormatrix_danya[] = {
            0.6f, 0.3f, 0.1f, 0, 73.3f,
            0.2f, 0.7f, 0.1f, 0, 73.3f,
            0.2f, 0.3f, 0.4f, 0, 73.3f,
            0, 0, 0, 1.0f, 0};
    // 蓝调
    public static final float colormatrix_landiao[] = {
            2.1f, -1.4f, 0.6f, 0.0f, -71.0f,
            -0.3f, 2.0f, -0.3f, 0.0f, -71.0f,
            -1.1f, -0.2f, 2.6f, 0.0f, -71.0f,
            0.0f, 0.0f, 0.0f, 1.0f, 0.0f};
    // 光晕
    public static final float colormatrix_guangyun[] = {
            0.9f, 0, 0, 0, 64.9f,
            0, 0.9f, 0, 0, 64.9f,
            0, 0, 0.9f, 0, 64.9f,
            0, 0, 0, 1.0f, 0};
    // 梦幻
    public static final float colormatrix_menghuan[] = {
            0.8f, 0.3f, 0.1f, 0.0f, 46.5f,
            0.1f, 0.9f, 0.0f, 0.0f, 46.5f,
            0.1f, 0.3f, 0.7f, 0.0f, 46.5f,
            0.0f, 0.0f, 0.0f, 1.0f, 0.0f};
    // 酒红
    public static final float colormatrix_jiuhong[] = {
            1.2f, 0.0f, 0.0f, 0.0f, 0.0f,
            0.0f, 0.9f, 0.0f, 0.0f, 0.0f,
            0.0f, 0.0f, 0.8f, 0.0f, 0.0f,
            0, 0, 0, 1.0f, 0};
    // 胶片
    public static final float colormatrix_fanse[] = {
            -1.0f, 0.0f, 0.0f, 0.0f, 255.0f,
            0.0f, -1.0f, 0.0f, 0.0f, 255.0f,
            0.0f, 0.0f, -1.0f, 0.0f, 255.0f,
            0.0f, 0.0f, 0.0f, 1.0f, 0.0f};
    // 湖光掠影
    public static final float colormatrix_huguang[] = {
            0.8f, 0.0f, 0.0f, 0.0f, 0.0f,
            0.0f, 1.0f, 0.0f, 0.0f, 0.0f,
            0.0f, 0.0f, 0.9f, 0.0f, 0.0f,
            0, 0, 0, 1.0f, 0};
    // 褐片
    public static final float colormatrix_hepian[] = {
            1.0f, 0.0f, 0.0f, 0.0f, 0.0f,
            0.0f, 0.8f, 0.0f, 0.0f, 0.0f,
            0.0f, 0.0f, 0.8f, 0.0f, 0.0f,
            0, 0, 0, 1.0f, 0};
    // 复古
    public static final float colormatrix_fugu[] = {
            0.9f, 0.0f, 0.0f, 0.0f, 0.0f,
            0.0f, 0.8f, 0.0f, 0.0f, 0.0f,
            0.0f, 0.0f, 0.5f, 0.0f, 0.0f,
            0, 0, 0, 1.0f, 0};
    // 泛黄
    public static final float colormatrix_huan_huang[] = {
            1.0f, 0.0f, 0.0f, 0.0f, 0.0f,
            0.0f, 1.0f, 0.0f, 0.0f, 0.0f,
            0.0f, 0.0f, 0.5f, 0.0f, 0.0f,
            0, 0, 0, 1.0f, 0};
    // 传统
    public static final float colormatrix_chuan_tong[] = {
            1.0f, 0.0f, 0.0f, 0, -10f,
            0.0f, 1.0f, 0.0f, 0, -10f,
            0.0f, 0.0f, 1.0f, 0, -10f,
            0, 0, 0, 1, 0};
    // 胶片2
    public static final float colormatrix_jiao_pian[] = {
            0.71f, 0.2f, 0.0f, 0.0f, 60.0f,
            0.0f, 0.94f, 0.0f, 0.0f, 60.0f,
            0.0f, 0.0f, 0.62f, 0.0f, 60.0f,
            0, 0, 0, 1.0f, 0};

    // 锐色
    public static final float colormatrix_ruise[] = {
            4.8f, -1.0f, -0.1f, 0, -388.4f,
            -0.5f, 4.4f, -0.1f, 0, -388.4f,
            -0.5f, -1.0f, 5.2f, 0, -388.4f,
            0, 0, 0, 1.0f, 0};
    // 清宁
    public static final float colormatrix_qingning[] = {
            0.9f, 0, 0, 0, 0,
            0, 1.1f, 0, 0, 0,
            0, 0, 0.9f, 0, 0,
            0, 0, 0, 1.0f, 0};
    // 浪漫
    public static final float colormatrix_langman[] = {
            0.9f, 0, 0, 0, 63.0f,
            0, 0.9f, 0, 0, 63.0f,
            0, 0, 0.9f, 0, 63.0f,
            0, 0, 0, 1.0f, 0};
    // 夜色
    public static final float colormatrix_yese[] = {
            1.0f, 0.0f, 0.0f, 0.0f, -66.6f,
            0.0f, 1.1f, 0.0f, 0.0f, -66.6f,
            0.0f, 0.0f, 1.0f, 0.0f, -66.6f,
            0.0f, 0.0f, 0.0f, 1.0f, 0.0f};
以其中的胶片效果为例,它就是将颜色数组中RGB中的系数取反,将颜色值反转,再加偏移量。
五、ColorMatrix类
5.1 setScale方法
ColorMatrix colorMatrix = new ColorMatrix();
//亮度调节
colorMatrix.setScale(1,1,1,1);//红、绿、蓝、透明度4个分量通道对应的系数
ColorMatrixColorFilter colorMatrixColorFilter = new ColorMatrixColorFilter(colorMatrix);
mPaint.setColorFilter(colorMatrixColorFilter);
canvas.drawBitmap(mBitmap,100,0,mPaint);
setScala方法全传1和原图一样,传1,2,1,1是偏绿色。他可以供我们调整图片的亮度。点进去看源码:
//setScala方法就是操作初始的颜色矩阵,将r/g/b/a四个系数重新赋值。
public void setScale(float rScale, float gScale, float bScale,
                     float aScale) {
    final float[] a = mArray;

    for (int i = 19; i > 0; --i) {
        a[i] = 0;
    }
    a[0] = rScale;
    a[6] = gScale;
    a[12] = bScale;
    a[18] = aScale;
}
5.2 setSaturation方法
setScala方法就是操作初始的颜色矩阵,将r/g/b/a四个系数重新赋值。
ColorMatrix colorMatrix = new ColorMatrix();
//饱和度调节:0:无色彩 1:默认图像 >1:饱和度加强
colorMatrix.setSaturation(0);
ColorMatrixColorFilter colorMatrixColorFilter = new ColorMatrixColorFilter(colorMatrix);
mPaint.setColorFilter(colorMatrixColorFilter);
canvas.drawBitmap(mBitmap,100,0,mPaint);
5.3 setRotate方法
setRotate方法负责色度调节,也就是对色彩的旋转运算。,参数为:颜色通道axis、角度degrees。源码注释:
/**
 * Set the rotation on a color axis by the specified values.
 * <p>
 * <code>axis=0</code> correspond to a rotation around the RED color
 * <code>axis=1</code> correspond to a rotation around the GREEN color
 * <code>axis=2</code> correspond to a rotation around the BLUE color
 * </p>
 */
 public void setRotate(int axis, float degrees) {
    reset();
    double radians = degrees * Math.PI / 180d;
    float cosine = (float) Math.cos(radians);
    float sine = (float) Math.sin(radians);
    switch (axis) {
    // Rotation around the red color
    case 0:
        mArray[6] = mArray[12] = cosine;
        mArray[7] = sine;
        mArray[11] = -sine;
        break;
    // Rotation around the green color
    case 1:
        mArray[0] = mArray[12] = cosine;
        mArray[2] = -sine;
        mArray[10] = sine;
        break;
    // Rotation around the blue color
    case 2:
        mArray[0] = mArray[6] = cosine;
        mArray[1] = sine;
        mArray[5] = -sine;
        break;
    default:
        throw new RuntimeException();
    }
}
传入的axis分别为为0、1、2表示红、绿、蓝三个颜色的通道,内部实际上还是操作的矩阵数组。只是算法的不同。首先要对角度值进行sin、cos值的运算,然后进行赋值操作。第二个参数就是要修改的值。具体如下:
ColorMatrix hueMatrix = new ColorMatrix();
hueMatrix.setRotate(0,hue0);
hueMatrix.setRotate(1,hue1);
hueMatrix.setRotate(2,hue2);
至于RGB色如何旋转,首先要根据R、G、B三色来建立三维坐标系,如下:
这里我们假设先暂不考虑蓝色,将绿、红看成二位坐标系,hueMatrix.setRotate(0,hue0);就是对红色的坐标进行旋转,旋转的角度为hue0的值。旋转计算前后的变化:
旋转后的红色的值需要计算R的cos值+G的sin值,绿色也会对其产生影响,故要加上。也就是两个垂直方向的值相加;旋转后绿色的值=G的cos值-R的sin值,也就是水平方向的值相加;当然了,蓝色的计算也是同样的道理
下面我们来试一下修改红色的旋转值:
		ColorMatrix colorMatrix = new ColorMatrix();
        colorMatrix.setRotate(0,45);
        ColorMatrixColorFilter colorMatrixColorFilter = new ColorMatrixColorFilter(colorMatrix);
        mPaint.setColorFilter(colorMatrixColorFilter);
        canvas.drawBitmap(mBitmap,100,0,mPaint);

