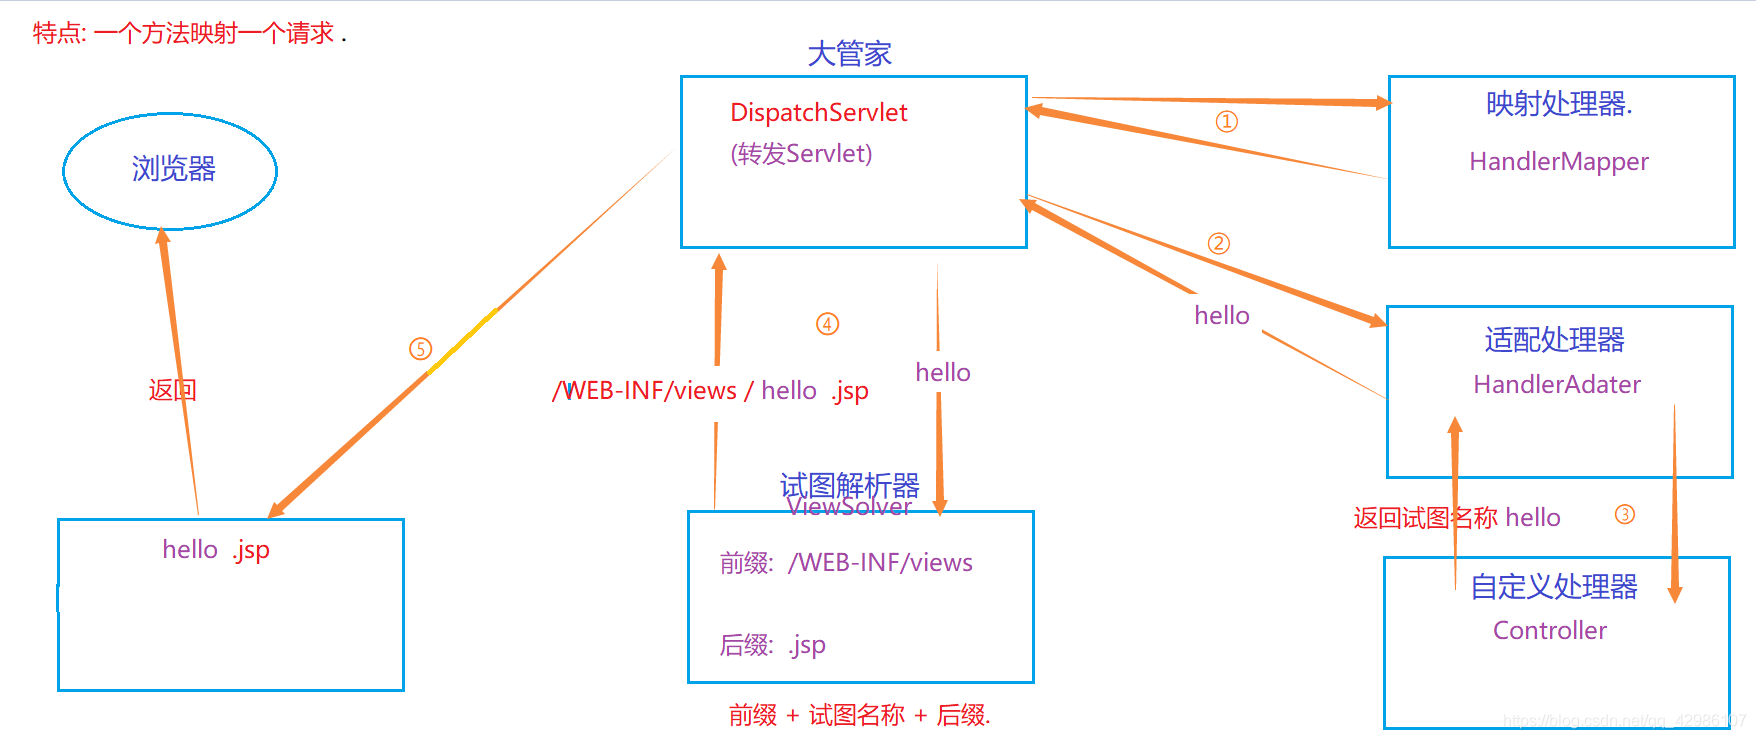
SpringMVC的执行流程:
SpringMVC的快速入门:
1.前提: 导入依赖jar包. ( pom.xml )
<!-- war: web项目rar -->
    <packaging>war</packaging>
    <build>
        <plugins>
            <!-- 配置Tomcat插件 -->
            <plugin>
                <groupId>org.apache.tomcat.maven</groupId>
                <artifactId>tomcat7-maven-plugin</artifactId>
                <version>2.2</version>
                <configuration>
                    <!--端口号-->
                    <port>80</port>
                    <!--项目路径-->
                    <path>/</path>
                </configuration>
            </plugin>
        </plugins>
    </build>

    <!-- 导入依赖 -->
    <dependencies>
        <!-- mvc的核心依赖 -->
        <dependency>
            <groupId>org.springframework</groupId>
            <artifactId>spring-webmvc</artifactId>
        </dependency>

        <!-- jstl表达式. -->
        <dependency>
            <groupId>jstl</groupId>
            <artifactId>jstl</artifactId>
        </dependency>

        <!-- sevlet -->
        <dependency>
            <groupId>javax.servlet</groupId>
            <artifactId>servlet-api</artifactId>
            <scope>provided</scope>
        </dependency>

        <!-- jsp -->
        <dependency>
            <groupId>javax.servlet</groupId>
            <artifactId>jsp-api</artifactId>
            <scope>provided</scope>
        </dependency>
    </dependencies>
2.配置前端控制器(DispatchServlet) (web.xml)
<!DOCTYPE web-app PUBLIC
 "-//Sun Microsystems, Inc.//DTD Web Application 2.3//EN"
 "http://java.sun.com/dtd/web-app_2_3.dtd" >

<web-app>
  <display-name>Archetype Created Web Application</display-name>

  <!-- 1. 转发servlet( 前端控制器 )  -->
  <servlet>
    <servlet-name>springmvc</servlet-name>
    <servlet-class>org.springframework.web.servlet.DispatcherServlet</servlet-class>

    <!-- 关联mvc的核心配置文件 -->
    <init-param>
      <param-name>contextConfigLocation</param-name>
      <param-value>classpath:applicationContext_mvc.xml</param-value>
    </init-param>

    <!-- 服务器启动时, 立即实例化当前servlet(默认0) -->
    <load-on-startup>1</load-on-startup>
  </servlet>
  <!-- servlet的映射 -->
  <servlet-mapping>
    <servlet-name>springmvc</servlet-name>
    <!-- 拦截除jsp以外的內容. -->
    <url-pattern>/</url-pattern>
  </servlet-mapping>

</web-app>
3.配置映射 , 适配 , 视图处理器 (mvc的配置文件中)
<?xml version="1.0" encoding="UTF-8"?>
<beans xmlns="http://www.springframework.org/schema/beans"
       xmlns:xsi="http://www.w3.org/2001/XMLSchema-instance"
       xmlns:mvc="http://www.springframework.org/schema/mvc"
       xmlns:context="http://www.springframework.org/schema/context"
       xsi:schemaLocation="http://www.springframework.org/schema/beans http://www.springframework.org/schema/beans/spring-beans.xsd http://www.springframework.org/schema/mvc http://www.springframework.org/schema/mvc/spring-mvc.xsd http://www.springframework.org/schema/context http://www.springframework.org/schema/context/spring-context.xsd">

    <!-- 1. 扫描包: 配置映射处理器 和 适配处理器 -->
    <mvc:annotation-driven/>

    <!-- 2. 配置试图解析器. -->
    <bean class="org.springframework.web.servlet.view.InternalResourceViewResolver">
        <!-- 前缀: 前后都加/  -->
        <property name="prefix" value="/WEB-INF/views/"/>
        <!-- 后缀: -->
        <property name="suffix" value=".jsp"/>
    </bean>

</beans>
4.配置自定义处理器.( 我们的控制层 )
// 表示控制层.
@Controller
// 一级目录.
@RequestMapping("test")
public class TestController {

    /**
     *   测试 是否配置好.
     */
    @RequestMapping("show01")
    public String show01(Model model){
        model.addAttribute("msg" ,"springMVC优秀!"+new Date().toLocaleString());
        return "hello";
    }
}
5.hello.jsp
// 注意: 默认忽略EL表达式 , 要加isElIgnored=false
<%@ page contentType="text/html;charset=UTF-8" language="java" isELIgnored="false" %>
<html>
<head>
    <title>Title</title>
</head>
<body>
    <h1>哥这一生不是在敲代码 , 就是再去敲代码的路上. </h1>

    // 获取自定义处理器返回的数据.
    <h3>${msg}</h3>
</body>
</html
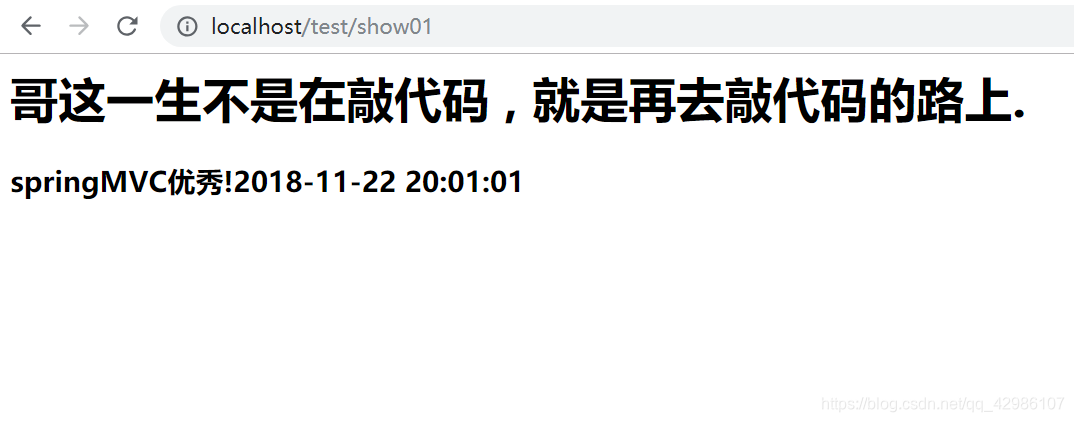
6.浏览器访问地址:
http://localhost:端口号/test/show01