Qt5下OpenGL程序的新写法可参考:
https://blog.csdn.net/caoshangpa/article/details/51103402
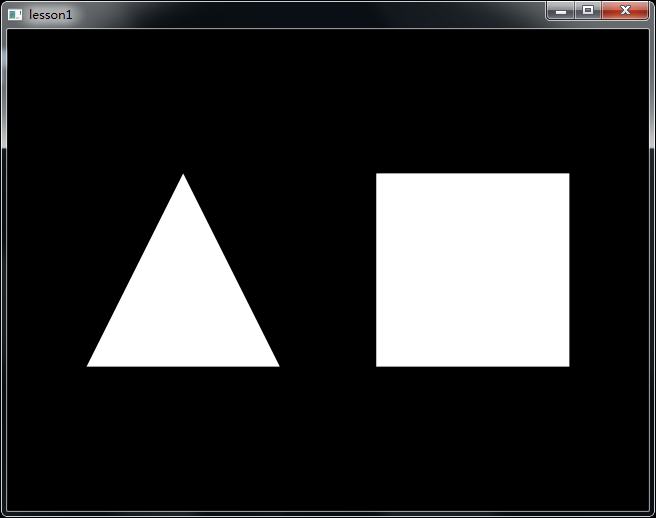
我们添加了一个三角形和一个四边形。也许你认为这很简单,但你已经迈出了一大步,要知道任何在OpenGL中绘制的模型都会被分解为这两种简单的图形。
lesson1.h
#ifndef LESSON1_H
#define LESSON1_H


#include <QWindow>
#include <QOpenGLFunctions_1_0>

class QPainter;
class QOpenGLContext;
class QOpenGLPaintDevice;

class Lesson1 : public QWindow, QOpenGLFunctions_1_0
{
    Q_OBJECT
public:
    explicit Lesson1(QWindow *parent = 0);
    ~Lesson1();

    virtual void render(QPainter *);
    virtual void render();
    virtual void initialize();

public slots:
    void renderNow();

protected:
    void exposeEvent(QExposeEvent *);
    void resizeEvent(QResizeEvent *);

private:
    void myPerspective( GLdouble fov, GLdouble aspectRatio, GLdouble zNear, GLdouble zFar );

private:
    QOpenGLContext *m_context;

};

#endif // LESSON1_H
lesson1.cpp
#include "lesson1.h"

#include <QCoreApplication>
#include <QOpenGLContext>
#include <QOpenGLPaintDevice>
#include <QPainter>

Lesson1::Lesson1(QWindow *parent) :
    QWindow(parent)
  , m_context(0)
{
    setSurfaceType(QWindow::OpenGLSurface);
}

Lesson1::~Lesson1()
{

}

void Lesson1::render(QPainter *painter)
{
    Q_UNUSED(painter);
}

void Lesson1::myPerspective( GLdouble fov, GLdouble aspectRatio, GLdouble zNear, GLdouble zFar )
{
    // 使用glu库函数,需要添加glu.h头文件
    // gluPerspective(fov, aspectRatio, zNear, zFar);
    GLdouble rFov = fov * 3.14159265 / 180.0;
    glFrustum( -zNear * tan( rFov / 2.0 ) * aspectRatio,
               zNear * tan( rFov / 2.0 ) * aspectRatio,
               -zNear * tan( rFov / 2.0 ),
               zNear * tan( rFov / 2.0 ),
               zNear, zFar );
}

void Lesson1::render()
{
    glClear(GL_COLOR_BUFFER_BIT|GL_DEPTH_BUFFER_BIT);

    glViewport(0,0,(GLint)width(),(GLint)height()); // 重置当前视口
    glMatrixMode(GL_PROJECTION);                    // 选择投影矩阵
    glLoadIdentity();                               // 重置投影矩阵为单位矩阵
    // glu库函数Qt不支持,但是glu库函数是对gl库函数的封装,方便使用。因此我们可以自己
    // 写一个类似gluPerspective的函数myPerspective,用于设置透视。
    //gluPerspective(45.0f,(GLfloat)width/(GLfloat)height,0.1f,100.0f);
    myPerspective(45.0,(GLfloat)width()/(GLfloat)height(),0.1,100.0);

    glMatrixMode(GL_MODELVIEW);// 选择模型视图矩阵
    glLoadIdentity();          // 重置模型视图矩阵为单位矩阵

    glTranslatef(-1.5f,0.0f,-6.0f);
    glBegin(GL_TRIANGLES);			// 绘制三角形
    glVertex3f( 0.0f, 1.0f, 0.0f);	// 上顶点
    glVertex3f(-1.0f,-1.0f, 0.0f);	// 左下
    glVertex3f( 1.0f,-1.0f, 0.0f);	// 右下
    glEnd();                        // 三角形绘制结束
    glTranslatef(3.0f,0.0f,0.0f);
    glBegin(GL_QUADS);				// 绘制正方形
    glVertex3f(-1.0f, 1.0f, 0.0f);	// 左上
    glVertex3f( 1.0f, 1.0f, 0.0f);	// 右上
    glVertex3f( 1.0f,-1.0f, 0.0f);	// 左下
    glVertex3f(-1.0f,-1.0f, 0.0f);	// 右下
    glEnd();					    // 正方形绘制结束
}

void Lesson1::initialize()
{
    glShadeModel(GL_SMOOTH);              // 启用平滑着色
    glClearColor(0.0f, 0.0f, 0.0f, 0.0f); // 黑色背景
    glClearDepth(1.0f);                   // 设置深度缓存
    glEnable(GL_DEPTH_TEST);              // 启用深度测试
    glDepthFunc(GL_LEQUAL);               // 深度测试类型
    // 接着告诉OpenGL我们希望进行最好的透视修正。这会十分轻微的影响性能。但使得透视图看起来好一点。
    glHint(GL_PERSPECTIVE_CORRECTION_HINT, GL_NICEST);
}

void Lesson1::renderNow()
{
    if (!isExposed())
        return;

    bool needsInitialize = false;

    if (!m_context) {
        m_context = new QOpenGLContext(this);
        m_context->setFormat(requestedFormat());
        m_context->create();

        needsInitialize = true;
    }

    m_context->makeCurrent(this);

    if (needsInitialize) {
        initializeOpenGLFunctions();
        initialize();
    }

    render();

    m_context->swapBuffers(this);
}

void Lesson1::exposeEvent(QExposeEvent *event)
{
    Q_UNUSED(event);

    if (isExposed())
        renderNow();
}

void Lesson1::resizeEvent(QResizeEvent *event)
{
    Q_UNUSED(event);

    if (isExposed())
        renderNow();
}
main.cpp
#include <QGuiApplication>
#include <lesson1.h>
int main(int argc, char *argv[])
{
    QGuiApplication app(argc, argv);

    QSurfaceFormat format;
    format.setSamples(16);

    Lesson1 window;
    window.setFormat(format);
    window.resize(640, 480);
    window.show();

    return app.exec();
}
运行效果
源码中用到的OpenGL库函数可以参考:
实际上仅用如下代码就能画出一个三角形
void Lesson1::render()
{
    glClear(GL_COLOR_BUFFER_BIT|GL_DEPTH_BUFFER_BIT);

    glViewport(0,0,(GLint)width(),(GLint)height()); // 重置当前视口
    glBegin(GL_TRIANGLES);			// 绘制三角形
    glVertex3f( 0.0f, 1.0f, 0.0f);	// 上顶点
    glVertex3f(-1.0f,-1.0f, 0.0f);	// 左下
    glVertex3f( 1.0f,-1.0f, 0.0f);	// 右下
    glEnd();                        // 三角形绘制结束
}

Qt4版NeHe OpenGL教程源码下载链接:https://download.csdn.net/download/caoshangpa/10409459
Qt5版本NeHe OpenGL教程1-5课源码链接:https://download.csdn.net/download/caoshangpa/10413680