集群部署:2台tarcker服务器,2台storage服务器。
192.168.201.86 ---------(trackerd+storage+nginx)
192.168.201.87 ---------(trackerd)
192.168.201.88 ---------(storage)
所有tracker机都要安装步骤一、二。
所有storage机都要安装步骤一、三、想要支持浏览器还要安装步骤四、五。
单机部署安装步骤一、二、三、四、五。
一、安装libfsatcomon、libevent
1.首先检查依赖环境gcc安装没有,如果没有安装,先安装
yum install gcc* make*
yum install perl libevent ------------装fastDFS的依赖工具
2.安装libfastcommon
# 切换目录
cd /usr/local --------------------解压到此目录下或者移动(复制)到此目录下再进行解压。
# 解压(没有unzip命令的同学自行安装:yum –y install unzip*)
unzip libfastcommon-master.zip -d libfastcommon-master
# 进到解压后的文件目录下
cd libfastcommon-master
# 进行安装
./make.sh
./make.sh install
3.fastDFS需要安装libevent比较新的版本,将本机的比较低的版本卸载了。
ls -al /usr/lib | grep libevent
-------------------查看是否已安装,如果已安装且版本低于1.3,则先进行卸载。
rpm -qa libevent
libevent-1.4.13-1.el6.x86_64
rpm -e --nodeps libevent
安装一个最新稳定版
cd /usr/local
wget https://github.com/downloads/libevent/libevent/libevent-2.0.18-stable.tar.gz
tar zxvf libevent-2.0.18-stable.tar.gz
cd libevent-2.0.18-stable
./configure
make && make install
为libevent创建软链接到/lib库下,64位系统对应/lib64
ln -s /usr/local/lib/libevent* /lib/
ln -s /usr/local/lib/libevent* /lib64/
二、安装FastDFS
Cd /usr/local
wget http://fastdfs.googlecode.com/files/FastDFS_v3.06.tar.gz
tar zxvf FastDFS_v3.06.tar.gz
cd FastDFS
./make.sh
./make.sh install
如果安装成功,则在/etc/fdfs下会生成3个文件。

1.配置tracker节点
Mkdir –p /home/tao/fastdfs
cd /etc/fdfs
cp tracker.conf.sample tracker.conf
#修改的文件内容如下(基础配置,不考虑性能调优情况下):
vi tracker.conf base_path=/home/tao/fastdfs
#设置 tracker 的数据文件和日志目录(需预先创建)
http.server_port=6666 (默认为8080,不建议修改,除非已经被其他应用占用,我这里更改了。)
cp client.conf.sample client.conf
cp storage.conf.sample storage.conf -------------剩余两个配置文件也要复制一份。
启动 tracker
/usr/local/FastDFS/init.d/fdfs_trackerd start /etc/fdfs/tracker.conf ------------如果显示没有这个目录,则在/usr/local/FastDFS/init.d下没有fdfs_trackerd这个启动文件,可用find / -name “fdfs_trackerd*”查找其路径,复制到路径下即可。
也可以直接做软连接:
ln -s /usr/bin/fdfs_trackerd /usr/local/bin
ln -s /usr/bin/stop.sh /usr/local/bin
ln -s /usr/bin/restart.sh /usr/local/bin
Service fdfs_trackerd start -----------------用命令也可以激活服务。
成功启动如下图:
用此命令查看端口是否被侦听
设置开机启动
Vi /etc/rc.d/rc.local
/usr/local/bin/fdfs_trackerd /etc/fdfs/tracker.conf
Service fdfs trackerd start
三. 配置并启动 storage server节点
配置 storage.conf
vim /etc/fdfs/storage.conf
base_path=/home/tao/fastdfs
store_path0=/home/tao/fastdfs
tracker_server=192.168.201.86:22122
启动 storage
/usr/local/bin/fdfs_storaged /etc/fdfs/storage.conf
Service fdfs_storaged start
检查服务端口是否开启,成功启动则如下图:

设置开机启动
vim /etc/rc.d/rc.local
/usr/local/bin/fdfs_storaged /etc/fdfs/storage.conf
Service fdfs_storaged start
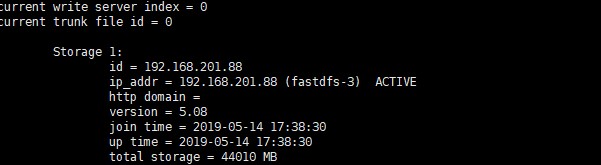
检查存储服务是否注册:命令:/usr/bin/fdfs_monitor /etc/fdfs/storage.conf
成功链接则如下图:ACTIVE(激活在线)
四 .配置client.conf文件
Cd /etc/fdfs/
Cp client.conf.sample client.conf
Vi client.conf
base_path=/home/tao/fastdfs
tracker_server=192.168.201.86:22122
http.tracker_server_port=8080
测试上传:
Mkdir test.txt
/usr/bin/fdfs_test /etc/fdfs/client.conf upload /目标文件路径
发现报错: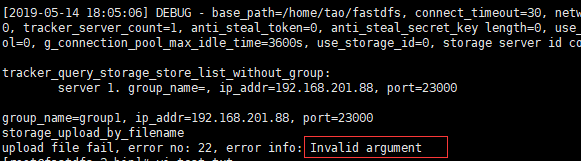
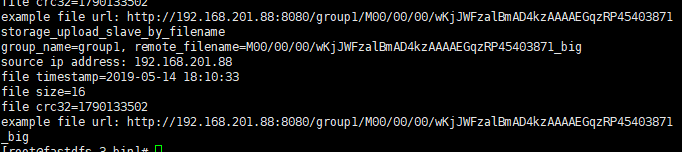
此处报错是因为text.txt/是一个目录而不是文件,在其下touch一个test再次上传则成功,如下图:
如果上传错误,可能是防火墙没有放行端口。这里举例两种防火墙的添加端口。
vi /etc/sysconfig/iptables
添加:
-A INPUT -m state --state NEW -m tcp -p tcp --dport 22122/23000/8080 -j ACCEPT
#重启防火墙
service iptables restart
firewall-cmd --zone=public --remove-port=22122/23000/8080/tcp –permanent ------添加端口
firewall-cmd –reload ----------重启防火墙。
启动nginx : /opt/nginx/sbin/nginx
(重启 Nginx 的命令为:/opt/nginx/sbin/nginx -s reload)
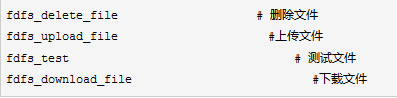
其他命令:
五 。此时可以上传但是不能浏览器访问和下载。需要安装支持服务的插件。
安装NGINX,使其支持HTTP协议访问。
需要重新编译libevent
解压:tar -zxvf fastdfs-nginx-module_v1.16.tar.gz
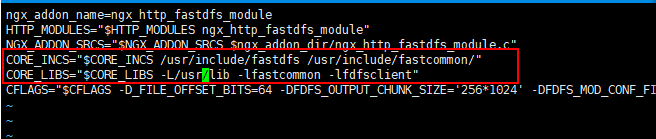
进入vi config
修改:CORE_INCS="$CORE_INCS /usr/include/fastdfs /usr/include/fastcommon"
# 将FastDFS-nginx-module/src下的mod_FastDFS.conf拷贝至/etc/fdfs/下
cp mod_fastdfs.conf /etc/fdfs/
# 修改mod_fastdfs.conf的内容
vi /etc/fdfs/mod_fastdfs.conf
base_path=/data/fastdfs-storage/logs tracker_server=192.168.201.86:22122 #tracker_server=192.168.201.88:22122(多个tracker配置多行) url_have_group_name=true
#url中包含group名称
store_path0=/data/fastdfs-storage
#指定文件存储路径
修改配置文件后进行保存,之后将http.conf 与 mime.types拷贝到/etc/fdfs下
# 切换盘符
cd /usr/local/FastDFS/conf/
# 拷贝文件
cp http.conf mime.types /etc/fdfs/
安装nginx:
Mkdir /var/temp/nginx/client -----------创建虚拟存储路径
# 解压 tar -zxvf nginx-1.8.0.tar.gz # 切换目录 cd nginx-1.8.0 # 环境准备 yum install -y pcre pcre-devel yum install -y zlib zlib-devel yum install -y openssl openssl-devel yum install gd-devel # 执行 ./configure \ --prefix=/data/nginx \
--pid-path=/var/run/nginx/nginx.pid \
--lock-path=/var/lock/nginx.lock \
--error-log-path=/var/log/nginx/error.log \
--http-log-path=/var/log/nginx/access.log \
--with-http_gzip_static_module \
--http-client-body-temp-path=/var/temp/nginx/client \
--http-proxy-temp-path=/var/temp/nginx/proxy \
--http-fastcgi-temp-path=/var/temp/nginx/fastcgi \
--http-uwsgi-temp-path=/var/temp/nginx/uwsgi \
--http-scgi-temp-path=/var/temp/nginx/scgi \
--add-module=/usr/local/fastdfs-nginx-module/src \
--with-http_image_filter_module
# 执行 make && make install
# 切换目录 cd /data/nginx/conf/
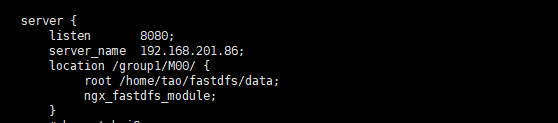
# 修改配置文件 vi nginx.conf
#添加location location /group1/M00/{ ngx_fastdfs_module; }
ln -s /home/tao/fastdfs/data /mnt/xfsd/fastdfs/storage/data/M00
--------------这样做的目的是将真实路径映射到访问路径上
当启动nginx报错:nginx: [emerg] open() "/usr/local/nginx/logs/nginx.pid" failed (2: No such file or directory)
只要在 /usr/local/nginx/下创建logs目录即可解决。
注意:实验中storage.conf里的http端口号要和nginx.conf以及client.conf的一致。
确认三个服务都起来,端口处于侦听状态。
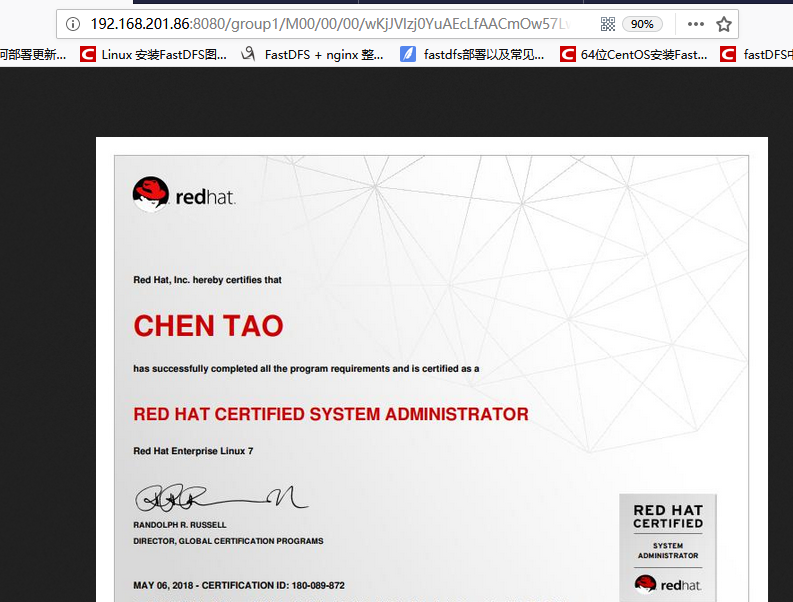
浏览器访问之前上传的文件:
报400 Bad Request错误,如下图:
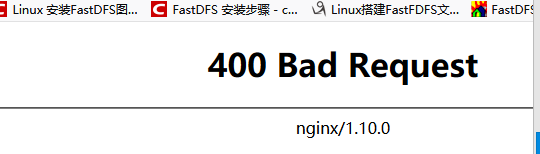
解决方法:vi /etc/fdfs/mod_fastdfs.conf

看仔细了,我把这个英文单词写错了,耽误了一天时间排错。改掉则访问成功。
报404 Not Found错误
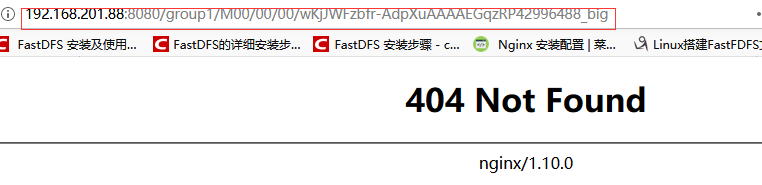
解决方法:路径格式不对。/group1/M00/00/00 没有正确映射到真实存储路径/home/tao/fastdfs/data/00/00 上。