1、搭建环境
a、安装Pillow库
打开cmd输入:pip install Pillow

b、安装pytesseract
在cmd窗口中输入:pip install pytesseract
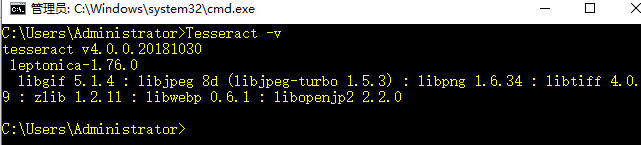
c、检查是否安装成功:

d、安装Tesseract-OCR
下载地址:https://digi.bib.uni-mannheim.de/tesseract/
安装后配置环境变量:
(1)配置TESSDATA_PREFI = "安装的目录"

(2)在系统变量里点击“path”添加变量为Tesseract-OCR的安装目录

(3)检查环境变量是否配置成功
(4)修改python安装路径D:\Python\Python2.7\Lib\site-packages\pytesseract里的pytesseract.py文件里tesseract_cmd指向的路径。
# tesseract_cmd = 'tesseract'
tesseract_cmd = 'D:\Program Files (x86)\Tesseract-OCR\tessdata'
2、编写测试代码
(1)登录页面

(2)测试代码
# coding=utf-8

# 小案例登录

from selenium import webdriver
from PIL import Image, ImageEnhance
import time
import pytesseract
import re

driver = webdriver.Chrome()
driver.get("https://mail2.mindray.com")
time.sleep(1) #避免页面未加载完毕读取不到元素
driver.find_element_by_id("username").send_keys("xxxxxxxx")
driver.find_element_by_id("password").clear()
driver.find_element_by_id("password").send_keys("********")

# 验证码图片保存地址
screenImg = "D:/image/verifyCode.png"
# 浏览器页面截图
driver.get_screenshot_as_file(screenImg)

# 定位验证码大小
location = driver.find_element_by_id("validationCode_img").location
size = driver.find_element_by_id("validationCode_img").size
left = location['x']
top = location['y']
right = location['x'] + size['width']
bottom = location['y'] + size['height']

# 从文件读取截图,截取验证码位置再次保存
img = Image.open(screenImg).crop((left, top, right, bottom))
img.convert('L')                       #转换模式:L|RGB
img = ImageEnhance.Contrast(img)       #增加对比度
img = img.enhance(2.0)                 #增加饱和度
img.save(screenImg)

# 再次读取验证码
img = Image.open(screenImg)
code = pytesseract.image_to_string(img)
driver.find_element_by_id("validationCode").send_keys(code)
driver.find_element_by_id("loginform_submit").click()

time.sleep(3)

driver.close()