(最近通过Android认识了Jetbrain公司,从此彻底迷上了这个公司的产品,Unity上用Rider,Java上用IDEA,于是我就有想法了,我可以先在Clion里编辑代码,然后再用IAR编译。试过一段时间后,觉得这样反倒是很麻烦,切换来切换去,还要两边添加头文件。于是去Google了一起下。看看有没有在Clion里直接编译调试STM32的,这样一搜还真有。地址如下:
https://blog.jetbrains.com/clion/2016/06/clion-for-embedded-development/
但是它使用的是J-link,我用的是开发板上的ST-link-v2.1,没办法全套照搬。相对于此,我参考了很多人的博客。终于在半个月后搞定了。下面把配置过程贴上来)
环境:Win7x64
工具:
1. Clion
2. SW4STM32
3. GNU Tools ARM Embedded
4. Python 3.5+
5. MXCUBE
首先,为什么会有工具2呢,我来解释一下,调试需要用到OpenOCD我一直搞不定,所以需要借用它的OpenOCD。工具4是因为需要用到一个Python的程序。
1. 安装软件和配置环境变量。
安装就不用多说了。重要的是环境变量的配置,需要在CMD下能够直接使用 arm-none-eabi-c++ , python 和 openocd.exe 。OpenOCD在我电脑里的目录是:
C:\Ac6\SystemWorkbench\plugins\fr.ac6.mcu.externaltools.openocd.win32_1.16.1.201710251246\tools\openocd\bin\openocd.exe
2. 安装cubemx2cmake
这里要用到某位老兄的软件:cubemx2cmake ,地址如下:
https://github.com/eugene-babichenko/cubemx2cmake
按照Installation安装就没问题了。其次,确认CMD中可以使用 cubemx2cmake 命令。进入下一步之前重启一次电脑。
3. 使用CUBEMX创建工程
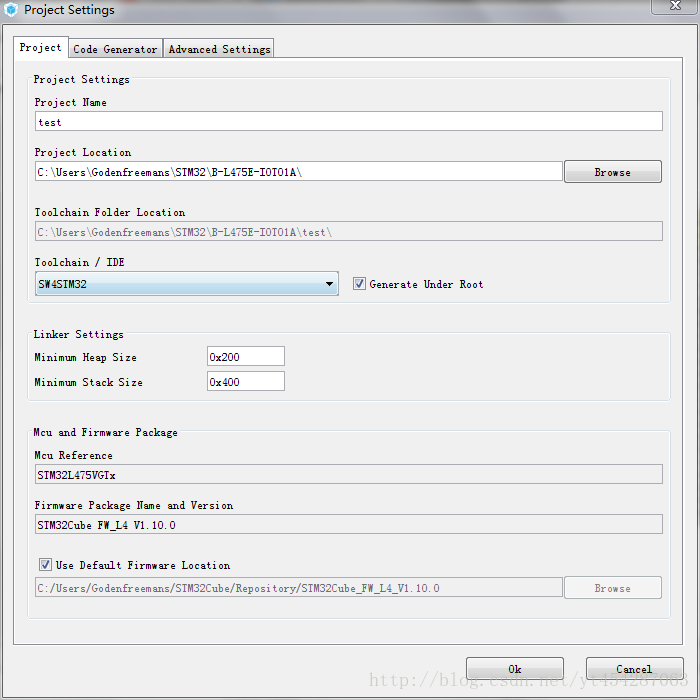
选择SW4STM32,勾选右边的选项(重点)。生成代码。
4. 导入Clion&设置Cmake
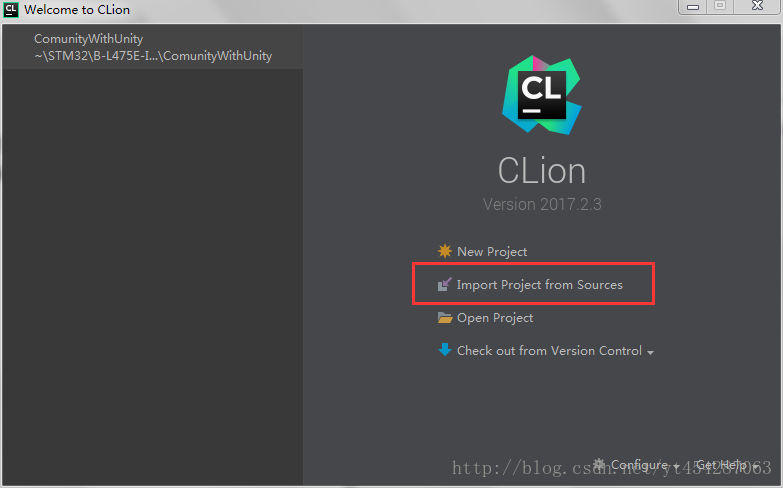
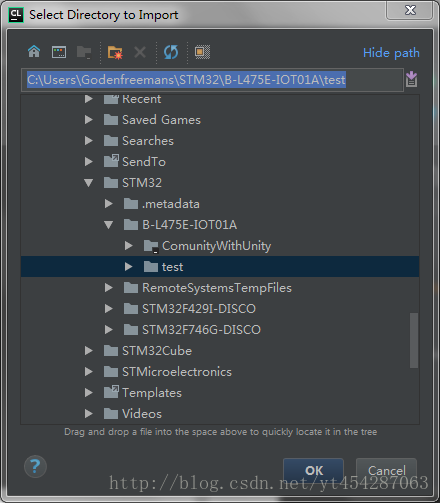
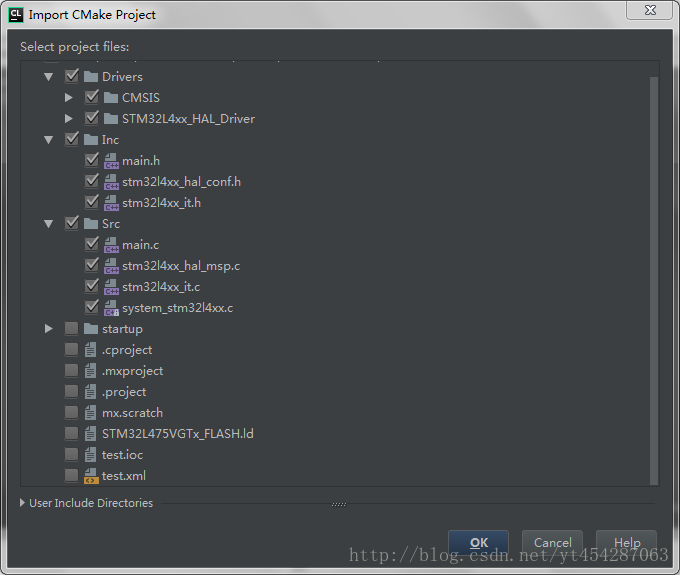
这个页面啥也别点,直接OK。
进入界面,打开下面的Terminal,使用命令 cubemx2cmake。然后会产生很多文件。
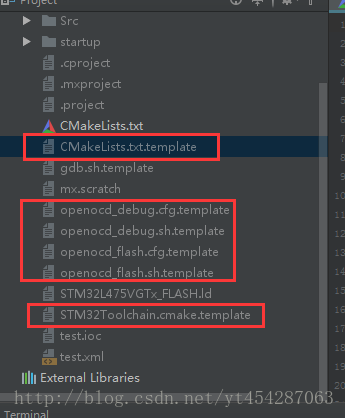
其中,首先修改CMakeLists.txt.template。重命名为CMakeLists.txt 覆写。
接着重命名STM32Toolchain.cmake.template为STM32Toolchain.cmake
接下来就可以试编译一下了。出现了报错:
C:/Users/Godenfreemans/STM32/B-L475E-IOT01A/test/Drivers/CMSIS/Device/ST/STM32L4xx/Include/stm32l4xx.h:179:3: error: #error “Please select first the target STM32L4xx device used in your application (in stm32l4xx.h file)”
#error “Please select first the target STM32L4xx device used in your application (in stm32l4xx.h file)”
这个就是没有定义芯片类型。我使用的开发板用的是STM32L475,所以
就选STM32L475xx这个定义。将它添加在Cmake里。
在CmakeList.txt文件中
删除下面两条语句
add_definitions(-DSTM32L475xE)
add_definitions(-DUSE_HAL_LIBRARY)
将这预定义添加在STM32Toolchain.cmake文件中的
set(COMMON_FLAGS “-mcpu=cortex-m4 -mfloat-abi=hard -mfpu=fpv4-sp-d16 -lc -specs=nosys.specs -mthumb -mthumb-interwork -ffunction-sections -fdata-sections -g -fno-common -fmessage-length=0”)
中:
set(COMMON_FLAGS “-DSTM32L475xx -DUSE_HAL_LIBRARY -mcpu=cortex-m4 -mfloat-abi=hard -mfpu=fpv4-sp-d16 -lc -specs=nosys.specs -mthumb -mthumb-interwork -ffunction-sections -fdata-sections -g -fno-common -fmessage-length=0”)
(这里埋个坑,看看读者能不能发现,笑)
接下来再编译,会发现错误:
C:\Users\GODENF~1\AppData\Local\Temp\ccozlDLD.s: Assembler messages:
C:\Users\GODENF~1\AppData\Local\Temp\ccozlDLD.s:517: Error: number of operands mismatch fords'ds’
C:\Users\GODENF~1\AppData\Local\Temp\ccozlDLD.s:536: Error: number of operands mismatch for
mingw32-make.exe[2]: * [CMakeFiles/test.elf.dir/Drivers/STM32L4xx_HAL_Driver/Src/stm32l4xx_hal_cortex.c.obj] Error 1
mingw32-make.exe[2]: * Waiting for unfinished jobs….
这里默认的编译工具是mingw,要把它定向到arm的编译器。
首先在这里添加arm编译器的路径:
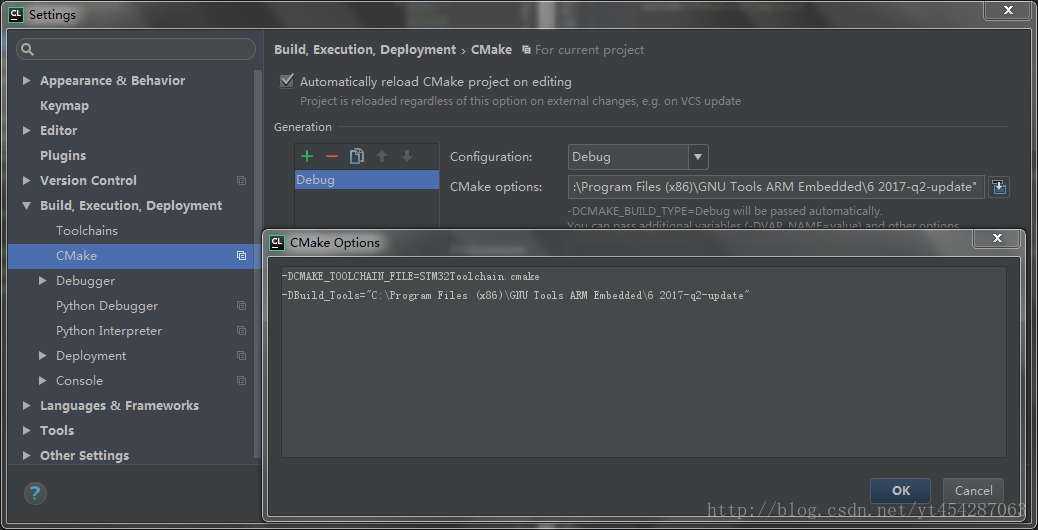
(图片看不清的话,右键在新选项卡中打开)
-DCMAKE_TOOLCHAIN_FILE=STM32Toolchain.cmake
-DBuild_Tools=”C:\Program Files (x86)\GNU Tools ARM Embedded\6 2017-q2-update”
上面的是设置编译工具链文件。就是之前改好名字的STM32Toolchain.cmake,其次就是定义一个变量叫Build_Tools
,接下来会用到它。
接下来设定Cmake寻找编译工具的目录。在STM32Toolchain.cmake文件中添加
SET(CMAKE_FIND_ROOT_PATH ${Build_Tools}/bin)
然后将这两条语句:
CMAKE_FORCE_C_COMPILER(arm-none-eabi-gcc GCC)
CMAKE_FORCE_CXX_COMPILER(arm-none-eabi-g++ GCC)
换成
set(CMAKE_C_COMPILER arm-none-eabi-gcc)
set(CMAKE_CXX_COMPILER arm-none-eabi-g++)
set(CMAKE_ASM_COMPILER arm-none-eabi-as)
接下来就在下面的CMAKE视图中使用一次Rset Cache and Reload Project按钮(在齿轮里),使用多次Reload CMAKE Project按钮直到CMAKE窗口中没有任何错误出现。再次编译,会有错误出现:
c:/progra~2/gnutoo~1/62017-~1/bin/../lib/gcc/arm-none-eabi/6.3.1/../../../../arm-none-eabi/bin/ld.exe: warning: cannot find entry symbol Reset_Handler; defaulting to 08000000
没有设置代码开头地址。
这是由于没有添加启动头文件startup_STM32L475xE导致的。虽然Cmake文件中有添加这个文件,但是实际上那个目录里没有文件。
修改其指向正确的汇编文件。
在CmakeList.txt文件中,将
file(GLOB_RECURSE CMSIS_STARTUP Drivers/CMSIS/Device/ST/STM32L4xx/Source/Templates/gcc/startup_STM32L475xE.s)
改成
file(GLOB_RECURSE CMSIS_STARTUP startup/startup_stm32l475xx.s)
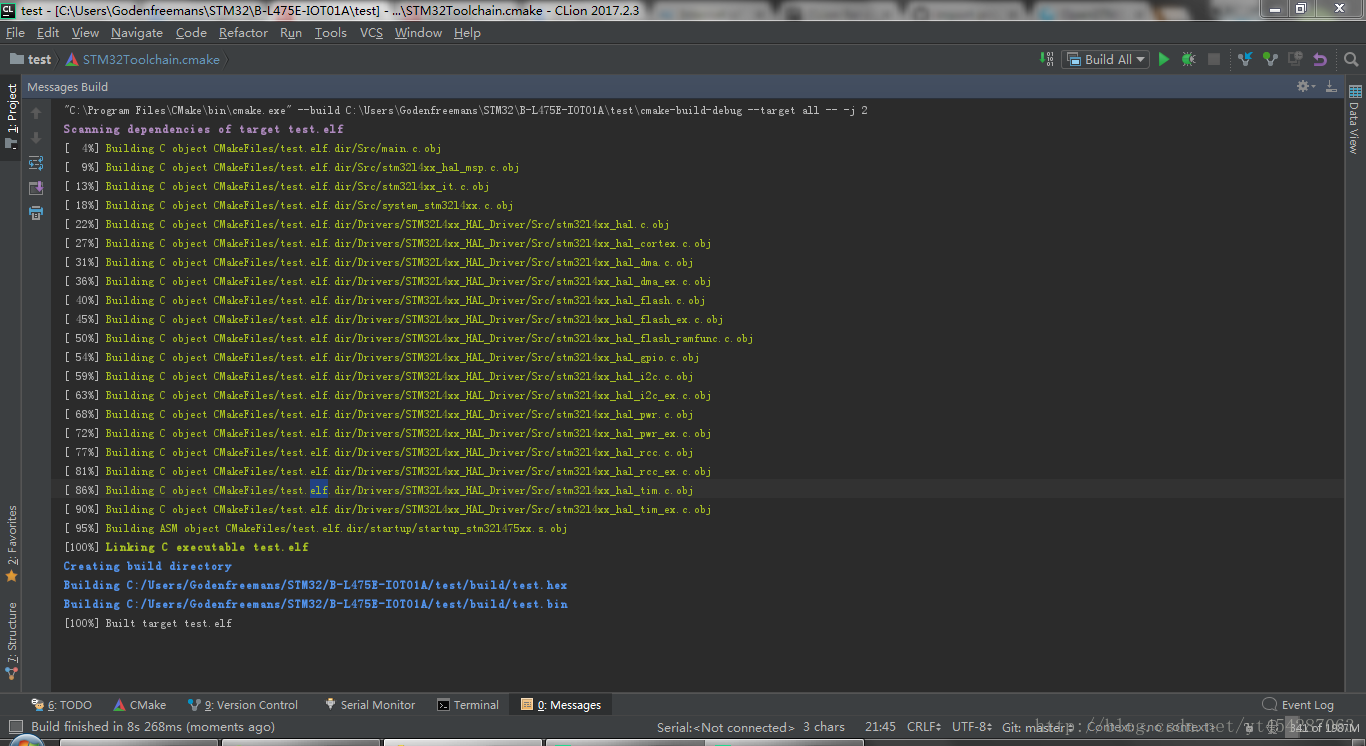
再编译一次,就没有问题了。
5. 调试。
开发怎么能不需要调试呢,这里要感谢Maxim Karpov制作的插件:μCL
在Clion的插件中心安装它。
然后在Clion的设置中会出现一个选项:
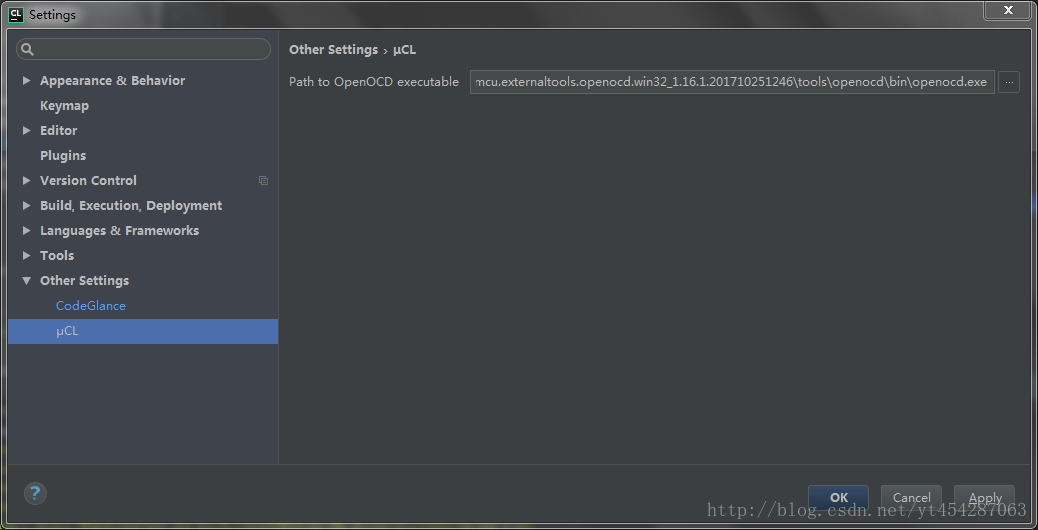
在右边设置openocd的目录位置。
我的是在:C:\Ac6\SystemWorkbench\plugins\fr.ac6.mcu.externaltools.openocd.win32_1.16.1.201710251246\tools\openocd\bin\openocd.exe。
然后设置GDB为arm的GDB。
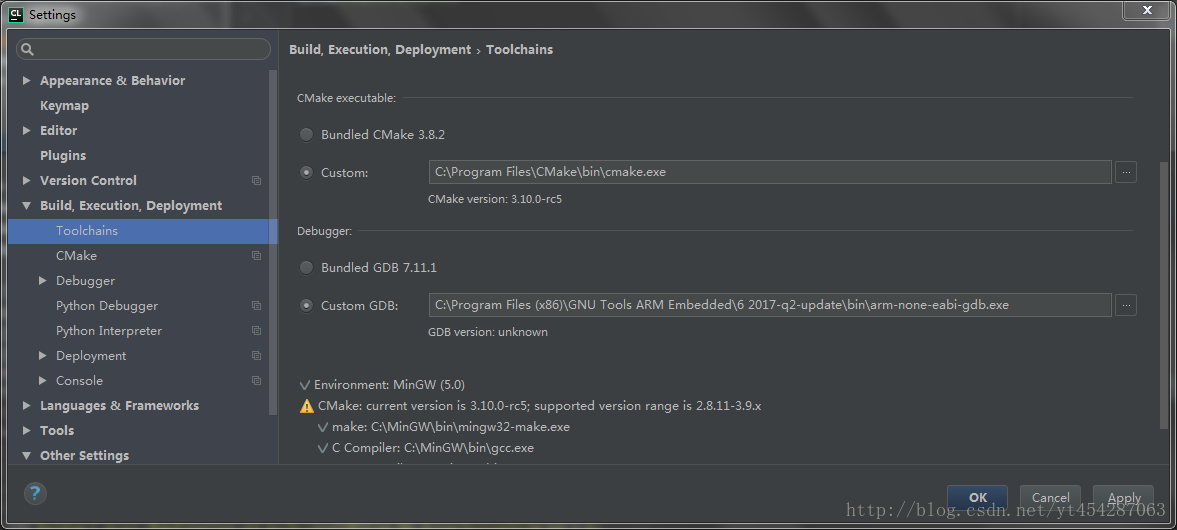
OK,这部分设置完成了。接下来还没完。打开这个设置页面。
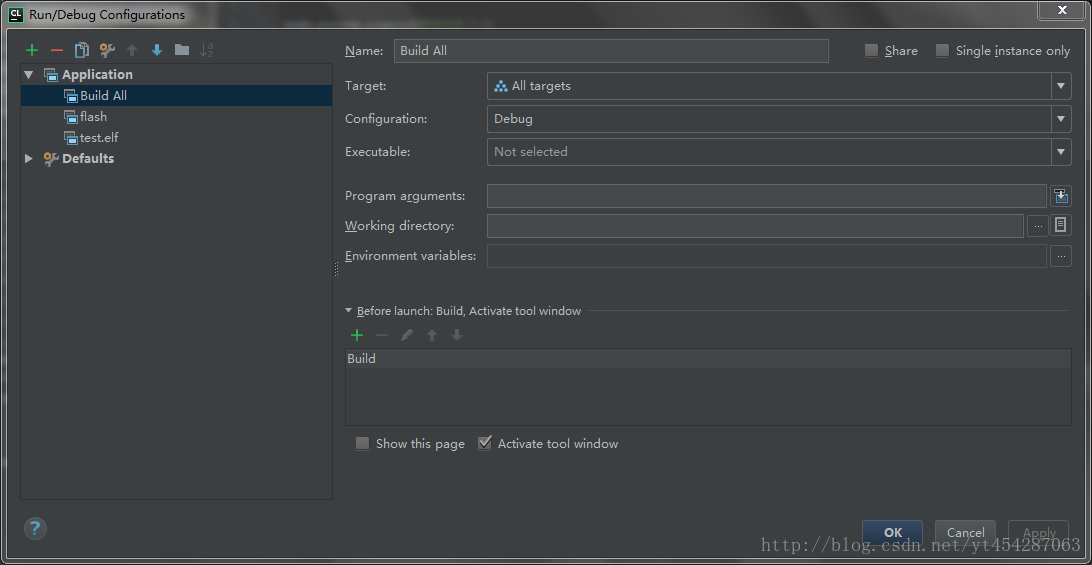
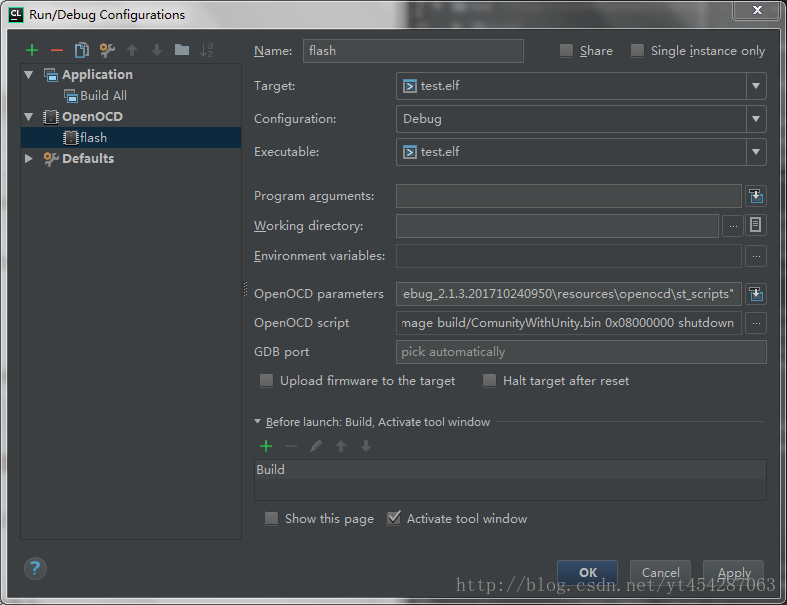
删除flash和test.elf。添加OpenOCD根。将unnamed命名为flash,Target选择为elf文件下面的Executable同样为elf文件,接着OpenOCD paraments选项设置为
-s “C:\Ac6\SystemWorkbench\plugins\fr.ac6.mcu.debug_2.1.3.201710240950\resources\openocd\st_scripts”
复制粘贴的时候注意引号会莫名其妙的变成中文符。
用来指定OpenOCD的脚本目录。
OpenOCD script选项填充如下内容:
source [find interface/stlink-v2-1.cfg]
source [find target/STM32L4x.cfg]
init
reset init
halt
flash write_image erase build/ComunityWithUnity.bin 0x08000000
verify_image build/ComunityWithUnity.bin 0x08000000
shutdown反勾选Upload firmware to the target。
到这里刷写flash就写完了。
复制flash,命名为Debug。设置Working directory为arm的目录:
C:\Program Files (x86)\GNU Tools ARM Embedded\6 2017-q2-update\arm-none-eabi\bin
接下来将OpenOCD script修改为:
# This is an ComunityWithUnity board with a single STM32L475VGTx chip
#
# Generated by System Workbench for STM32
# Take care that such file, as generated, may be overridden without any early notice. Please have a look to debug launch configuration setup(s)

source [find interface/stlink-tcp.cfg]

set WORKAREASIZE 0x8000

transport select "hla_swd"

set CHIPNAME STM32L475VGTx

# Enable debug when in low power modes
set ENABLE_LOW_POWER 1

# Stop Watchdog counters when halt
set STOP_WATCHDOG 1

# STlink Debug clock frequency
set CLOCK_FREQ 4000

# use hardware reset, connect under reset
# connect_assert_srst needed if low power mode application running (WFI...)
reset_config srst_only srst_nogate connect_assert_srst
set CONNECT_UNDER_RESET 1

source [find target/stm32l4x.cfg]
OK,到这里就完成了。
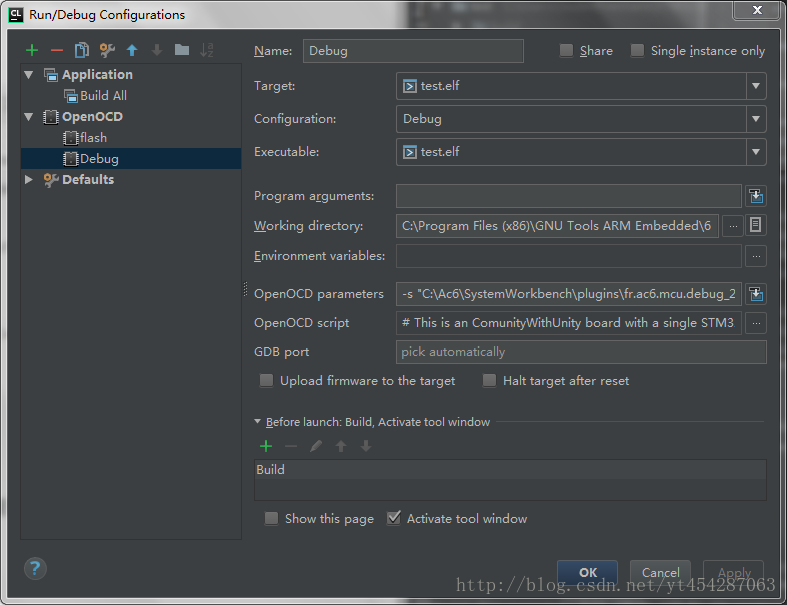
想要Debug的时候就把选项设置到Debug再点右边的小青虫。就可以Debug了。