本文介绍如下三个方面的知识:
1、如何将pascal voc数据集转化为TensorFlow的tfrecord文件?
2、如何使用lxml解析xml文件?
3、如何使用opencv在图片上画出目标边框?
【第一部分】将pascal voc数据集转化为TensorFlow的tfrecord文件
pascal voc数据集下载地址为:
http://host.robots.ox.ac.uk/pascal/VOC/voc2012/index.html
其中的name与label数字标签的映射关系文件下载地址为:
https://github.com/tensorflow/models
位于:models-master\research\object_detection\data\pascal_label_map.pbtxt
整个解析过程分为三步:
1.将name与label的映射文件pascal_label_map.pbtxt解析为字典格式数据,即name---label格式
2.将xml文件使用lxml读取出来后,将其解析为字典格式的数据。
3.将原始图片数据与annotation数据转为tfrecord文件格式数据。
代码如下:
import tensorflow as tf
from lxml import etree
import os
from PIL import Image

#定义解析单个lxml文件
def parse_xml(xml_path,name_label_map):
    tree = etree.parse(xml_path)
    dict = {}
    for x in tree.xpath('//filename'):
        if len(x):
            print("error")
        else:
            dict["image_"+x.tag] = x.text
    for x in tree.xpath('//size'):
        for x1 in x.getchildren():
            dict["image_"+x1.tag] = x1.text
    object_numbers = 0
    #可能存在多个object节点,即多目标检测
    for obj in tree.xpath('//object'):
        #获取当前object节点的子节点
        for x in obj.getchildren():
            #判断节点x是否有子节点
            if len(x):
                if x.tag == 'bndbox':
                    for bbox in x.getchildren():
                        dict['object_'+str(object_numbers)+'/bndbbox/'+bbox.tag] = bbox.text
                else:
                    pass
            elif x.tag == 'name':
                #将name与id均保存到字典中
                dict["object_"+str(object_numbers)+"/"+x.tag] = x.text
                dict["object_" + str(object_numbers) + "/id" ] = name_label_map[x.text]
            else:
                pass
        object_numbers += 1
    dict['object_number'] = object_numbers
    return dict
#将name与label的映射map文件解析为字典格式
# name<---->id
def parse_map_file(map_file):
    name_label_map = {}
    with open(map_file) as f:
        id = 0
        for line in f.readlines():
            if len(line) > 1:
                if line.find('id') != -1:
                    line = line.strip('\\n')
                    line = line.strip(' ')
                    colon = line.index(':')
                    colon = colon + 1
                    line_id = line[colon:].strip(' ')
                    id = int(line_id)
                elif line.find('name') != -1:
                    line = line.strip('\\n').strip(' ')
                    first = line.index("'")
                    last = line.rindex("'")
                    line_name = line[first+1:last]
                    name_label_map[line_name]=id
                    id = 0
                else:
                    pass
            else:
                #print("empty line")
                pass
    return name_label_map

MAP_FILE = r"D:\models-master\research\object_detection\data\pascal_label_map.pbtxt"
BASE_PATH= r"E:\VOCtrainval_11-May-2012\VOCdevkit\VOC2012\Annotations"
BASE_JPEG_PATH = r"E:\VOCtrainval_11-May-2012\VOCdevkit\VOC2012\JPEGImages"
name_label_map = parse_map_file(MAP_FILE)
xml_file_list = os.listdir(BASE_PATH)
train_list = []
test_list = []
j = 0
for i in range(len(xml_file_list)):
    if j % 6 == 0:
        test_list.append(xml_file_list[i])
    else:
        train_list.append(xml_file_list[i])
    j = j + 1
with tf.python_io.TFRecordWriter(path=r"E:\VOCtrainval_11-May-2012\train.tfrecords") as tf_writer:
    for i in range(len(train_list)):
        file_path = os.path.join(BASE_PATH,train_list[i])
        if os.path.isfile(file_path):
            #解析xml为字典格式数据
            xml_dict = parse_xml(file_path,name_label_map)
            image = Image.open(os.path.join(BASE_JPEG_PATH,xml_dict['image_filename']))
            image_bytes = image.tobytes()
            features = {}
            features["image"] = tf.train.Feature(bytes_list=tf.train.BytesList(value = [image_bytes]))
            features['image_width'] = tf.train.Feature(int64_list=tf.train.Int64List(value = [int(xml_dict['image_width'])]))
            features['image_height'] = tf.train.Feature(
                int64_list=tf.train.Int64List(value=[int(xml_dict['image_height'])]))
            features['image_depth'] = tf.train.Feature(
                int64_list=tf.train.Int64List(value=[int(xml_dict['image_depth'])]))
            features['image/object_number'] = tf.train.Feature(
                int64_list=tf.train.Int64List(value=[int(xml_dict['object_number'])]))
            xmin = []
            xmax = []
            ymin = []
            ymax = []
            object_id = []
            object_name = []
            object_number = xml_dict['object_number']
            for j in range(object_number):
                object_i = 'object_'+str(j)
                #print(xml_dict[object_i+'/name'])
                #print(type(xml_dict[object_i+'/name']))
                object_name.append(bytes(xml_dict[object_i+'/name'],'utf-8'))
                object_id.append(int(xml_dict[object_i+'/id']))
                xmin.append(float(xml_dict[object_i+'/bndbbox/xmin']))
                xmax.append(float(xml_dict[object_i + '/bndbbox/xmax']))
                ymin.append(float(xml_dict[object_i + '/bndbbox/ymin']))
                ymax.append(float(xml_dict[object_i + '/bndbbox/ymax']))
            #变长数据以list形式存储
            features["image/object/names"] = tf.train.Feature(bytes_list=tf.train.BytesList(value=object_name))
            features['image/object/id'] = tf.train.Feature(int64_list=tf.train.Int64List(value=object_id))
            features['image/object/xmin'] = tf.train.Feature(float_list=tf.train.FloatList(value=xmin))
            features['image/object/xmax'] = tf.train.Feature(float_list=tf.train.FloatList(value=xmax))
            features['image/object/ymin'] = tf.train.Feature(float_list=tf.train.FloatList(value=ymin))
            features['image/object/ymax'] = tf.train.Feature(float_list=tf.train.FloatList(value=ymax))
            tf_features = tf.train.Features(feature=features)
            tf_example = tf.train.Example(features=tf_features)
            tf_serialized = tf_example.SerializeToString()
            tf_writer.write(tf_serialized)
【第二部分】读取目标检测tfrecord数据并使用opencv在图片上画出目标边框
整个过程分为如下两步:
1.编写tfrecord解析函数,即反序列化函数。
2.获取图片标注数据,并使用OpenCV绘制边框。
具体代码如下:
import tensorflow as tf
import numpy as np
import cv2
def parse_tf(example_proto):
dics = {}
#定长数据解析
dics['image'] = tf.FixedLenFeature(shape=[],dtype=tf.string)
dics['image_width'] = tf.FixedLenFeature(shape=[], dtype=tf.int64)
dics['image_height'] = tf.FixedLenFeature(shape=[], dtype=tf.int64)
dics['image_depth'] = tf.FixedLenFeature(shape=[], dtype=tf.int64)
dics['image/object_number']= tf.FixedLenFeature(shape=[], dtype=tf.int64)
#列表数据解析
dics["image/object/names"] = tf.VarLenFeature(tf.string)
dics['image/object/id'] = tf.VarLenFeature(tf.int64)
dics['image/object/xmin'] = tf.VarLenFeature(tf.float32)
dics['image/object/xmax'] = tf.VarLenFeature(tf.float32)
dics['image/object/ymin'] = tf.VarLenFeature(tf.float32)
dics['image/object/ymax'] = tf.VarLenFeature(tf.float32)
parse_example = tf.parse_single_example(serialized=example_proto,features=dics)
object_number = parse_example["image/object_number"]
xmin = parse_example['image/object/xmin']
xmax = parse_example['image/object/xmax']
ymin = parse_example['image/object/ymin']
ymax = parse_example['image/object/ymax']
image = tf.decode_raw(parse_example['image'],out_type=tf.uint8)
w = parse_example['image_width']
h = parse_example['image_height']
c = parse_example['image_depth']
return image,w,h,c,object_number,xmin,xmax,ymin,ymax
dataset = tf.data.TFRecordDataset(r"E:\VOCtrainval_11-May-2012\train.tfrecords")
dataset = dataset.map(parse_tf).batch(1).repeat(1)
iterator = dataset.make_one_shot_iterator()
next_element = iterator.get_next()
with tf.Session() as session:
image, w, h, c, object_number, xmin, xmax, ymin, ymax = session.run(fetches=next_element)
image = np.reshape(image,newshape=[h[0],w[0],c[0]])
#使用OpenCV绘制表框
for i in range(object_number[0]):
#左上角坐标与右下角坐标
cv2.rectangle(image,(xmin.values[i],ymin.values[i]),(xmax.values[i],ymax.values[i]),color=(0,255,0))
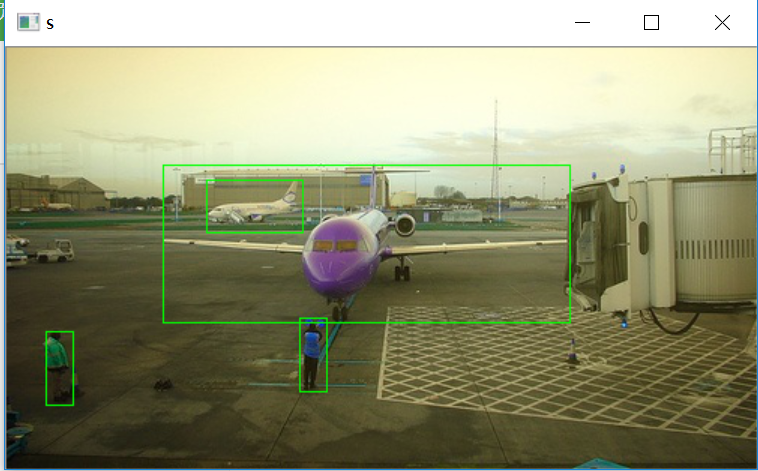
cv2.imshow("s",image)
cv2.waitKey(0)效果如下图:
PS:在解析tfrecord数据文件时,由于在解析函数中拿到的都是tensor,而不是数据本身,又由于session无法传递到解析函数中,所以许多预处理操作在解析函数中无法实施,需要在外面拿到数据后,在利用numpy等对数据进行预处理。