当初一开始就是如此设想,通过opencv获取视频(摄像头)的图片帧,图像处理识别之后加工(绘制)图片,并把该图片作为视频流的一帧推送rtmp,然后远端直播,之间走了很多很多弯路(甚至想要手动实现rtmp推流)也就是了,搜索了一两周的攻略,断断续续的总算是实现了demo,参考地址:
https://stackoverflow.com/questions/36422211/processing-camera-stream-in-opencv-pushing-it-over-rtmp-nginx-rtmp-module-usi
rtmpUrl = 'rtmp://39.107.26.100:1935:1935/myapp/test1'
mycv = CvHelp()#我自己的opencv工具类,提供绘图识别工具
# 视频来源 地址需要替换自己的可识别文件地址
filePath='/mnt/e/nginx-rtmp/'
camera = cv2.VideoCapture(filePath+"test2.mp4") # 从文件读取视频
#这里的摄像头可以在树莓派3b上使用
# camera = cv2.VideoCapture(0) # 参数0表示第一个摄像头 摄像头读取视频
# if (camera.isOpened()):# 判断视频是否打开
# print 'Open camera'
# else:
# print 'Fail to open camera!'
# return
# camera.set(cv2.CAP_PROP_FRAME_WIDTH, 1280) # 2560x1920 2217x2217 2952×1944 1920x1080
# camera.set(cv2.CAP_PROP_FRAME_HEIGHT, 720)
# camera.set(cv2.CAP_PROP_FPS, 5)
# 视频属性
size = (int(camera.get(cv2.CAP_PROP_FRAME_WIDTH)), int(camera.get(cv2.CAP_PROP_FRAME_HEIGHT)))
sizeStr = str(size[0]) + 'x' + str(size[1])
fps = camera.get(cv2.CAP_PROP_FPS) # 30p/self
fps = int(fps)
hz = int(1000.0 / fps)
print 'size:'+ sizeStr + ' fps:' + str(fps) + ' hz:' + str(hz)
# 视频文件保存
fourcc = cv2.VideoWriter_fourcc(*'XVID')
out = cv2.VideoWriter(filePath+'res_mv.avi',fourcc, fps, size)
# 管道输出 ffmpeg推送rtmp 重点 : 通过管道 共享数据的方式
command = ['ffmpeg',
'-y',
'-f', 'rawvideo',
'-vcodec','rawvideo',
'-pix_fmt', 'bgr24',
'-s', sizeStr,
'-r', str(fps),
'-i', '-',
'-c:v', 'libx264',
'-pix_fmt', 'yuv420p',
'-preset', 'ultrafast',
'-f', 'flv',
rtmpUrl]
# pipe = sp.Popen(command, stdout = sp.PIPE, bufsize=10**8)
pipe = sp.Popen(command, stdin=sp.PIPE) #,shell=False
# pipe.stdin.write(frame.tostring())
lineWidth = 1 + int((size[1]-400) / 400)# 400 1 800 2 1080 3
textSize = size[1] / 1000.0# 400 0.45
heightDeta = size[1] / 20 + 10# 400 20
count = 0
faces = []
while True:
###########################图片采集
count = count + 1
ret, frame = camera.read() # 逐帧采集视频流
if not ret:
break
if(count % fps == 0):
###########################图片处理
# 探测图片中的人脸 延帧检测 很基本的通用性人脸检测 网上攻略一大把
faces = mycv.classfier.detectMultiScale(frame,scaleFactor=1.1,minNeighbors=5,minSize=(5,5))
pass
for (x, y, w, h) in faces:#绘制矩形框出人脸区域
pass
# cv2.rectangle(frame, (x, y), (x+w, y+h), (0, 255, 0), 2)
mycv.drawRect(frame, (x, y), (x+w, y+h), (128, 64, 255), line_width=lineWidth )
# 当发现人脸 进行 操作
# 保存图片文件
# 记录数据库
# 推送提醒socket
pass
# 绘制推送图片帧信息
# print(len(faces))
fpsshow = "Fps :" + str(int(fps)) + " Frame:" + str(count)
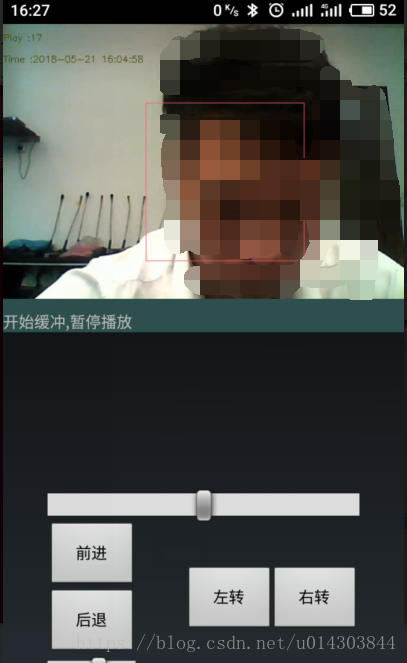
nframe = "Play :" + str(int(count / fps))
ntime = "Time :" + time.strftime("%Y-%m-%d %H:%M:%S", time.localtime())
if(count % fps == 0):
print(fpsshow + " " + ntime)
mycv.drawText(frame, (0, heightDeta * 1), fpsshow, textSize=textSize, lineWidth=lineWidth )
mycv.drawText(frame, (0, heightDeta * 2), nframe, textSize=textSize, lineWidth=lineWidth )
mycv.drawText(frame, (0, heightDeta * 3), ntime, textSize=textSize, lineWidth=lineWidth )
############################图片输出
# 结果帧处理 存入文件 / 推流 / ffmpeg 再处理
out.write(frame) # 存入视频文件
pipe.stdin.write(frame.tostring()) # 存入管道
pass
camera.release()
# Release everything if job is finished
out.release()
print("Over!")
pass大概就是:
只通过管道pipe来使用了ffmpeg提供的rtmp推流工具!
当初本想使用python-rtmp包来实现socket推流的,但是几经尝试感觉过于麻烦,还是这样的管道方式比较容易,目前也还比较快,直播延时大概2s
效果: