
引言
一文教会你造一个简易的狙击游戏。
说到狙击,相信大家都不陌生,无论是影视作品还是网络游戏,都经常能看到狙击枪的身影,最深刻的是它能够从百里之外,一枪爆头。
本文将介绍如何在Cocos Creator中造一个简易的狙击游戏,非常详细。
本文源工程在文末获取,小伙伴们自行前往。
1.狙击游戏常见的元素有什么?
以下是狙击游戏中常见的一些元素:
-
狙击枪: 各种类型的狙击枪。
-
瞄准镜: 玩家可以使用各种瞄准镜来提高精准度和观察敌人。
-
目标: 狙击目标。
那么实现狙击游戏需要哪些知识点?
2.实现狙击游戏的知识点
想要在Cocos Creator中造一个简易的狙击游戏,需要掌握以下知识点:
-
动画编辑:狙击游戏通常包含一些动画效果,例如打开瞄准镜的时候、子弹的运动轨迹等等都需要一些简易的动画效果,本文用到动画编辑器和Tween动画。
-
瞄准镜效果:瞄准镜的效果通常使用RTT方法,全称RenderToTexture,通过把摄像机拍到的内容渲染到2D的UI上。
-
碰撞检测:本文是简易狙击游戏,开枪即判断是否命中,采用的是屏幕射线检测,子弹的物理碰撞不做详细介绍。
-
圆形遮罩:圆形的瞄准镜,需要借助一下Mask遮罩。
-
3D游戏基础:例如模型的摆放、坐标的计算转换以及相机的调整。
以上相关知识点笔者前面的文章都有介绍,可在文末100个Cocos实例专栏查阅。
话不多说,一起来看下如何在Cocos Creator中造一个简易的狙击游戏
3.一起来造一个简易的狙击游戏
我们根据以下的步骤一步一步来造一个简易的狙击游戏:
1.环境
引擎版本:Cocos Creator 3.8.1
编程语言:TypeScript
2.资源准备
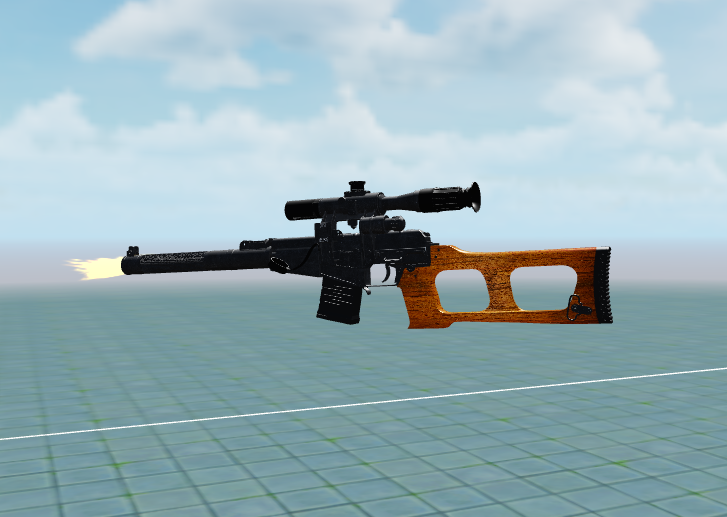
首先从市场搞一把帅气的带瞄准镜的狙击枪模型,还送了个开火特效!(这回节目组可是下重本啊。)
然后找一张简单的瞄准镜画面UI,准备做几个小按钮用作瞄准镜开镜、射击和重置复位。
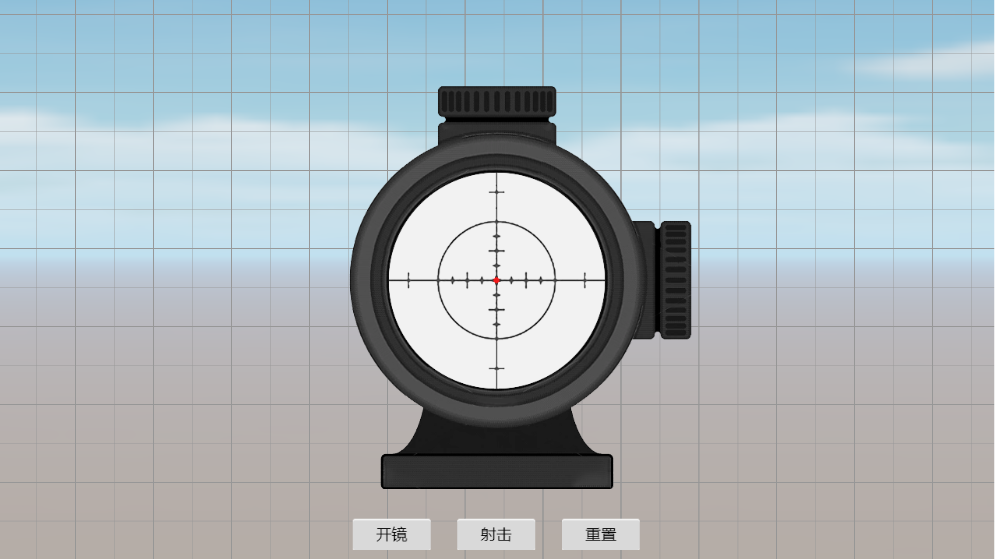
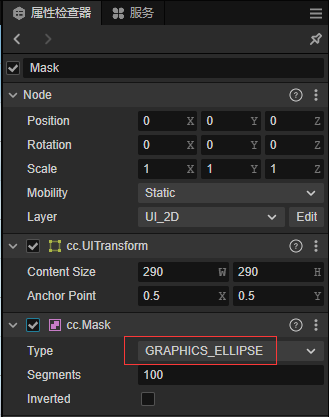
给瞄准镜添加一个Mask组件形成圆形遮罩。
为了营造一个非常好的打鸡效果,我们把熟悉的鸡朋友拉过来当靶子。

添加2个摄像机,并且分别调整各自的摄像机的机位,包括原有的主摄像机,瞄准镜摄像机和子弹轨迹跟踪摄像机。
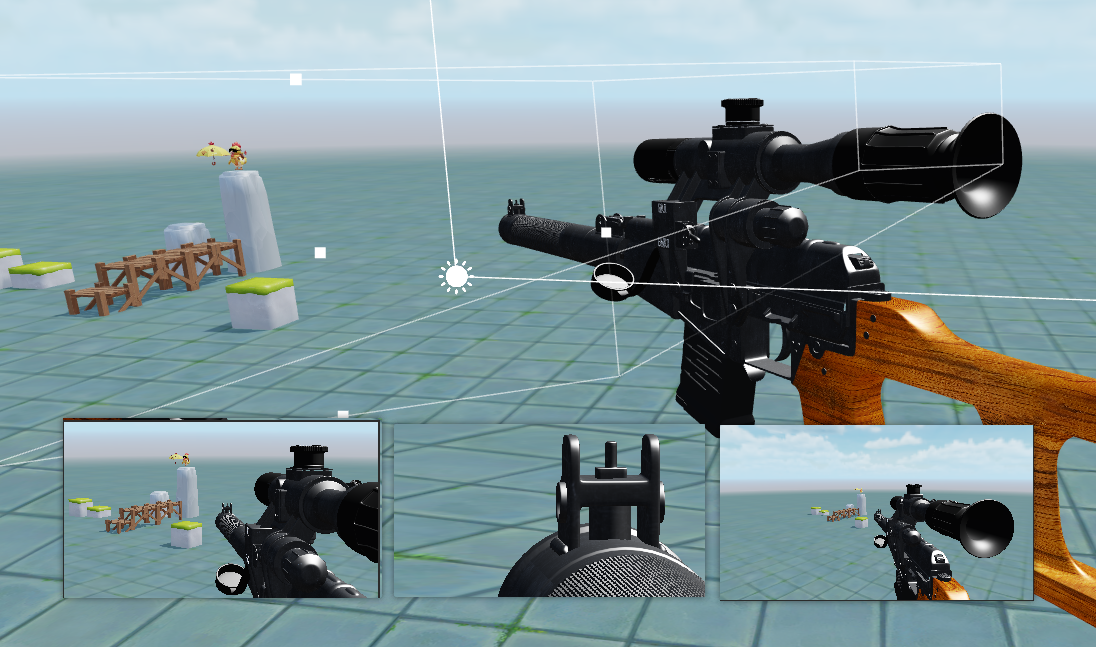
小技巧:
瞄准镜摄像机可以和主摄像机一致,包括位置、旋转和设置,通过改变相机Fov实现放大效果。
通过动画编辑器简单编辑一下开镜动画。
3.编写代码
首先定义一个Snipe组件,包含以下几个属性。
@ccclass('Snipe')
export class Snipe extends Component {
    bulletPfb: Node;         //子弹预制体
    animation: Animation;    //动画组件
    sighting: Node = null;   //瞄准UI节点
    bullet: Node;            //当前子弹
    checkerCameraNode: Node; //相机检测节点
}
然后在start方法里面初始化一下,并且监听一下开镜、射击、重置事件。
start() {
    this.animation = this.node.getComponent(Animation);
    director.getScene().on("PreShoot", this.PreShoot, this);
    director.getScene().on("Shoot", this.Shoot, this);
    director.getScene().on("Reset", this.Reset, this);
    this.bulletPfb = this.node.getChildByPath("qiang/Line16");
    this.SightingCamera();
}
开镜、射击、重置事件从UI_Joystick中的按钮发出。
const sighting = this.node.getChildByName('Sighting');
this.node.getChildByName('BtnOpen').on(NodeEventType.TOUCH_END, () => {
    this._scene.emit("PreShoot", sighting);
}, this);
this.node.getChildByName('BtnShoot').on(NodeEventType.TOUCH_END, () => {
    if (sighting.active) {
        this._scene.emit("Shoot", checkerCamera.node);
    }
}, this);
this.node.getChildByName('BtnReset').on(NodeEventType.TOUCH_END, () => {
    this._scene.emit("Reset");
}, this);
实现瞄准镜的核心源码。
- 创建
RenderTexture。 - 设置摄像机的
targetTexture为上面创建的RenderTexture。 - 创建
SpriteFrame也设置它的texture为上面创建的RenderTexture。 - 最后将瞄准镜
Sprite的spriteFrame为上面创建的SpriteFrame。
SightingCamera() {
    const modelRtt = new RenderTexture();
    modelRtt.reset({
        width: 1024,
        height: 1024
    });
    const camera = find("Main Camera/SightingCamera").getComponent(Camera);
    camera.targetTexture = modelRtt;
    const spriteFrame = new SpriteFrame();
    spriteFrame.texture = modelRtt;
    find("Canvas/ui_joystick_panel/Sighting/Mask/SightingSprite").getComponent(Sprite).spriteFrame = spriteFrame;
}
在PreShoot方法中实现开镜动画的播放,核心API如下。
- 通过
animation.play播放动画。 - 通过
animation.on(Animation.EventType.FINISHED监听动画播放完成。 - 通过
animation.targetOff取消监听。
PreShoot(sighting: Node, callback = null) {
    if (this.bullet) return;
    this.sighting = sighting;
    if (this.node.children[0].active) {
        this.animation.targetOff(this);
        this.animation.on(Animation.EventType.FINISHED, (event) => {
            this.sighting.active = true;
            this.node.children[0].active = false;
        }, this);
        this.animation.play("animation");
    }
    else {
        this.animation.targetOff(this);
        if (callback) {
            this.animation.on(Animation.EventType.FINISHED, (event) => {
                callback();
            }, this);
        }
        this.sighting.active = false;
        this.node.children[0].active = true;
        this.animation.play("animation2");
    }
}
在Shoot方法中利用射线检测判断瞄准镜是否瞄准了目标核心API如下。
- 通过
camera.screenPointToRay产生射线。 - 通过
PhysicsSystem.instance.raycast进行射线碰撞检测并记录结果。 - 通过
PhysicsSystem.instance.raycastResults获取射线检测结果,通过名字或者其他信息得到想要的物体。
Shoot(checkerCameraNode: Node) {
    this.checkerCameraNode = checkerCameraNode;
    var ray = new geometry.Ray();
    var camera = find("Main Camera").getComponent(Camera);
    var size = view.getViewportRect();
    camera.screenPointToRay(size.width / 2, size.height / 2, ray);
    if (PhysicsSystem.instance.raycast(ray)) {
        const raycastResults = PhysicsSystem.instance.raycastResults;
        for (let i = 0; i < raycastResults.length; i++) {
            const item = raycastResults[i];
            if (item.collider.node.name == "rooster_man_skin") {
                this.OnShootTarget(item.collider.node, item.hitPoint);
                return;
            }
        }
        this.OnShoot();
    } else {
        this.OnShoot();
    }
}
最后在OnShootTarget中通过Tween动画运行子弹并且击中目标。
OnShootTarget(hitNode: Node, hitPoint: Vec3) {
    this.checkerCameraNode.active = false;
    this.PreShoot(this.sighting, () => {
        this.node.children[1].active = true;
        const bullet = instantiate(this.bulletPfb);
        this.bullet = bullet;
        bullet.parent = this.bulletPfb.parent;
        bullet.children[0].active = true;
        // tween(bullet.children[1]).by(0.5, { eulerAngles: new Vec3(0, 360, 0) }).repeatForever().start();
        tween(bullet).by(3, { position: new Vec3(0, -0.5, 0) }).to(1, { worldPosition: hitPoint }).call(() => {
            bullet.getComponentInChildren(MeshRenderer).enabled = false;
            hitNode.getComponent(CharacterMovement).onJump("btn_slot_0");
            this.node.children[1].active = false;

        }).start();
        tween(bullet.children[0].getComponent(Camera)).to(3, { fov: 30 }).to(1, { fov: 80 }).start();
    })
}
4.效果演示
瞄准镜动画效果。
瞄准镜效果。

射击效果。

整体效果。

结语
本文源工程可通过阅读原文或者私信发送"Snipe"付费获取。付费不仅是知识的获取,更是对笔者的支持和认可,感谢!
我是"亿元程序员",一位有着8年游戏行业经验的主程。在游戏开发中,希望能给到您帮助, 也希望通过您能帮助到大家。
AD:笔者线上的小游戏《贪吃蛇掌机经典》《重力迷宫球》《填色之旅》大家可以自行点击搜索体验。
实不相瞒,想要个赞和在看!请把该文章分享给你觉得有需要的其他小伙伴。谢谢!
推荐专栏: