做为Android 初学者,不管是您从事的是混合移动开发还是原生开发,我认为,学习一下Android UI是非常有必要的。Android stuido 的强大特性可以使用布局编辑器来进行开发界面,以了解各个布局及微件之间的层次关系,今天就来使用 布局编辑器练练手吧。
Android UI 初步了解
在编写之前需要简单了解下什么是布局,什么是微件,以及Android ui 的构成。
Android 应用的界面 (UI) 以布局和微件的层次结构形式构建而成。布局是 ViewGroup 对象,即控制其子视图在屏幕上的放置方式的容器。微件是 View 对象,即按钮和文本框等界面组件。如下图布局和微件之间的关系:

查看源码:ViewGroup

查看源码:View

布局编辑器使用
打开布局编辑器
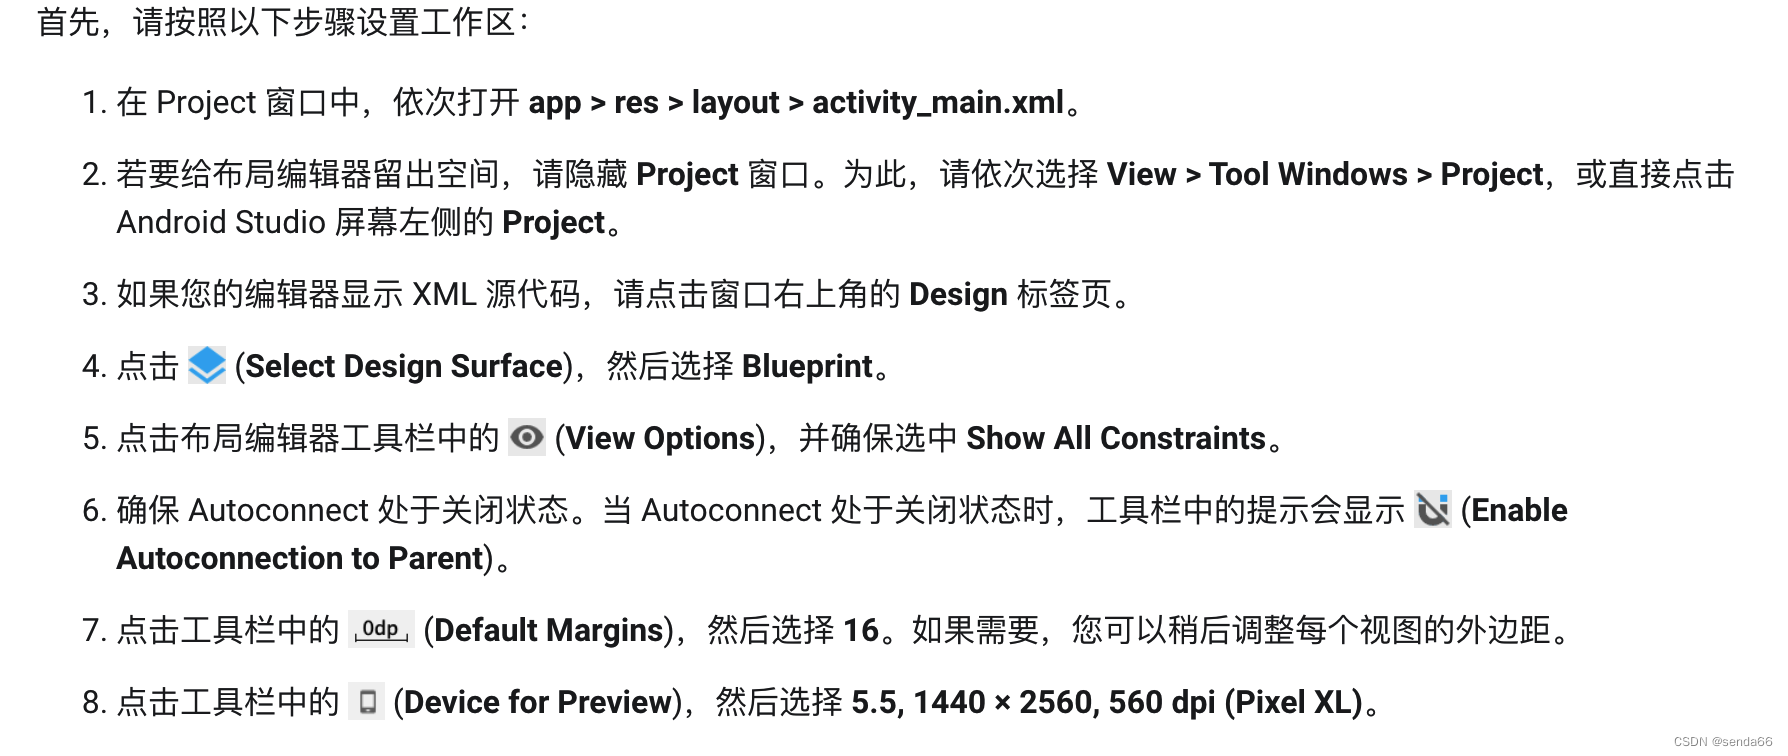
操作完上述步骤,您的布局编辑器现在下图所示。
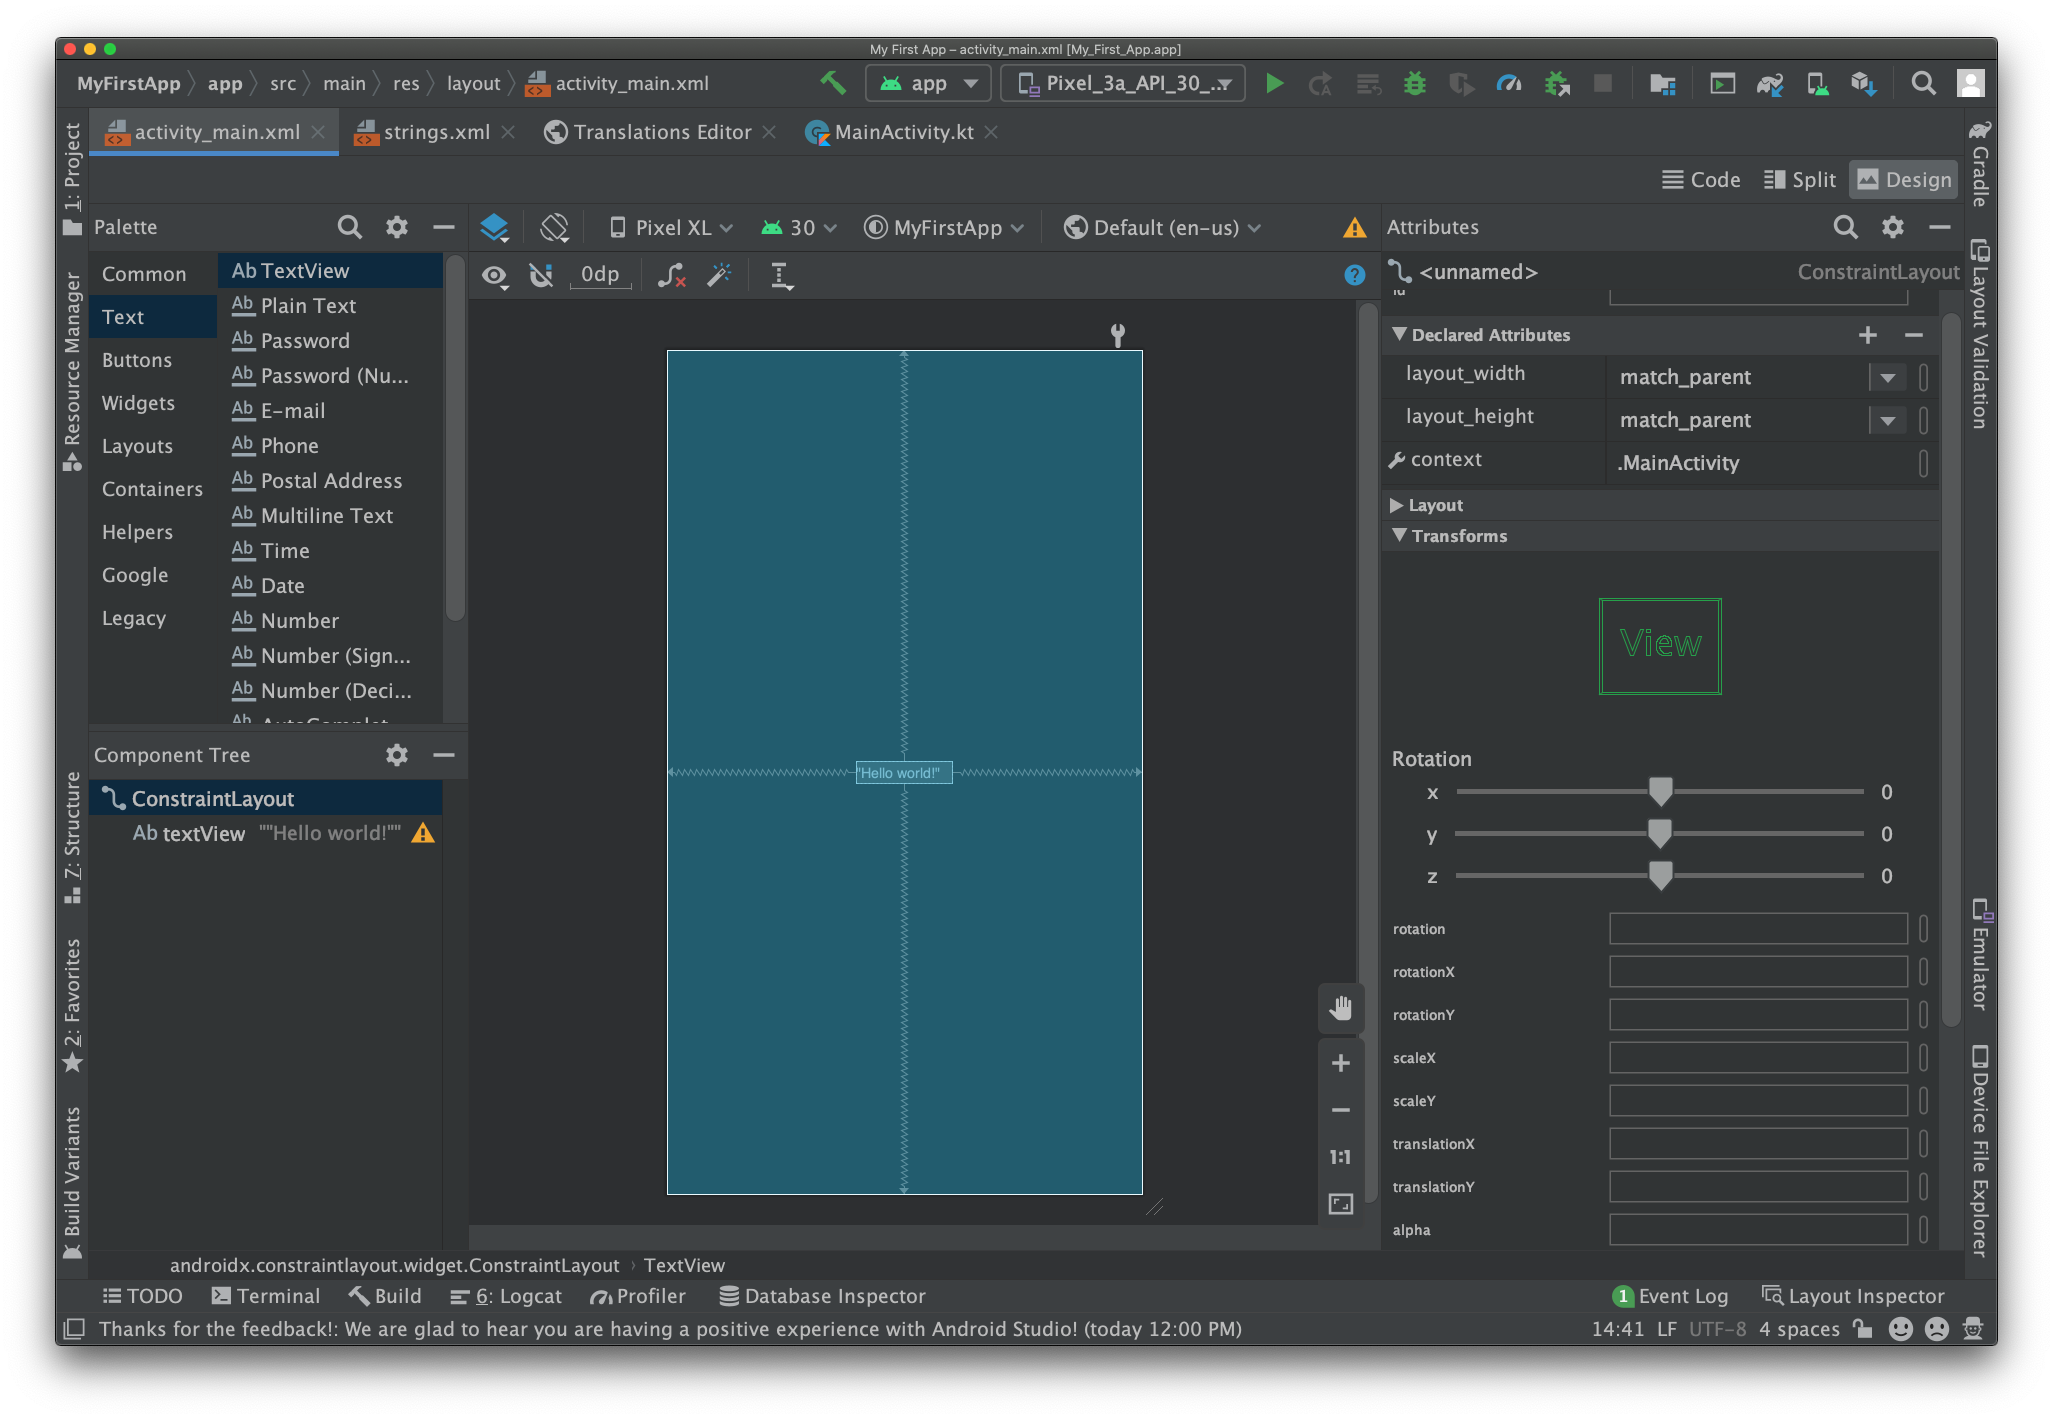
添加文本框
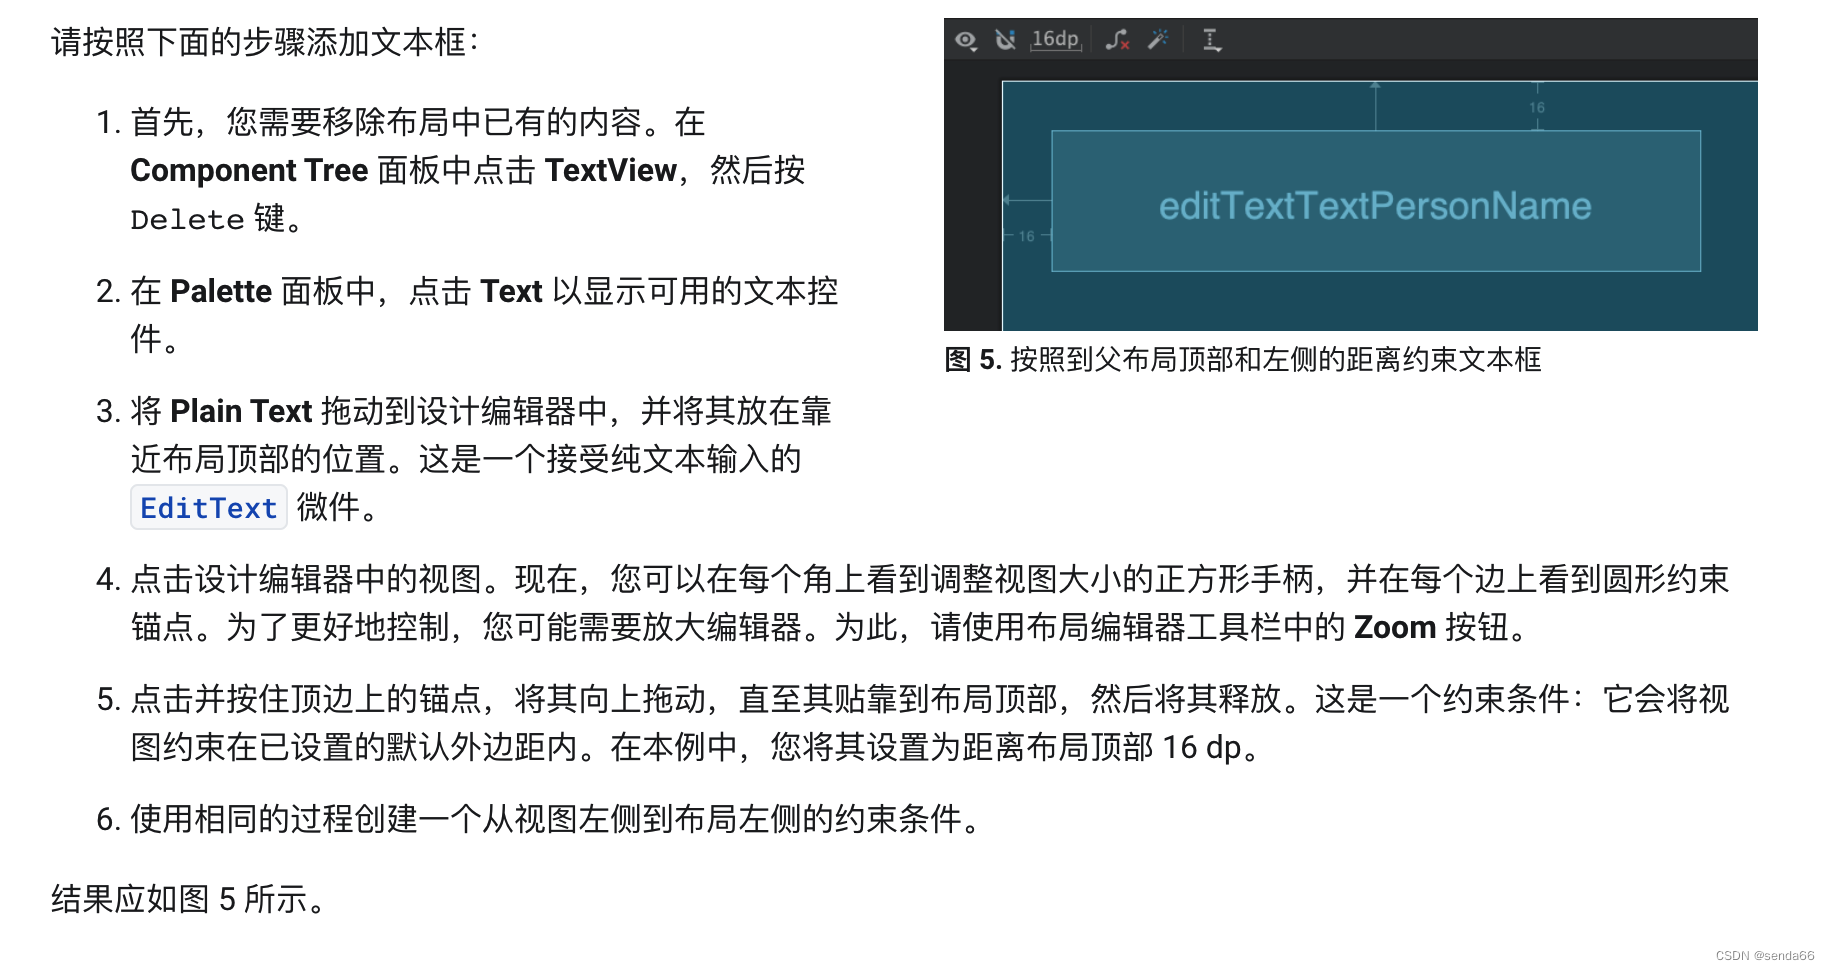
添加按钮
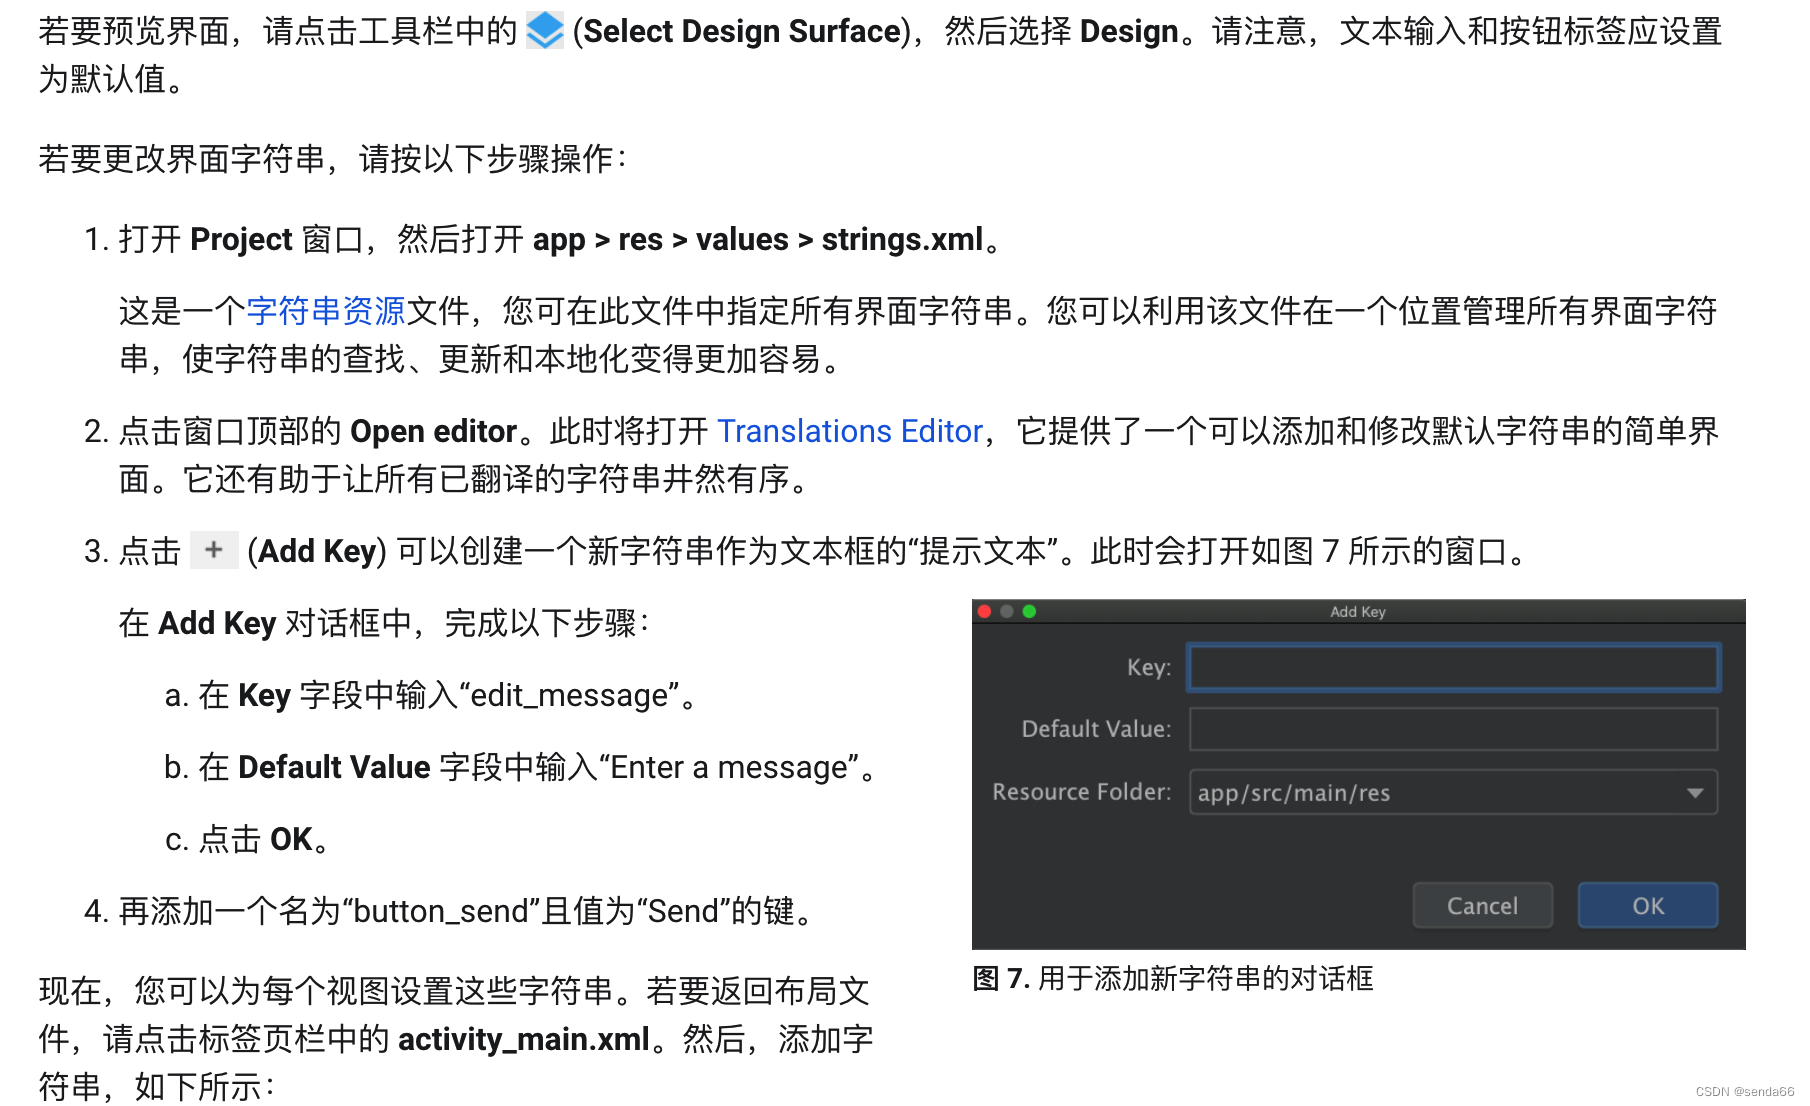
更改界面字符串

此时布局文件的xml代码如下:
<?xml version="1.0" encoding="utf-8"?>
<androidx.constraintlayout.widget.ConstraintLayout xmlns:android="http://schemas.android.com/apk/res/android"
    xmlns:app="http://schemas.android.com/apk/res-auto"
    xmlns:tools="http://schemas.android.com/tools"
    android:layout_width="match_parent"
    android:layout_height="match_parent">

    <EditText
        android:id="@+id/editTextTextPersonName"
        android:layout_width="wrap_content"
        android:layout_height="wrap_content"
        android:layout_marginStart="16dp"
        android:layout_marginTop="16dp"
        android:ems="10"
        android:hint="@string/edit_message"
        android:inputType="textPersonName"
        android:minHeight="48dp"
        app:layout_constraintStart_toStartOf="parent"
        app:layout_constraintTop_toTopOf="parent"
        android:autofillHints="" />

    <Button
        android:id="@+id/button2"
        android:layout_width="95dp"
        android:layout_height="48dp"
        android:layout_marginStart="16dp"
        android:text="@string/button_send"
        app:layout_constraintBaseline_toBaselineOf="@+id/editTextTextPersonName"
        app:layout_constraintStart_toEndOf="@+id/editTextTextPersonName" />
</androidx.constraintlayout.widget.ConstraintLayout>
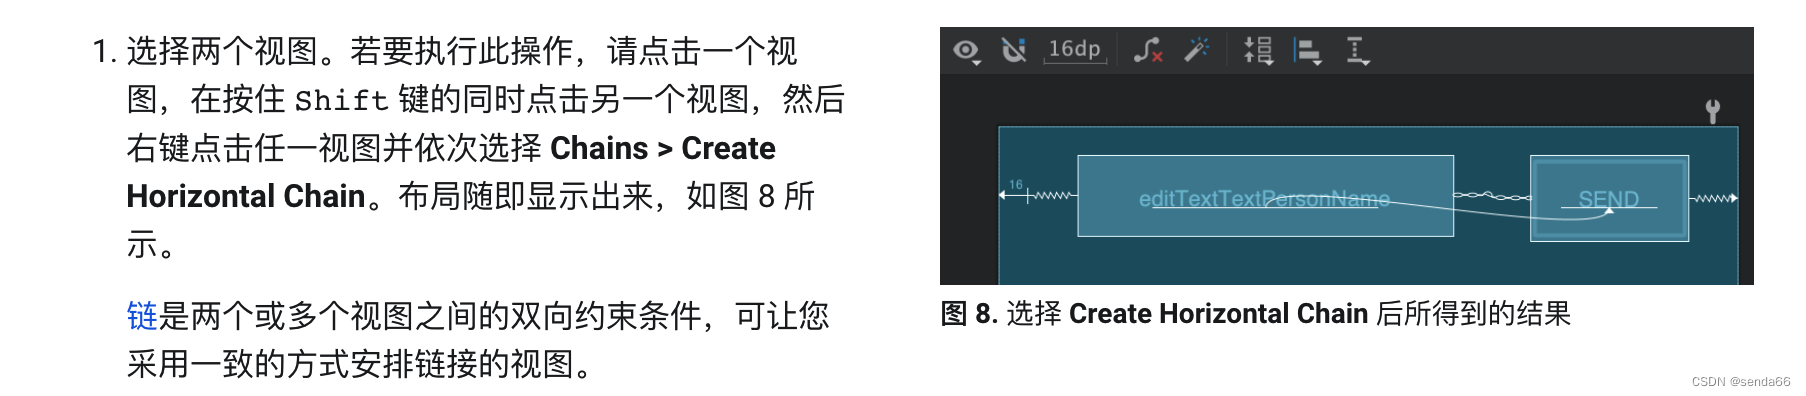
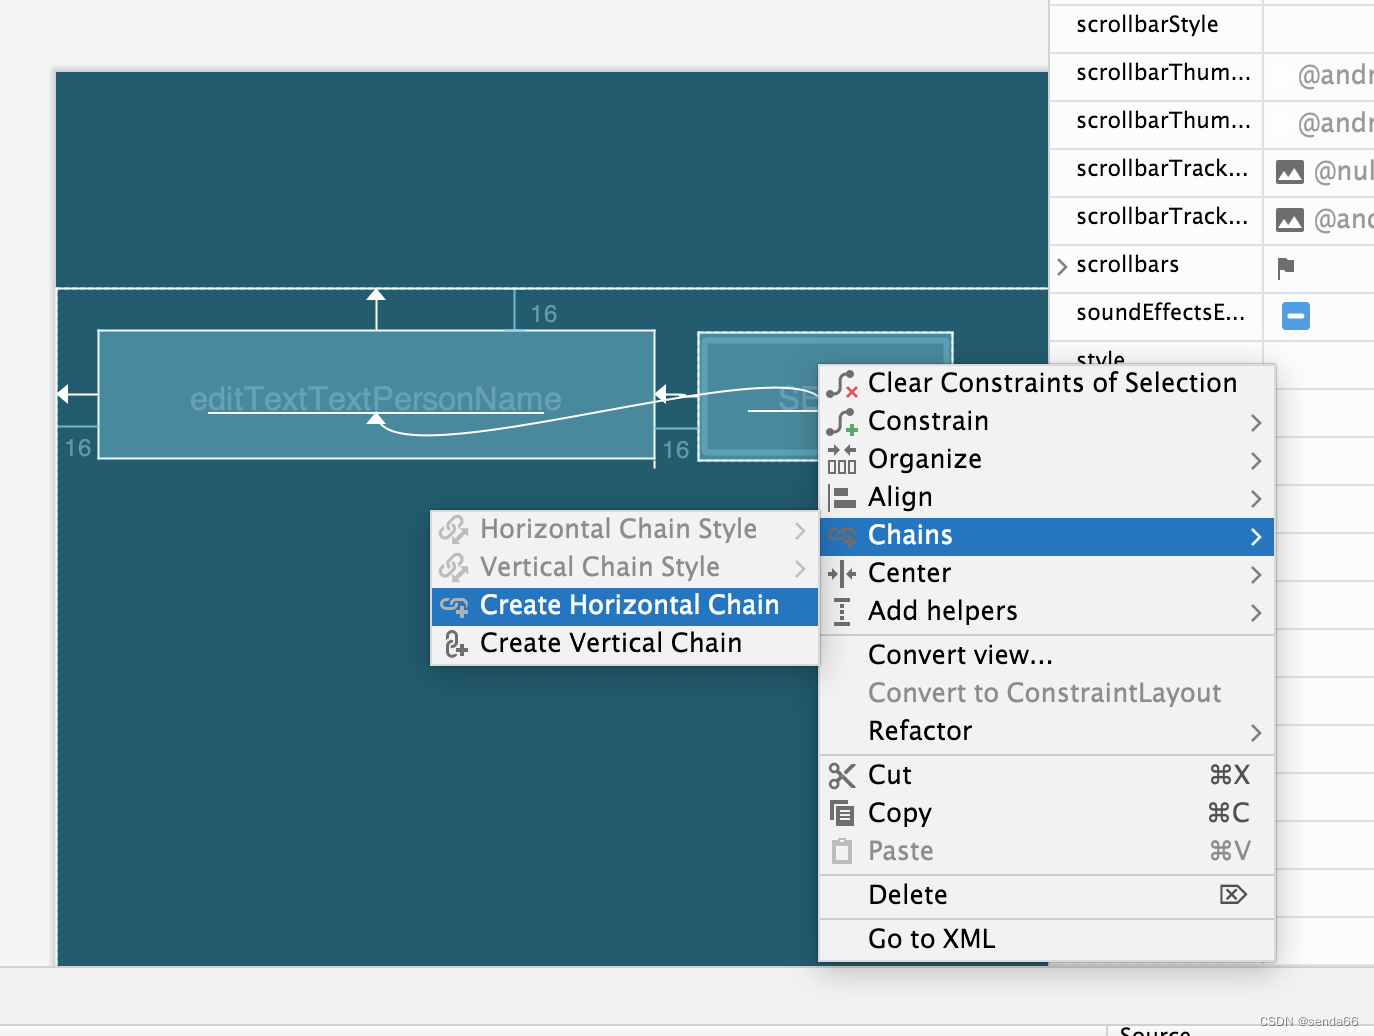
让文本框大小可灵活调整


最终的xml如下:
<?xml version="1.0" encoding="utf-8"?>
<androidx.constraintlayout.widget.ConstraintLayout xmlns:android="http://schemas.android.com/apk/res/android"
    xmlns:app="http://schemas.android.com/apk/res-auto"
    xmlns:tools="http://schemas.android.com/tools"
    android:layout_width="match_parent"
    android:layout_height="match_parent">

    <EditText
        android:id="@+id/editTextTextPersonName"
        android:layout_width="0dp"
        android:layout_height="wrap_content"
        android:layout_marginStart="16dp"
        android:layout_marginTop="16dp"
        android:autofillHints=""
        android:ems="10"
        android:hint="@string/edit_message"
        android:inputType="textPersonName"
        android:minHeight="48dp"
        app:layout_constraintEnd_toStartOf="@+id/button2"
        app:layout_constraintHorizontal_bias="0.5"
        app:layout_constraintStart_toStartOf="parent"
        app:layout_constraintTop_toTopOf="parent" />

    <Button
        android:id="@+id/button2"
        android:layout_width="95dp"
        android:layout_height="48dp"
        android:layout_marginStart="16dp"
        android:layout_marginEnd="16dp"
        android:text="@string/button_send"
        app:layout_constraintBaseline_toBaselineOf="@+id/editTextTextPersonName"
        app:layout_constraintEnd_toEndOf="parent"
        app:layout_constraintHorizontal_bias="0.5"
        app:layout_constraintStart_toEndOf="@+id/editTextTextPersonName" />
</androidx.constraintlayout.widget.ConstraintLayout>
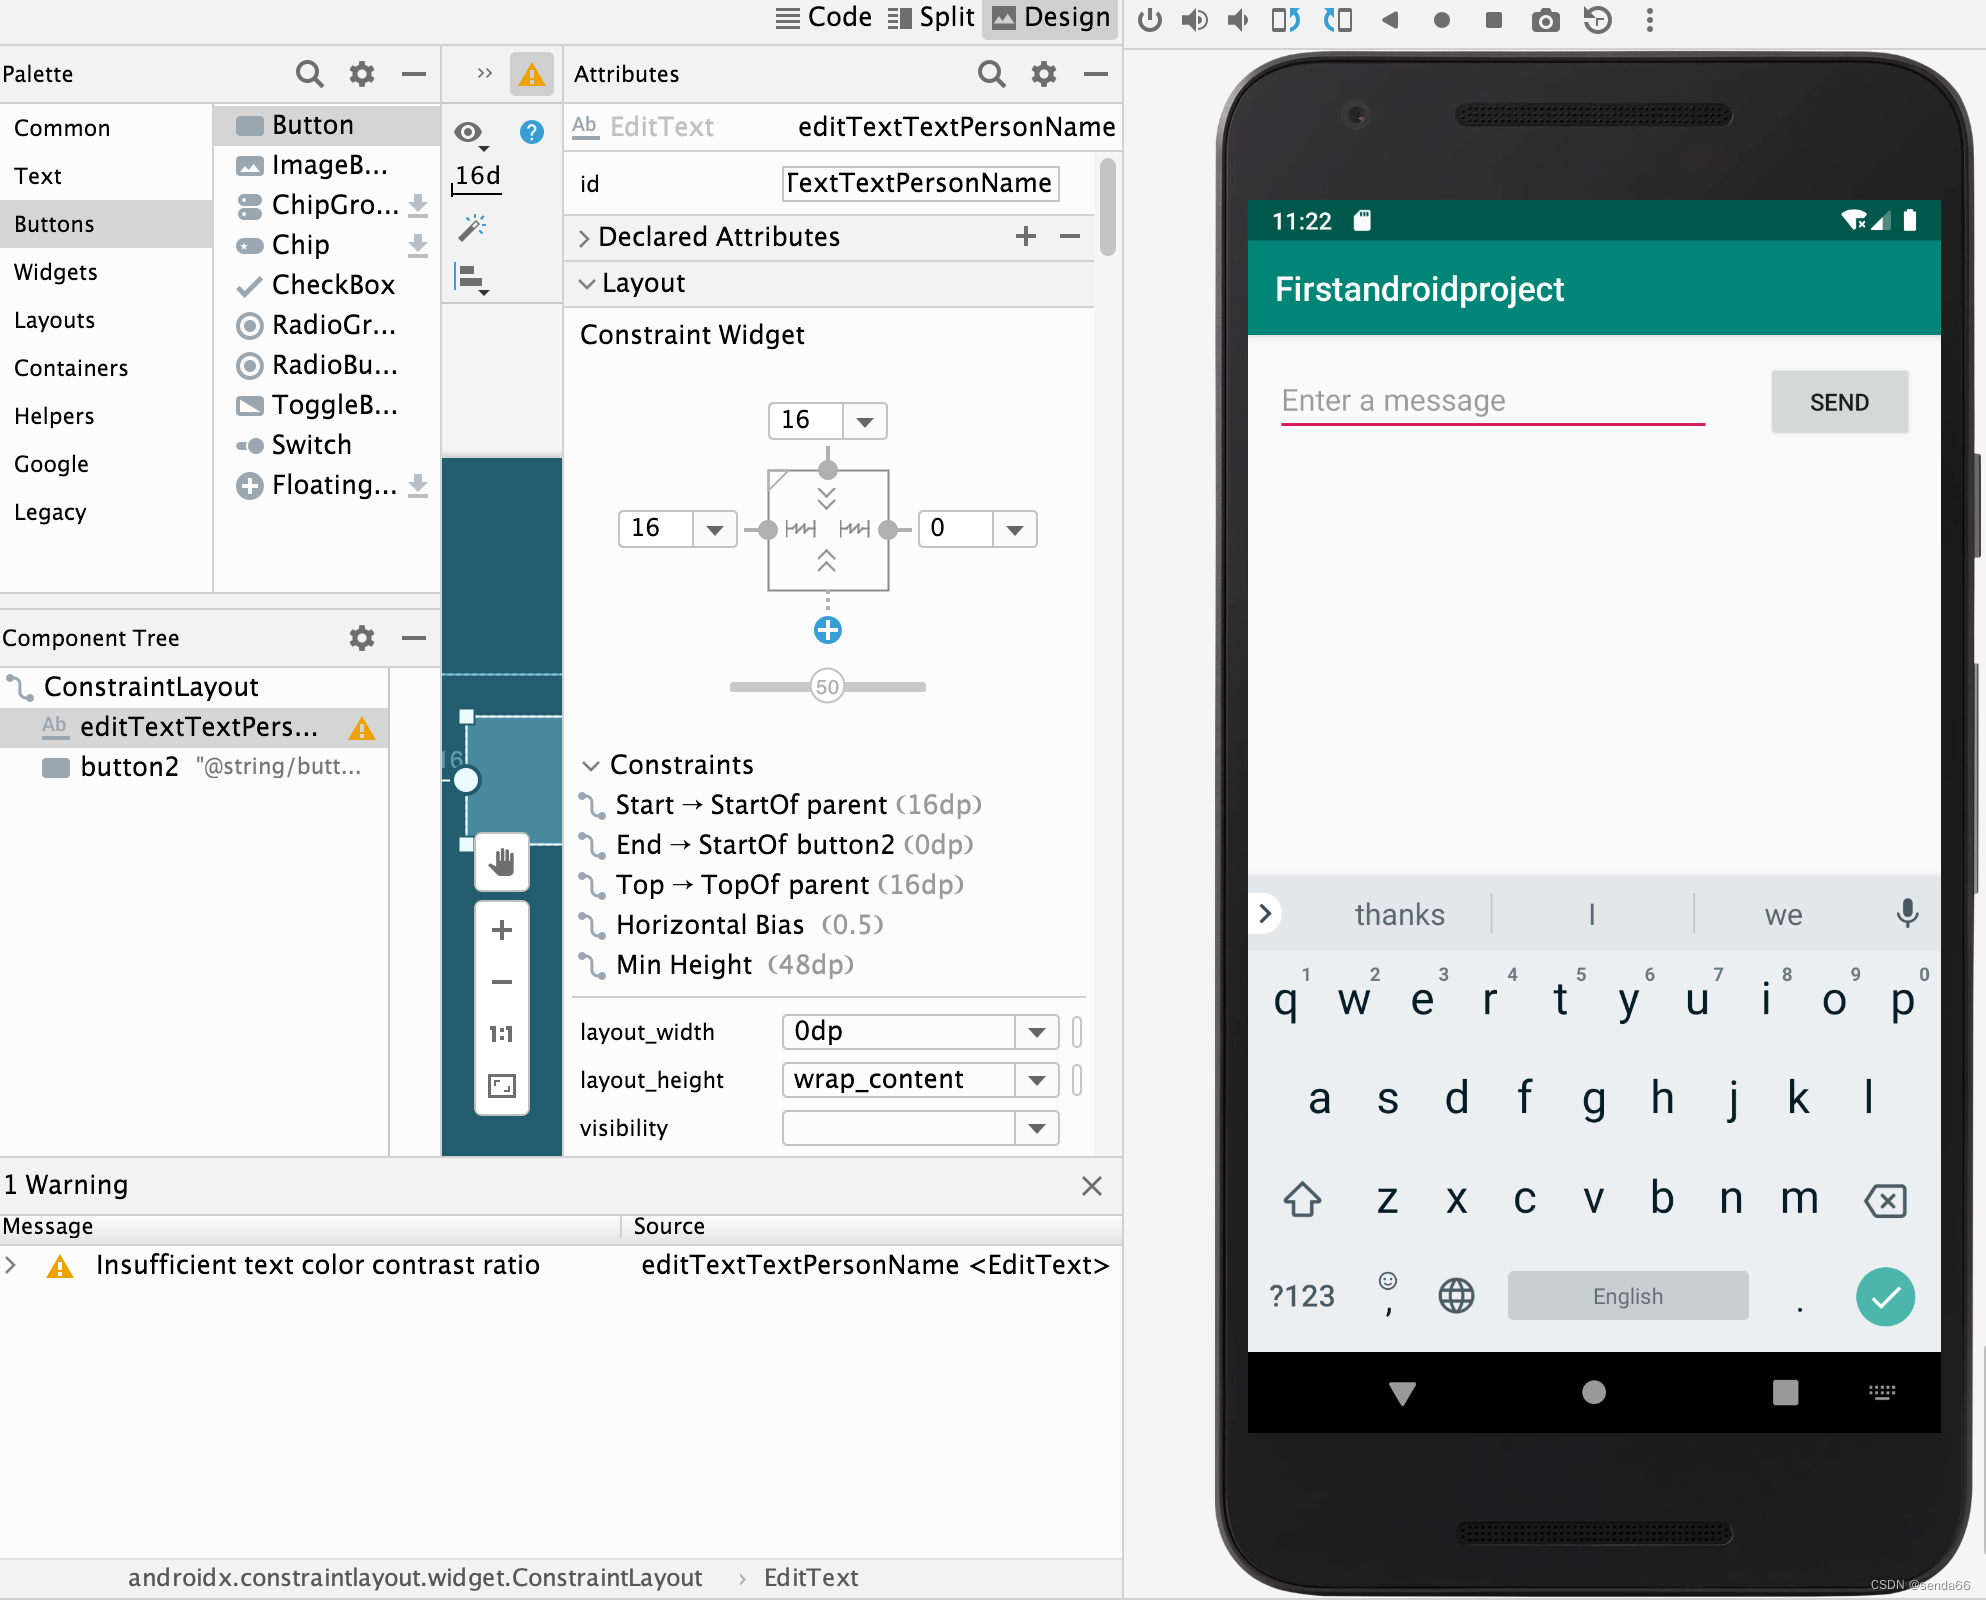
运行应用如下:
总结
文章的目的
为了让出学者了解Android开发UI的构成,初步了解什么是布局、什么是微件,以及如何使用编辑器编写一个布局和简单的界面,初步了解布局和微件之间的层次关系。