https://www.digitalocean.com/community/tutorials/how-to-create-an-ssl-certificate-on-nginx-for-ubuntu-14-04
How To Create an SSL Certificate on Nginx for Ubuntu 14.04
Introduction
TLS, or transport layer security, and its predecessor SSL, which stands for secure sockets layer, are web protocols used to wrap normal traffic in a protected, encrypted wrapper.
Using this technology, servers can send traffic safely between the server and the client without the concern that the messages will be intercepted and read by an outside party. The certificate system also assists users in verifying the identity of the sites that they are connecting with.
In this guide, we will show you how to set up a self-signed SSL certificate for use with an Nginx web server on an Ubuntu 14.04 server. A self-signed certificate will not validate the identity of your server for your users since it is not signed by one of their web browser's trusted certificate authorities, but it will allow you to encrypt communications with your web clients.
Prerequisites
To get started on this guide, you will need to set up some basic things on your server.
You should have a non-root user available who has sudo privileges. You can learn how to set up such a user account by following steps 1-4 in our initial server setup for Ubuntu 14.04.
After that, you'll also need to have the Nginx web server installed. If you would like to install an entire LEMP (Linux, Nginx, MySQL, PHP) stack on your server, you can follow our guide on setting up LEMP on Ubuntu 14.04.
If you just want the Nginx web server, you can instead just type:
sudo apt-get update
sudo apt-get install nginx
Step One — Create the SSL Certificate
We can start off by creating a directory that will be used to hold all of our SSL information. We should create this under the Nginx configuration directory:
sudo mkdir /etc/nginx/ssl
Now that we have a location to place our files, we can create the SSL key and certificate files in one motion by typing:
sudo openssl req -x509 -nodes -days 365 -newkey rsa:2048 -keyout /etc/nginx/ssl/nginx.key -out /etc/nginx/ssl/nginx.crt
You will be asked a series of questions. Before we go over that, let's take a look at what is happening in the command we are issuing:
- openssl: This is the basic command line tool for creating and managing OpenSSL certificates, keys, and other files.
- req: This subcommand specifies that we want to use X.509 certificate signing request (CSR) management. The "X.509" is a public key infrastructure standard that SSL and TLS adheres to for its key and certificate management. We want to create a new X.509 cert, so we are using this subcommand.
- -x509: This further modifies the previous subcommand by telling the utility that we want to make a self-signed certificate instead of generating a certificate signing request, as would normally happen.
- -nodes: This tells OpenSSL to skip the option to secure our certificate with a passphrase. We need Nginx to be able to read the file, without user intervention, when the server starts up. A passphrase would prevent this from happening because we would have to enter it after every restart.
- -days 365: This option sets the length of time that the certificate will be considered valid. We set it for one year here.
- -newkey rsa:2048: This specifies that we want to generate a new certificate and a new key at the same time. We did not create the key that is required to sign the certificate in a previous step, so we need to create it along with the certificate. The
rsa:2048portion tells it to make an RSA key that is 2048 bits long. - -keyout: This line tells OpenSSL where to place the generated private key file that we are creating.
- -out: This tells OpenSSL where to place the certificate that we are creating.
As we stated above, these options will create both a key file and a certificate. We will be asked a few questions about our server in order to embed the information correctly in the certificate.
Fill out the prompts appropriately. The most important line is the one that requests the Common Name (e.g. server FQDN or YOUR name). You need to enter the domain name that you want to be associated with your server. You can enter the public IP address instead if you do not have a domain name.
The entirety of the prompts will look something like this:
Country Name (2 letter code) [AU]:US
State or Province Name (full name) [Some-State]:New York
Locality Name (eg, city) []:New York City
Organization Name (eg, company) [Internet Widgits Pty Ltd]:Bouncy Castles, Inc.
Organizational Unit Name (eg, section) []:Ministry of Water Slides
Common Name (e.g. server FQDN or YOUR name) []:your_domain.com
Email Address []:admin@your_domain.com
Both of the files you created will be placed in the /etc/nginx/ssl directory.
Step Two — Configure Nginx to Use SSL
We have created our key and certificate files under the Nginx configuration directory. Now we just need to modify our Nginx configuration to take advantage of these by adjusting our server block files. You can learn more about Nginx server blocks in this article.
Nginx versions 0.7.14 and above (Ubuntu 14.04 ships with version 1.4.6) can enable SSL within the same server block as regular HTTP traffic. This allows us to configure access to the same site in a much more succinct manner.
Your server block may look something like this:
server {
        listen 80 default_server;
        listen [::]:80 default_server ipv6only=on;

        root /usr/share/nginx/html;
        index index.html index.htm;

        server_name your_domain.com;

        location / {
                try_files $uri $uri/ =404;
        }
}
The only thing we would need to do to get SSL working on this same server block, while still allowing regular HTTP connections, is add a these lines:
server {
        listen 80 default_server;
        listen [::]:80 default_server ipv6only=on;

        listen 443 ssl;

        root /usr/share/nginx/html;
        index index.html index.htm;

        server_name your_domain.com;
        ssl_certificate /etc/nginx/ssl/nginx.crt;
        ssl_certificate_key /etc/nginx/ssl/nginx.key;

        location / {
                try_files $uri $uri/ =404;
        }
}
When you are finished, save and close the file.
Now, all you have to do is restart Nginx to use your new settings:
sudo service nginx restart
This should reload your site configuration, now allowing it to respond to both HTTP and HTTPS (SSL) requests.
Step Three — Test your Setup
Your site should now have SSL functionality, but we should test it to make sure.
First, let's test to make sure we can still access the site with using normal HTTP. In your web browser, go to your server's domain name or IP address:
http://server_domain_or_IP
You should see your normal website. In my example, I'm just serving the default Nginx page:
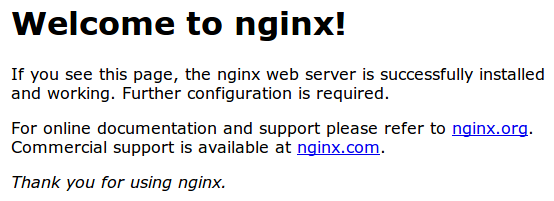
If you get this page, then your server is still handling HTTP requests correctly.
Now, we can check whether our server can use SSL to communicate. Do this by specifying the https protocol instead of the http protocol.
https://server_domain_or_IP
You will likely get a warning in your web browser that looks something like this:
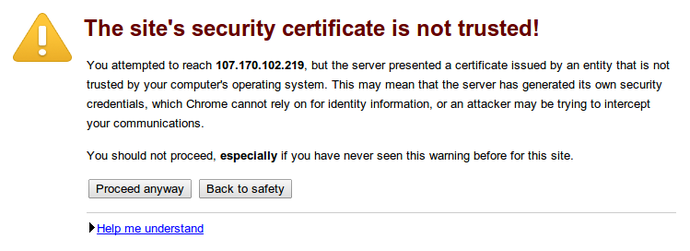
This is expected. It is telling you that it cannot verify the identity of the server you are trying to connect to because it isn't signed by a certificate authority that the browser has been configured to trust. Since we created a self-signed certificate, this makes perfect sense.
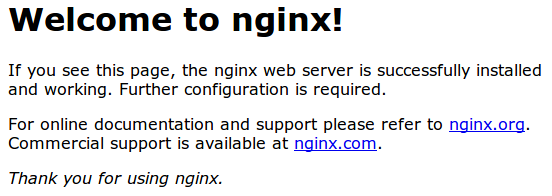
Click on "Proceed anyway", "Continue", or whatever similar option is available. You should see your site again:
Your browser may show the "https" crossed out in the address bar or a broken or crossed out "lock" icon. If you click on the lock icon, you can see some more information about the connection:
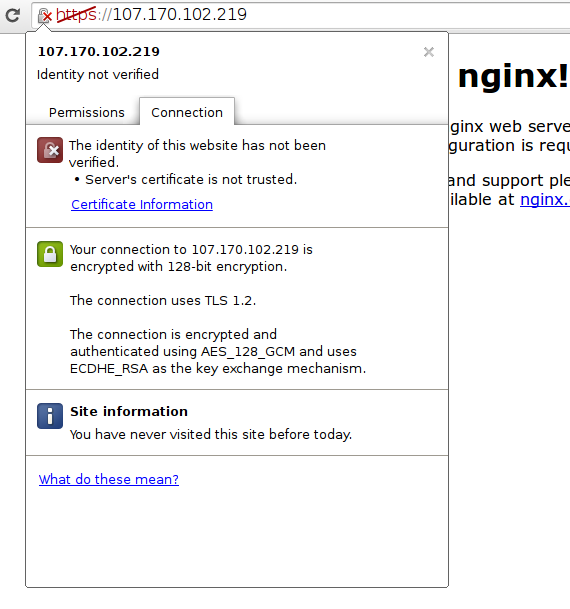
As you can see, the issue is only that the browser cannot verify the identity of the server because it isn't signed by a certificate authority that it is configured to trust. The middle section shows that the connection is encrypted, however, so we have achieved that goal.
Conclusion
You have configured your Nginx server to handle both HTTP and SSL requests. This will help you communicate with clients securely and avoid outside parties from being able to read your traffic.
If you are planning on using SSL for a public website, you should probably purchase an SSL certificate from a trusted certificate authority to prevent the scary warnings from being shown to each of your visitors.