本文实验的部分代码参考
Hyperspectral-Classification![]() https://github.com/eecn/Hyperspectral-Classification如果对dataloader的工作原理不太清楚可以参见
https://github.com/eecn/Hyperspectral-Classification如果对dataloader的工作原理不太清楚可以参见
一、原理解析
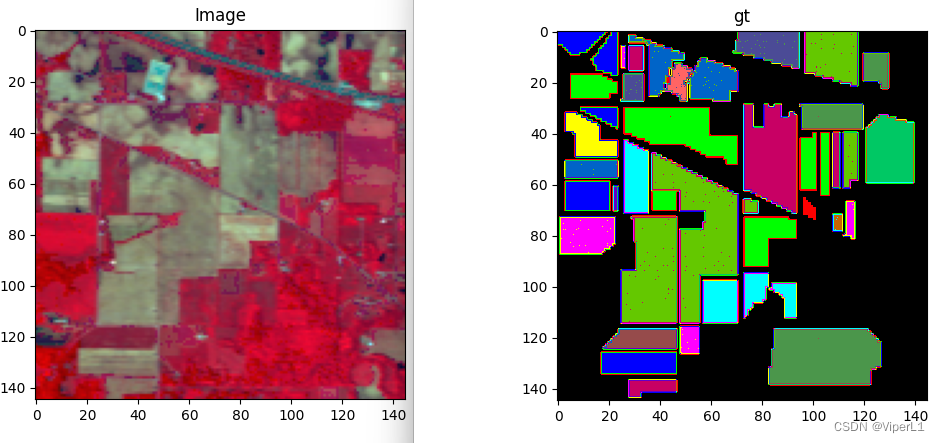
常见的高光谱数据维.mat格式,由数据文件和gt(ground-truth)文件组成,图像数据和标签数据。这里以印度松数据为例,图像数据的尺寸为145*145*200,标签数据的尺寸为145*145*1。
本文的实验代码主要思想如下:
①获取高光谱数据集和gt标签集
②按一定比例将数据集切割为训练集、测试集、验证集
③将训练集和验证集装入dataloader
二、获取高光谱数据
#  解析高光谱数据
def get_dataset(target_folder,dataset_name):
    palette = None

    #  拼接文件路径
    folder = target_folder + '/' + dataset_name

    #  打开数据文件
    if dataset_name == 'IndianPines':
        img = open_file(folder + '/Indian_pines_corrected.mat')
        img = img['indian_pines_corrected'] #选择矩阵

        rgb_bands = (43, 21, 11)  # AVIRIS sensor
        gt = open_file(folder + '/Indian_pines_gt.mat')['indian_pines_gt']
        #  设置标签
        label_values = ["Undefined", "Alfalfa", "Corn-notill", "Corn-mintill",
                        "Corn", "Grass-pasture", "Grass-trees",
                        "Grass-pasture-mowed", "Hay-windrowed", "Oats",
                        "Soybean-notill", "Soybean-mintill", "Soybean-clean",
                        "Wheat", "Woods", "Buildings-Grass-Trees-Drives",
                        "Stone-Steel-Towers"]
        ignored_labels = [0]

    #  设置背景标签
    nan_mask = np.isnan(img.sum(axis=-1))
    img[nan_mask] = 0
    gt[nan_mask] = 0
    ignored_labels.append(0)

    #  数据格式转换
    ignored_labels = list(set(ignored_labels))
    img = np.asarray(img, dtype='float32')
    data = img.reshape(np.prod(img.shape[:2]), np.prod(img.shape[2:]))
    data  = preprocessing.minmax_scale(data)
    img = data.reshape(img.shape)
    return img, gt, label_values, ignored_labels, rgb_bands, palette
这里仅适配了印度松,有其他数据集需求的可以自行修改内部的参数。
该函数会从.mat文件中获取图像文件和gt文件,并将相关信息打包返回,其中,读取文件的函数为:open_file(.)
#  打开高光谱文件
def open_file(dataset):
    _, ext = os.path.splitext(dataset)
    ext = ext.lower()
    # 根据格式不同打开文件
    if ext == '.mat':
        return io.loadmat(dataset)
    elif ext == '.tif' or ext == '.tiff':
        return imageio.imread(dataset)
    elif ext == '.hdr':
        img = spectral.open_image(dataset)
        return img.load()
    else:
        raise ValueError("Unknown file format: {}".format(ext))
在主函数中调用如下:
DataSetName = 'IndianPines'
target_folder = 'Dataset'

img, gt, LABEL_VALUES, IGNORED_LABELS, RGB_BANDS,
            palette = get_dataset(target_folder,DataSetName)
二、DataSet类
在使用DataSet类加载数据集前,我们需要将数据集进行随机划分,这里直接调用了原项目的sample_gt(.)函数对gt进行分割。
def sample_gt(gt, train_size, mode='random'):
    indices = np.nonzero(gt)
    X = list(zip(*indices)) # x,y features
    y = gt[indices].ravel() # classes
    train_gt = np.zeros_like(gt)
    test_gt = np.zeros_like(gt)
    if train_size > 1:
       train_size = int(train_size)

    if mode == 'random':
       train_indices, test_indices = sklearn.model_selection.train_test_split(X, train_size=train_size, stratify=y)
       train_indices = [list(t) for t in zip(*train_indices)]
       test_indices = [list(t) for t in zip(*test_indices)]
       train_gt[tuple(train_indices)] = gt[tuple(train_indices)]
       test_gt[tuple(test_indices)] = gt[tuple(test_indices)]
    elif mode == 'fixed':
       print("Sampling {} with train size = {}".format(mode, train_size))
       train_indices, test_indices = [], []
       for c in np.unique(gt):
           if c == 0:
              continue
           indices = np.nonzero(gt == c)
           X = list(zip(*indices)) # x,y features

           train, test = sklearn.model_selection.train_test_split(X, train_size=train_size)
           train_indices += train
           test_indices += test
       train_indices = [list(t) for t in zip(*train_indices)]
       test_indices = [list(t) for t in zip(*test_indices)]
       train_gt[train_indices] = gt[train_indices]
       test_gt[test_indices] = gt[test_indices]

    elif mode == 'disjoint':
        train_gt = np.copy(gt)
        test_gt = np.copy(gt)
        for c in np.unique(gt):
            mask = gt == c
            for x in range(gt.shape[0]):
                first_half_count = np.count_nonzero(mask[:x, :])
                second_half_count = np.count_nonzero(mask[x:, :])
                try:
                    ratio = first_half_count / second_half_count
                    if ratio > 0.9 * train_size and ratio < 1.1 * train_size:
                        break
                except ZeroDivisionError:
                    continue
            mask[:x, :] = 0
            train_gt[mask] = 0

        test_gt[train_gt > 0] = 0
    else:
        raise ValueError("{} sampling is not implemented yet.".format(mode))
    return train_gt, test_gt
主函数调用如下:
#--训练集占比
SAMPLE_PERCENTAGE = 0.1

#--数据集划分
train_gt, test_gt = sample_gt(gt,SAMPLE_PERCENTAGE,mode='random')
train_gt, val_gt = sample_gt(train_gt, 0.95, mode='random')
随后将划分好的数据集放入DataSet类中,DataSet类共计9个参数,分别代表:
data-高光谱数据集;
gt-标签集;
patch_size-邻居个数(即感受野,影响提取的每个块大小);
ignored_labels - 需要忽略的类别;
flip_augmentation - 是否使用随机折叠;
radiation_augmentation - 是否使用随机噪声;
mixture_augmentation - 是否对光谱进行随机混合
center_pixel - 设置为True以仅考虑中心像素的标签
supervision - 训练模式,可选'full'-全监督 或 'semi'-半监督
DataSet如下:
#  高光谱dataset类
class HyperX(torch.utils.data.Dataset):

    def __init__(self,data,gt,patch_size,ignored_labels,flip_augmentation,radiation_augmentation,mixture_augmentation,center_pixel,supervision):
        super().__init__()
        self.data = data
        self.label = gt
        self.patch_size = patch_size
        self.ignored_labels = ignored_labels
        self.flip_augmentation = flip_augmentation
        self.radiation_augmentation = radiation_augmentation
        self.mixture_augmentation = mixture_augmentation
        self.center_pixel = center_pixel
        supervision = supervision

        # 监督模式
        if supervision == 'full':
            mask = np.ones_like(gt)
            for l in self.ignored_labels:
                mask[gt == l] = 0
        #  半监督模式
        elif supervision == 'semi':
            mask = np.ones_like(gt)

        x_pos, y_pos = np.nonzero(mask)
        p = self.patch_size // 2
        self.indices = np.array([(x,y) for x,y in zip(x_pos, y_pos) if x > p-1 and x < data.shape[0] - p and y > p-1 and y < data.shape[1] - p])
        self.labels = [self.label[x,y] for x,y in self.indices]
        np.random.shuffle(self.indices)

    @staticmethod   #静态方法
    def flip(*arrays):
        horizontal = np.random.random() > 0.5
        vertical = np.random.random() > 0.5
        if horizontal:
            arrays = [np.fliplr(arr) for arr in arrays]
        if vertical:
            arrays = [np.flipud(arr) for arr in arrays]
        return arrays

    @staticmethod
    def radiation_noise(data, alpha_range=(0.9, 1.1), beta=1/25):
        alpha = np.random.uniform(*alpha_range)
        noise = np.random.normal(loc=0., scale=1.0, size=data.shape)
        return alpha * data + beta * noise

    def mixture_noise(self, data, label, beta=1/25):
        alpha1, alpha2 = np.random.uniform(0.01, 1., size=2)
        noise = np.random.normal(loc=0., scale=1.0, size=data.shape)
        data2 = np.zeros_like(data)
        for  idx, value in np.ndenumerate(label):
            if value not in self.ignored_labels:
                l_indices = np.nonzero(self.labels == value)[0]
                l_indice = np.random.choice(l_indices)
                assert(self.labels[l_indice] == value)
                x, y = self.indices[l_indice]
                data2[idx] = self.data[x,y]
        return (alpha1 * data + alpha2 * data2) / (alpha1 + alpha2) + beta * noise

    #  获得长度数据
    def __len__(self):
        return len(self.indices)

    #  获得元素
    def __getitem__(self, i):
        x,y = self.indices[i]
        x1,y1 = x-self.patch_size // 2, y-self.patch_size // 2
        x2,y2 = x1+self.patch_size, y1+self.patch_size

        data = self.data[x1:x2,y1:y2]
        label = self.label[x1:x2,y1:y2]

        #  选择数据增强模式
        if self.flip_augmentation and self.patch_size > 1:  #
            data, label = self.flip(data, label)
        if self.radiation_augmentation and np.random.random() < 0.1:
                data = self.radiation_noise(data)
        if self.mixture_augmentation and np.random.random() < 0.2:
                data = self.mixture_noise(data, label)

        #  mat->np->tensor
        data = np.asarray(np.copy(data).transpose((2, 0, 1)), dtype='float32')
        label = np.asarray(np.copy(label), dtype='int64')

        data = torch.from_numpy(data)
        label = torch.from_numpy(label)

        #  提取中心标签
        if self.center_pixel and self.patch_size > 1:
            label = label[self.patch_size // 2, self.patch_size // 2]

        #  使用不可见光谱时删除未使用部分
        elif self.patch_size == 1:
            data = data[:, 0, 0]
            label = label[0, 0]

        #  进行3D卷积时增加一维
        if self.patch_size > 1:
            data = data.unsqueeze(0)

        return data,label
dataset_collate:
def HyperX_collate(batch):
    datas = []
    labels = []
    for data, label in batch:
        datas.append(data)
        labels.append(label)
    datas = np.array(datas)
    labels = np.array(labels)
    return datas, labels
在主函数中调用如下:
# 调用dataset
train_dataset = HyperX(img, train_gt,patch_size,IGNORED_LABELS,True,True,True,True,'full')
val_dataset = HyperX(img, val_gt,patch_size,IGNORED_LABELS,True,True,True,True,'full')
# 调用dataloader
train_loader = DataLoader(train_dataset,batch_size=batch_size,pin_memory=True,shuffle=True)
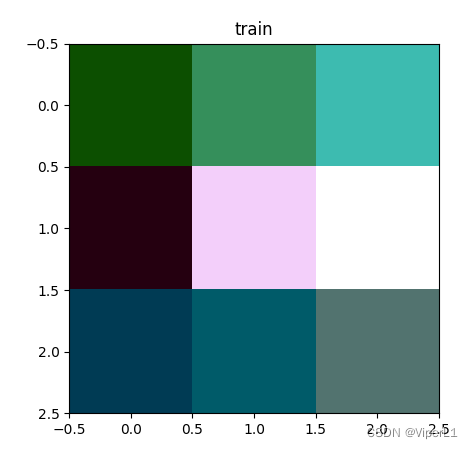
val_loader = DataLoader(val_dataset,batch_size=batch_size,pin_memory=True,shuffle=True)三、数据展示
#  可视化展示
for item in train_dataset:
    img,label = item
    img = torch.squeeze(img,0)  #除去第0维度
    img = img.permute(1,2,0)    #调整通道位置
    print('tensor尺寸:{}'.format(img.shape))
    img = img.numpy()           #转换为numpy
    view1 = spy.imshow(data=img, bands=RGB_BANDS, title="train")  # 图像显示
print('标签编号:{}'.format(label.numpy()))邻居个数patch_size设置为9,运行后得到如下结果:
![]()
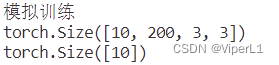
四、模拟训练
    print("模拟训练")
    for epoch in range(3):
        step = 0
        for data in train_loader:
            imgs, labels = data
            print(imgs.shape)
            print(labels.shape)
            img = imgs[0]
            img = torch.squeeze(img,0).permute(1,2,0).numpy()  #通道调整和numpy转换
            view1 = spy.imshow(data=img, bands=RGB_BANDS, title="train")  # 图像显示
        step=step+1
    input("按任意键继续")
测试结果如下: