一、CentOS系统相关文件配置
1、防火墙配置
1)关闭防火墙
[root@cdh-cm-v01 ~]# systemctl stop firewalld
[root@cdh-cm-v01 ~]# systemctl disable firewalld

2)不关闭防火墙,需要开放给外网的 主机-端口
ipa xxx.xxx.xxx.xxx 18080
ClouderaManager xxx.xxx.xxx.xxx 7180,7182,7183
Master1 xxx.xxx.xxx.xxx 16010,9870,8889,8888,25010,8088,19888
Master2 xxx.xxx.xxx.xxx 16010,9870,8889,8888,25020,8088,18088
Client1 xxx.xxx.xxx.xxx 18443
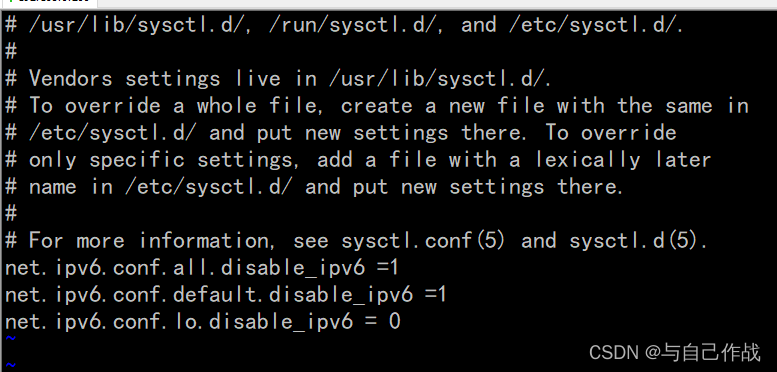
2、禁用IP6
- 命令
vi /etc/sysctl.conf
- 添加内容
net.ipv6.conf.all.disable_ipv6 =1
net.ipv6.conf.default.disable_ipv6 =1
net.ipv6.conf.lo.disable_ipv6 = 0
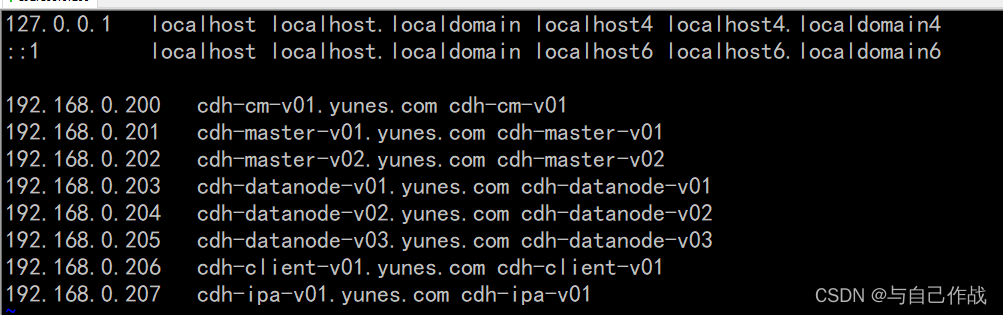
3、hosts修改
vi /etc/hosts
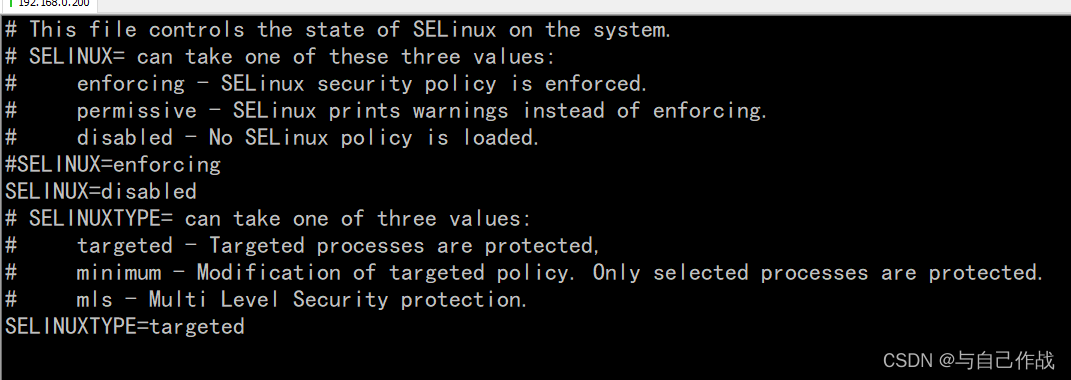
4、关闭SELINUX
vi /etc/selinux/config
SELINUX=disabled

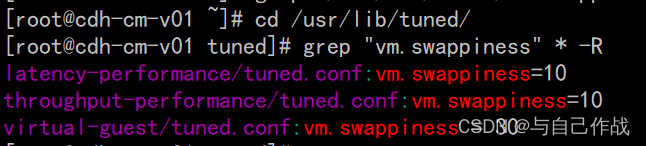
5、修改swappiness参数
1)配置参数
cd /usr/lib/tuned/
grep “vm.swappiness” * -R
latency-performance/tuned.conf:vm.swappiness=10
throughput-performance/tuned.conf:vm.swappiness=10
virtual-guest/tuned.conf:vm.swappiness = 30
2)如果服务器内存充足,建议禁用 swappiness ( cloudera 建议最大值 10)
vi /etc/sysctl.conf
vm.swappiness = 10
sysctl -p
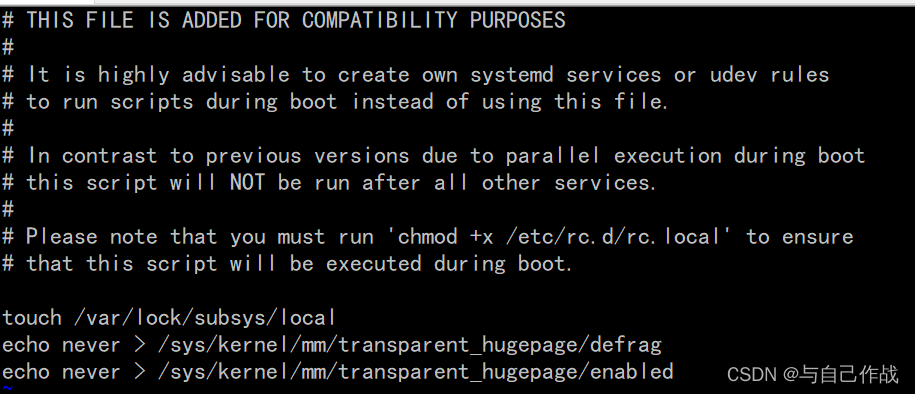
6、禁用透明页
- 不开启透明大页面会报错
已启用透明大页面压缩,可能会导致重大性能问题。请运行“echo never > /sys/kernel/mm/transparent_hugepage/defrag”和“echo never > /sys/kernel/mm/transparent_hugepage/enabled”以禁用此设置,然后将同一命令添加到 /etc/rc.local 等初始化脚本中,以便在系统重启时予以设置。以下主机将受到影响:
vi /etc/rc.local
echo never > /sys/kernel/mm/transparent_hugepage/defrag
echo never > /sys/kernel/mm/transparent_hugepage/enabled
7、格式化硬盘
1)安装fdisk
yum install util-linux
2)创建分区
fdisk /dev/vdb

[root@cdh-cm-v01 ~]# fdisk /dev/sdb
Welcome to fdisk (util-linux 2.23.2).

Changes will remain in memory only, until you decide to write them.
Be careful before using the write command.

Device does not contain a recognized partition table
Building a new DOS disklabel with disk identifier 0x4cb309d1.

Command (m for help): n
Partition type:
   p   primary (0 primary, 0 extended, 4 free)
   e   extended
Select (default p): p
Partition number (1-4, default 1): 1
First sector (2048-209715199, default 2048): 2048
Last sector, +sectors or +size{

    K,M,G} (2048-209715199, default 209715199):
Using default value 209715199
Partition 1 of type Linux and of size 100 GiB is set

Command (m for help): w
The partition table has been altered!

Calling ioctl() to re-read partition table.
Syncing disks.
3)格式化硬盘
mkfs -t ext4 /dev/sdb1

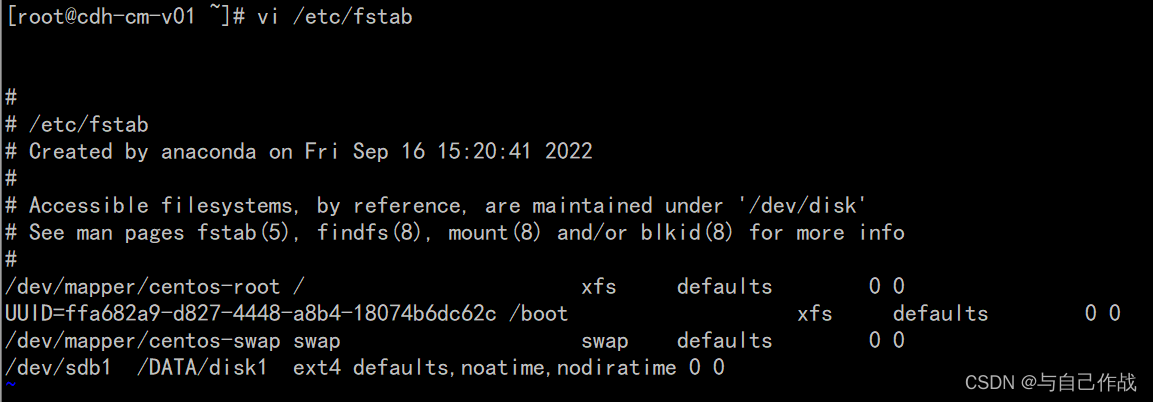
4)挂在硬盘
[root@cdh-cm-v01 ~]# mkdir -p /DATA/disk1
[root@cdh-cm-v01 ~]# vi /etc/fstab
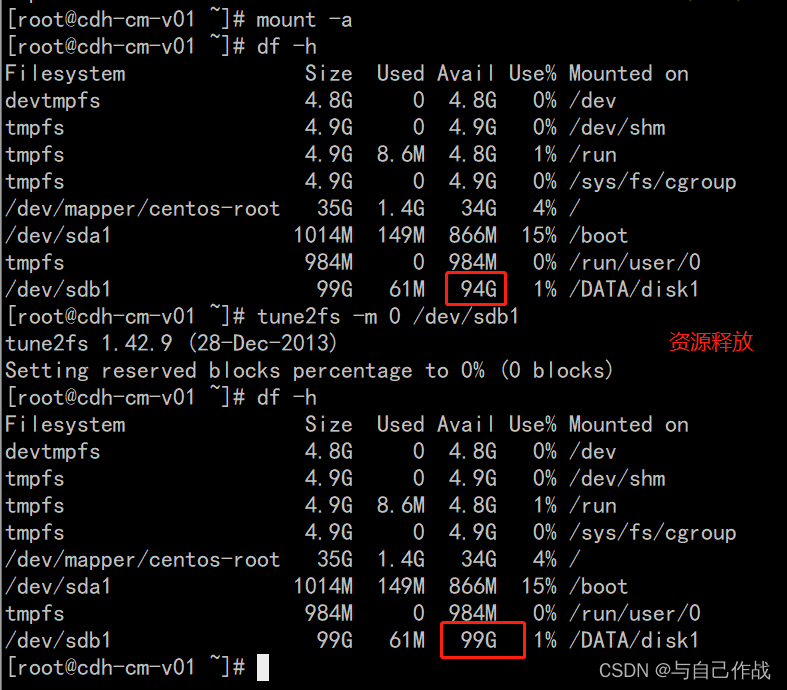
[root@cdh-cm-v01 ~]# mount -a
[root@cdh-cm-v01 ~]# tune2fs -m 0 /dev/sdb1
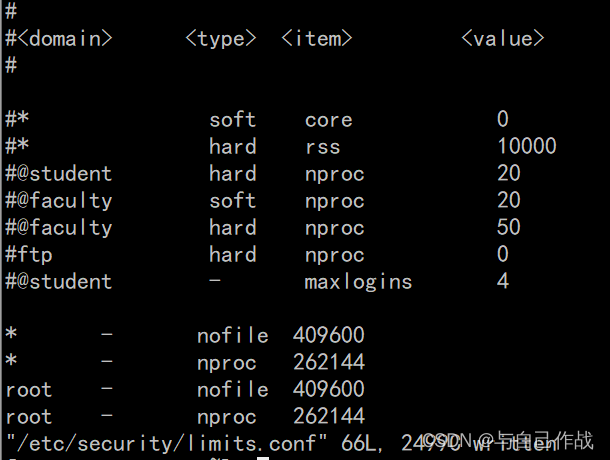
8、修改limits参数
vi /etc/security/limits.conf
*       -       nofile  409600
*       -       nproc   262144
root    -       nofile  409600
root    -       nproc   262144
二、yum安装相关文件(默认所有服务器都要安装)
1、install pip
1)执行命令
yum -y install epel-release
yum -y install python-pip
pip --version  # 查看pip版本
pip install --upgrade pip
2)pip install --upgrade pip 报错解决方法
看这篇文章解决:https://tianlingqun.blog.csdn.net/article/details/120693237
Collecting pip
  Downloading https://files.pythonhosted.org/packages/4b/30/e15b806597e67057e07a5acdc135216ccbf76a5f1681a324533b61066b0b/pip-22.2.2.tar.gz (2.0MB)
    100% |████████████████████████████████| 2.0MB 592kB/s
    Complete output from command python setup.py egg_info:
    Traceback (most recent call last):
      File "<string>", line 1, in <module>
      File "/tmp/pip-build-_o3pqZ/pip/setup.py", line 7
        def read(rel_path: str) -> str:
                         ^
    SyntaxError: invalid syntax

    ----------------------------------------
Command "python setup.py egg_info" failed with error code 1 in /tmp/pip-build-_o3pqZ/pip/
You are using pip version 8.1.2, however version 22.2.2 is available.
You should consider upgrading via the 'pip install --upgrade pip' command.
2、安装 httpd (cdh-cm-v01服务器上执行)
1)安装httpd
yum -y install httpd createrepo
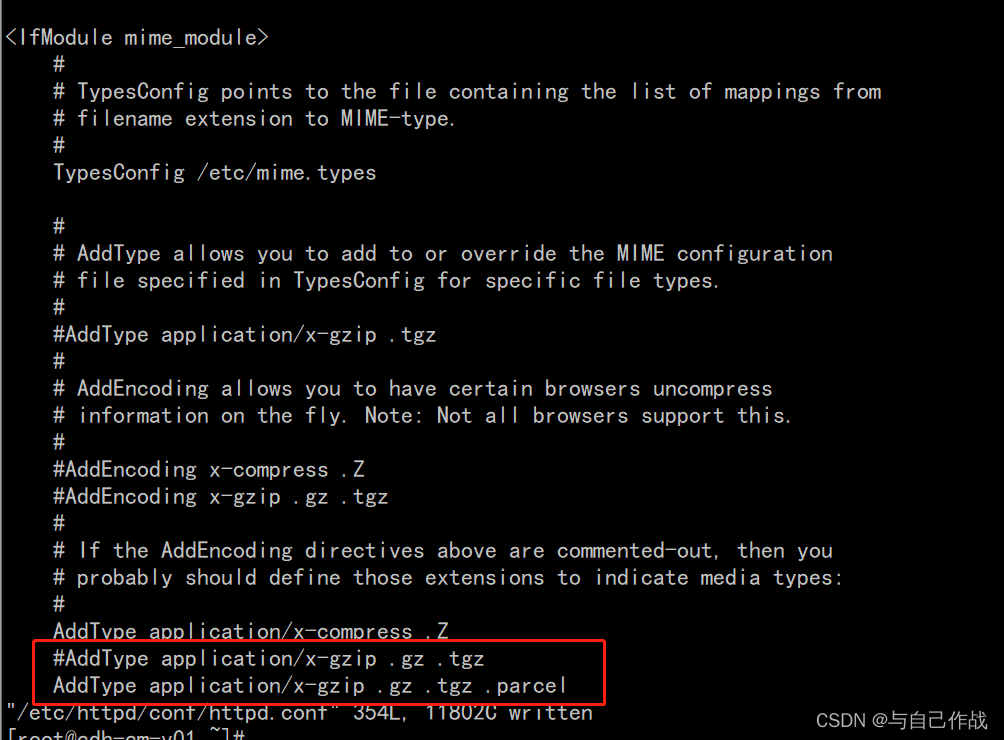
2)修改httpd配置文件
vi /etc/httpd/conf/httpd.conf
3)修改内容
AddType application/x-gzip .gz .tgz .parcel
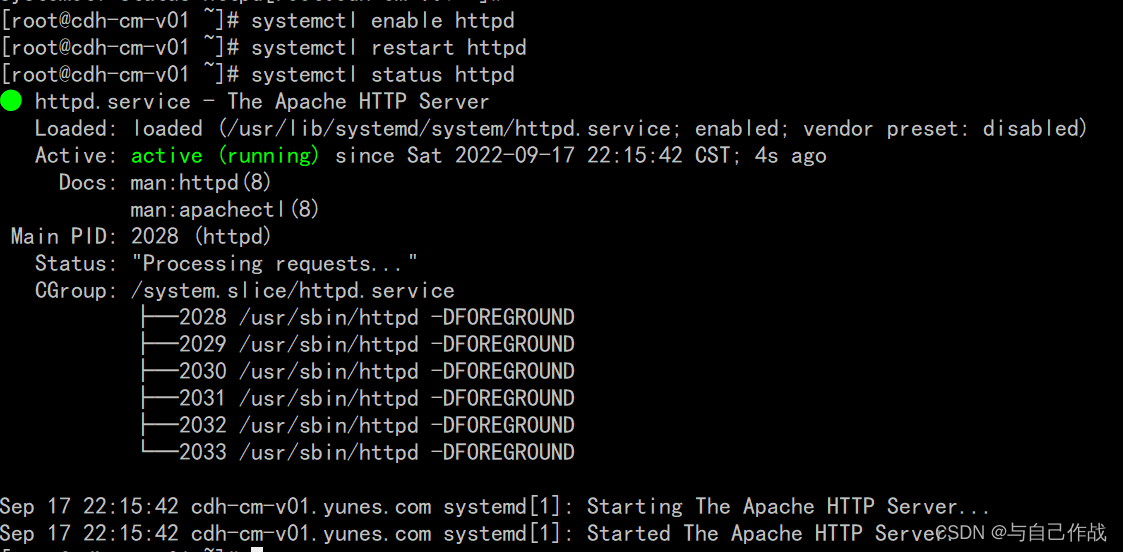
4)设置开机启动
[root@cdh-cm-v01 ~]# systemctl enable httpd
[root@cdh-cm-v01 ~]# systemctl restart httpd
[root@cdh-cm-v01 ~]# systemctl status httpd
三、免密访问
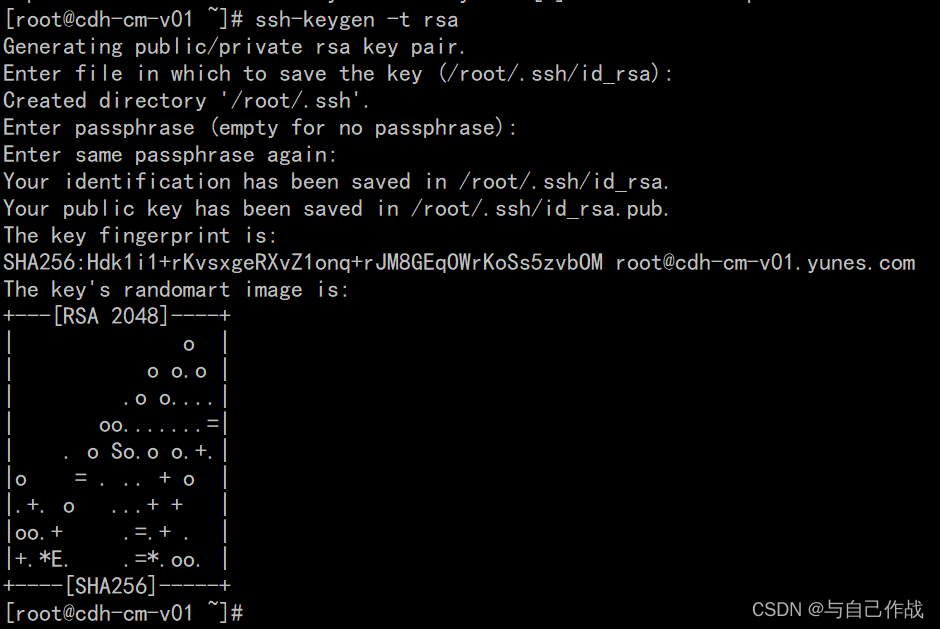
1、生成秘钥key
- 直接默认回车
[root@cdh-cm-v01 ~]# ssh-keygen -t rsa
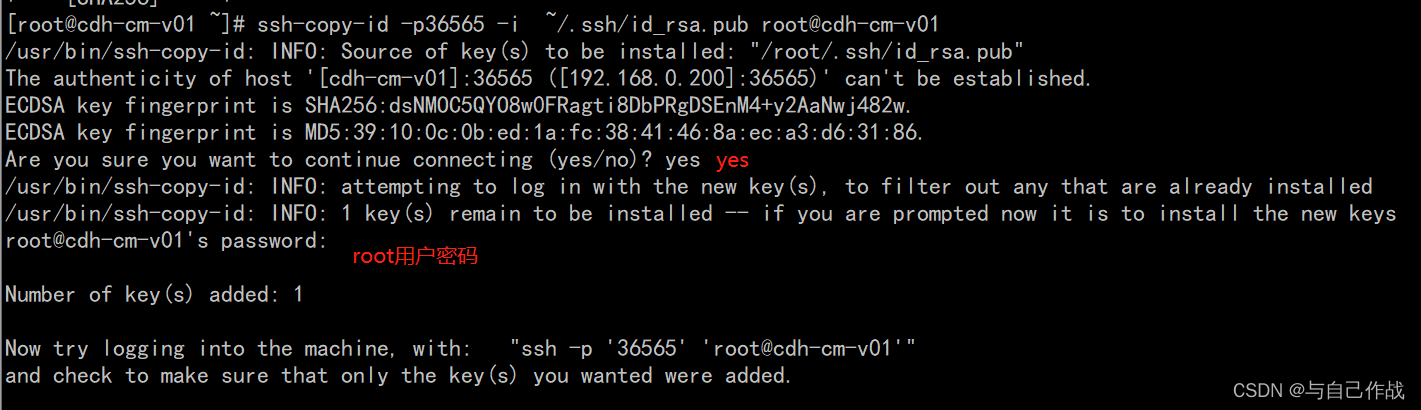
2、配置免密
[root@cdh-cm-v01 ~]# ssh-copy-id -p36565 -i ~/.ssh/id_rsa.pub root@cdh-cm-v01
3、查看免密配置文件
[root@cdh-cm-v01 ~]# cd .ssh/
[root@cdh-cm-v01 .ssh]# ls
authorized_keys  id_rsa  id_rsa.pub  known_hosts
[root@cdh-cm-v01 .ssh]# cat authorized_keys
ssh-rsa AAAAB3NzaC1yc2EAAAADAQABAAABAQCpTrsAmWst7IDw5TEkiBxEzLUK4Hzx8XJNt7uX6w0JkvafQkjN4UATck0E3B3XWTtUXrymXCwDKFMgi9rooSSMaE9xRPx9DjXLej8VbYc8JmxkJwkrHb1kj/fR+v/tohPPfMWuOyyyMrQkTLQ5W5oSA2SypDekYi/bIpzpm7Zifz7wUqGQi4bCO1wnVZT2IgtBCI3YP9agASiyBOYTNAU5jcbFOXvO1XoQSgsYpihlgox6LtBgXopusIvoJuzRXFogUeHrFCZBkdYKT6XtmLrAdbxeP7IlRWXiFOLZYwieAfUQloL82kOwvQNppX9IMJJ+oCmUFBymZq3cUHCRrSLV root@cdh-cm-v01.yunes.com

4、分发到各个节点
ssh-copy-id -p36565 -i  ~/.ssh/id_rsa.pub root@cdh-cm-v01
ssh-copy-id -p36565 -i  ~/.ssh/id_rsa.pub root@cdh-master-v01
ssh-copy-id -p36565 -i  ~/.ssh/id_rsa.pub root@cdh-master-v02
ssh-copy-id -p36565 -i  ~/.ssh/id_rsa.pub root@cdh-client-v01
ssh-copy-id -p36565 -i  ~/.ssh/id_rsa.pub root@cdh-datanode-v01
ssh-copy-id -p36565 -i  ~/.ssh/id_rsa.pub root@cdh-datanode-v02
ssh-copy-id -p36565 -i  ~/.ssh/id_rsa.pub root@cdh-datanode-v03
ssh-copy-id -p36565 -i ~/.ssh/id_rsa.pub root@cdh-cm-v01
ssh-copy-id -p36565 -i ~/.ssh/id_rsa.pub root@cdh-master-v01
ssh-copy-id -p36565 -i ~/.ssh/id_rsa.pub root@cdh-master-v02
ssh-copy-id -p36565 -i ~/.ssh/id_rsa.pub root@cdh-client-v01
ssh-copy-id -p36565 -i ~/.ssh/id_rsa.pub root@cdh-datanode-v01
ssh-copy-id -p36565 -i ~/.ssh/id_rsa.pub root@cdh-datanode-v02
ssh-copy-id -p36565 -i ~/.ssh/id_rsa.pub root@cdh-datanode-v03
5、测试免密
- 修改过端口号,免密时候要加上端口号
[root@cdh-cm-v01 .ssh]# ssh -p36565 cdh-cm-v01
Last login: Sat Sep 17 19:21:31 2022 from 192.168.0.128
