spring要与freemarker整合的话,需要两个包,一个是freemarker的jar包,另一个是spring-context-support的jar包。所以我们需要在taotao-item-web工程中确保对这两个jar包的依赖,如下所示。
<dependency>
    <groupId>org.springframework</groupId>
    <artifactId>spring-context-support</artifactId>
</dependency>
<dependency>
    <groupId>org.freemarker</groupId>
    <artifactId>freemarker</artifactId>
</dependency>
我们的taotao-item-web工程已经添加过对这两个jar包的依赖了,因此我们不必关心这步了。
下面我们就来整合spring与freemarker,在taotao-item-web工程的src/main/resources资源目录中的spring目录下新建一个整合spring的配置文件,即springmvc-freemarker.xml文件,在该文件中添加关于freemarker的配置,如下图所示。
为方便大家复制,现将springmvc-freemarker.xml文件的内容给出。
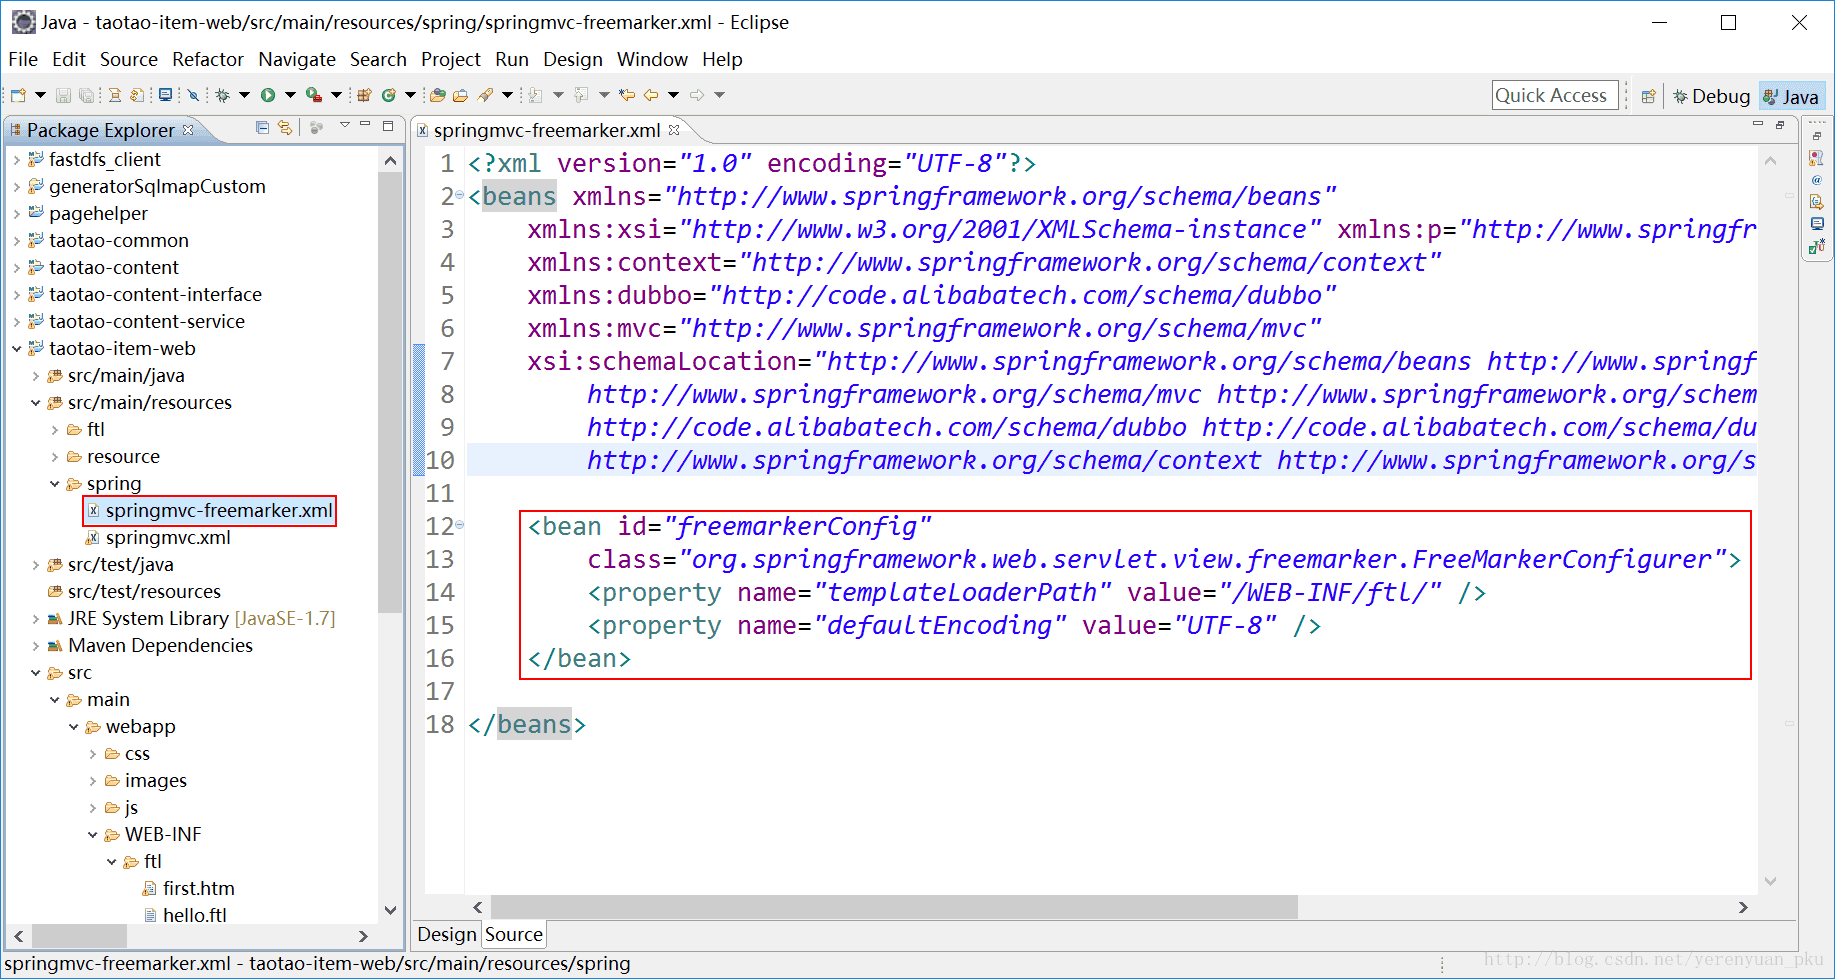
<?xml version="1.0" encoding="UTF-8"?>
<beans xmlns="http://www.springframework.org/schema/beans"
xmlns:xsi="http://www.w3.org/2001/XMLSchema-instance" xmlns:p="http://www.springframework.org/schema/p"
xmlns:context="http://www.springframework.org/schema/context"
xmlns:dubbo="http://code.alibabatech.com/schema/dubbo"
xmlns:mvc="http://www.springframework.org/schema/mvc"
xsi:schemaLocation="http://www.springframework.org/schema/beans http://www.springframework.org/schema/beans/spring-beans-4.2.xsd
http://www.springframework.org/schema/mvc http://www.springframework.org/schema/mvc/spring-mvc-4.2.xsd
http://code.alibabatech.com/schema/dubbo http://code.alibabatech.com/schema/dubbo/dubbo.xsd
http://www.springframework.org/schema/context http://www.springframework.org/schema/context/spring-context-4.2.xsd">
<bean id="freemarkerConfig"
class="org.springframework.web.servlet.view.freemarker.FreeMarkerConfigurer">
<property name="templateLoaderPath" value="/WEB-INF/ftl/" />
<property name="defaultEncoding" value="UTF-8" />
</bean>
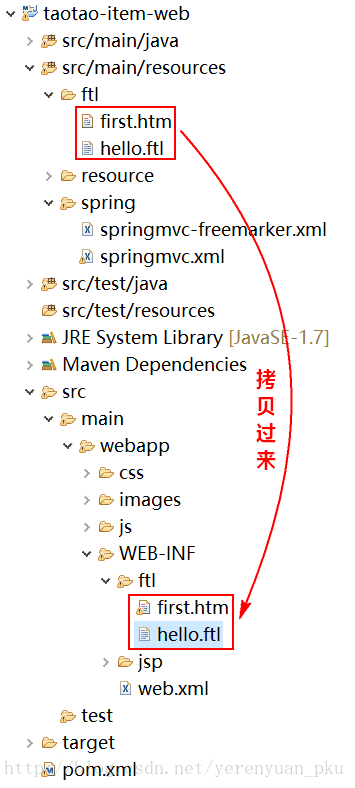
</beans>从上面的配置文件中可知,我们还须在WEB-INF目录下新建一个ftl目录,并将src/main/resources资源目录中的ftl目录下的两个模板文件拷贝过来。
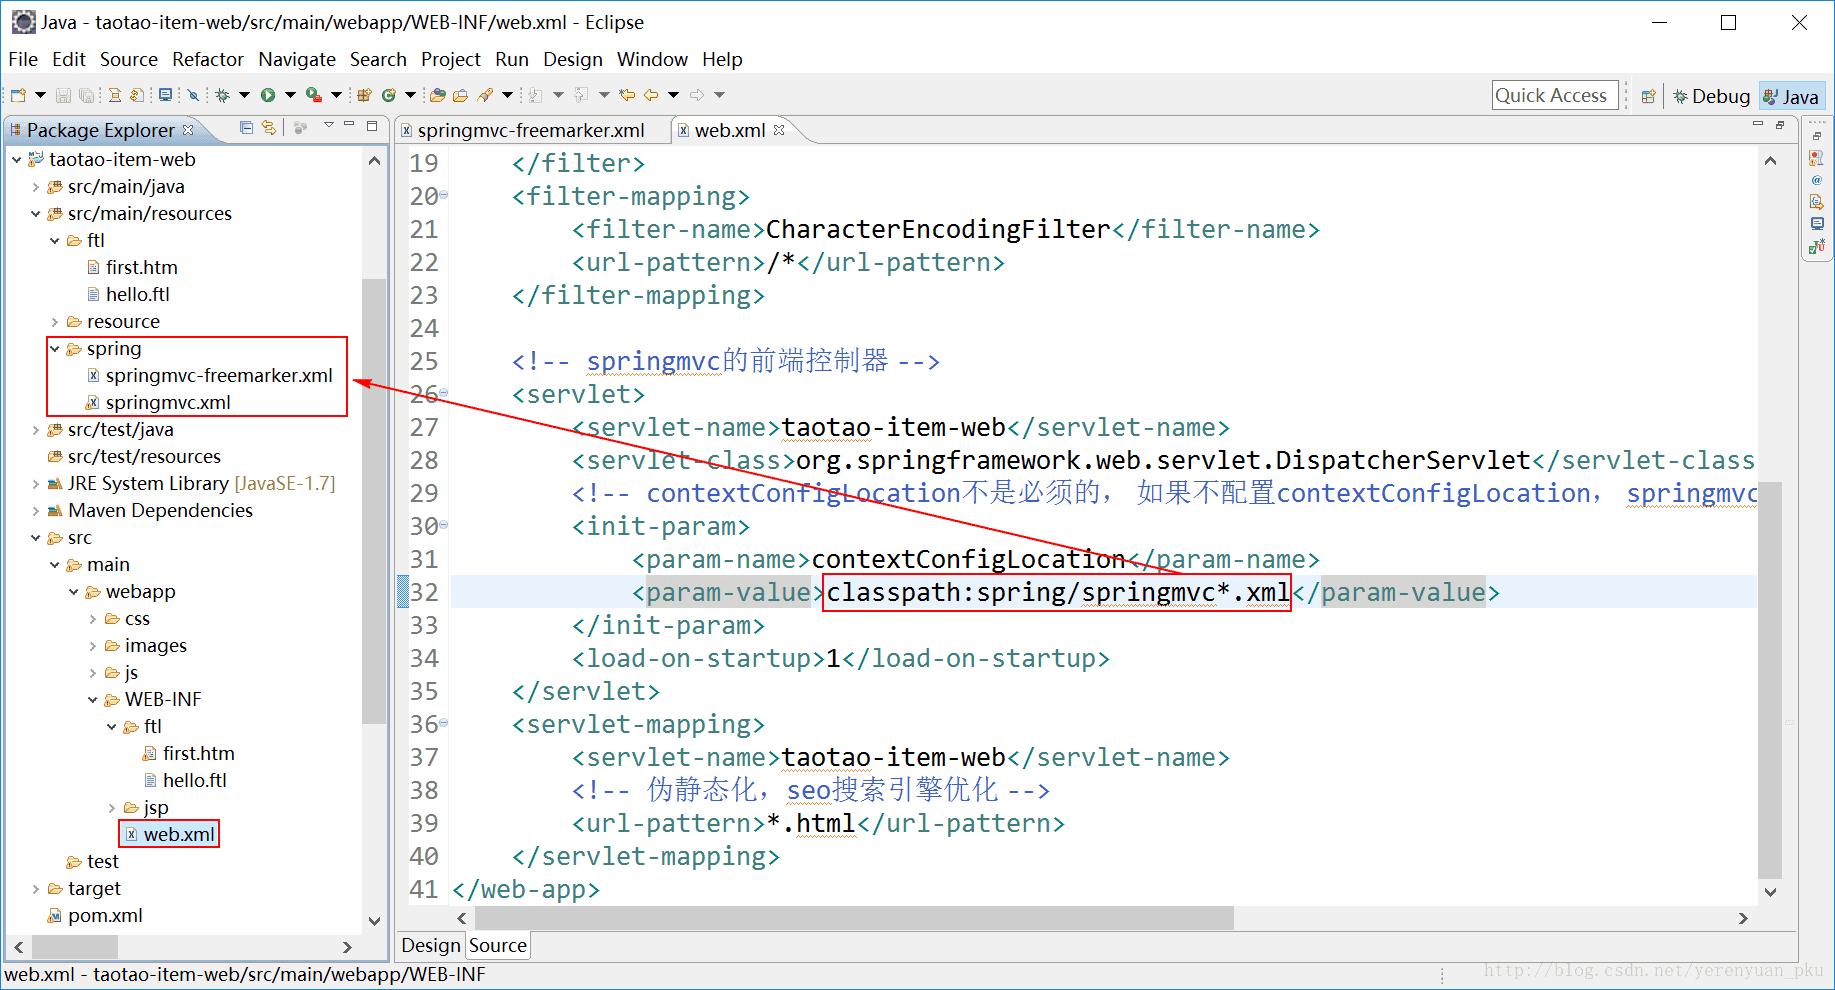
除此之外,要保证springmvc-freemarker.xml文件能被Spring容器加载到,我们还得修改一下web.xml文件,如下图所示,将classpath:spring/springmvc.xml改为classpath:spring/springmvc*.xml。
下面在taotao-item-web工程下的com.taotao.item.controller包中编写一个FreemarkerController类,如下图所示。
为方便大家复制,现将FreemarkerController类的代码给出。
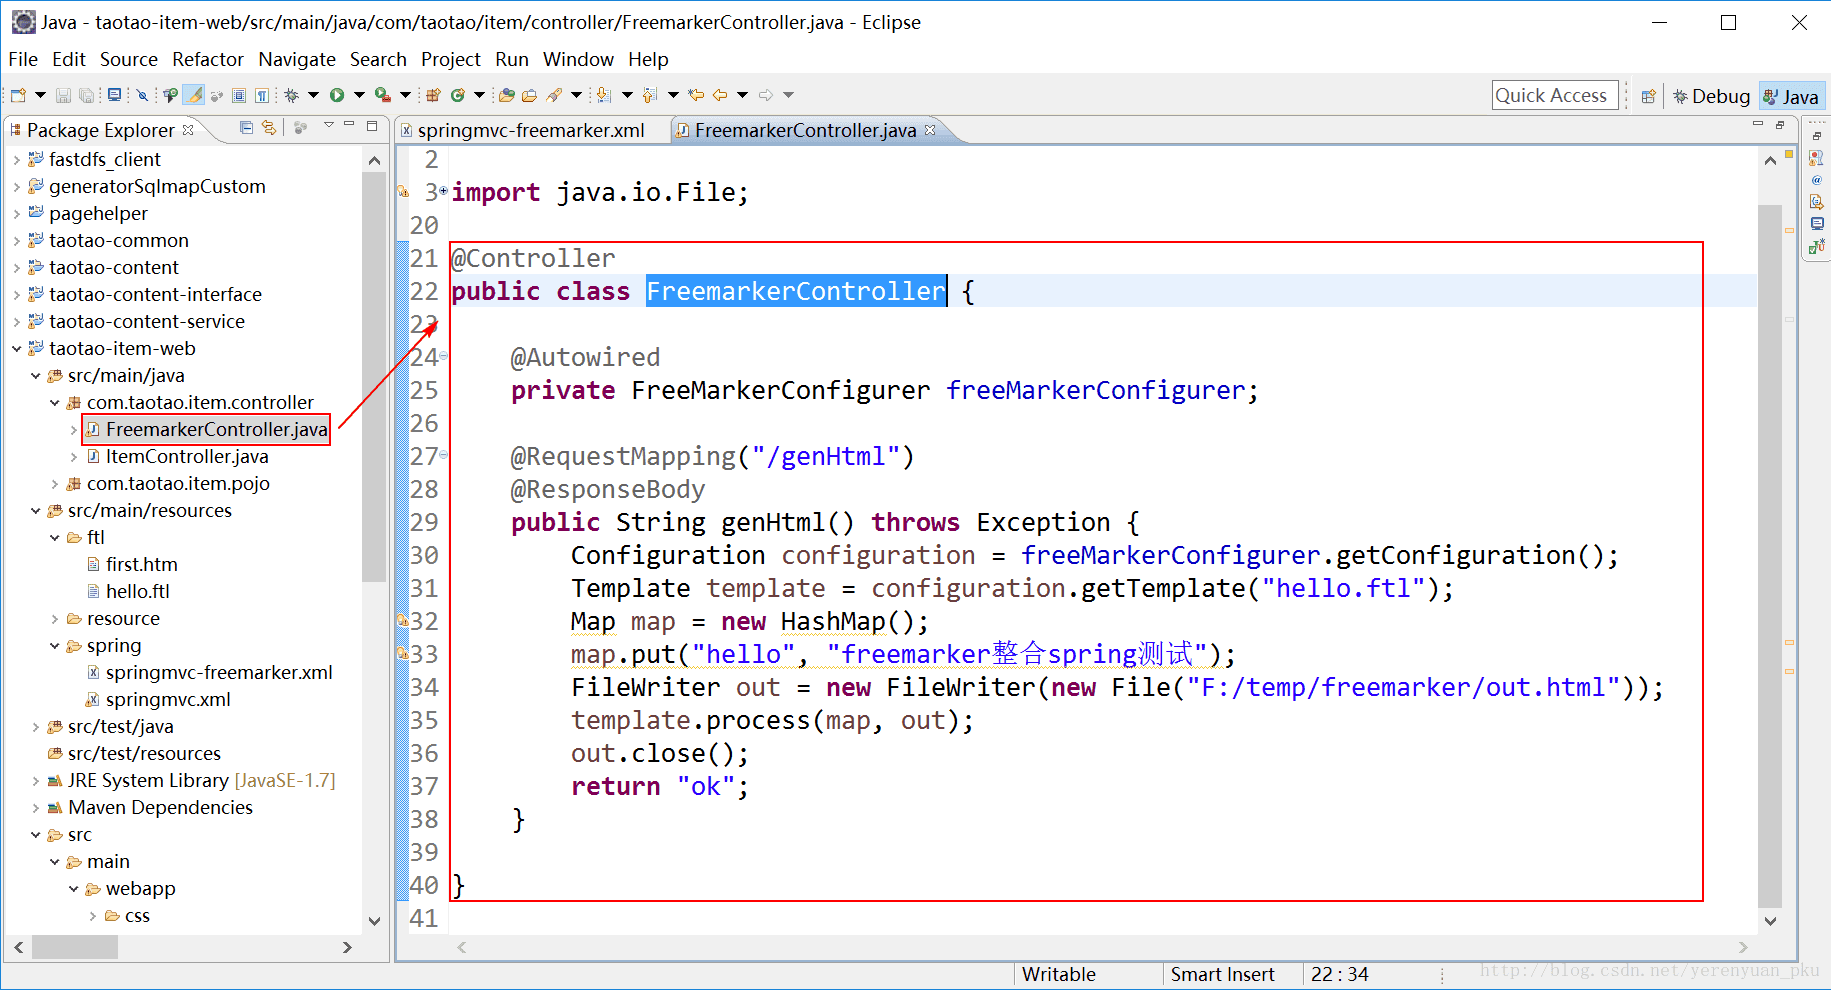
@Controller
public class FreemarkerController {

    @Autowired
    private FreeMarkerConfigurer freeMarkerConfigurer;

    @RequestMapping("/genHtml")
    @ResponseBody
    public String genHtml() throws Exception {
        Configuration configuration = freeMarkerConfigurer.getConfiguration();
        Template template = configuration.getTemplate("hello.ftl");
        Map map = new HashMap();
        map.put("hello", "freemarker整合spring测试");
        FileWriter out = new FileWriter(new File("F:/temp/freemarker/out.html"));
        template.process(map, out);
        out.close();
        return "ok";
    }

}
写完了代码,现在我们测试一下spring与freemarker是否整合成功,我们先启动各个服务,zookeeper服务、image服务、Solr服务(我这里用的是集群版)、Redis服务(我这里用的是单机版)、ActiveMQ服务。然后依次启动taotao-manager、taotao-content、taotao-search、taotao-manager-web、taotao-portal-web、 taotao-search-web、taotao-item-web这7个工程。都启动成功后,我们在浏览器地址栏中输入http://localhost:8086/genHtml.html并回车,即可看到页面输出”ok”,如下图所示。
我们到F盘的temp/freemarker目录下查看生成的out.html页面,双击它在浏览器中查看,可以看到”freemarker整合spring测试”。
以上就是freemarker与spring的简单整合。

