Spring超详细学习笔记
引言:
本文主要分享了有关Spring的相关知识,包括:技术的演变、Spring框架的基本常识、使用IDEA创建Maven项目并配置Spring环境、模拟了Spring处理业务的场景、spring的管理对象、控制反转以及依赖注入、两种注入的方式、面向切面编程(AOP的相关概念、代理模式的介绍、静态代理、JDK基于接口的动态代理、cglib动态代理、Spring实现动态代理)、Spring通知类、使用AOP实现(使用注解@Component和不使用注解)、AOP的扩展(Java对象的织入_注解)、Spring中常用的注解以及spring-test的单元测试;
文章目录
- Spring超详细学习笔记
- 1. 技术演变线路(单一项目)
- 2. Spring框架
- 3. 使用IDEA创建Maven项目并配置Spring环境
- 4. 没有Spring时处理业务场景
- 5. 使用Spring处理业务场景
- 6. spring管理对象
- 7. Spring核心_IOC(控制反转)&DI(依赖注入)
- 8. 注入的方式
- 9. 面向切面编程(AOP)
- 10. AOP扩展
- 11. 关于注解开发
- 12. 基于spring-test测试单元
1. 技术演变线路(单一项目)
VCM(Model View Controller)模型、视图、控制器
- HTML/JSP + JSP/Servlet + JavaBean + JDBC + DB
- HTML(AJAX、JSTL) + Servlet + JavaBean + JDBC + DB
各层间紧密耦合,分工难,后期维护较困难;高级开发者使用设计模式解决耦合问题(工厂设计模式);
SSM(SpringMVC Spring MyBatis)
- HTML/JSP + SpringMVC(只开发JavaBean) + JavaBean + MyBatis + DB
用IOC/DI技术
2. Spring框架
2.1 Spring常识
传统开发遇到问题:
- jdbc复杂,重复代码多、开发困难 —> Mybatis
- 层间耦合 —> 工厂模式解决—>代码量激增,后期维护量大---->spring
JDBC开发效率比较低,但是是访问数据库最快的方式
2.2 Spring概念
Spring是一个项目管理框架,同时也是一套解决方案;
SSH :struts +spring +Hibernate (几乎不操作数据库)
SSM: springmvc +Spring + Mybatis
官网地址:https://spring.io/
包下载地址:https://repo.spring.io/release/org/springframework/spring/
2.3 Spring常用组件
以下groupId都是org.springframework;
| artifactId | explain |
|---|---|
| spring-beans | Beans支持(包含Groovy) |
| spring-aop | 基于代理的AOP支持 |
| spring-aspects | 基于AspectJ的切面 |
| spring-context | 应用上下文运行时(调度远程抽象) |
| spring-context-support | 支持将常见的第三方类库集成到Spring应用上下文 |
| spring-core | 其他模块所依赖的核心模块 |
| spring-expression | Spring的表达式语言 |
| spring-test | 单元测试和集成测试支持组件 |
| spring-tx | 事务基础组件(对DAO的支持以及JCA的集成) |
| spring-web | web支持包(客户端以及web的远程调用) |
| spring-webmvc | REST web服务以及web应用的MVC实现 |
3. 使用IDEA创建Maven项目并配置Spring环境
3.1 新建项目
3.2 选择对应的Maven项目

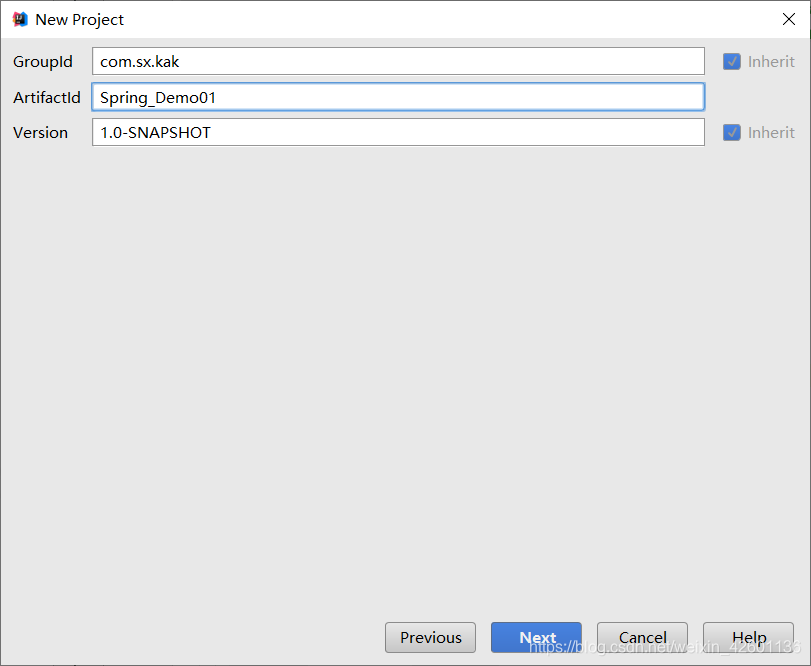
3.3 GAV坐标


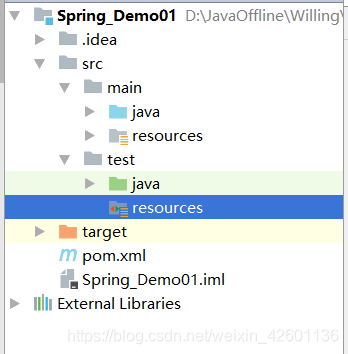
3.4 补齐对应的文件
3.5 Spring环境搭建_在pom.xml中引入依赖
Spring框架中包含多个模块,每个模块都有其作用,因此需要结合需求引入相关的jar包
- jar包彼此存在依赖,只需引入外层jar包,可由Maven自动导入相关的jar到项目中;

  <dependencies>
    <dependency>
      <groupId>junit</groupId>
      <artifactId>junit</artifactId>
      <version>4.12</version>
      <scope>test</scope>
    </dependency>
    <!--添加Spring依赖-->
    <dependency>
      <groupId>org.springframework</groupId>
      <artifactId>spring-context</artifactId>
      <version>4.3.6.RELEASE</version>
    </dependency>
  </dependencies>
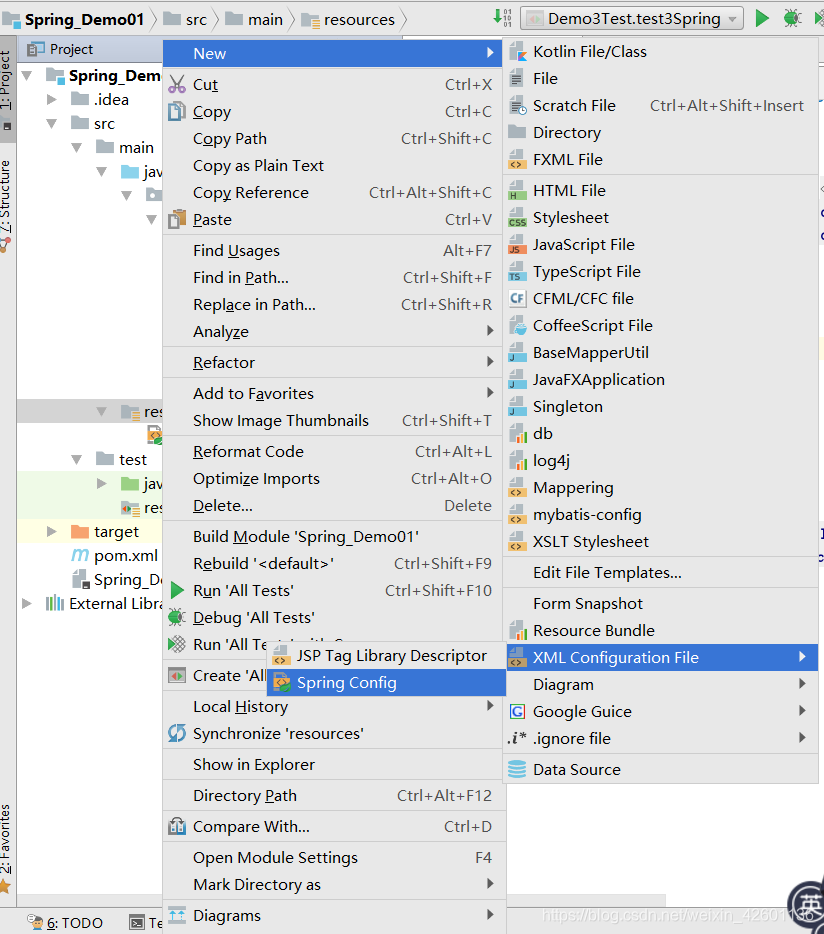
3.5 创建Spring配置文件
引入依赖后在对应位置加入Spring的配置文件
<?xml version="1.0" encoding="UTF-8" ?>
<beans xmlns="http://www.springframework.org/schema/beans"
       xmlns:xsi="http://www.w3.org/2001/XMLSchema-instance"
       xsi:schemaLocation="http://www.springframework.org/schema/beans
      http://www.springframework.org/schema/beans/spring-beans.xsd">

    </beans>
4. 没有Spring时处理业务场景
4.1 传统做法
定义StuDao接口,并添加实现类;
定义service层(CustomerServlet),调用业务层(StuDao)
在controller层调用Service层的方法
4.1.1 Dao层
//StuDao接口
public interface StuDao {


    public String sayHello(String name);
}

//StuDaoImpl接口实现类
public class StuDaoImpl implements StuDao{


    @Override
    public String sayHello(String name) {


        String str = "HelloKak" + name;
        return str;
    }
}
4.1.2 Service层
//调用业务层
public interface CustomService {


    public String helloCustom(String name);
}

//CustomServiceImpl接口实现类
public class CustomServiceImpl implements CustomService{


    public String helloCustom(String name) {


        StuDao stuDao = new StuDaoImpl();
        String s = stuDao.sayHello(name);
        return s;
    }
}
4.1.3 Controller层
public class StuServlet {


    public void sayHello(){


        CustomService customService = new CustomServiceImpl();
        String helloCustom = customService.helloCustom("kaka");
        System.out.println(helloCustom);
    }
}
- 紧耦合,层级越多耦合性越高
4.2 加入工厂模式
定义工厂,解决高耦合问题
4.2.1 Dao层
//StuDao接口
public interface StuDao {


    public String sayHello(String name);
}

//StuDaoImpl1接口实现类1
public class StuDaoImpl1 implements StuDao{


    public String sayHello(String name) {


        String str = "HelloKak" + name;
        return str;
    }
}

//StuDaoImpl2接口实现类2
public class StuDaoImpl2 implements StuDao{


    public String sayHello(String name) {


        String str = "Hello Word !!!!!!!!" + name;
        return str;
    }
}

//构造dao工厂
public class StuDaoFactory {


    public static StuDao getStuDao(String flag){


        if(flag.equals("A")){


            return new StuDaoImpl1();
        }else{


            return new StuDaoImpl2();
        }
    }
}
4.2.2 Service层
//Service层调用业务层
public interface CustomService {


    public  String   helloCustom(String name);
}

//CustomServiceImpl接口实现类
public class CustomServiceImpl implements CustomService{


    @Override
    public String helloCustom(String name) {


        StuDao stuDao = StuDaoFactory.getStuDao("A");
        String s = stuDao.sayHello(name);
        return s;
    }
}

//构造Service层的工厂
public class CustomServiceFactory {


    public static CustomService getService(String flag){


        if(flag.equals("AA")){


            return new CustomServiceImpl();
        }else{


            return null;
        }
    }
}
4.2.3 Controller层
public class StuServlet {


    public void sayHello(){


        CustomService customService = CustomServiceFactory.getService("AA");
        String helloCustom = customService.helloCustom("kaka");
        System.out.println(helloCustom);
    }
}
- 使用工厂只需要关注对应的接口和工厂的传值
- 使用工厂解耦合,代码量增加,后期维护较难
5. 使用Spring处理业务场景
调用者和被调用者都需要有Spring创建
5.1 添加相应的依赖
见3.5板块
5.2 在resources下添加spring.xml
<?xml version="1.0" encoding="UTF-8" ?>
<beans xmlns="http://www.springframework.org/schema/beans"
       xmlns:xsi="http://www.w3.org/2001/XMLSchema-instance"
       xsi:schemaLocation="http://www.springframework.org/schema/beans
      http://www.springframework.org/schema/beans/spring-beans.xsd">

    </beans>
5.3 Dao层
//StuDao接口
public interface StuDao {


    public String sayHello (String name);
}

//接口实现类
public class StuDaoImpl implements StuDao{


    public String sayHello(String name) {


        String str = "HelloWord" + name;
        return str;
    }
}
5.4 Service层
在service实现类中添加StuDao类型的成员变量,并添加setter方法
//CustomService接口
public interface CustomService {


    public String helloCustom(String name);
}

//接口实现类
public class CustomServiceImpl implements CustomService{


    //创建对象并生成set方法
    private StuDao stuDao;
    public void setStuDao(StuDao stuDao){


        this.stuDao=stuDao;
    }
    @Override
    public String helloCustom(String name) {


        String s = stuDao.sayHello(name);
        return s;
    }
}
5.5 在spring.xml中注册dao和service实现类
<?xml version="1.0" encoding="UTF-8" ?>
<beans xmlns="http://www.springframework.org/schema/beans"
       xmlns:xsi="http://www.w3.org/2001/XMLSchema-instance"
       xsi:schemaLocation="http://www.springframework.org/schema/beans
      http://www.springframework.org/schema/beans/spring-beans.xsd">
    <!--在spring容器中注册dao的实现类(被调用者)-->
    <bean id="StuDaox" class="com.sx.kak.demo_03.dao.StuDaoImpl">

    </bean>
    <!--在spring容器中注册service的实现类(调用者)-->
    <bean id="CustomService" class="com.sx.kak.demo_03.service.CustomServiceImpl">
       <!-- 将dao的对象注入到service的实现对象中-->
        <!--name值与类的成员变量保持一致;ref的值与被调用者的id一致-->
        <property name="stuDao" ref="StuDaox"/>
    </bean>

    </beans>
5.6 编写测试类
在测试类中获取spring上下文
public class Demo3Test {


    @Test
    public void test3Spring(){


        //获取spring容器的上下文对象
        ApplicationContext applicationContext = new ClassPathXmlApplicationContext("classpath:spring.xml");
        //从spring上下文中获取service对象
        CustomService customService = (CustomService)applicationContext.getBean("CustomService");
        String s = customService.helloCustom("kaka");
        System.out.println(s);
    }
}
5.7 对应关系
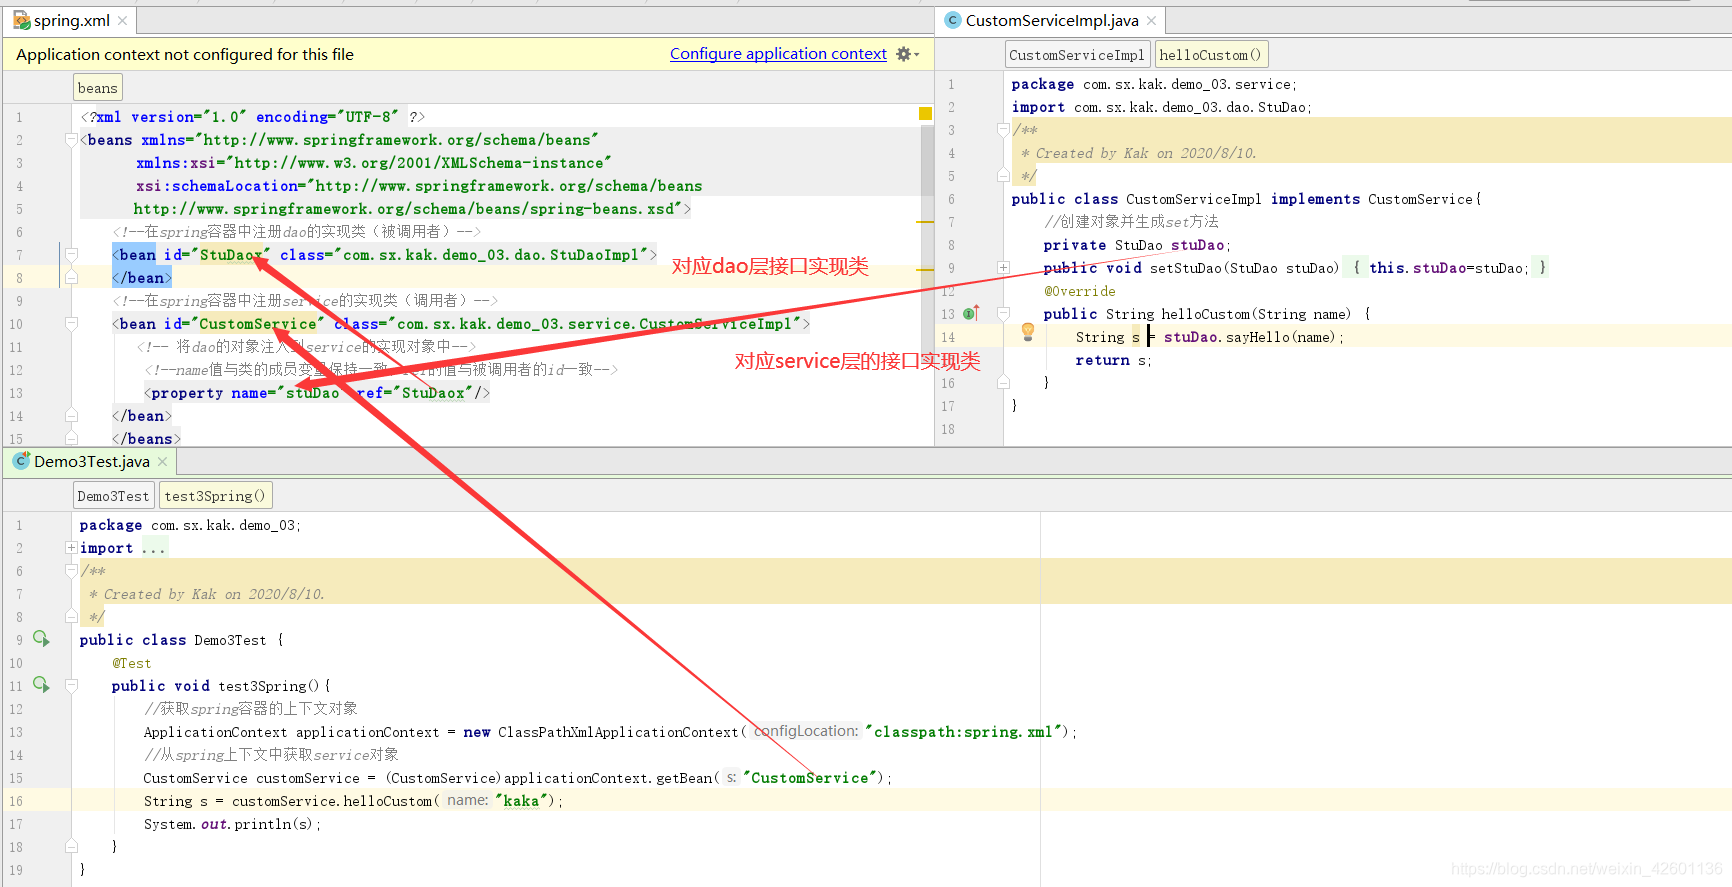
6. spring管理对象
- 默认情况下 scope取值为singleton (单例) spring管理自己创建的对象生命周期,地址值不会改变;
- 当scope设为prototype时spring将按照多例创建对象,会改变地址;
6.1 创建Maven项目
步骤见第三板块(创建web项目)
6.2 导入依赖
<!--添加依赖-->
    <dependency>
      <groupId>org.springframework</groupId>
      <artifactId>spring-context</artifactId>
      <version>4.3.6.RELEASE</version>
    </dependency>
6.3 配置spring.xml文件
<?xml version="1.0" encoding="UTF-8"?>
<beans xmlns="http://www.springframework.org/schema/beans"
       xmlns:xsi="http://www.w3.org/2001/XMLSchema-instance"
       xsi:schemaLocation="http://www.springframework.org/schema/beans http://www.springframework.org/schema/beans/spring-beans.xsd">
    <!--调用者-->
    <bean id="student" class="com.sx.kak.entity.Student">

    </bean>
</beans>
6.4 编写Student实体类
在entity包下
package com.sx.kak.entity;

/**
 * Created by Kak on 2020/8/11.
 */
public class Student {


    private int id;
    private String name;
    private String sex;
    private String age;


    public int getId() {


        return id;
    }

    public void setId(int id) {


        this.id = id;
    }

    public String getName() {


        return name;
    }

    public void setName(String name) {


        this.name = name;
    }

    public String getSex() {


        return sex;
    }

    public void setSex(String sex) {


        this.sex = sex;
    }

    public String getAge() {


        return age;
    }

    public void setAge(String age) {


        this.age = age;
    }

    public Student(int id, String name, String sex, String age) {


        this.id = id;
        this.name = name;
        this.sex = sex;
        this.age = age;
    }

    public Student() {


    }
}
6.5 编写测试类
在测试文件夹下的对应目录
package com.sx.kak.entity;

import org.junit.Test;
import org.springframework.context.support.ClassPathXmlApplicationContext;

/**
 * Created by Kak on 2020/8/11.
 */
public class TestStudent {


    @Test
    public void test1(){


        Student student = new Student();
        //手动new对象
        System.out.println("手动创建:"+student);

        //从spring获得new对象
        ClassPathXmlApplicationContext context = new ClassPathXmlApplicationContext("classpath:spring.xml");
        Student student1 = (Student) context.getBean("student");
        System.out.println("spring创建01:"+student1);

        //从spring再次获取对象
        Student student2 = (Student) context.getBean("student");
        System.out.println("spring创建02:"+student2);

    }
}
6.6 运行结果

- 当scope取值为singleton(默认) ,spring管理自己创建的对象生命周期,地址值不会改变;
7. Spring核心_IOC(控制反转)&DI(依赖注入)
IOC(inverse of controll)是在程序代码编译之先就已经确立相互间的依赖关系 (由代码控制的依赖关系),将对象的创建由容器(spring)完成,事先不知道所对应的对象,只有执行到对应的位置才可以知道对应的对象,在运行时动态由容器注入给依赖着,由此确定相互间依赖关系称为IOC;
解决了具有耦合关系之间的强耦合;
- 由代码控制的依赖关系在编译之初已经确立
- 由运行时动态的容器注入实现的依赖关系
DI (dependency injection)依赖注入,编译的时候不知道,只有在运行时由容器动态的注入;就是在spring创建时为对应的属性赋值;
注意:IOC就是DI,DI就是IOC
7.1 配置spring.xml文件
<?xml version="1.0" encoding="UTF-8"?>
<beans xmlns="http://www.springframework.org/schema/beans"
       xmlns:xsi="http://www.w3.org/2001/XMLSchema-instance"
       xsi:schemaLocation="http://www.springframework.org/schema/beans http://www.springframework.org/schema/beans/spring-beans.xsd">

    <bean id="student01" class="com.sx.kak.entity.Student">
        <!--给student的属性注入值-->
        <property name="id" value="1001"/>
        <property name="name" value="kaka"/>
        <property name="sex" value="man"/>
        <property name="age" value="23"/>
    </bean>

    <bean id="student02" class="com.sx.kak.entity.Student">
        <!--给student的属性注入值-->
        <property name="id" value="1002"/>
        <property name="name" value="taotao"/>
        <property name="sex" value="man"/>
        <property name="age" value="21"/>
    </bean>

        <!--引用注入-->
    <bean id="stuDao" class="com.sx.kak.dao.StuDao">
        <property name="student" ref="student01"/>
    </bean>
</beans>
7.2 编写Student实体类
package com.sx.kak.entity;

/**
 * Created by Kak on 2020/8/11.
 */
public class Student {


    private int id;
    private String name;
    private String sex;
    private String age;


    public int getId() {


        return id;
    }

    public void setId(int id) {


        this.id = id;
    }

    public String getName() {


        return name;
    }

    public void setName(String name) {


        this.name = name;
    }

    public String getSex() {


        return sex;
    }

    public void setSex(String sex) {


        this.sex = sex;
    }

    public String getAge() {


        return age;
    }

    public void setAge(String age) {


        this.age = age;
    }

    public Student(int id, String name, String sex, String age) {


        this.id = id;
        this.name = name;
        this.sex = sex;
        this.age = age;
    }

    public Student() {


    }
}
7.3 编写StuDao
package com.sx.kak.dao;
import com.sx.kak.entity.Student;

/**
 * Created by Kak on 2020/8/11.
 */
public class StuDao {


    private Student student;
    public void setStudent(Student student){


        this.student = student;
    }
    //此处不知道对象是student01还是student01,只有在运行时才知道
    public void sayHello(){


         System.out.println("student:【"+student.getId()+"\t"+student.getName()+"\t"+student.getSex()+"\t"+student.getAge()+"】");

    }
}
7.4 编写对应的测试类
package com.sx.kak.entity;

import com.sx.kak.dao.StuDao;
import org.junit.Test;
import org.springframework.context.ApplicationContext;
import org.springframework.context.support.ClassPathXmlApplicationContext;

/**
 * Created by Kak on 2020/8/11.
 */
public class TestStudent {


    @Test
    public void test1(){


        //从spring获得new对象
        ApplicationContext context = new ClassPathXmlApplicationContext("classpath:spring.xml");
        //直接得到Student的对象
        Student student01 = context.getBean("student01", Student.class);
        System.out.println(student01.getId()+"\t"+student01.getName()+"\t"+student01.getSex()+"\t"+student01.getAge());

        Student student02 = context.getBean("student02", Student.class);
        System.out.println(student02.getId()+"\t"+student02.getName()+"\t"+student02.getSex()+"\t"+student02.getAge());

        //依赖student01
        //IOC原理:运行时动态的由spring给StuDao注入对象,(spring内核有两对象)注入只有在运行时生效
        StuDao stuDao = context.getBean(StuDao.class);
        stuDao.sayHello();
    }
}
7.5 运行结果

- 运行时动态的由spring给StuDao注入对象,(spring内核有两对象)注入只有在运行时生效
7.6 从spring中获取对象
两种搜索机制
- 按照名称搜索
- 按照类型搜索
8. 注入的方式
8.1 值注入
常见于在spring上下文中的属性,使用value节点(设值注入的特例)
 <bean id="student01" class="com.sx.kak.entity.Student">

 </bean>
- 前提条件:有同名的成员变量,及setter方法
8.2 设值注入
成员变量私有,有setter方法,设值注入需要确保被spring创建的类含有无参构造器;
8.2.1 直接赋值则使用value属性完成
 <bean id="student01" class="com.sx.kak.entity.Student">
        <!--给student的属性注入值-->
        <property name="id" value="1001"/>
        <property name="name" value="kaka"/>
        <property name="sex" value="man"/>
        <property name="age" value="23"/>
    </bean>
8.3.2 注入的是另外一个spring管理的对象
8.3.2.1使用ref完成(常用)
 <bean id="stuDao" class="com.sx.kak.dao.StuDao">
        <property name="student" ref="student01"/>
    </bean>
8.3.2.2 使用bean完成
 <!--等价于上面-->
<bean id="stuDao" class="com.sx.kak.dao.StuDao">
        <property name="student">
              <ref bean="student01"/>
        </property>
    </bean>
8.3 构造子注入
当对象依赖需要明确先后顺序,被注入的对象一定先于注入产生
8.3.1 编写含有构造器的StuDao
package com.sx.kak.dao;
import com.sx.kak.entity.Student;

/**
 * Created by Kak on 2020/8/11.
 */
public class StuDao2 {


    private Student student;

    public StuDao2(Student student){


        this.student = student;
    }

    public void sayHello(){


        System.out.println("student:【"+student.getId()+"\t"+student.getName()+"\t"+student.getSex()+"\t"+student.getAge()+"】");

    }
}
8.3.2 配置spring.xml文件
<!--构造子注入-->
    <bean id = "StuDao2" class="com.sx.kak.dao.StuDao2" >
        <!--智能注入-->
        <constructor-arg  ref="student01"></constructor-arg>
    </bean>
8.3.3 编写测试类
package com.sx.kak.entity;

import com.sx.kak.dao.StuDao2;
import org.junit.Test;
import org.springframework.context.support.ClassPathXmlApplicationContext;

/**
 * Created by Kak on 2020/8/11.
 */
public class TestStudent_02 {


    @Test
    public void test1(){


        ClassPathXmlApplicationContext context = new ClassPathXmlApplicationContext("spring.xml");
        StuDao2 bean = context.getBean(StuDao2.class);
        bean.sayHello();
    }
}
8.3.4 构造子注入按照形参名称注入
<bean id="stu01" class="com.sx.kak.dao.Stu">
       <!-- 构造子注入按照形参名称注入-->
        <constructor-arg name="id" value="1001"/>
        <constructor-arg name="name" value="kaka"/>
        <constructor-arg name="sex" value="man"/>
        <constructor-arg name="age" value="23"/>

    </bean>
8.3.5 构造子注入按照形参下标顺序注入
 <bean id="stu02" class="com.sx.kak.dao.Stu">
        <!--构造子注入按照形参下标顺序注入-->
        <constructor-arg index="0" value="1002"/>
        <constructor-arg index="1" value="taotao"/>
        <constructor-arg index="2" value="man"/>
        <constructor-arg index="3" value="24"/>
    </bean>
8.4 构造子注入与设值注入的异同点
- 使用场景不同,前者在对象生产顺序有严格要求时必须采纳;后者对对象生产顺序不敏感可采纳;
- 实现方式不同:前者需要以成员变量的类型作为构造器的参数类型 ;后者需要对成员变量有setter方法
9. 面向切面编程(AOP)
本板块用到的依赖
<dependencies>
    <dependency>
      <groupId>junit</groupId>
      <artifactId>junit</artifactId>
      <version>4.11</version>
      <scope>test</scope>
    </dependency>
    <!--添加spring依赖-->
    <dependency>
      <groupId>org.springframework</groupId>
      <artifactId>spring-context</artifactId>
      <version>4.3.6.RELEASE</version>
    </dependency>
    <!--引入AOP相关依赖-->
    <dependency>
      <groupId>org.springframework</groupId>
      <artifactId>spring-aspects</artifactId>
      <version>4.3.6.RELEASE</version>
    </dependency>
    <!-- 添加cglkib依赖 -->
    <dependency>
      <groupId>cglib</groupId>
      <artifactId>cglib</artifactId>
      <version>3.3.0</version>
    </dependency>
    <!--添加aop依赖-->
    <dependency>
      <groupId>org.springframework</groupId>
      <artifactId>spring-aop</artifactId>
      <version>4.3.6.RELEASE</version>
    </dependency>
  </dependencies>
9.1 AOP基本概念
AOP(Aspect Oriented Programming)切面编程,AOP是将分散在各处的相同业务集中管理的编程方式;AOP的优势是代码高可用、高复用、后期维护方便;是spring的核心基石;
- Spring的AOP编程即是通过动态代理类为原始类的方法添加辅助功能;
9.2 AOP开发术语
- 连接点(Joinpoint):连接点是程序类中的客观存在的方法,可被Spring拦截并切入内容;
- 切入点(Pointcut):被Spring切入连接点;
- 通知、增强(Advice):可以为切入点添加额外功能(前置通知、后置通知、异常通知、环绕通知);
- 目标对象(Target):代理的目标对象;
- 引介(Introduction):一种特殊的增强,可在运行期间为类动态的添加Filed和Method;
- 织入(Weaving):把通知应用到具体的类,进而创建新的代理类的过程;
- 代理(Proxy):被AOP织入通知后,产生的结果类;
- 切面(Aspect):由切点和通知组成,将横切逻辑织入切面所指定的连接点;
9.3 代理设计模式
将核心功能与辅助功能(事务、日志等等)分离,实现辅助业务代码的复用;(案例场景:模拟计算机)
9.3.1 没有使用代理模式
缺点:
- 工作量大,如果项目中有多个类或者多个方法需要修改多次;
- 违背了开闭原则,对扩展开放,对修改关闭,而为了增加功能把每个方法都修改了,不便于维护;
- 违背了单一职责,每个方法除了要完成自己本身的功能,还要计算耗时、延时;
- 违背了依赖倒转,抽象不应该依赖细节,两者都应该依赖抽象;
package com.sx.kak.demo01;

/**
 * 定义了四个方法
 * Created by Kak on 2020/8/11.
 */
public class Calculator {


    public int plus(int a, int b){


        return a + b;
    }

    public int minus(int a, int b){


        return a - b;
    }

    public int multi(int a, int b){


        return a * b;
    }

    public int div(int a, int b){


        return a / b;
    }
}
package com.sx.kak.demo01;
import java.util.Random;

/**
 * 继承Calculator中的方法(修改了方法)
 * Created by Kak on 2020/8/11.
 */
public class StaticProxy extends Calculator{


    public int plus(int a,int b){


        long begin = System.currentTimeMillis();
        int result = a + b;
        this.sleeping();
        long end = System.currentTimeMillis();
        System.out.println("方法耗时:"+(end - begin));
        return  result;
    }

    public int minus(int a,int b){


        long begin = System.currentTimeMillis();
        int result = a - b;
        this.sleeping();
        long end = System.currentTimeMillis();
        System.out.println("方法耗时:"+(end - begin));
        return  result;
    }

    public int multi(int a,int b){


        long begin = System.currentTimeMillis();
        int result = a * b;
        this.sleeping();
        long end = System.currentTimeMillis();
        System.out.println("方法耗时:"+(end - begin));
        return  result;
    }

    public int div(int a,int b){


        long begin = System.currentTimeMillis();
        int result = a / b;
        this.sleeping();
        long end = System.currentTimeMillis();
        System.out.println("方法耗时:"+(end - begin));
        return  result;
    }

    public void sleeping(){


        Random random = new Random(1000);
        try {


            Thread.sleep(random.nextInt());
        } catch (InterruptedException e) {


            e.printStackTrace();
        }
    }
}
9.3.2 静态代理设计模式
通过代理类的对象,为原始类的对象添加辅助功能,更加容易更换代理实现类,利于维护;
条件:
- 必须要有接口;
- 单一职责
9.3.2.1 创建IMath接口
package com.sx.kak.demo02;

/**
 * 接口调用Calculator
 * 父类接口指向子类实现
 * Created by Kak on 2020/8/11.
 */
public interface IMath {


    public int plus(int a ,int b);
    public int minus(int a ,int b);
    public int multi(int a ,int b);
    public int div(int a ,int b);
}
9.3.2.2 创建Calculator实现IMath接口
package com.sx.kak.demo02;

/**
 * Created by Kak on 2020/8/11.
 */
public class Calculator implements IMath{


    public int plus(int a, int b){


        return a + b;
    }

    public int minus(int a, int b){


        return a - b;
    }

    public int multi(int a, int b){


        return a * b;
    }

    public int div(int a, int b){


        return a / b;
    }
}
9.3.2.3 创建StaticProxy.java实现IMath
静态代理类由原始类的接口加辅助功能加原始类的业务方法组成
package com.sx.kak.demo02;

import java.util.Random;

/**
 * Created by Kak on 2020/8/11.
 */
public class StaticProxy implements IMath{


    private IMath math;
    public StaticProxy(IMath math){


        this.math = math;
    }
    @Override
    public int plus(int a, int b) {


        long begin = System.currentTimeMillis();
        int result = math.plus(a,b);
        this.sleeping();
        long end = System.currentTimeMillis();
        System.out.println("方法耗时:"+(end - begin));
        return result;
    }

    @Override
    public int minus(int a, int b) {


        long begin = System.currentTimeMillis();
        int result = math.minus(a,b);
        this.sleeping();
        long end = System.currentTimeMillis();
        System.out.println("方法耗时:"+(end - begin));
        return result;
    }

    @Override
    public int multi(int a, int b) {


        long begin = System.currentTimeMillis();
        int result = math.multi(a,b);
        this.sleeping();
        long end = System.currentTimeMillis();
        System.out.println("方法耗时:"+(end - begin));
        return result;
    }

    @Override
    public int div(int a, int b) {


        long begin = System.currentTimeMillis();
        int result = math.div(a,b);
        this.sleeping();
        long end = System.currentTimeMillis();
        System.out.println("方法耗时:"+(end - begin));
        return result;
    }

    public void sleeping(){


        Random random = new Random(1000);
        try {


            Thread.sleep(random.nextInt());
        } catch (InterruptedException e) {


            e.printStackTrace();
        }
    }
}
9.3.2.4 静态代理优缺点
优点:
- 解决了开闭原则,没有修改Calculator类,扩展出了StaticProxy类
- 解决了单一职责的问题,Calculator类不再需要去计算耗时与延时操作;
- 引入接口解决了依赖倒转问题;
优点:
- 如果项目中有多个类,则需要编写多个代理类,工作量大,不好修改,不能应对变化,维护性差;
9.3.3 动态代理设计模式_ jdk代理
动态创建代理类,为原始类的对象添加辅助功能;
只能代理有接口的实现
使用Proxy 接口API
9.3.3.1 创建IMath接口
package com.sx.kak.demo03;

/**
 * 接口调用Calculator
 * 父类接口指向子类实现
 * Created by Kak on 2020/8/11.
 */
public interface IMath {


    public int plus(int a, int b);
    public int minus(int a, int b);
    public int multi(int a, int b);
    public int div(int a, int b);
}
9.3.3.2 创建Calculator实现IMath接口
package com.sx.kak.demo03;
/**
 * Created by Kak on 2020/8/11.
 */
public class Calculator implements IMath{


    public int plus(int a, int b){


        return a + b;
    }

    public int minus(int a, int b){


        return a - b;
    }

    public int multi(int a, int b){


        return a * b;
    }

    public int div(int a, int b){


        return a / b;
    }
}
9.3.3.3 创建DynamicProxy加入动态代理实现InvocationHandler接口
package com.sx.kak.demo03;

import java.lang.reflect.InvocationHandler;
import java.lang.reflect.Method;
import java.lang.reflect.Proxy;
import java.util.Random;

/**
 * JDK动态代理
 * Created by Kak on 2020/8/11.
 */
public class DynamicProxy implements InvocationHandler{


    Object targetObject;
    public Object getObject(Object SrcObject){


        this.targetObject = SrcObject;
        //获取代理对象
        /**
         * 作用:使用动态代理自动给正在执行的对象的接口生成一个新的派生对象,此对象还有invoke方法中附带的逻辑
         * 第一个参数:需要执行方法的对象的类加载器
         * 第二个参数:需要执行方法的对象实现的接口
         * 第三个参数:InvocationHandler的实现对象
         */
        Object o = Proxy.newProxyInstance(SrcObject.getClass().getClassLoader(),SrcObject.getClass().getInterfaces(),this);
        return o;
    }

    @Override
    public Object invoke(Object proxy, Method method, Object[] args) throws Throwable {


        long begin = System.currentTimeMillis();
        sleeping();
        //执行原有的方法
        /**
         * 第一个参数:方法所在的对象
         * 第二个参数:方法执行的实参
         */
        Object result = method.invoke(targetObject,args);
        long end = System.currentTimeMillis();
        System.out.println("方法耗时:" + (end - begin));
        return result;
    }

    public void sleeping(){


        try {


            Thread.sleep(new Random().nextInt(100));
        } catch (InterruptedException e) {


            e.printStackTrace();
        }
    }
}
9.3.3.4 创建测试类
package com.sx.kak.demo03;

/**
 * Created by Kak on 2020/8/11.
 */
public class TestCalculator {


    public static void main(String[] args) {


        //源对象
        Calculator cal = new Calculator();
        //自定义的附带有计算耗时的动态代理
        DynamicProxy proxy = new DynamicProxy();
        IMath newObj = (IMath)proxy.getObject(cal);
        int plus = newObj.plus(1, 10);
        System.out.println(plus);
    }
}
9.3.3.4 JDK动态代理的优缺点
优势:
- 解决了静态代理存在的问题
- JDK内置的Proxy动态代理可以在运行时动态生成字节码,而没必要针对每个类编写代理类;使用到了一个接口InvocationHandler与Proxy.newProxyInstance静态方法;
劣势:
- 被代理的类必须实现接口,未实现接口则没办法完成动态代理。
9.3.4 动态代理设计模式_ cglib代理
CGLIB(Code Generation Library)是一个开源项目,高性能,高质量的Code生成类库,可以在运行时动态生成字节码;
- cglib继承被代理的类,重写方法,织入通知,动态生成字节码并运行(动态的生成一个子类去覆盖所要代理的类);
- 因为是继承所以final类是没有办法动态代理的;
- 必须引入cglib的jar包;
- 不需要接口可以在运行时,动态生成新的派生匿名对象从而附加新的功能;
Enhancer允许为非接口类型创建一个JAVA代理,Enhancer动态的创建给定类的子类并且拦截代理类的所有的方法;
9.3.4.1 编写Calculator.java需要被代理的类
package com.sx.kak.demo04;
/**
 * Created by Kak on 2020/8/11.
 */
public class Calculator {


    public int plus(int a, int b){


        return a + b;
    }

    public int minus(int a, int b){


        return a - b;
    }

    public int multi(int a, int b){


        return a * b;
    }

    public int div(int a, int b){


        return a / b;
    }
}
9.3.4.2 编写DynamicProxy.java实现cglib代理
package com.sx.kak.demo04;

import net.sf.cglib.proxy.Enhancer;
import net.sf.cglib.proxy.MethodInterceptor;
import net.sf.cglib.proxy.MethodProxy;
import java.lang.reflect.Method;
import java.util.Random;

/**
 * Created by Kak on 2020/8/11.
 */
public class DynamicProxy implements MethodInterceptor{


    Object targetObj;
    public Object getObject(Object srcObj){


        this.targetObj = srcObj;
        //创建代码增强器
        Enhancer enhancer = new Enhancer();
        //设定增强器的父类
        enhancer.setSuperclass(srcObj.getClass());
        //设定增强器回调对象
        enhancer.setCallback(this);
        //获取附加逻辑的新对象
        Object o = enhancer.create();
        return o;
    }

    /**
     * @param o 需要代理的对象
     * @param method 需要执行的方法
     * @param objects 执行方法所需要的实参
     * @param methodProxy 代理的对象
     */
    @Override
    public Object intercept(Object o, Method method, Object[] objects, MethodProxy methodProxy) throws Throwable {


        long begin = System.currentTimeMillis();
        sleeping();
        Object invoke = method.invoke(targetObj, objects);
        long end = System.currentTimeMillis();
        System.out.println("耗时:"+ (end - begin));
        return invoke;
    }

    public void sleeping(){


        try {


            Thread.sleep(new Random().nextInt(100));
        } catch (InterruptedException e) {


            e.printStackTrace();
        }
    }
}
9.3.4.3 编写测试类
package com.sx.kak.demo04;

/**
 * Created by Kak on 2020/8/11.
 */
public class TestCglib {


    public static void main(String[] args) {


        Calculator newObj = (Calculator)new DynamicProxy().getObject(new Calculator());
        int minus = newObj.minus(20, 30);
        System.out.println(minus);
    }
}
9.4 Spring实现动态代理_01
- ProxyFactory
9.4.1 被代理类
package com.sx.kak.demo05;


/**
 * Created by Kak on 2020/8/11.
 */
public class Calculator {


    public int plus(int a, int b){


        System.out.println("plus......");
        return a + b;
    }

    public int minus(int a, int b){


        return a - b;
    }

    public int multi(int a, int b){


        return a * b;
    }

    public int div(int a, int b){


        return a / b;
    }
}
9.4.2 设置通知类
/**
 * 前置通知
 * Created by Kak on 2020/8/11.
 */
public class BeforeAdviser implements MethodBeforeAdvice{


    @Override
    public void before(Method method, Object[] args, Object target) throws Throwable {


        System.out.println("前置通知..........");
    }
}

/**
 * 后置通知
 * Created by Kak on 2020/8/11.
 */
public class MyAfterAdviser implements AfterReturningAdvice{


    @Override
    public void afterReturning(Object returnValue, Method method, Object[] args, Object target) throws Throwable {


        System.out.println("后置通知............");
    }
}

/**
 * 环绕通知
 * Created by Kak on 2020/8/11.
 */
public class MyRoundAdviser implements org.aopalliance.intercept.MethodInterceptor{


    @Override
    public Object invoke(MethodInvocation invocation) throws Throwable {


        System.out.println("around before .........");
        //执行原有逻辑
        Object pro = invocation.proceed();
        System.out.println("around after ...........");
        return pro;
    }
}
9.4.3 TestSpring.java测试
package com.sx.kak.demo05;
import org.springframework.aop.framework.ProxyFactory;

/**
 * Spring代理
 * Created by Kak on 2020/8/11.
 */
public class TestSpring {


    public static void main(String[] args) {


        ProxyFactory proxyFactory = new ProxyFactory();
        //给spring的代理工厂添加代理的原生对象
        proxyFactory.setTarget(new Calculator());

        //织入通知
        //给代理工厂添加额外的通知对象
        //前置通知
        proxyFactory.addAdvice(new BeforeAdviser());

        //添加一个后置通知
        proxyFactory.addAdvice(new MyAfterAdviser());

        //环绕通知
        proxyFactory.addAdvice(new MyRoundAdviser());

        //设值spring代理的模式:true--->cglib代理   false--->jdk代理
        proxyFactory.setProxyTargetClass(true);
        Calculator proxy = (Calculator)proxyFactory.getProxy();
        int plus = proxy.plus(23, 34);
        System.out.println(plus);
    }
}
9.5 Spring实现动态代理_02
使用xml实现动态代理
9.5.1 配置xml文件
<?xml version="1.0" encoding="UTF-8"?>
<beans xmlns="http://www.springframework.org/schema/beans"
       xmlns:xsi="http://www.w3.org/2001/XMLSchema-instance" xmlns:p="http://www.springframework.org/schema/p"
       xsi:schemaLocation="http://www.springframework.org/schema/beans http://www.springframework.org/schema/beans/spring-beans.xsd">
<!--需要代理的对象-->
    <bean id="calcu" class="com.sx.kak.demo06.Calculator"/>
    <!--需要植入通知的对象-->
    <bean id="beforeAdviser" class="com.sx.kak.demo06.BeforeAdviser"/>

    <!--
        将代理的对象和通知通过配置编织
        target-ref:代理的目标对象
       interceptorNames:是一个字符出数组,代表需要织入的通知对象
       proxyTargetClass:设值spring代理的模式 true:cglib
    -->
    <bean id="pf" class="org.springframework.aop.framework.ProxyFactoryBean"
          p:target-ref = "calcu"
          p:interceptorNames="beforeAdviser"
          p:proxyTargetClass="true"
    >

    </bean>
</beans>
9.5.2 被代理类
package com.sx.kak.demo06;


/**
 * Created by Kak on 2020/8/11.
 */
public class Calculator{


    public int plus(int a, int b){


        System.out.println("plus ........");
        return a + b;
    }

    public int minus(int a, int b){


        return a - b;
    }

    public int multi(int a, int b){


        return a * b;
    }

    public int div(int a, int b){


        return a / b;
    }
}
9.5.3 设置通知方法
package com.sx.kak.demo06;

import org.springframework.aop.MethodBeforeAdvice;

import java.lang.reflect.Method;

/**
 * 前置通知
 * Created by Kak on 2020/8/11.
 */
public class BeforeAdviser implements MethodBeforeAdvice{


    @Override
    public void before(Method method, Object[] args, Object target) throws Throwable {


        System.out.println("前置通知..........");
    }
}
9.5.4 编写动态代理测试类
package com.sx.kak.demo06;
import org.springframework.context.support.ClassPathXmlApplicationContext;

/**
 * Created by Kak on 2020/8/11.
 */
public class TestSpring {


    public static void main(String[] args) {


        ClassPathXmlApplicationContext context = new ClassPathXmlApplicationContext("demo06/bean.xml");
        Calculator pf = (Calculator)context.getBean("pf");
        int plus = pf.plus(23, 21);
        System.out.println(plus);
    }
}

9.6 Spring通知类
定义通知类可以达到通知的效果;
- 前置通知:MethodBeforeAdvice
- 后置通知:AfterAdvice、AfterReturningAdvice(有异常不执行,无返回值,方法会因为异常而结束)
- 异常通知:ThrowsAdvice
- 环绕通知:MethodInterceptor
9.7 使用AOP实现_无注解
9.7.1 设置前置通知
package com.sx.kak.aop01;

import org.springframework.aop.MethodBeforeAdvice;

import java.lang.reflect.Method;

/**
 * 前置通知
 * Created by Kak on 2020/8/11.
 */
public class BeforeAdviser implements MethodBeforeAdvice{


    @Override
    public void before(Method method, Object[] args, Object target) throws Throwable {


        System.out.println("前置通知..........");
    }
}
9.7.2 设置代理类
package com.sx.kak.aop01;


/**
 * Created by Kak on 2020/8/11.
 */
public class Calculator {


    public int plus(int a, int b){


        System.out.println("plus ........");
        return a + b;
    }

    public int minus(int a, int b){


        return a - b;
    }

    public int multi(int a, int b){


        return a * b;
    }

    public int div(int a, int b){


        return a / b;
    }
}
9.7.3 配置xml文件
<?xml version="1.0" encoding="UTF-8"?>
<beans xmlns="http://www.springframework.org/schema/beans"
       xmlns:xsi="http://www.w3.org/2001/XMLSchema-instance" xmlns:p="http://www.springframework.org/schema/p"
       xmlns:aop="http://www.springframework.org/schema/aop"
       xsi:schemaLocation="http://www.springframework.org/schema/beans http://www.springframework.org/schema/beans/spring-beans.xsd http://www.springframework.org/schema/aop http://www.springframework.org/schema/aop/spring-aop.xsd">
    <!--目标对象-->
    <bean id="calcu" class="com.sx.kak.aop01.Calculator"/>
    <!--拦截对象-->
    <bean id="beforeAdviser" class="com.sx.kak.aop01.BeforeAdviser"/>
    <!--aop配置 设定此配置支支持cglib代理-->
    <aop:config proxy-target-class="true">
        <!--定义一个切入点-->
        <!--Calculator类下的所有方法及参数-->
        <aop:pointcut id="poinyCut1" expression="execution(* com.sx.kak.aop01.Calculator.*(..))"/>
        <!--组装切面-->
        <aop:advisor advice-ref="beforeAdviser" pointcut-ref="poinyCut1" />
    </aop:config>
</beans>
9.7.4 编写测试类
package com.sx.kak.aop01;

import org.springframework.context.support.ClassPathXmlApplicationContext;

/**
 * spring-aop
 * Created by Kak on 2020/8/11.
 */
public class TestAop1 {


    public static void main(String[] args) {


        ClassPathXmlApplicationContext context = new ClassPathXmlApplicationContext("classpath:aop01/bean.xml");
        Calculator bean = context.getBean(Calculator.class);
        int plus = bean.plus(23, 89);
        System.out.println(plus);

        int div = bean.div(20, 5);
        System.out.println(div);
    }
}

9.8 使用AOP实现_使用Component注解
9.8.1 设置前置通知
package com.sx.kak.aop01;

import org.springframework.aop.MethodBeforeAdvice;

import java.lang.reflect.Method;

/**
 * 前置通知
 * Created by Kak on 2020/8/11.
 */
public class BeforeAdviser implements MethodBeforeAdvice{


    @Override
    public void before(Method method, Object[] args, Object target) throws Throwable {


        System.out.println("前置通知..........");
    }
}
9.8.2 设置代理类_Dog
package com.sx.kak.entity;

import org.springframework.stereotype.Component;

/**
 * Created by Kak on 2020/8/11.
 */
@Component
public class Dog {


    public void run(){


        System.out.println("Dog running ........");
    }

    public void bark(){


        System.out.println("Dog bark ..........");
    }
}
9.8.3 设置代理类_Person
package com.sx.kak.entity;

import org.springframework.stereotype.Component;

/**
 * Created by Kak on 2020/8/11.
 */
//告诉spring容器把此类管理起来等同于bean配置
@Component
public class Person {


    public void run(){


        System.out.println("Person running .......");
    }
}
9.8.4 配置xml文件
<?xml version="1.0" encoding="UTF-8"?>
<beans xmlns="http://www.springframework.org/schema/beans"
       xmlns:xsi="http://www.w3.org/2001/XMLSchema-instance" xmlns:p="http://www.springframework.org/schema/p"
       xmlns:aop="http://www.springframework.org/schema/aop"
       xmlns:context="http://www.springframework.org/schema/context"
       xsi:schemaLocation="http://www.springframework.org/schema/beans http://www.springframework.org/schema/beans/spring-beans.xsd http://www.springframework.org/schema/aop http://www.springframework.org/schema/aop/spring-aop.xsd http://www.springframework.org/schema/context http://www.springframework.org/schema/context/spring-context.xsd">
    <!--扫描base-package包下的所有含有@Component注解的类由spring容器管理-->
    <context:component-scan base-package="com.sx.kak.entity"/>
    <!--添加通知-->
    <bean id="beforeAdviser" class="com.sx.kak.entity.BeforeAdviser"/>
    <!--aop配置 设定此配置支支持cglib代理-->
    <aop:config proxy-target-class="true">
        <!--定义一个切入点-->
        <!--Calculator类下的所有方法及参数-->
        <aop:pointcut id="myp1" expression="execution(* com.sx.kak.entity.*.*(..))"/>
        <!--组装切面-->
        <aop:advisor advice-ref="beforeAdviser" pointcut-ref="myp1" />
    </aop:config>
</beans>
9.8.5 编写测试类
package com.sx.kak.entity;

import org.springframework.context.support.ClassPathXmlApplicationContext;

/**
 * 两个对象引用前置通知
 * Created by Kak on 2020/8/11.
 */
public class TestEntity {


    public static void main(String[] args) {


        ClassPathXmlApplicationContext context = new ClassPathXmlApplicationContext("classpath:entity/bean.xml");
        Dog dog = context.getBean(Dog.class);
        dog.run();
        dog.bark();
        Person per = context.getBean(Person.class);
        per.run();
    }
}

10. AOP扩展
本版块用到的依赖
  <dependencies>
    <dependency>
      <groupId>junit</groupId>
      <artifactId>junit</artifactId>
      <version>4.11</version>
      <scope>test</scope>
    </dependency>
<!--添加spring-context-->
    <dependency>
      <groupId>org.springframework</groupId>
      <artifactId>spring-context</artifactId>
      <version>4.3.6.RELEASE</version>
    </dependency>
<!--添加切面依赖-->
    <dependency>
      <groupId>org.springframework</groupId>
      <artifactId>spring-aspects</artifactId>
      <version>4.3.6.RELEASE</version>
    </dependency>
  </dependencies>
10.1 Java对象的织入
简单java对象织入
- aop:config
- aop:before
- aop:after
10.1.1 创建被代理类
package com.sx.kak.aop03;

/**
 * 代理对象_被代理类
 * Created by Kak on 2020/8/12.
 */
public class StuDao {


    public void find(){


        System.out.println("代理对象");
    }
}
10.1.2 创建自定义通知类
package com.sx.kak.aop03;

import org.aspectj.lang.JoinPoint;

/**
 * 简单Java类作为通知
 * Created by Kak on 2020/8/12.
 */
public class MyAdviser {


    public void before(JoinPoint joinPoint){


        String methodName = joinPoint.getSignature().getName();
        System.out.println("before......" + methodName);
    }

    public void after(JoinPoint joinPoint){


        String methodName = joinPoint.getSignature().getName();
        System.out.println("after......" + methodName);
    }
}
10.1.3 配置XML
<?xml version="1.0" encoding="UTF-8"?>
<beans xmlns="http://www.springframework.org/schema/beans"
       xmlns:xsi="http://www.w3.org/2001/XMLSchema-instance" xmlns:aop="http://www.springframework.org/schema/aop"
       xsi:schemaLocation="http://www.springframework.org/schema/beans http://www.springframework.org/schema/beans/spring-beans.xsd http://www.springframework.org/schema/aop http://www.springframework.org/schema/aop/spring-aop.xsd">
    <!--代理类-->
    <bean id="stuDao" class="com.sx.kak.aop03.StuDao"/>
    <!--通知对象-->
    <bean id="myAdviser" class="com.sx.kak.aop03.MyAdviser"/>

    <!--配置aop-->
    <aop:config proxy-target-class="true">
        <!--定义切面-->
        <aop:aspect ref="myAdviser">
            <!--定义切点-->
            <aop:pointcut id="ppl" expression="execution(* com.sx.kak.aop03.StuDao.*(..))"/>
            <!--织入通知-->
            <!--在名为ppl的位置织入一个切面类型的方法before作为此切点的前置通知-->
            <aop:before method="before" pointcut-ref="ppl"/>
            <!--在名为ppl的位置织入一个切面类型的方法after作为此切点的后置通知-->
            <aop:after method="after" pointcut-ref="ppl"/>
        </aop:aspect>
    </aop:config>
</beans>
10.1.4 编写测试类
package com.sx.kak.aop03;

import org.junit.Test;
import org.springframework.context.support.ClassPathXmlApplicationContext;

/**
 * Created by Kak on 2020/8/12.
 */
public class TestDamo03 {


    @Test
    public void test01(){


        ClassPathXmlApplicationContext context = new ClassPathXmlApplicationContext("classpath:aop03/bean.xml");
        StuDao stuDao = context.getBean(StuDao.class);
        stuDao.find();
    }
}

10.2 基于注解的对象织入_单个
注解模式:使用@Component +@Aspects
- 在通知方法前使用@Before 或@after 或@Around
10.2.1 创建被代理类
package com.sx.kak.aop04;

import org.springframework.stereotype.Component;

/**
 * 代理对象_被代理类
 * Created by Kak on 2020/8/12.
 */
@Component
public class StuDao {


    public void find(){


        System.out.println("代理对象");
    }
}
10.2.2 创建自定义通知类
package com.sx.kak.aop04;

import org.aspectj.lang.JoinPoint;
import org.aspectj.lang.annotation.After;
import org.aspectj.lang.annotation.Aspect;
import org.aspectj.lang.annotation.Before;
import org.springframework.stereotype.Component;

/**
 * 简单Java类作为通知
 * Created by Kak on 2020/8/12.
 */
//spring管理
@Component
//标识此类为一个切面类
@Aspect
public class MyAdviser {


    //将此方法作为一个前置通知植入
    @Before(value = "execution(* com.sx.kak.aop04.StuDao.*(..))")
    public void before(JoinPoint joinPoint){


        String methodName = joinPoint.getSignature().getName();
        System.out.println("before......" + methodName);
    }
    //将此方法作为一个后置通知植入
    @After(value = "execution(* com.sx.kak.aop04.StuDao.*(..))")
    public void after(JoinPoint joinPoint){


        String methodName = joinPoint.getSignature().getName();
        System.out.println("after......" + methodName);
    }
}
10.2.3 配置xml文件
<?xml version="1.0" encoding="UTF-8"?>
<beans xmlns="http://www.springframework.org/schema/beans"
       xmlns:xsi="http://www.w3.org/2001/XMLSchema-instance" xmlns:aop="http://www.springframework.org/schema/aop"
       xmlns:context="http://www.springframework.org/schema/context"
       xsi:schemaLocation="http://www.springframework.org/schema/beans http://www.springframework.org/schema/beans/spring-beans.xsd http://www.springframework.org/schema/aop http://www.springframework.org/schema/aop/spring-aop.xsd http://www.springframework.org/schema/context http://www.springframework.org/schema/context/spring-context.xsd">

    <!--配置spring管理的包扫描路径-->
   <context:component-scan base-package="com.sx.kak.aop04"/>
    <!--启动spring对aop的自动配置,且默认使用cglib代理-->
    <aop:aspectj-autoproxy proxy-target-class="true"/>
</beans>
10.2.4 编写测试类
package com.sx.kak.aop04;

import com.sx.kak.aop03.*;
import org.junit.Test;
import org.springframework.context.support.ClassPathXmlApplicationContext;

/**
 * 注解开发01
 * Created by Kak on 2020/8/12.
 */
public class TestDemo04 {


    @Test
    public void test01(){


        ClassPathXmlApplicationContext context = new ClassPathXmlApplicationContext("classpath:aop04/bean.xml");
        StuDao stuDao = context.getBean(StuDao.class);
        stuDao.find();
    }
}

10.3 基于注解的对象织入_整合
如果多个方法加通知,会显得繁琐,因此整合到一块,定义一个切点;
注解模式:使用@Component +@Aspects
- @PointCut 自定义切点
- @Before(切点函数)、@After 、@Around
10.3.1 创建被代理类
package com.sx.kak.aop05;

import org.springframework.stereotype.Component;

/**
 * 代理对象_被代理类
 * Created by Kak on 2020/8/12.
 */
@Component
public class StuDao {


    public void find(){


        System.out.println("查询成功");
    }

    public void StuUpdateStu(){


        System.out.println("修改");
    }

    public void StuDeleteStu(){


        System.out.println("删除");
    }

    public void StuAddStu(){


        System.out.println("增加");
    }
}
10.3.2 创建自定义通知类
package com.sx.kak.aop05;

import org.aspectj.lang.JoinPoint;
import org.aspectj.lang.ProceedingJoinPoint;
import org.aspectj.lang.annotation.*;
import org.springframework.stereotype.Component;

/**
 * 简单Java类作为通知
 * Created by Kak on 2020/8/12.
 */
//spring管理
@Component
//标识此类为一个切面类
@Aspect
public class MyAdviser {


    //自定义切点
    @Pointcut(value = "execution(* com.sx.kak.aop05.StuDao.*(..))")
    public void pp1(){


    }
    //将此方法作为一个前置通知织入
    @Before("pp1()")
    public void before(JoinPoint joinPoint){


        String methodName = joinPoint.getSignature().getName();
        System.out.println("before......" + methodName);
    }
    //将此方法作为一个后置通知织入
    @After("pp1()")
    public void after(JoinPoint joinPoint){


        String methodName = joinPoint.getSignature().getName();
        System.out.println("after......" + methodName);
    }
    //自定义切点(非查询切入)
    @Pointcut("execution(* com.sx.kak.aop05.StuDao.*Stu(..))")
    public void pp2(){


    }
    @Around("pp2()")
    public void around(ProceedingJoinPoint point)throws Throwable{


        //执行方法本身
        System.out.println("around before....");
        point.proceed();
        System.out.println("around after....");
    }
}
10.3.3 创建xml文件
<?xml version="1.0" encoding="UTF-8"?>
<beans xmlns="http://www.springframework.org/schema/beans"
       xmlns:xsi="http://www.w3.org/2001/XMLSchema-instance" xmlns:aop="http://www.springframework.org/schema/aop"
       xmlns:context="http://www.springframework.org/schema/context"
       xsi:schemaLocation="http://www.springframework.org/schema/beans http://www.springframework.org/schema/beans/spring-beans.xsd http://www.springframework.org/schema/aop http://www.springframework.org/schema/aop/spring-aop.xsd http://www.springframework.org/schema/context http://www.springframework.org/schema/context/spring-context.xsd">

    <!--配置spring管理的包扫描路径-->
    <context:component-scan base-package="com.sx.kak.aop05"/>
    <!--启动spring对aop的自动配置,且默认使用cglib代理-->
    <aop:aspectj-autoproxy proxy-target-class="true"/>
</beans>
10.3.4 编写测试类
package com.sx.kak.aop05;

import org.junit.Test;
import org.springframework.context.support.ClassPathXmlApplicationContext;

/**
 * Created by Kak on 2020/8/12.
 */
public class TestDemo05 {


    @Test
    public void test01(){


        ClassPathXmlApplicationContext context = new ClassPathXmlApplicationContext("classpath:aop05/bean.xml");
        StuDao stuDao = context.getBean(StuDao.class);
        stuDao.find();
        stuDao.StuAddStu();
        stuDao.StuUpdateStu();
        stuDao.StuDeleteStu();
    }
}

10.4 通配切入点
根据不同的需求切入的方法
<!--匹配参数-->
<aop:pointcut id="pointcuts" expression="execution(* com.sx.kak.aop03.StuDao.*(..))"/>
<!--匹配方法名(无参)-->
<aop:pointcut id="pointcuts" expression="execution(* save())"/>
<!--匹配匹配方法名(任意参数)-->
<aop:pointcut id="pointcuts" expression="execution(* save(..))"/>
<!--匹配返回值类型-->
<aop:pointcut id="pointcuts" expression="execution(* com.sx.kak.aop03.Student *(..))"/>
<!--匹配类名-->
<aop:pointcut id="pointcuts" expression="execution(* com.sx.kak.aop03.StuDao.*(..))"/>
<!--匹配包名-->
<aop:pointcut id="pointcuts" expression="execution(* com.sx.kak.aop03.*.*(..))"/>
<!--匹配包名以及子类包名-->
<aop:pointcut id="pointcuts" expression="execution(* com.sx.kak..*.*(..))"/>
11. 关于注解开发
11.1 使用注解所需要的配置
<!--配置hander的扫描路径-->
<context:component-scan base-package="com.sx.kak.controller"/>
<tx:annotation-driven transaction-manager="txManager"/?
11.2 声明bean
用于替换自建类型的<bean…>标签,快速的声明bean;
- @Service:业务类专用
- @Repository:dao层专用
- @Controller:web层专用
- @Component:通用,组件注解适用所有对象
- @Scope:用户控制bean的创建模式(singleton单例模式、prototype多例模式)
11.3 注入
用于完成bean中属性的注入
- @Autowrited:按照类型注入
- @Resource:基于名称自动注入
- @Qualifier:限定要自动注入的bean的id,一般和@Autowrited联用
- @Value:注入简单类型数据
11.4 事务控制
用于控制事务的切入
- @Transaction:标识事务注解
- 省略工厂配置中的<tx:advice…和<aop:config…
11.5 AOP开发
- @Before:前置通知
- @After:后置通知
- @Around:环绕通知
- @Aspects:标识切面
- @PointCut:标识切点
12. 基于spring-test测试单元
12.1 导入依赖
<dependencies>
    <dependency>
      <groupId>junit</groupId>
      <artifactId>junit</artifactId>
      <version>4.12</version>
      <scope>test</scope>
    </dependency>
     <!--添加spring-test依赖-->
    <dependency>
      <groupId>org.springframework</groupId>
      <artifactId>spring-test</artifactId>
      <version>4.3.6.RELEASE</version>
      <scope>test</scope>
    </dependency>
</dependencies>
12.2 编码
可以免去工厂的创建过程,直接将需要测试的组件注入到测试类中;
@RunWith(SpringJUnit4ClassRunner.class)  //启动测试单元
@ContextConfiguration("classpath:spring-mybatis.xml")  //加载spring上下文
public class TestStudentMapper {


//    从spring容器中注入StudentMapper对象,提供按照类型装配,可以省略setter方法
    @Autowired(required = false)
//    @Qualifier("studentMapper")
    private  StudentMapper studentMapper;

    @Test
    public void testFindAll(){


        List<Student> all = studentMapper.findAll();
        for (Student s: all              ) {


            System.out.println(s);
        }
    }
}