经过不断地踩坑(学习),初代的简易智能家居中控系统已经做好了,在申请项目时填写的功能都做出来了,但是有些功能不是用Wio Terminal实现的(一方面是因为代码量太大,会给Wio Terminal的"压力"也很大,另一方面,我的技术还不太够,还要继续学习、寻找解决方法)。
先给大家介绍一下我最初的想法
项目简介
Wio Terminal is a highly integrated development board, which comes with an LCD display, three buttons, a five-way switch, as well as microphones, speakers, accelerometers, infrared transmitters, etc., it can even be combined with the Raspberry Pi, Jetson nano! As the “brain” of a home, these hardware are extremely practical, therefore, in the smart home control system, I choose Wio Terminal as the core of this system.
Wio Terminal是一块高度集成的开发板,它自带一块液晶显示屏、三个按钮、一个五向开关以及麦克风、扬声器、加速度传感器、红外发射器等,它甚至可以和树莓派、Jetson nano结合。而作为一个家的"大脑",这些硬件都是非常实用的,因此,在智能家居中控系统中,我选择将Wio Terminal作为这个系统的核心。
In the future, there should be a smart housekeeper in the house, and this smart housekeeper is a simple version of what I am doing now. With it, you will be able to get accurate and real-time data of temperature, humidity, light intensity and so on. Not only that, it’s also like a “universal” remote control which can help you control your home’s appliances. Of course, it should be like a smart speaker can understand our instructions, and give us a response!
未来的家里,应该有一个智能管家,这个智能管家就是我现在做的简易版本。有了它,你便可以获取家里准确且实时的温度、湿度、光照强度等数据。不仅如此,它还像一个"万能"遥控器,能帮助你操控家里的电器。当然,它应该像智能音箱一样可以听懂我们给它的指令,并给我们做出回应!
系统功能
- 在液晶显示屏上展示温湿度、光照强度、大气压力、可燃气体含量等数据,为了省电,当用户拿起它时,该系统才会显示这些数据。
- 控制灯的开关,左边的按钮能控制灯的开关,中间和右边的按钮分别能调亮和调暗。
- 对该系统说话时,他会给用户发送一个包含温湿度、光照强度、大气压力、可燃气体含量等数据的邮件。
- 该系统会在用户操控灯或是用语音操控其发送邮件时,会给予语音反馈。
前期准备
在做这个项目的过程中,我第一次使用Wio Terminal这一开发板:
给初次使用Wio Terminal的开发者的入门指南
不知道是什么原因,我在Wio Terminal上使用Grove - Temperature Humidity Pressure Gas Sensor时收不到数据,以至于我不得不绕了弯去实现它:
使用Django搭建简易数据中台(基于Grove - Temperature Humidity Pressure Gas Sensor)
重新走回正轨,实现显示数据的主要功能:
使用Wio Terminal通过HTTP请求获取并展示传感器实时数据
下一步就要完善其他三个功能了,这三个功能我主要通过Python实现
完善系统功能
前面我简单提了一下某些不在Wio Terminal上实现的功能的原因,具体原因就不过多地阐述了,毕竟才刚开始做,所以我打算先把功能实现了,至于实现方式,我想在二代系统中去改善
通过Wio Terminal输出状态
我想表达的状态,是读取Configurable Buttons的状态(是否按下按钮)和Microphone的数据 (数据也可以代表状态)
对于Wio Terminal来说,单纯地输出这些数据是比较简单的
在setup()里补充引脚定义:
pinMode(WIO_MIC, INPUT);
pinMode(WIO_KEY_A, INPUT_PULLUP);
pinMode(WIO_KEY_B, INPUT_PULLUP);
pinMode(WIO_KEY_C, INPUT_PULLUP);
在loop()里补充if条件语句:
int val_first = analogRead(WIO_MIC);
int val_next = analogRead(WIO_MIC);

if (abs(val_first - val_next) >= 100){
  Serial.println("send message!");
  }
if (digitalRead(WIO_KEY_A) == LOW) {
  Serial.println("A Key pressed");
 }
if (digitalRead(WIO_KEY_B) == LOW) {
  Serial.println("B Key pressed");
 }
if (digitalRead(WIO_KEY_C) == LOW) {
  Serial.println("C Key pressed");
 }
当Wio Terminal连接PC端时,PC端会读取串口的数据,读到对应的输出就做出相应的动作
到这里,所有关于Arduino的代码就讲完了,下面把代码整理一下,分享给大家,这篇文章没有讲到的代码,请到前期准备里查看
#include <WiFiClientSecure.h>
#include <ArduinoJson.h>
#include"LIS3DHTR.h"
#include"Free_Fonts.h"
#include"TFT_eSPI.h"


TFT_eSPI tft;
LIS3DHTR<TwoWire> lis;
WiFiClient client;

const char* ssid     = "Your WiFi account";
const char* password = "Your WiFi password";
const char*  server = "192.168.1.102";  // Server URL
String data;
float accelerator_readings[3];


void setup() {

    //Initialize serial and wait for port to open:
    Serial.begin(115200);
    delay(100);

    pinMode(WIO_MIC, INPUT);
    pinMode(WIO_KEY_A, INPUT_PULLUP);
    pinMode(WIO_KEY_B, INPUT_PULLUP);
    pinMode(WIO_KEY_C, INPUT_PULLUP);

    lis.begin(Wire1);
    lis.setOutputDataRate(LIS3DHTR_DATARATE_25HZ);
    lis.setFullScaleRange(LIS3DHTR_RANGE_2G);

    float x_raw = lis.getAccelerationX();
    float y_raw = lis.getAccelerationY();
    float z_raw = lis.getAccelerationZ();
    accelerator_readings[0] = x_raw; //store x-axis readings
    accelerator_readings[1] = y_raw; //store y-axis readings
    accelerator_readings[2] = z_raw; //store z-axis readings

//    Serial.print("Attempting to connect to SSID: ");
//    Serial.println(ssid);
    WiFi.begin(ssid, password);

    tft.begin();
    tft.setRotation(3);
    tft.fillScreen(TFT_BLACK);
    tft.setFreeFont(FMB12);
    tft.setCursor((320 - tft.textWidth("Connecting to Wi-Fi.."))/2, 120);
    tft.print("Connecting to Wi-Fi..");

    // attempt to connect to Wifi network:
    while (WiFi.status() != WL_CONNECTED) {
//        Serial.print(".");
        // wait 1 second for re-trying
        delay(1000);
    }

//    Serial.print("Connected to ");
//    Serial.println(ssid);

    tft.fillScreen(TFT_BLACK);
    tft.setCursor((320 - tft.textWidth("Connected!"))/2, 120);
    tft.print("Connected!");

    getFirstData();
}

void loop()
{
    int val_first = analogRead(WIO_MIC);
    float x_raw = lis.getAccelerationX();
    float y_raw = lis.getAccelerationY();
    float z_raw = lis.getAccelerationZ();
    int val_next = analogRead(WIO_MIC);

    if (abs(val_first - val_next) >= 100){
      Serial.println("send message!");
      }
    if (digitalRead(WIO_KEY_A) == LOW) {
      Serial.println("A Key pressed");
     }
    if (digitalRead(WIO_KEY_B) == LOW) {
      Serial.println("B Key pressed");
     }
    if (digitalRead(WIO_KEY_C) == LOW) {
      Serial.println("C Key pressed");
     }

    if (abs(accelerator_readings[0] - x_raw) >= 0.1 && abs(accelerator_readings[1] - y_raw) >= 0.1 && abs(accelerator_readings[2] - z_raw) >= 0.1){
      // Turning on the LCD backlight
      digitalWrite(LCD_BACKLIGHT, HIGH);
      getFirstData();
      delay(3000);
      getLastData();
      delay(3000);
    }
    else {
      // Turning off the LCD backlight
      digitalWrite(LCD_BACKLIGHT, LOW);
      delay(500);
      }

    for (uint8_t i = 0; i<3; i++){
        accelerator_readings[i] = 0.0; //this is used to remove the first read variable
      }

    accelerator_readings[0] = x_raw; //store x-axis readings
    accelerator_readings[1] = y_raw; //store y-axis readings
    accelerator_readings[2] = z_raw; //store z-axis readings
}

void getFirstData() {
//    Serial.println("\nStarting connection to server...");
    if (!client.connect(server, 9000)) {
//        Serial.println("Connection failed!");
        tft.fillScreen(TFT_BLACK);
        tft.setCursor((320 - tft.textWidth("Connection failed!"))/2, 120);
        tft.print("Connection failed!");
    } else {
//        Serial.println("Connected to server!");

        // Make a HTTP request:
        String postRequest =(String)("GET ") + "/ HTTP/1.1\r\n" + "Connection: close\r\n\r\n";
//        Serial.println(postRequest);
        client.print(postRequest);

        while (client.connected()) {
            String line = client.readStringUntil('\n');
            if (line == "\r") {
//                Serial.println("headers received");
                break;
            }
        }

        while(client.available())
        {
          String line = client.readStringUntil('\r');
          data = line;
        }
//        Serial.println(data);
        client.stop();
//        Serial.println("closing connection");
    }

    //ArduinoJson to parse data, plesae check ArduinoJson for more info
    const size_t capacity = JSON_OBJECT_SIZE(5) + 100;
    DynamicJsonDocument doc(capacity);
    deserializeJson(doc, data);

    float temperature = doc["temperature"];
    float pressure = doc["pressure"];
    float humidity = doc["humidity"];

// -----------------LCD---------------------
    tft.setFreeFont(FF17);
    tft.setTextColor(tft.color565(224,225,232));
    tft.drawString("Current Data At Home",20,10);

    tft.fillRoundRect(10, 45, 300, 55, 5, tft.color565(40,40,86));
    tft.fillRoundRect(10, 105, 300, 55, 5, tft.color565(40,40,86));
    tft.fillRoundRect(10, 165, 300, 55, 5, tft.color565(40,40,86));

    tft.setFreeFont(FM9);
    tft.drawString("temperature:", 75, 50);
    tft.drawString("pressure:",75, 110);
    tft.drawString("humidity:",75, 170);

    tft.setFreeFont(FMB12);
    tft.setTextColor(TFT_RED);
    tft.drawFloat(temperature,2 , 140, 75);
    tft.setTextColor(tft.color565(224,225,232));
    tft.drawFloat(pressure,2 , 140, 135);
    tft.setTextColor(TFT_GREEN);
    tft.drawFloat(humidity,2 , 140, 195);

    tft.drawString("℃", 210, 75);
    tft.drawString("KPa",210, 135);
    tft.drawString("%",210, 195);
}

void getLastData() {
//    Serial.println("\nStarting connection to server...");
    if (!client.connect(server, 9000)) {
//        Serial.println("Connection failed!");
        tft.fillScreen(TFT_BLACK);
        tft.setCursor((320 - tft.textWidth("Connection failed!"))/2, 120);
        tft.print("Connection failed!");
    } else {
//        Serial.println("Connected to server!");

        // Make a HTTP request:
        String postRequest =(String)("GET ") + "/ HTTP/1.1\r\n" + "Connection: close\r\n\r\n";
//        Serial.println(postRequest);
        client.print(postRequest);

        while (client.connected()) {
            String line = client.readStringUntil('\n');
            if (line == "\r") {
//                Serial.println("headers received");
                break;
            }
        }

        while(client.available())
        {
          String line = client.readStringUntil('\r');
          data = line;
        }
//        Serial.println(data);
        client.stop();
//        Serial.println("closing connection");
    }

    //ArduinoJson to parse data, plesae check ArduinoJson for more info
    const size_t capacity = JSON_OBJECT_SIZE(5) + 100;
    DynamicJsonDocument doc(capacity);
    deserializeJson(doc, data);

    float humidity = doc["humidity"];
    float gas = doc["gas"];
    String updataTime = doc["updataTime"];

// -----------------LCD---------------------
    tft.setFreeFont(FF17);
    tft.setTextColor(tft.color565(224,225,232));
    tft.drawString("Current Data At Home",20,10);

    tft.fillRoundRect(10, 45, 300, 55, 5, tft.color565(40,40,86));
    tft.fillRoundRect(10, 105, 300, 55, 5, tft.color565(40,40,86));
    tft.fillRoundRect(10, 165, 300, 55, 5, tft.color565(40,40,86));

    tft.setFreeFont(FM9);
    tft.drawString("humidity:", 75, 50);
    tft.drawString("gas:",75, 110);
    tft.drawString("updataTime:",75, 170);

    tft.setFreeFont(FMB12);
    tft.setTextColor(TFT_RED);
    tft.drawFloat(humidity,2 , 140, 75);
    tft.setTextColor(tft.color565(224,225,232));
    tft.drawFloat(gas,2 , 140, 135);
    tft.setTextColor(TFT_GREEN);
    tft.drawString(updataTime , 30, 195);

    tft.drawString("%", 210, 75);
    tft.drawString("Kohms",210, 135);
}
成功上传后,打开串口监视器:

下面,我们来看看Python的具体实现
使用Python读取串口数据并做出相应决策
WEB端增加保存数据的功能
因为需要发送邮件,所以我把传感器接收到的数据先存放到一个txt文本文件里,发送邮件时,直接发送这个文本文件即可
在views.py里:
def index(request):
    datas = getDatas()
    content = {
        'temperature':datas[0],
        'pressure':datas[1],
        'humidity':datas[2],
        'gas':datas[3],
        'updataTime':datas[4],
    }
    jsonData = json.dumps(content)
    with open("D:\TemperatureHumidityPressureGasData.txt", "w") as fp:
        fp.write(jsonData)
    return HttpResponse(jsonData)
主要改动的地方就是:
with open("D:\TemperatureHumidityPressureGasData.txt", "w") as fp:
        fp.write(jsonData)
文件存放的路径可以修改成自己的路径
打开该文本文件,看一下是否可以成功保存:

通过红外模块控制小夜灯
小夜灯是在某宝买的,可以用遥控器控制的那种:

因为Wio Terminal没有红外解码功能,所以我另外买了一个红外模块,编码和解码合在一起那种,当然还需要一个USB-TTL串口转换器:

思路其实很简单,读取遥控器上对应按键发送的数据,再用红外模块发射出去即可
解码可以用串口调试助手,比较方便:

串口收到什么就发送什么,接收的时候最好找个暗一点的地方,多试几次
下面是我收集到的各个按键应该发送的数据(十六进制):
send_data = 'FD FD 30 03 53 4B 00 34 17 01 3B 02 65 00 26 00 1E 00 27 00 D9 09 26 00 8A 00 40 02 C3 17 26 00 00 00 21 00 FF FF FF FF 01 22 22 22 22 11 11 11 11 12 11 22 22 21 22 11 13 45 46 F0 00 00 00 00 00 00 00 00 00 00 00 00 00 00 00 00 00 00 00 00 00 00 00 00 00 00 00 00 00 00 00 00 00 00 00 00 00 00 00 00 00 00 00 00 00 00 00 00 00 00 00 00 00 00 00 00 00 00 00 00 00 00 00 00 00 00 00 00 00 00 00 00 00 00 00 00 00 00 00 00 00 00 00 00 00 00 00 00 00 00 00 00 00 00 00 00 00 00 00 00 00 00 00 00 00 00 00 00 00 00 00 00 00 00 00 00 00 00 00 00 00 00 00 00 00 00 00 00 00 00 00 00 00 00 00 00 00 00 00 00 00 00 00 00 00 00 00 00 00 00 00 00 00 00 00 00 00 00 00 00 00 00 00 00 00 00 00 00 00 00 05 76 00 22 DF DF'
send_data = 'FD FD 30 03 52 47 00 34 16 01 3A 02 66 00 27 00 20 00 27 00 D9 09 25 00 8A 00 41 02 00 00 21 00 FF FF FF FF FF FF FF FF 01 22 22 22 22 11 11 11 12 21 11 22 21 12 22 11 13 45 F0 00 00 00 00 00 00 00 00 00 00 00 00 00 00 00 00 00 00 00 00 00 00 00 00 00 00 00 00 00 00 00 00 00 00 00 00 00 00 00 00 00 00 00 00 00 00 00 00 00 00 00 00 00 00 00 00 00 00 00 00 00 00 00 00 00 00 00 00 00 00 00 00 00 00 00 00 00 00 00 00 00 00 00 00 00 00 00 00 00 00 00 00 00 00 00 00 00 00 00 00 00 00 00 00 00 00 00 00 00 00 00 00 00 00 00 00 00 00 00 00 00 00 00 00 00 00 00 00 00 00 00 00 00 00 00 00 00 00 00 00 00 00 00 00 00 00 00 00 00 00 00 00 00 00 00 00 00 00 00 00 00 00 00 00 00 00 00 00 00 00 00 08 76 3F 6D DF DF '
send_data = 'FD FD 30 03 53 4B 00 34 16 01 3C 02 63 00 27 00 1F 00 27 00 DA 09 25 00 8B 00 3D 02 C4 17 24 00 00 00 20 00 FF FF FF FF 01 22 22 22 22 11 11 11 12 11 11 22 21 22 22 11 13 45 46 F0 00 00 00 00 00 00 00 00 00 00 00 00 00 00 00 00 00 00 00 00 00 00 00 00 00 00 00 00 00 00 00 00 00 00 00 00 00 00 00 00 00 00 00 00 00 00 00 00 00 00 00 00 00 00 00 00 00 00 00 00 00 00 00 00 00 00 00 00 00 00 00 00 00 00 00 00 00 00 00 00 00 00 00 00 00 00 00 00 00 00 00 00 00 00 00 00 00 00 00 00 00 00 00 00 00 00 00 00 00 00 00 00 00 00 00 00 00 00 00 00 00 00 00 00 00 00 00 00 00 00 00 00 00 00 00 00 00 00 00 00 00 00 00 00 00 00 00 00 00 00 00 00 00 00 00 00 00 00 00 00 00 00 00 00 00 00 00 00 00 00 02 76 3F 2E DF DF '
发送红外只需要再加两行即可:
send_data = bytes.fromhex(send_data) #先编码,再发送
infrared_ser.write(send_data)
通过语音控制PC端发送邮件
语音这块不是真正意义上的语音识别,当Wio Terminal识别到环境音频信号有起伏时,会向串口发送"send message!",PC端读取到后就会发送邮件
说话时,音频信号会有明显的起伏:

发送邮件不难,我把他封装成了一个方法 ,用到时直接调用即可:
import smtplib
from email.mime.text import MIMEText
from email.mime.multipart import MIMEMultipart
from email.header import Header

def send():
    # 第三方 SMTP 服务
    mail_host="smtp.qq.com"  #设置服务器
    mail_user=""    #用户名
    mail_pass=""   #口令

    sender = ''
    receivers = ['']  # 接收邮件,可设置为你的QQ邮箱或者其他邮箱

    #创建一个带附件的实例
    message = MIMEMultipart()
    message['From'] = Header("Wio Terimal", 'utf-8')
    message['To'] =  Header("温湿度、大气压力、可燃气体检测数据", 'utf-8')
    subject = '当前温湿度、大气压力、可燃气体检测数据'
    message['Subject'] = Header(subject, 'utf-8')

    #邮件正文内容
    message.attach(MIMEText('温湿度、大气压力、可燃气体检测数据', 'plain', 'utf-8'))

    # 构造附件,传送当前目录下的 test.txt 文件
    att = MIMEText(open('D:\TemperatureHumidityPressureGasData.txt', 'rb').read(), 'base64', 'utf-8')
    att["Content-Type"] = 'application/octet-stream'
    # 这里的filename可以任意写,写什么名字,邮件中显示什么名字
    att["Content-Disposition"] = 'attachment; filename="TemperatureHumidityPressureGasData.txt"'
    message.attach(att)
    server = smtplib.SMTP_SSL(mail_host, 465) # SMTP协议默认端口是25
    server.set_debuglevel(1)
    server.login(mail_user, mail_pass)

    try:
        server.sendmail(sender, receivers, message.as_string())
        print ("邮件发送成功")
    except smtplib.SMTPException:
        print ("Error: 无法发送邮件")
这里的发送方和接收方都可以写成自己的邮箱 ,试着发送一封邮件测试一下:
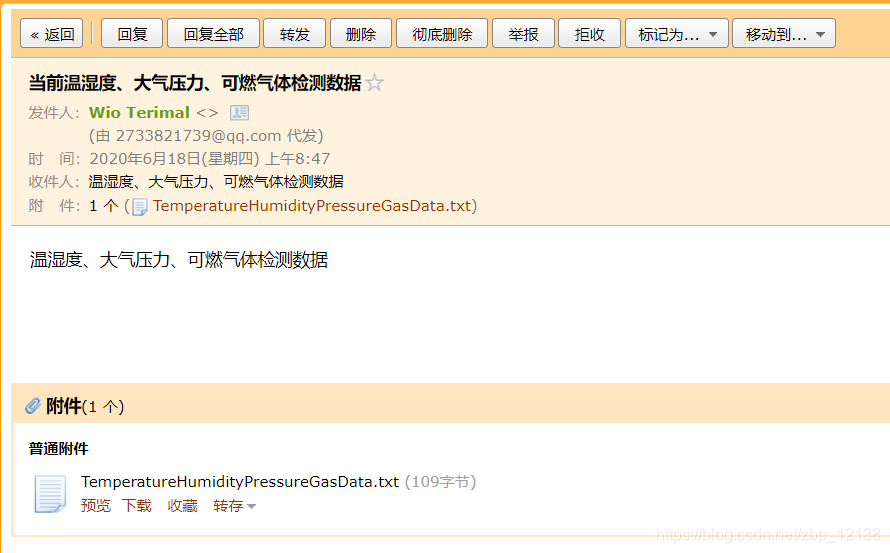
预览一下这个txt文件:

通过语音合成给予用户回复
在Windows系统下,可以直接调用系统的语音包:
import win32com.client

speaker = win32com.client.Dispatch("SAPI.SpVoice")
text = "输入要语音合成的内容"
speaker.Speak(text)
下面来看一下完整的程序
完整的程序
代码里的串口需要改成自己的串口 :
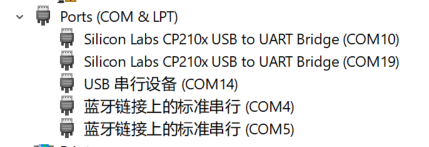
- COM14是Wio Terminal开发板
- COM15是红外模块
- COM19是Seeeduino V4.2开发板
每次插拔后,串口可能会发生改变,因为电脑上的USB接口不够用,我买了一个USB扩展坞
import serial
import re

import smtplib
from email.mime.text import MIMEText
from email.mime.multipart import MIMEMultipart
from email.header import Header

import win32com.client

speaker = win32com.client.Dispatch("SAPI.SpVoice")

def send():
    # 第三方 SMTP 服务
    mail_host="smtp.qq.com"  #设置服务器
    mail_user="[email protected]"    #用户名
    mail_pass=""   #口令

    sender = '[email protected]'
    receivers = ['[email protected]']  # 接收邮件,可设置为你的QQ邮箱或者其他邮箱

    #创建一个带附件的实例
    message = MIMEMultipart()
    message['From'] = Header("Wio Terimal", 'utf-8')
    message['To'] =  Header("温湿度、大气压力、可燃气体检测数据", 'utf-8')
    subject = '当前温湿度、大气压力、可燃气体检测数据'
    message['Subject'] = Header(subject, 'utf-8')

    #邮件正文内容
    message.attach(MIMEText('温湿度、大气压力、可燃气体检测数据', 'plain', 'utf-8'))

    # 构造附件,传送当前目录下的 test.txt 文件
    att = MIMEText(open('D:\TemperatureHumidityPressureGasData.txt', 'rb').read(), 'base64', 'utf-8')
    att["Content-Type"] = 'application/octet-stream'
    # 这里的filename可以任意写,写什么名字,邮件中显示什么名字
    att["Content-Disposition"] = 'attachment; filename="TemperatureHumidityPressureGasData.txt"'
    message.attach(att)
    server = smtplib.SMTP_SSL(mail_host, 465) # SMTP协议默认端口是25
    server.set_debuglevel(1)
    server.login(mail_user, mail_pass)

    try:
        server.sendmail(sender, receivers, message.as_string())
        print ("邮件发送成功")
        speaker = win32com.client.Dispatch("SAPI.SpVoice")
        text = "Message sent successfully"
        speaker.Speak(text)
    except smtplib.SMTPException:
        print ("Error: 无法发送邮件")


infrared_ser = serial.Serial('COM10', 9600, timeout=0.2)
Wio_terminal = serial.Serial('COM14', 115200, timeout=0.2)

# 接收返回的信息
while True:
    strs = Wio_terminal.readline().decode('utf-8')
    if strs.strip()!='':
        print(strs)
        if (re.match(r"C",strs)):
            send_data = 'FD FD 30 03 53 4B 00 34 17 01 3B 02 65 00 26 00 1E 00 27 00 D9 09 26 00 8A 00 40 02 C3 17 26 00 00 00 21 00 FF FF FF FF 01 22 22 22 22 11 11 11 11 12 11 22 22 21 22 11 13 45 46 F0 00 00 00 00 00 00 00 00 00 00 00 00 00 00 00 00 00 00 00 00 00 00 00 00 00 00 00 00 00 00 00 00 00 00 00 00 00 00 00 00 00 00 00 00 00 00 00 00 00 00 00 00 00 00 00 00 00 00 00 00 00 00 00 00 00 00 00 00 00 00 00 00 00 00 00 00 00 00 00 00 00 00 00 00 00 00 00 00 00 00 00 00 00 00 00 00 00 00 00 00 00 00 00 00 00 00 00 00 00 00 00 00 00 00 00 00 00 00 00 00 00 00 00 00 00 00 00 00 00 00 00 00 00 00 00 00 00 00 00 00 00 00 00 00 00 00 00 00 00 00 00 00 00 00 00 00 00 00 00 00 00 00 00 00 00 00 00 00 00 00 05 76 00 22 DF DF'
            send_data = bytes.fromhex(send_data)
            infrared_ser.write(send_data)
            text = "OK executed"
            speaker.Speak(text)
        elif (re.match(r"B",strs)):
            send_data = 'FD FD 30 03 52 47 00 34 16 01 3A 02 66 00 27 00 20 00 27 00 D9 09 25 00 8A 00 41 02 00 00 21 00 FF FF FF FF FF FF FF FF 01 22 22 22 22 11 11 11 12 21 11 22 21 12 22 11 13 45 F0 00 00 00 00 00 00 00 00 00 00 00 00 00 00 00 00 00 00 00 00 00 00 00 00 00 00 00 00 00 00 00 00 00 00 00 00 00 00 00 00 00 00 00 00 00 00 00 00 00 00 00 00 00 00 00 00 00 00 00 00 00 00 00 00 00 00 00 00 00 00 00 00 00 00 00 00 00 00 00 00 00 00 00 00 00 00 00 00 00 00 00 00 00 00 00 00 00 00 00 00 00 00 00 00 00 00 00 00 00 00 00 00 00 00 00 00 00 00 00 00 00 00 00 00 00 00 00 00 00 00 00 00 00 00 00 00 00 00 00 00 00 00 00 00 00 00 00 00 00 00 00 00 00 00 00 00 00 00 00 00 00 00 00 00 00 00 00 00 00 00 00 08 76 3F 6D DF DF '
            send_data = bytes.fromhex(send_data)
            infrared_ser.write(send_data)
            text = "Brightness up"
            speaker.Speak(text)
        elif (re.match(r"A",strs)):
            send_data = 'FD FD 30 03 53 4B 00 34 16 01 3C 02 63 00 27 00 1F 00 27 00 DA 09 25 00 8B 00 3D 02 C4 17 24 00 00 00 20 00 FF FF FF FF 01 22 22 22 22 11 11 11 12 11 11 22 21 22 22 11 13 45 46 F0 00 00 00 00 00 00 00 00 00 00 00 00 00 00 00 00 00 00 00 00 00 00 00 00 00 00 00 00 00 00 00 00 00 00 00 00 00 00 00 00 00 00 00 00 00 00 00 00 00 00 00 00 00 00 00 00 00 00 00 00 00 00 00 00 00 00 00 00 00 00 00 00 00 00 00 00 00 00 00 00 00 00 00 00 00 00 00 00 00 00 00 00 00 00 00 00 00 00 00 00 00 00 00 00 00 00 00 00 00 00 00 00 00 00 00 00 00 00 00 00 00 00 00 00 00 00 00 00 00 00 00 00 00 00 00 00 00 00 00 00 00 00 00 00 00 00 00 00 00 00 00 00 00 00 00 00 00 00 00 00 00 00 00 00 00 00 00 00 00 00 02 76 3F 2E DF DF '
            send_data = bytes.fromhex(send_data)
            infrared_ser.write(send_data)
            text = "Brightness down"
            speaker.Speak(text)
        elif (re.match(r"send",strs)):
            try:
                send()
            except:
                text = "Failed to send mail. Please try again later"
                speaker.Speak(text)


infrared_ser.close()
Wio_terminal.close()
项目展示
基于Wio Terminal的简易智能家居中控系统
后期想法
目前的系统只是非常简易的初代版本,后期会考虑使用云平台来存储传感器收集的温湿度、光照强度、紫外线强度等数据,并制作一个app,让用户出门在外也能对家里的情况了如指掌。