Função de binarização do OpenCvSharp e ajuste de limite trackBar
0. Visão geral do projeto
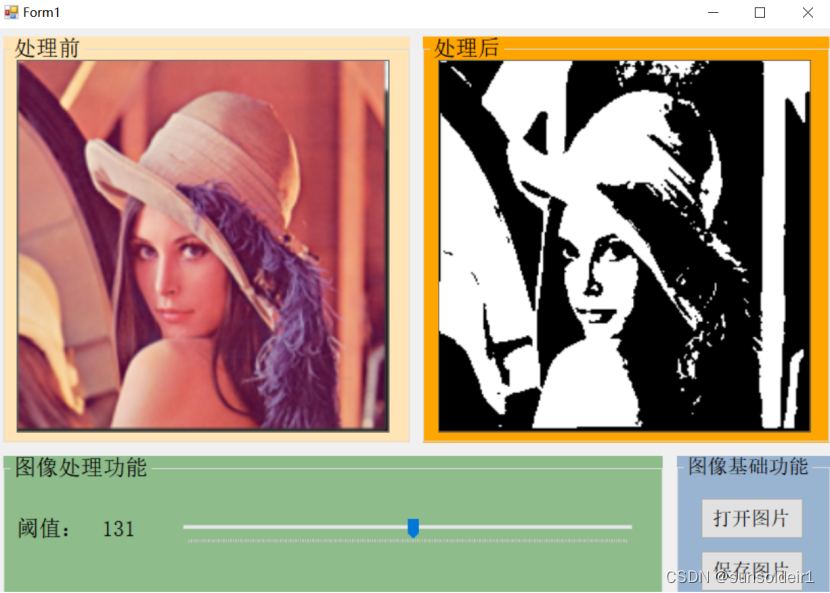
Use a função de processamento de imagem binária no OpenCvSharp, use o controle trackBar para obter o ajuste de limite e exiba os resultados na caixa de imagens e, finalmente, salve a imagem no disco local.
Código fonte: https://download.csdn.net/download/sunsoldeir1/86513261
1 passos básicos
Para instalar e fazer referência ao OpenCvSharp, OpenCvSharp.Extensions consulte o blog anterior: https://blog.csdn.net/sunsoldeir1/article/details/126073489 .
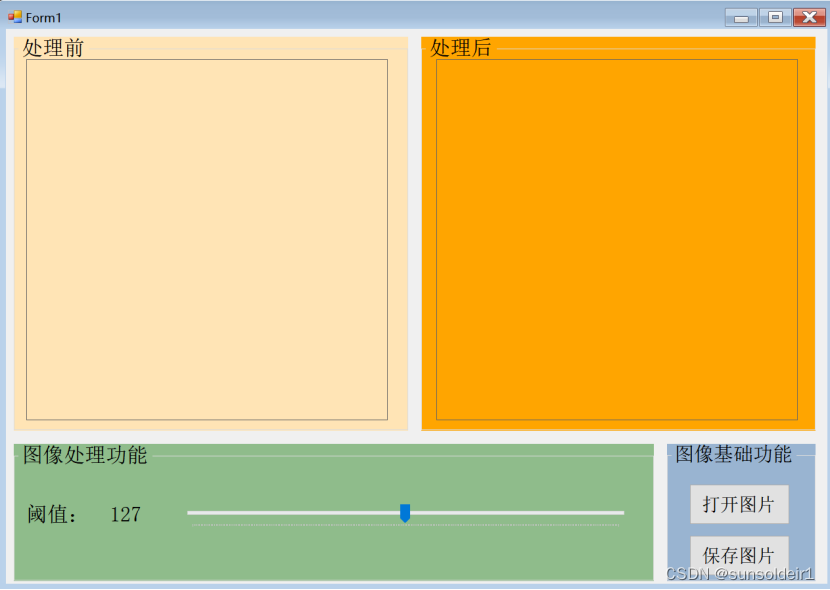
2 design de interface
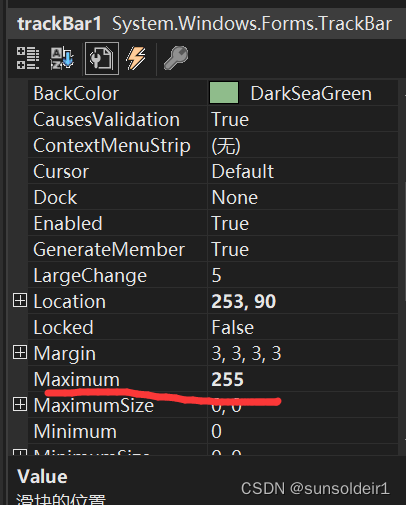
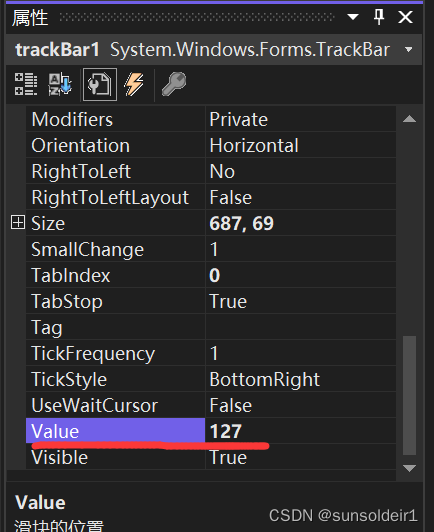
2.1 Na caixa de ferramentas à esquerda, procure por Picturebox, Label, Button, groupBox, trackBar e outros controles, respectivamente, e arraste-os para o layout da linha, renomeie, ajuste a forma e a fonte para formar a seguinte interface: 2.2 trackBar e outros controles: ajuste o Máximo de trackBar para 255.
Ajuste o Value do trackBar para 127.
2.3 Abra a imagem e exiba-a em picturebox1, use o seguinte código para conseguir:
 private void button1_Click(object sender, EventArgs e)//打开图片
        {


            OpenFileDialog file = new OpenFileDialog();//OpenFileDialog是一个类,实例化此类可以设置弹出一个文件对话框
            file.Filter = "JPG(*.JPG;*.JPEG);PNG文件(*.PNG);bmp文件(*.BMP);gif文件(*.GIF)|*.jpg;*.jpeg;*.png;*.bmp;*.gif";//文件类型过滤,只可选择图片的类型
            file.ShowDialog();//显示通用对话框
            if (file.FileName != string.Empty)
            {


                try
                {


                    pathname = file.FileName;
                    Img1 = Cv2.ImRead(pathname);//读取路径下的图片
                    pictureBox1.Load(pathname); //pictureBox1直接加载

                }
                catch (Exception ex)
                {


                    MessageBox.Show(ex.Message);
                }
            }
        }
2.4 Salve a imagem em picturebox2, use o seguinte código para conseguir:
 private void button3_Click(object sender, EventArgs e) //保存图片
        {


            SaveFileDialog saveImageDialog = new SaveFileDialog();
            saveImageDialog.Title = "图片保存";
            saveImageDialog.Filter = "jpg图片|*.JPG|gif图片|*.GIF|png图片|*.PNG|jpeg图片|*.JPEG|BMP图片|*.BMP";//文件类型过滤,只可选择图片的类型
            saveImageDialog.FilterIndex = 1;//设置默认文件类型显示顺序
            saveImageDialog.FileName = "图片保存"; //设置默认文件名,可为空
            saveImageDialog.RestoreDirectory = true; //OpenFileDialog与SaveFileDialog都有RestoreDirectory属性,这个属性默认是false,打开一个文件后,那么系统默认目录就会指向刚才打开的文件。如果设为true就会使用系统默认目录
            if (saveImageDialog.ShowDialog() == DialogResult.OK)
            {


                string fileName = saveImageDialog.FileName.ToString();
                if (fileName != "" && fileName != null)
                {


                    string fileExtName = fileName.Substring(fileName.LastIndexOf(".") + 1).ToString();
                    System.Drawing.Imaging.ImageFormat imgformat = null;
                    if (fileExtName != "")
                    {


                        switch (fileExtName)
                        {


                            case "jpg":
                                imgformat = System.Drawing.Imaging.ImageFormat.Jpeg;
                                break;
                            case "png":
                                imgformat = System.Drawing.Imaging.ImageFormat.Png;
                                break;
                            case "gif":
                                imgformat = System.Drawing.Imaging.ImageFormat.Gif;
                                break;
                            case "bmp":
                                imgformat = System.Drawing.Imaging.ImageFormat.Bmp;
                                break;
                            default:
                                imgformat = System.Drawing.Imaging.ImageFormat.Jpeg;
                                break;
                        }
                        try
                        {


                            MessageBox.Show("保存路径:" + fileName, "提示", MessageBoxButtons.OK, MessageBoxIcon.Information);
                            pictureBox2.Image.Save(fileName, imgformat);
                        }
                        catch
                        {


                            MessageBox.Show("图片保存失败!");
                        }
                    }
                }
            }
        }
realização de 3 funções
3.1 Inicializar variáveis
  Mat Img1 = new Mat();//用 Mat类定义图片
  Mat Img2 = new Mat();//用 Mat类定义图片
  Mat  ImgCvt = new Mat();//用 Mat类定义图片
  Bitmap bitmap;//Bitmap类定义picturebox2要显示的图片
3.2 Ajuste de binarização
 label2.Text = trackBar1.Value.ToString();
            if (pictureBox2.Image == null)//判断图片是否已打开
            {


                MessageBox.Show("没有打开图片");
                return;
            }
            Img2 = ImgCvt.Threshold(trackBar1.Value, 255, ThresholdTypes.Binary);
            bitmap = BitmapConverter.ToBitmap(Img2); //把Mat格式的图片转换成Bitmap
            pictureBox2.Image = bitmap;
3.3 Perceba o efeito