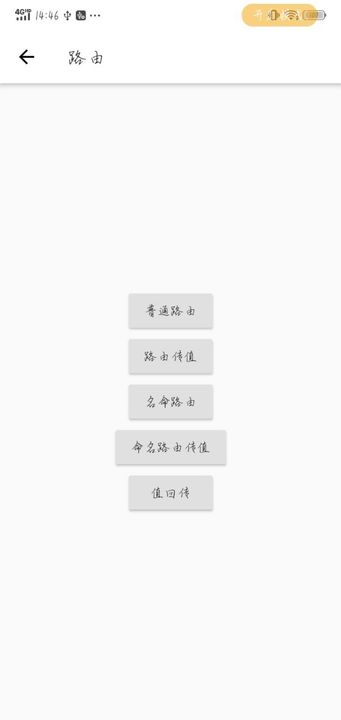
1. ルーティングの概要
Flutter のページ ジャンプもルートです。Flutter は Navigator コンポーネントを使用してルート ナビゲーションを管理し、スタック管理を提供します。
Flutter では、ルーティング ジャンプを構成する 2 つの方法、基本ルーティングと名前付きルーティングが提供されます。
2. 基本ルーティングを使用する必要があります
1) 基本ルーティングの使用
  Navigator.of(context).push(
                    MaterialPageRoute(
                      builder: (context) {
                        return One();//跳转的目标页面
                      },
                    ),
                  );
2) 値を受け渡せる基本ルーティングの実装
RaisedButton(
                onPressed: () {
                  Navigator.of(context)
                      .push(MaterialPageRoute(builder: (context) {
                    return TwoPage(
                      content: "我是传过来的值",
                    );//跳转到目标页面并且带有要传递的参数
                  }));
                },
                child: Text("路由传值"),
              ),

//目标页面接收参数
class TwoPage extends StatefulWidget {
  String content;
  //定义名命构造函数
  TwoPage({Key key,this.content,}) : super(key: key);

  @override
  _TwoPageState createState() => _TwoPageState();
}

class _TwoPageState extends State<TwoPage> {
  @override
  Widget build(BuildContext context) {
    return Container(
      child: Scaffold(
        appBar: AppBar(
          title: Text("路由传值"),
        ),
        body: Center(child: Text("${widget.content}"),),//接收到的参数
      ),
    );
  }
}
3. 名前付きルーティング
1) ルーティングを設定する
final routes = {
//不需要传值的
  '/three': (context) => Three(),
//需要传值
  '/four': (context, {arguments}) => Four(arguments: arguments),

  '/five': (context, {arguments}) => Five(arguments: arguments),
};

// routes是一个Map,通过下面方法遍历需要跳转的页面,然后通过基本路由进行跳转
var onGenerateRoute = (RouteSettings settings) {

  final String name = settings.name;
  final Function pageContentBuilder = routes[name];
  if (pageContentBuilder != null) {
    //判断路由是否需要传值
    if (settings.arguments != null) {
      final Route route = MaterialPageRoute(
          builder: (context) =>
              pageContentBuilder(context, arguments: settings.arguments));
      return route;
    } else {
      final Route route =
          MaterialPageRoute(builder: (context) => pageContentBuilder(context));
      return route;
    }
  }
};

//需要在入口函数进行配置
class _MyAppState extends State<MyApp> {
  @override
  Widget build(BuildContext context) {
    return ScreenUtilInit(
      designSize: Size(750, 1334),
      allowFontScaling: false,
      builder: () => MaterialApp(
        title: "Myapp",
        debugShowCheckedModeBanner: false,

        initialRoute: "/",
        //配置路由
        onGenerateRoute: onGenerateRoute,
        theme: ThemeData(primaryColor: Colors.white),
      ),
    );


  }
2) 名前付きルーティングの使用
 RaisedButton(
                onPressed: () {
                  Navigator.pushNamed(context, "/three"); // /three 跳转的目标路由
                },
                child: Text("名命路由"),
              ),
3) 名前付きルートを使用して値を渡す方法
 RaisedButton(
                onPressed: () {
                  Navigator.pushNamed(context, "/four",arguments: {"content":"我是名命路由传值"});//通过arguments进行传值
                },
                child: Text("命名路由传值"),
              ),
//目标页面
class Four extends StatefulWidget {
  var arguments;
  Four({Key key, this.arguments}) : super(key: key);

  @override
  _FourState createState() => _FourState();
}

class _FourState extends State<Four> {
  @override
  Widget build(BuildContext context) {
    return Container(
      child: Scaffold(
        appBar: AppBar(
          title: Text("命名路由传值"),
        ),
        body: Text("${widget.arguments["content"]}"),
      ),
    );
  }
}
4) 値の戻り値
RaisedButton(
                onPressed: () async {
                  var result = await Navigator.pushNamed(context, "/five");
                  print(result);//获取从目标页面传回来的数据
                },
                child: Text("值回传"),
              ),

//目标页面
class Five extends StatefulWidget {
  var arguments;
  Five({Key key,this.arguments}) : super(key: key);

  @override
  _FiveState createState() => _FiveState();
}

class _FiveState extends State<Five> {
  @override
  Widget build(BuildContext context) {
    return Container(
      child: Scaffold(
        appBar: AppBar(
          title: Text("值回传"),
        ),
        body: Center(
          child: RaisedButton(
            onPressed: () {
              Navigator.pop(context,"我是值回传");//通过这个方法吧把数据传回上个页面
            },
            child: Text("值回传"),
          ),
        ),
      ),
    );
  }
}