vue3+ts+uniapp はアプレットに入力を実装してフォーカスを取得し、プッシュされたページまでの距離を計算します。
入力がフォーカスを取得し、ページのプッシュ距離を計算します
自我记录
1. まず私のニーズについて話しましょう。
需求
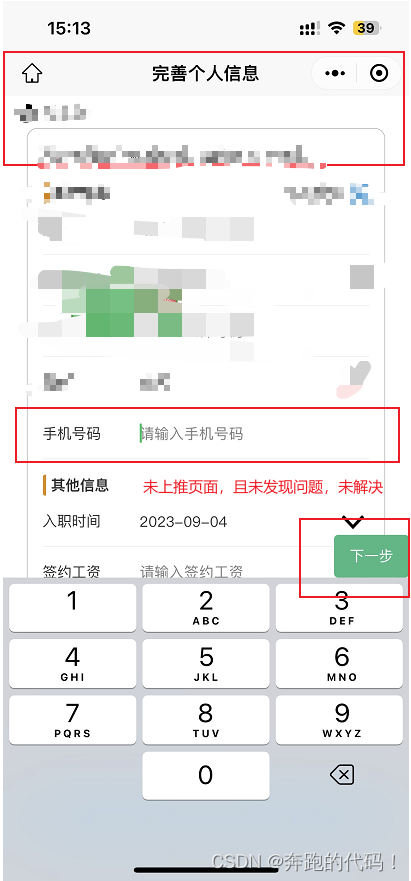
1. キーボードの兄弟に「次へ」や「確認」などのボタンを追加します
2. 最初のアイデアは、入力フォーカスを取得するときにキーボードの高さを取得し、ページ上のボタンに固定して設定することです。キーボードの通常の高さです。ロジックは問題ありません。
2. 問題を見つける
发现问题:
1. ページ
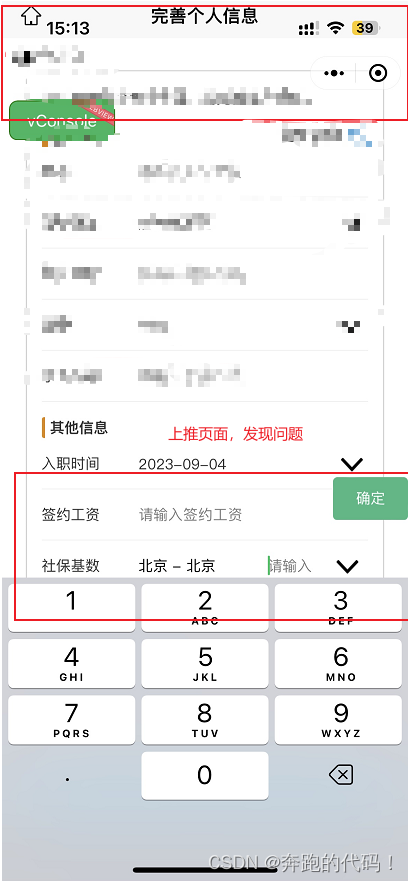
inputが最下部にある場合(ポップアップしたときのキーボードの高さがページ最下部の入力を覆うことがわかります)、入力は自動的に押し上げられる属性があるため、押し込まadjustPositionれ整个页面ますinputポイントはその整个页面!!!
2 /ページに合わせてボタンを配置しているため、ページ全体を押し上げると、ボタンの下端がキーボードの高さに位置していても、ボタンが表示されます。キーボードには取り付けないでください。
3.解決策のアイデア
1. ドキュメントに突き上げ距離を取得できる属性またはメソッドがあるか確認
×
2. ref で入力に関連するターゲットを取得×
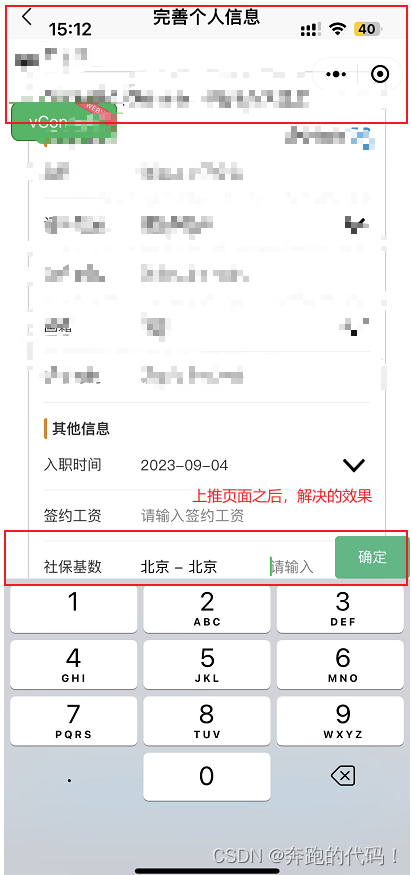
3. uni.createSelectorQuery() で入力に関連するターゲットを取得√
3.1 取得入力の下端と画面の上端との間の距離 距離 - キーボード高さ位置決めボタンの下端と画面の上端との間の距離 = 押し上げ距離
直接上代码
4.コード表示
<script setup lang="ts">
import {

     getCurrentInstance, ref } from 'vue'
//  监听键盘高度变化
const keyboardHeight = ref(0)
// 当前键盘类型
const keyboardType = ref('')
// 下一步
const nextText = ref('下一步')
const isNext = ref(false)

const onInputFocus = (event: UniHelper.InputOnFocusEvent, type: string) => {


  // 获取键盘高度
  keyboardHeight.value = Math.ceil(event.detail.height || 0)
  keyboardType.value = type

  if (['wage', 'fund', 'socialSecurity'].includes(type)) {


    nextText.value = '确定'
  } else {


    nextText.value = '下一步'
  }
  handleKeyboardOpen(type)
  // 监听键盘高度发生变化时(来短信验证码)提高按钮
  uni.onKeyboardHeightChange((res) => {


    keyboardHeight.value = Math.ceil(res.height)
    handleKeyboardOpen(type)
  })
}

// 失去焦点触发
const onInputBlur: UniHelper.InputOnBlur = () => {


  if (isNext.value) return (isNext.value = false)
   // 移除监听事件
  uni.offKeyboardHeightChange()
  keyboardHeight.value = 0
  keyboardType.value = ''
}
// 下一步触发
const onNextConfirm = (event: UniHelper.CustomEvent, type: string) => {


  isNext.value = true
  event.stopPropagation()
  if (type === 'name') {


    idCardInput.value = true
  } else if (type === 'idCard') {


    phoneInput.value = true
  } else if (['phone', 'wage', 'fund', 'socialSecurity'].includes(type)) {


    idCardInput.value = false
    phoneInput.value = false
    nameInput.value = false
    isNext.value = false
  }
}
// 主要逻辑相关!!!
//1、首先导入当前组件的实例 form 'vue'
var currentInstance = getCurrentInstance()
// 键盘弹出时计算推上去的距离
const handleKeyboardOpen = (type: string) => {


  // 使用 inputQuery 获取输入框 & 按钮位置
  //2、添加上in方法
  const inputQuery = uni.createSelectorQuery().in(currentInstance)
  const ButtonQuery = uni.createSelectorQuery().in(currentInstance)
  let rectBottom = 0
  let rectBottom2 = 0
  // 获取输入框
  inputQuery
    .select(`#${

      type}`)
    .boundingClientRect((rect: any) => {


      console.log(rect, 'rect')
      rectBottom = rect.bottom
    })
    .exec()
  // 获取按钮位置
  setTimeout(() => {


    ButtonQuery.select(`#next`)
      .boundingClientRect((rect: any) => {


        // rect 包含了按钮的位置信息
        rectBottom2 = rectBottom - rect.bottom
        // >0 证明 上推页面了 !=0 证明获取到按钮信息了
        if (rectBottom2 > 0 && rect.bottom !== 0) {


          keyboardHeight.value = keyboardHeight.value - rectBottom2
        }
      })
      .exec()
  })
}
</script>
<template>
 <input
  id="fund"
  class="input"
  focus
  type="digit"
  placeholder="请输入"
  placeholder-style="font-size:28rpx"
  v-model="formInfo.fundVal"
  @focus="onInputFocus($event, 'fund')"
  @blur="onInputBlur"
/>

<input
id="socialSecurity"
class="input"
type="digit"
focus
placeholder="请输入"
placeholder-style="font-size:28rpx"
v-model="formInfo.socialSecurityVal"
@focus="onInputFocus($event, 'socialSecurity')"
@blur="onInputBlur"
/>

<input
 id="wage"
  class="input"
  type="digit"
  placeholder="请输入签约工资"
  v-model="formBottomInfo.wage"
  @focus="onInputFocus($event, 'wage')"
  @blur="onInputBlur"
/>
 <!-- 下一步 -->
 <view
   id="next"
   class="nextKey"
   :style="{ bottom: keyboardHeight + 'px', display: keyboardHeight ? 'block' : 'none' }"
   @tap.stop="onNextConfirm($event, keyboardType)"
   >{

    {

     nextText }}</view
 >
</template>
<style lang="scss" scoped>
  .nextKey {


    position: fixed;
    bottom: 0;
    right: 0;
    display: none;
    width: 140rpx;
    height: 80rpx;
    line-height: 80rpx;
    text-align: center;
    color: #fff;
    border-radius: 8rpx;
    font-size: 28rpx;
    background-color: #42b983;
  }
</style>
整理が大変なので転載する場合は元のアドレスにご注意ください!