次に、webStromを使用してコードを記述し、WeChat開発者ツールを使用してデバッグします。
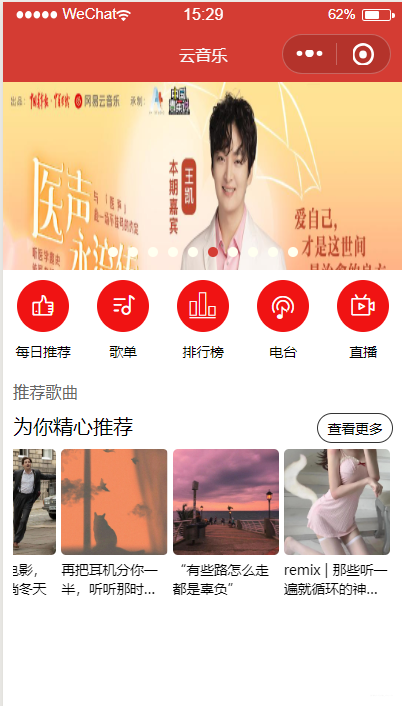
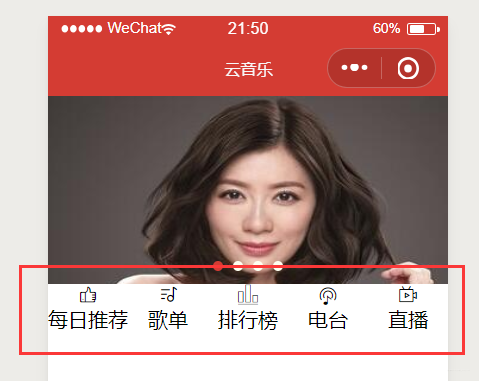
この記事の最終的なレンダリング:
ここにカタログタイトルを書く
1.カルーセル
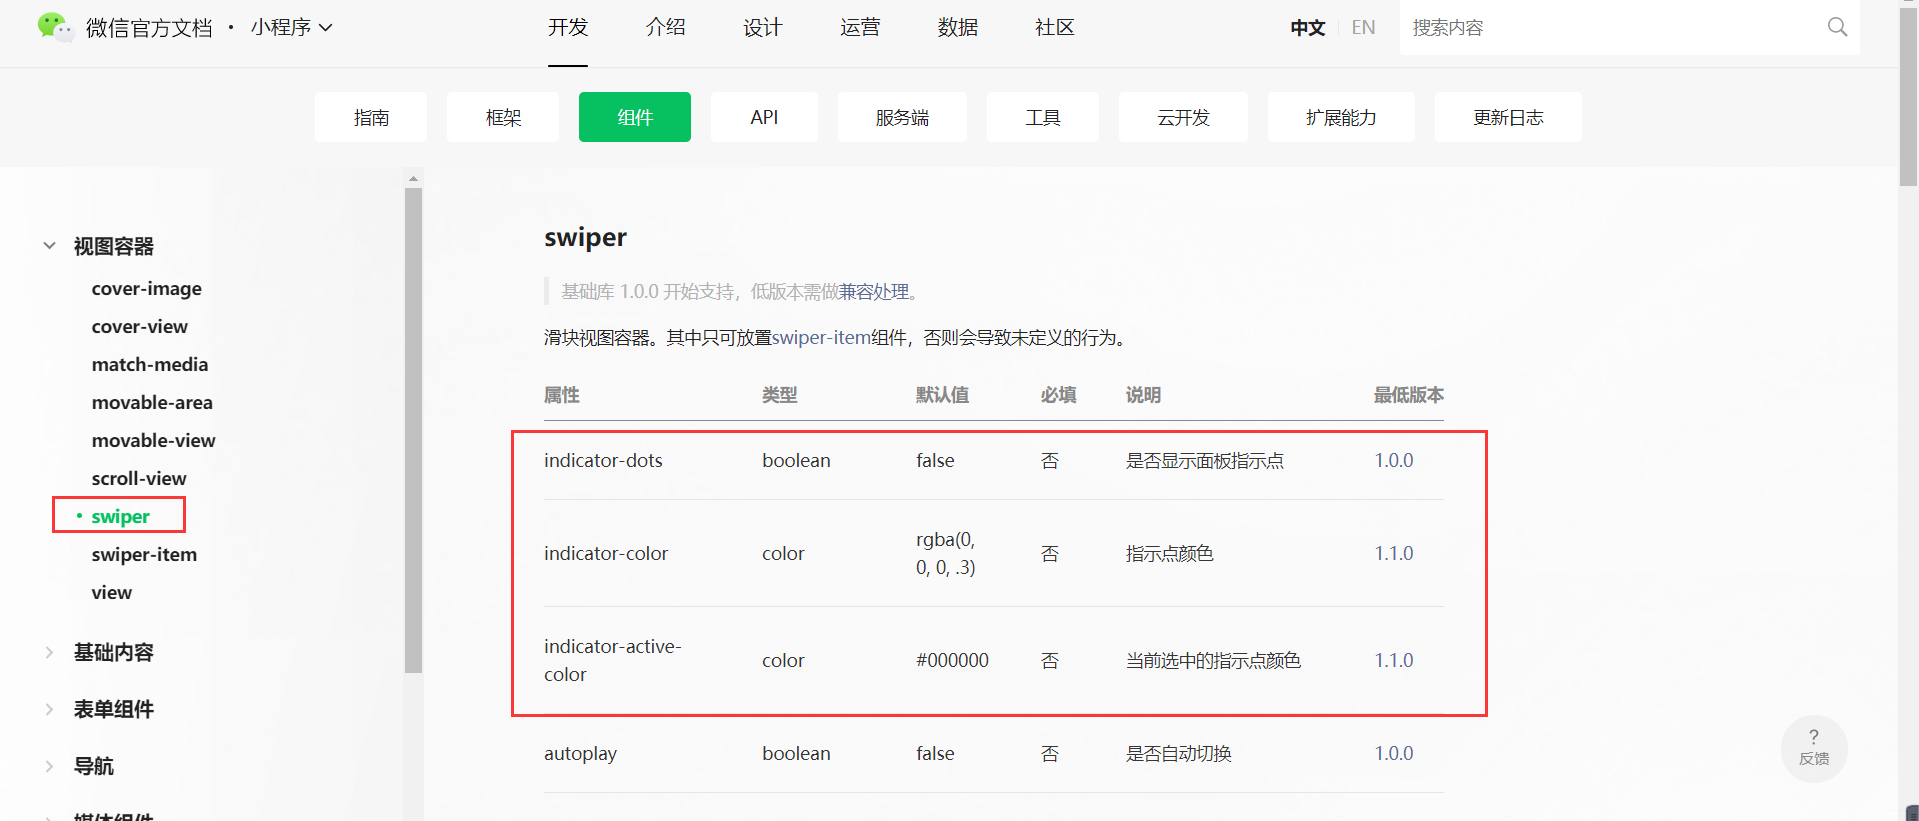

<!---  轮播图  ----->
<swiper
 class="banners"
 indicator-dots="true"
 indicator-color="ivory"
 indicator-active-color="#d43c33"
>
	<swiper-item>
		<image src="/static/images/nvsheng.jpg" />
	</swiper-item>
	<swiper-item>
		<image src="/static/images/nvsheng.jpg" />
	</swiper-item>
	<swiper-item>
		<image src="/static/images/nvsheng.jpg" />
	</swiper-item>
	<swiper-item>
		<image src="/static/images/nvsheng.jpg" />
	</swiper-item>
</swiper>
.banner{


  width: 100%;
  height: 300rpx;
}

.banner image{


  width: 100%;
  height: 100%;
}
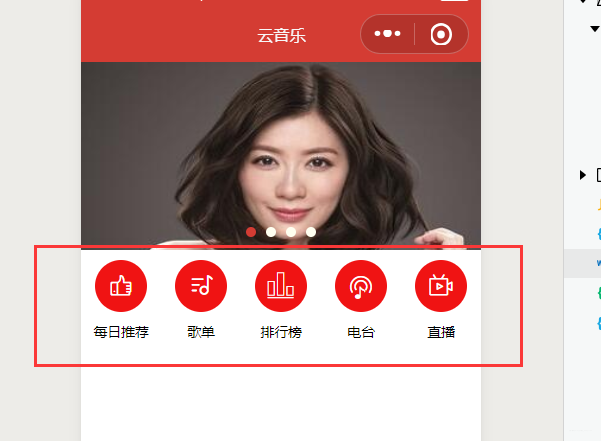
2、5つの小さなアイコン
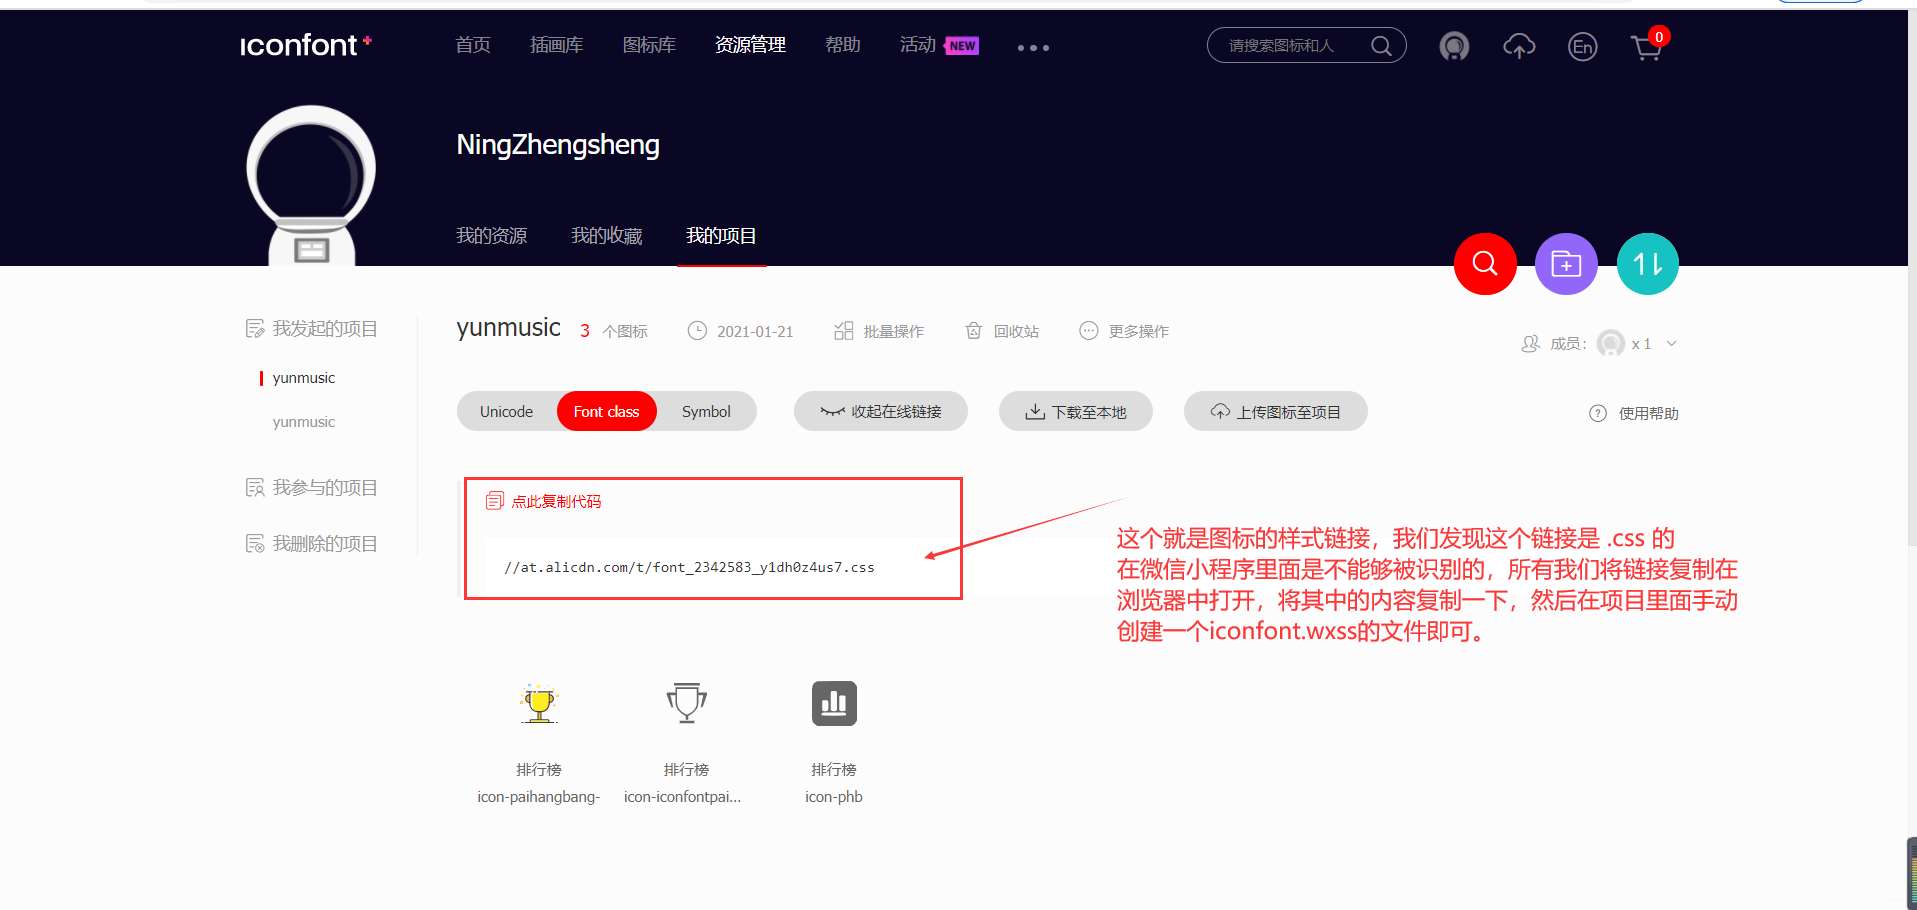
1.アリババのベクターアイコンをローカルに変換します
アカウントにログインし、必要なアイコンを
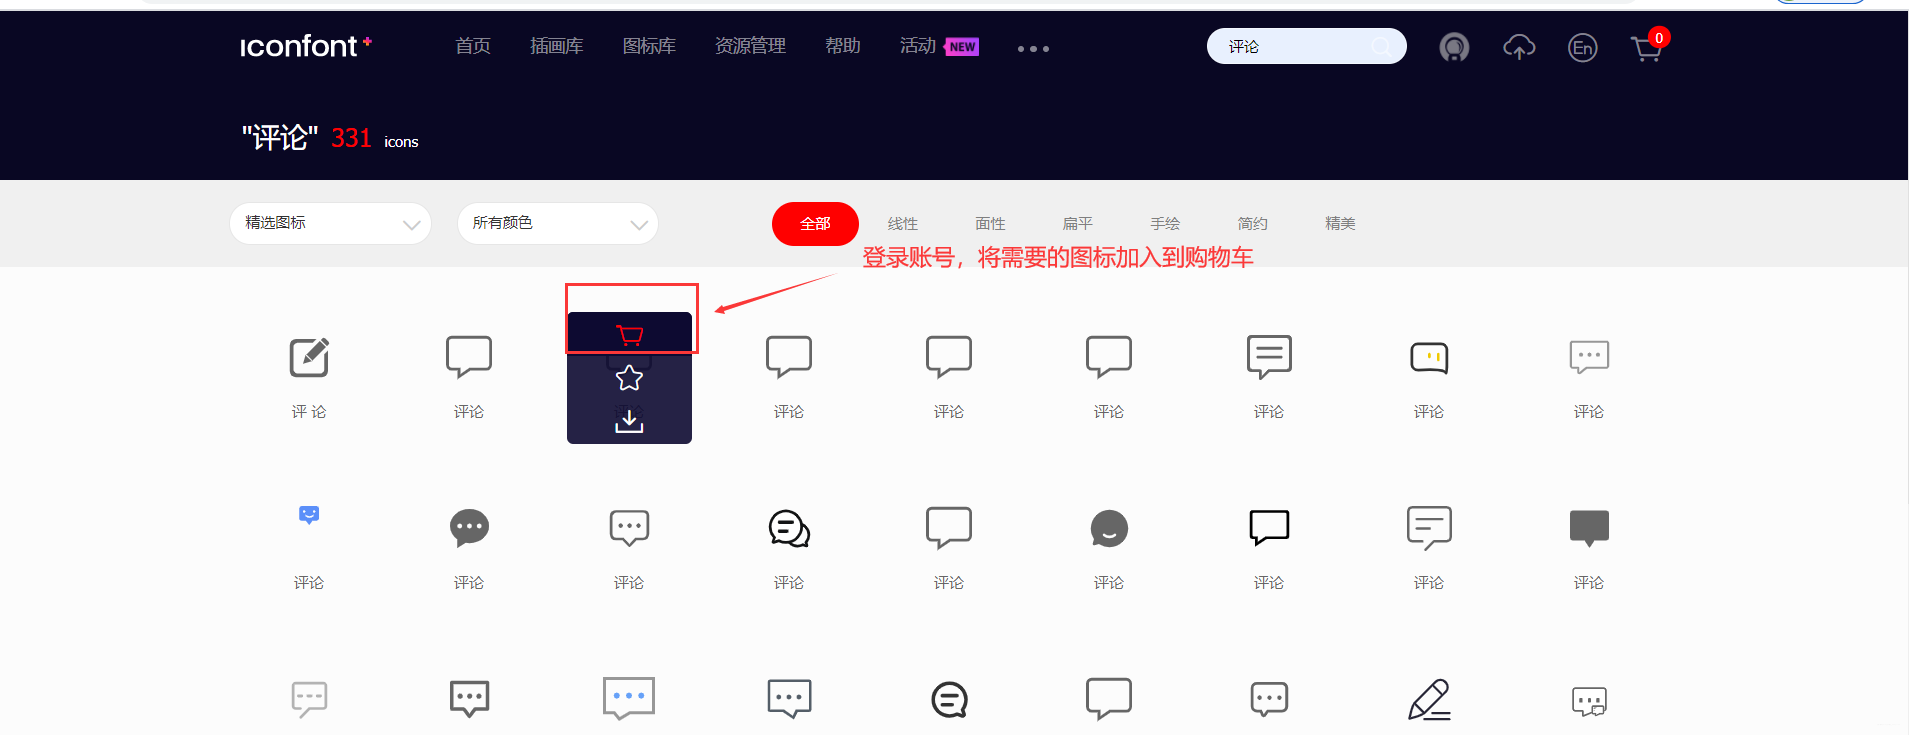
ショッピングカートに追加します。ショッピングカートをクリックして、選択したアイコンをプロジェクトに追加します(管理に便利です)。
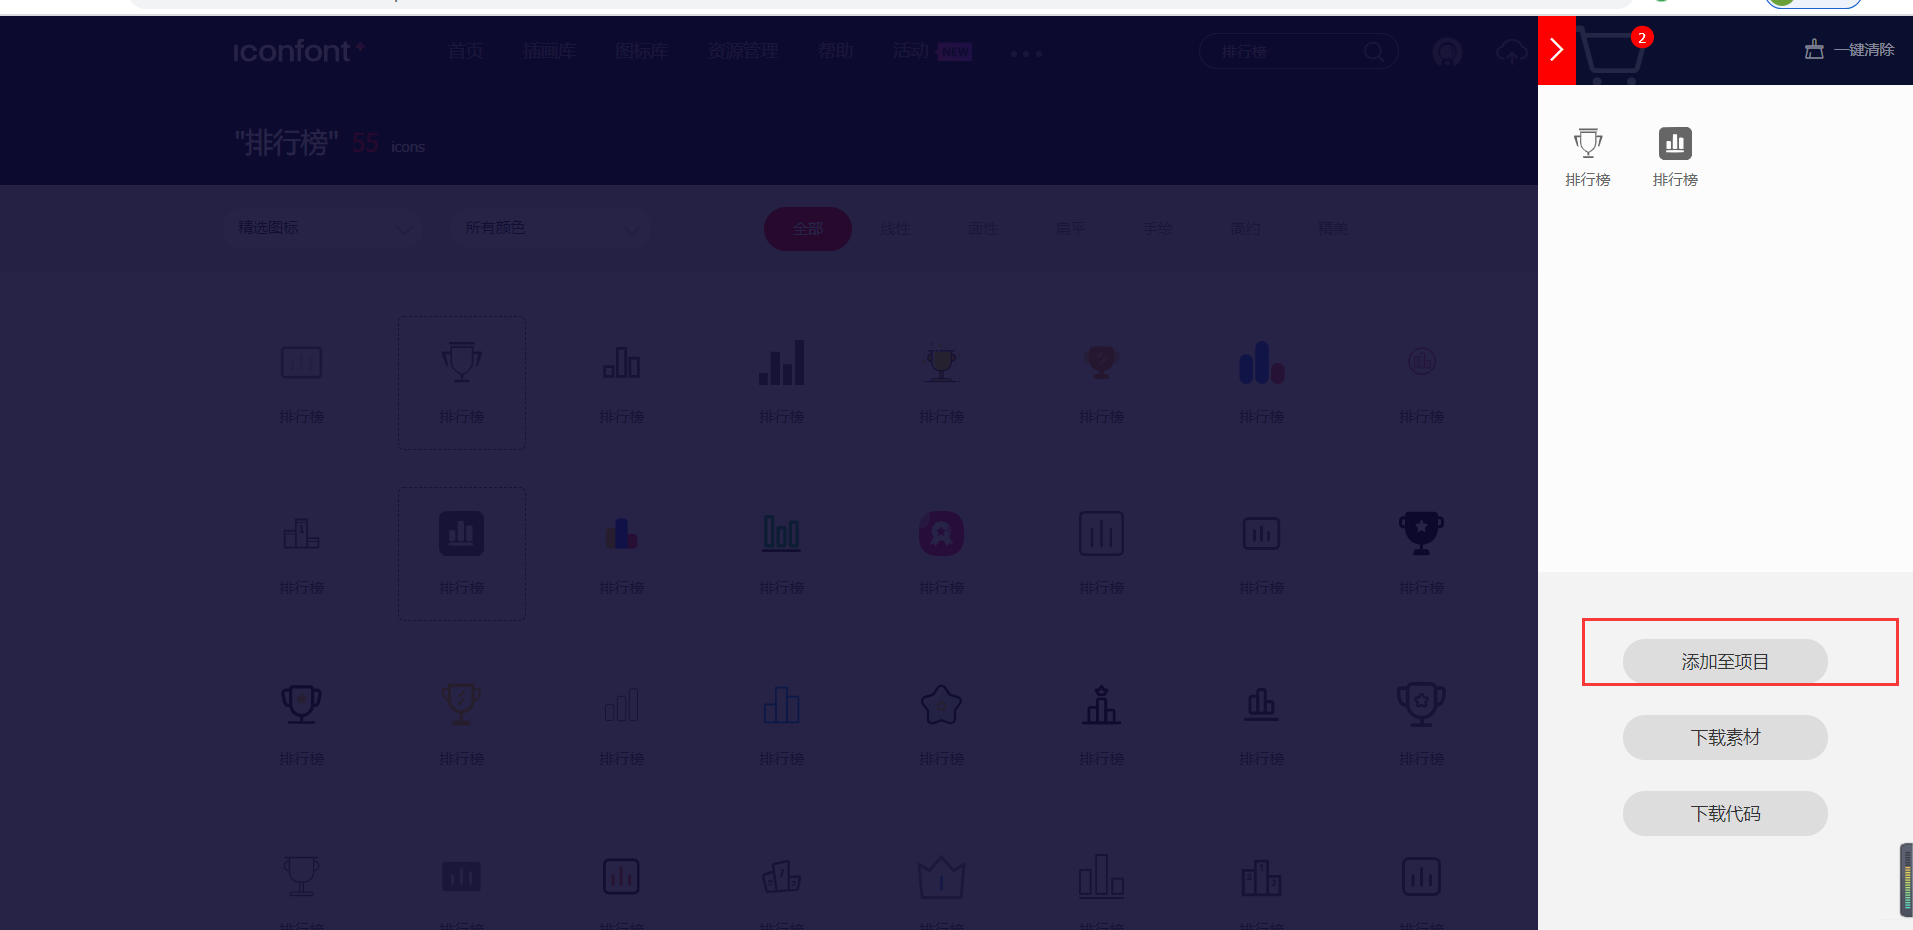
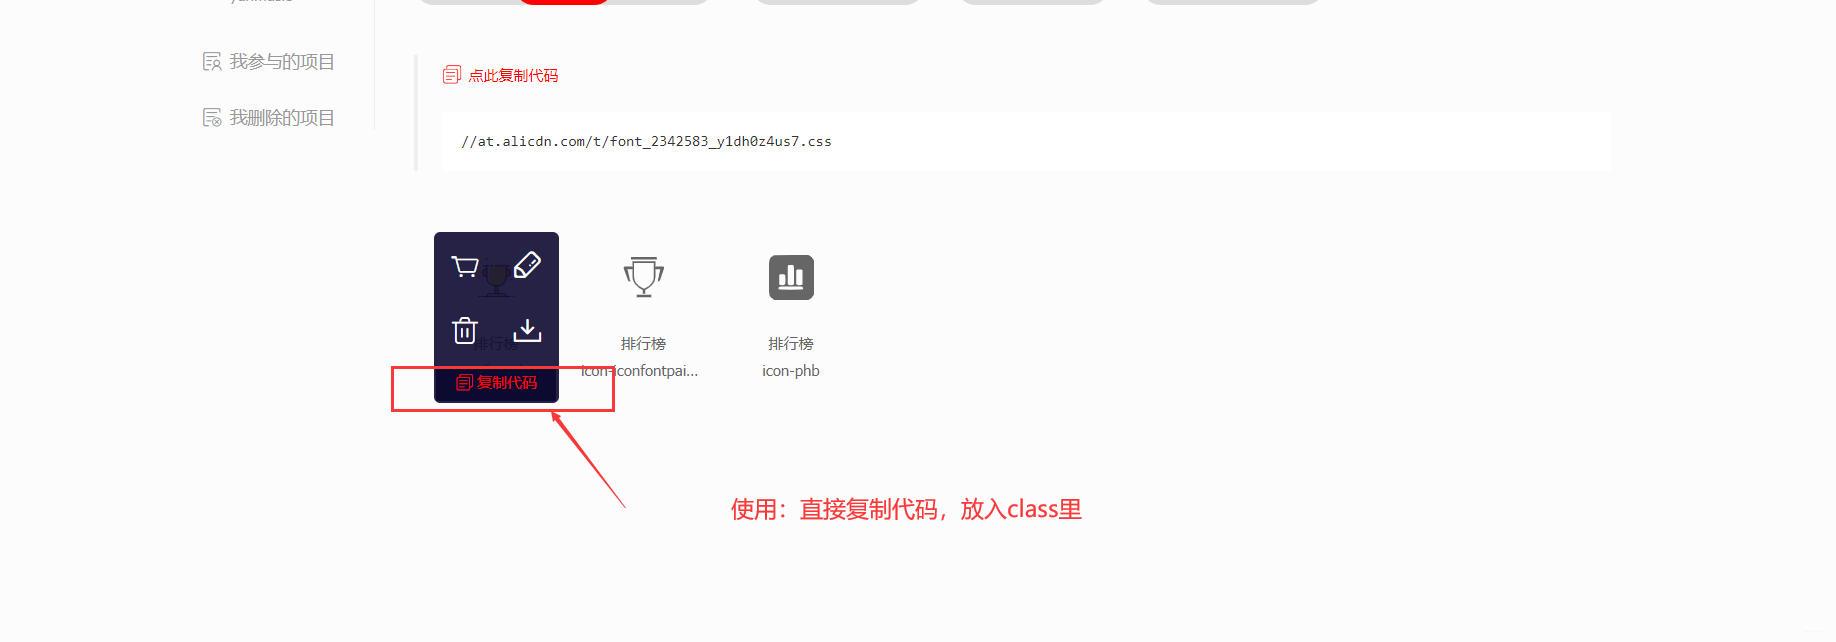
プロジェクトにコードスタイルを追加する
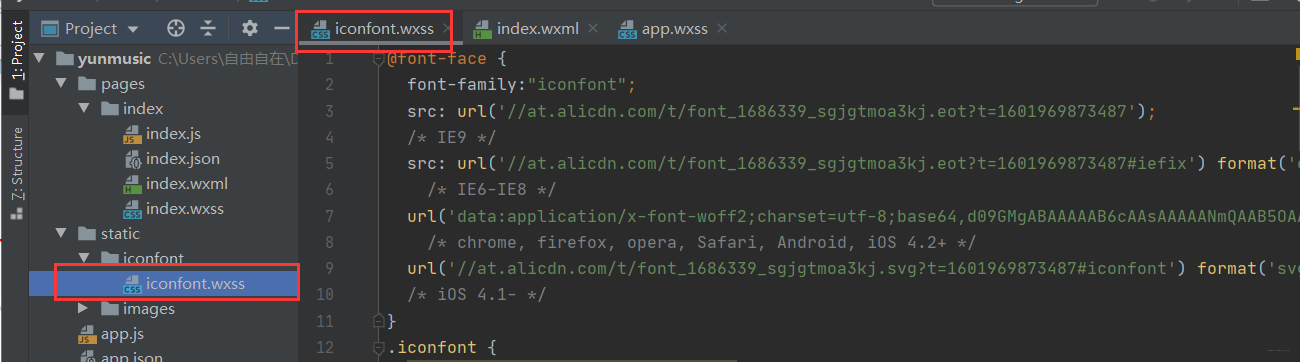
2.プロジェクト使用アイコン
グローバルリファレンスiconfont.wxssスタイル

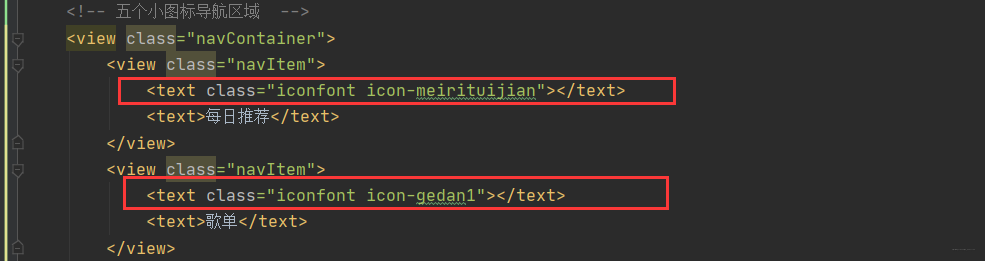
効果画像:
以下のスタイルを調整します。
/* 五个导航栏的样式 */
.navContainer{


  display: flex;
}

.navItem{


  display: flex;
  flex-direction: column;
  align-items: center;
  width: 20%;
}

.navItem .iconfont{


  width: 100rpx;
  height: 100rpx;
  border-radius: 50%;
  text-align: center;
  line-height: 100rpx;
  background: rgb(240,19,19);
  font-size: 50rpx;
  color: #fff;
  margin: 20rpx 0;
}


.navItem text{


  font-size: 26rpx;
}
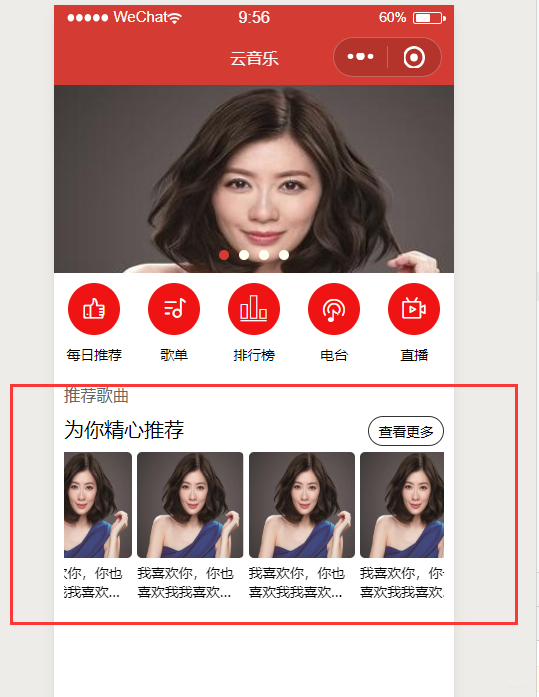
3、スクロールバースクロールビュー
注意点:
enable-flexフレックスボックスレイアウトを有効にします。開いた後、現在のノードはdisplay:flexを宣言し、flexコンテナになり、その子ノードに作用します。
scroll-x 水平スクロールを許可する

	<!-- 推荐歌曲区域	-->
	<view class="commmendContainer">
		<!--	头部	-->
		<view class="header">
			<text class="title">推荐歌曲</text>
			<view>
				<text>为你精心推荐</text>
				<text class="more">查看更多</text>
			</view>
		</view>
		<!--	内容区	-->
		<scroll-view class="recommendScroll" enable-flex scroll-x>
			<view class="scrollItem">
				<image src="/static/images/nvsheng.jpg"></image>
				<text>我喜欢你,你也喜欢我我喜欢你,你也喜欢我</text>
			</view>
			<view class="scrollItem">
				<image src="/static/images/nvsheng.jpg"></image>
				<text>我喜欢你,你也喜欢我我喜欢你,你也喜欢我</text>
			</view>
			<view class="scrollItem">
				<image src="/static/images/nvsheng.jpg"></image>
				<text>我喜欢你,你也喜欢我我喜欢你,你也喜欢我</text>
			</view>
			<view class="scrollItem">
				<image src="/static/images/nvsheng.jpg"></image>
				<text>我喜欢你,你也喜欢我我喜欢你,你也喜欢我</text>
			</view>
			<view class="scrollItem">
				<image src="/static/images/nvsheng.jpg"></image>
				<text>我喜欢你,你也喜欢我我喜欢你,你也喜欢我</text>
			</view>
		</scroll-view>
	</view>
/* 推荐歌曲样式设置 */
.commmendContainer{


  padding: 20rpx;
}

.commmendContainer .header{


  padding-bottom: 20rpx;
}

.commmendContainer .header .title{


  font-size: 32rpx;
  line-height: 80rpx;
  color: #666;
}

.commmendContainer .header .more{


  float: right;
  border: 1rpx solid #333;
  padding: 10rpx 20rpx;
  font-size: 26rpx;
  border-radius: 30rpx;
}

/* 推荐内容区 的样式*/
.recommendScroll{


  display: flex;
}

.scrollItem{


  width: 200rpx;
  margin-right: 10rpx;
}

.scrollItem image{


  width: 200rpx;
  height: 200rpx;
  border-radius: 10rpx;
}

.scrollItem text{


  font-size: 26rpx;
  /* 单行文本溢出隐藏 省略号代替 */
  /*display: block;*/
  /*white-space: nowrap;*/
  /*overflow: hidden;*/
  /*text-overflow: ellipsis;*/

  /*  多行文本溢出隐藏 省略号代替 */
  overflow: hidden;
  text-overflow: ellipsis;
  display: -webkit-box;
  -webkit-box-orient: vertical; /* 设置对其模式 */
  -webkit-line-clamp:2; /* 设置多行的行数*/
}
4つのフロントエンドインタラクション(動的データの取得)
NetEase Cloudが提供するインターフェースからデータを取得し、アプレットの静的データを置き換えます。
文法: wx.request()
予防:
- プロトコルはhttpsプロトコルである必要があります。
- 1つのインターフェースに最大20のドメイン名を構成できます。
- 並行性の上限は10です。
- ローカル開発で検証されない有効なドメイン名を設定できます。開発ツール->右上隅の詳細->ローカル設定->検証なしを設定します。
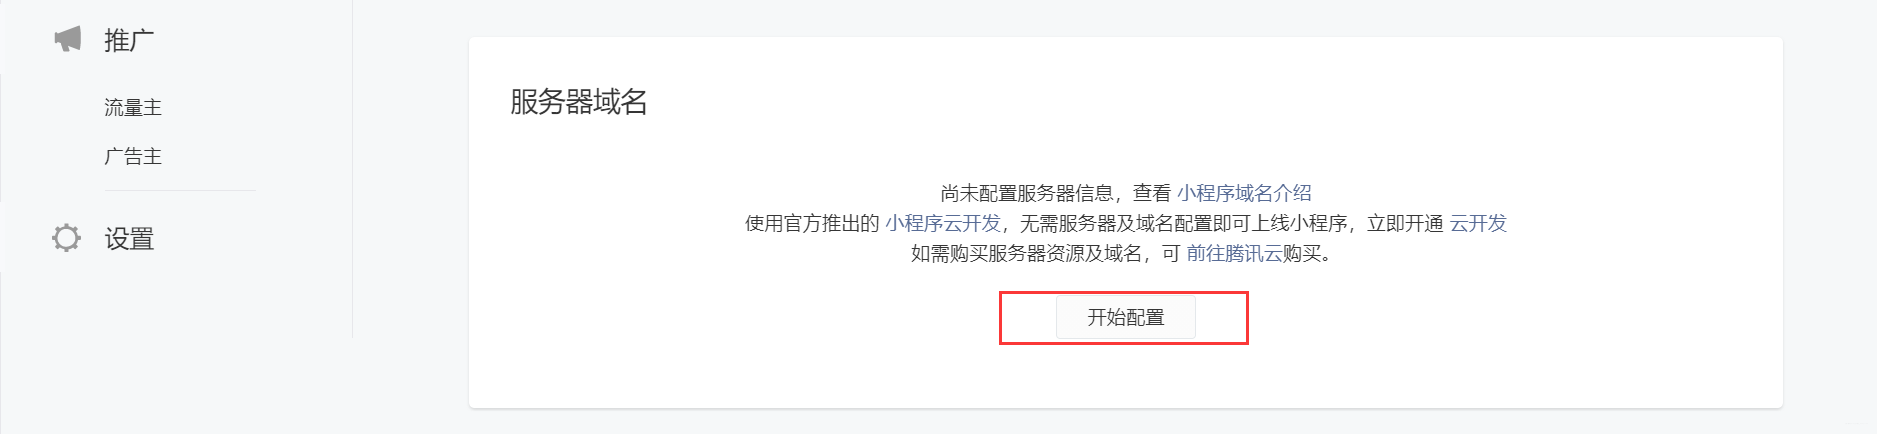
1. WeChatアプレットにログインして、サーバーのドメイン名を設定します(実際の開発中)
実際の開発ではアプレットのドメイン名を設定する必要があります。そうしないと、ドメイン名が不正であるというエラーが報告されます。
この記事ではローカルで開発と学習を行っているため、設定は行いません。
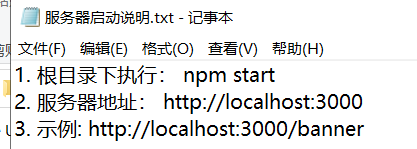
2.ローカル開発(http:localhost:3000 /)
(1)サーバーをローカルで起動します
これはカプセル化されたインターフェースであり、NetEase Cloudからデータを取得する必要はありません。これは、私たちが使用するのに便利で標準化された仲介者と見なすことができます。

(2)データを取得する
バックグラウンドデータを取得するためのindex.jsコード
  onLoad: function (options) {


    wx.request({


      url:"http://localhost:3000/banner",
      data:{


        type:2
      },
      success:(res)=>{


        // 获取后台数据成功
        console.log("获取后台数据成功",res);
      },
      fail:(err)=>{


        // 获取后台数据失败
        console.log("获取后台数据失败",err);
      }
    })
  },
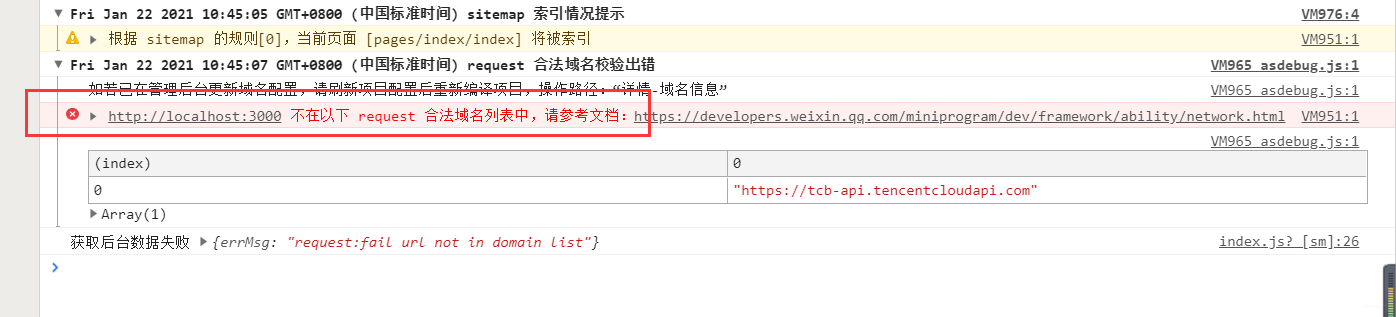
ドメイン名検出が設定されていない場合、上記のエラーが報告されるため、以下を設定する必要があります。
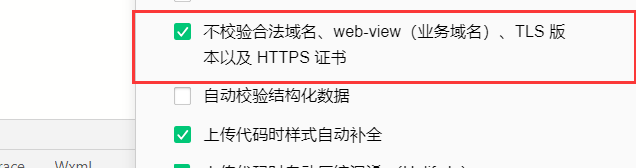
設定後にデータを取得します。

(3)パッケージ機能機能
awaitそしてasync、データの取得を達成するために!
インデックスコード:
import request from "../../utils/request";
  /**
   * 生命周期函数--监听页面加载
   */
  onLoad: async function (options) {


    let result = await request("http://localhost:3000/banner", {

    type: 2});
    console.log("返回结果:",result);
  },
request.jaコード:
// 专门发送ajax请求

export default(url , data={

    }, method="GET")=>{


    return new Promise((resolve,reject)=>{


        // 1. new Promise 初始化promise 实例的状态pending
        wx.request({


            url,
            data,
            method,
            success:(res)=>{


                // 获取后台数据成功
                console.log("获取后台数据成功",res);
                resolve(res.data);
            },
            fail:(err)=>{


                // 获取后台数据失败
                console.log("获取后台数据失败",err);
                reject(err);
            }
        })
    })
}
上記のパッケージ関数を使用したところ、次のエラーが発生しました。
TypeError: Cannot read property 'mark' of undefined
解決策:(拡張コンパイルをオンに
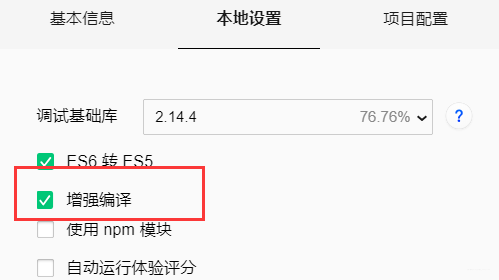
します)データを取得します:

V.リストのレンダリング(等高線図と推奨曲に動的データを使用)
コンポーネントにレンダリングするドキュメントの公式リストは、プロパティを制御して配列をバインドするために使用します。データの配列を使用して、コンポーネントを繰り返しレンダリングできます。デフォルト配列の現在の項目の添え字変数名はデフォルトで、に設定され、配列の現在の項目の変数名はデフォルトでに設定されます。
wx:for
wx:forindexitem
公式例:
<view wx:for="{

    {array}}">
  {

    {

    index}}: {

    {

    item.message}}
</view>
Page({


  data: {


    array: [{


      message: 'foo',
    }, {


      message: 'bar'
    }]
  }
})

プロジェクトアプリケーション:
	<!---  轮播图  ----->
	<swiper class="banners" indicator-dots="true" indicator-color="ivory" indicator-active-color="#d43c33">
		<swiper-item wx:for="{

     {bannerList}}" wx:key="bannerId">
			<image src="{

     {item.pic}}" ></image>
		</swiper-item>
	</swiper>

	<!-- 推荐歌曲区域	-->
	<view class="commmendContainer">
		<!--	内容区	-->
		<scroll-view class="recommendScroll" enable-flex scroll-x>
			<view class="scrollItem" wx:for="{

     {recommendList}}" wx:key="id">
				<image src="{

     {item.picUrl}}"></image>
				<text>{

   {item.name}}</text>
			</view>
		</scroll-view>
	</view>
  onLoad: async function (options) {


    // 1. 获取轮廓图的数据
    let bannerList = await request("/banner", {

    type: 2});
    this.setData({


      bannerList:bannerList.banners
    });

    // 2. 获取推荐歌单的数据
    let recommendList = await request("/personalized",{

    limit:10});
    this.setData({


      recommendList:recommendList.result
    });
  },