1. Paquete de funciones interactivas de Android
La creación de proyectos específicos, la creación de módulos, la creación de clases Java y otros procesamientos no se detallarán aquí. Para obtener más detalles, consulte: Uso de Android WebView
Este documento es solo para especificar el nombre del paquete para obtener el ícono y el nombre de una aplicación y para abrir la aplicación.
1. Clase de llamada al método
El código específico es el siguiente:
import android.content.Context;
import android.content.Intent;
import android.content.pm.ApplicationInfo;
import android.content.pm.PackageManager;
import android.graphics.Bitmap;
import android.graphics.Canvas;
import android.graphics.drawable.Drawable;
import android.util.Log;

import java.io.ByteArrayOutputStream;

public class GetApplicationListUtils {
    private Context mContext;
    private static GetApplicationListUtils mGetApplicationListUtils = null;

    public GetApplicationListUtils(Context context) {
        this.mContext = context;
    }


    public static GetApplicationListUtils getInstance(Context context){
        if (mGetApplicationListUtils == null) {
            mGetApplicationListUtils = new GetApplicationListUtils(context);
        }
        return mGetApplicationListUtils;
    }

    //通过包名获取应用图标
    public byte[] getDrawableIconByPackageName(String packageName) {
        Drawable icon = getAppIcon(packageName);
        Bitmap bitmap = drawableToBitmap(icon);
        return bitmapToByte(bitmap);
    }

    //获取应用图标
    private Drawable getAppIcon(String packageName) {
        try {
            PackageManager pm = mContext.getPackageManager();
            ApplicationInfo info = pm.getApplicationInfo(packageName, 0);
            Log.i("GetApplicationListUtils","getAppIcon");
            return info.loadIcon(pm);
        } catch (Exception e) {
            e.printStackTrace();
            Log.i("GetApplicationListUtils","Exception");
            return null;
        }
    }

    //Drawable转Bitmap
    private Bitmap drawableToBitmap(Drawable drawable){
        //取drawable的长宽
        int width = drawable.getIntrinsicWidth();
        int height = drawable.getIntrinsicHeight();
        //取drawable的颜色格式
        Bitmap.Config config = Bitmap.Config.ARGB_8888;
        //创建对应Bitmap
        Bitmap bitmap = Bitmap.createBitmap(width,height,config);
        //建立对应Bitmap的画布
        Canvas canvas = new Canvas(bitmap);
        drawable.setBounds(0,0,width,height);
        //把drawable内容画到画布中
        drawable.draw(canvas);
        Log.i("GetApplicationListUtils","drawableToBitmap");
        return bitmap;
    }

    //Bitmap转Byte
    private byte[] bitmapToByte(Bitmap bitmap){
        ByteArrayOutputStream stream = new ByteArrayOutputStream();
        bitmap.compress(Bitmap.CompressFormat.PNG, 100, stream);
        Log.i("GetApplicationListUtils","bitmapToByte");
        return stream.toByteArray();
    }

    //通过包名获取应用名称
    public String getApplicationNameByPackageName(String packageName) {
        String name;
        PackageManager pm = mContext.getPackageManager();
        try {
            name = pm.getApplicationLabel(pm.getApplicationInfo(packageName, PackageManager.GET_META_DATA)).toString();
        } catch (android.content.pm.PackageManager.NameNotFoundException e) {
            name = "";
        }
        return name;
    }

    //通过包名打开应用
    public void StartApp(String packageName) {
        try {
            Intent intent = mContext.getPackageManager().getLaunchIntentForPackage(packageName);
            mContext.startActivity(intent);
        } catch (Exception exception) {}
    }
}
2. Asuntos que requieren atención
(1) Dibujable a mapa de bits
Después de obtener el ícono de la aplicación, obtendrá los datos en formato Drawable, que debe convertirse en un mapa de bits y luego convertirse nuevamente en una matriz de bytes para llamadas posteriores de Unity.
1) Adquisición de mapa de bits
Android 10.0, es decir, las versiones por debajo del nivel API 29, pueden usar directamente ((BitmapDrawable)drawable).getBitmap() para obtener el mapa de bits;
API de Android nivel 29 (incluido 29) y superior, ((BitmapDrawable)drawable).getBitmap() no es válido, debe obtener Bitmap a través de Bitmap.createBitmap(width,height,config).
2) Selección de mapa de bits.Configuración
Para obtener más información, consulte: Bitmap.Config
Para garantizar la visualización normal de iconos con canales transparentes, se puede seleccionar Bitmap.Config.ARGB_8888.
3) Configuración del lienzo
Es necesario configurar el lienzo; de lo contrario, habrá un problema con la posición de visualización del icono. Es decir, el siguiente código es indispensable.
//Crea un lienzo correspondiente al lienzo de mapa de bits
canvas = new Canvas(bitmap);
drawable.setBounds(0,0,width,height);
//Dibuja el contenido dibujable en el lienzo
drawable.draw(canvas);
Dos, llamado a la unidad
1. Colocación del paquete AAR
Arrastre y suelte el paquete AAR directamente en Activos de Unity-->Complementos-->ruta de Android.
2. Cree un script C# y llame al paquete AAR.
Escriba el siguiente contenido para llamar a la interfaz de función en el paquete AAR.
using System.Collections;
using System.Collections.Generic;
using UnityEngine;
using UnityEngine.UI;
public class LauncherManager : MonoBehaviour
{
public RawImage appIcon;
public Text appNameText;
private AndroidJavaObject getApplicationListUtils;
private void Awake()
{
AndroidJavaClass unityPlayer = new AndroidJavaClass("com.unity3d.player.UnityPlayer");
AndroidJavaObject currentActivity = unityPlayer.GetStatic<AndroidJavaObject>("currentActivity");
AndroidJavaClass getApplicationListUtilsClass = new AndroidJavaClass("包名.GetApplicationListUtils");
getApplicationListUtils = getApplicationListUtilsClass.CallStatic<AndroidJavaObject>("getInstance", currentActivity);
}
// Start is called before the first frame update
void Start()
{
//获取应用图标数据
byte[] drawableBytes = getApplicationListUtils.Call<byte[]>("getDrawableIconByPackageName", "指定应用包名");
//新建一个Texture2D来加载获得的图像byte[]数据
Texture2D texture2D = new Texture2D(100, 100);
texture2D.LoadImage(drawableBytes);
//在界面上显示获得的应用图标
appIcon.texture = texture2D;
//在界面上显示获得的应用名称
appNameText.text = getApplicationListUtils.Call<string>("getApplicationNameByPackageName", "指定应用包名");
}
//打开应用
public void OpenApplication()
{
getApplicationListUtils.Call("StartApp", "指定应用包名");
}
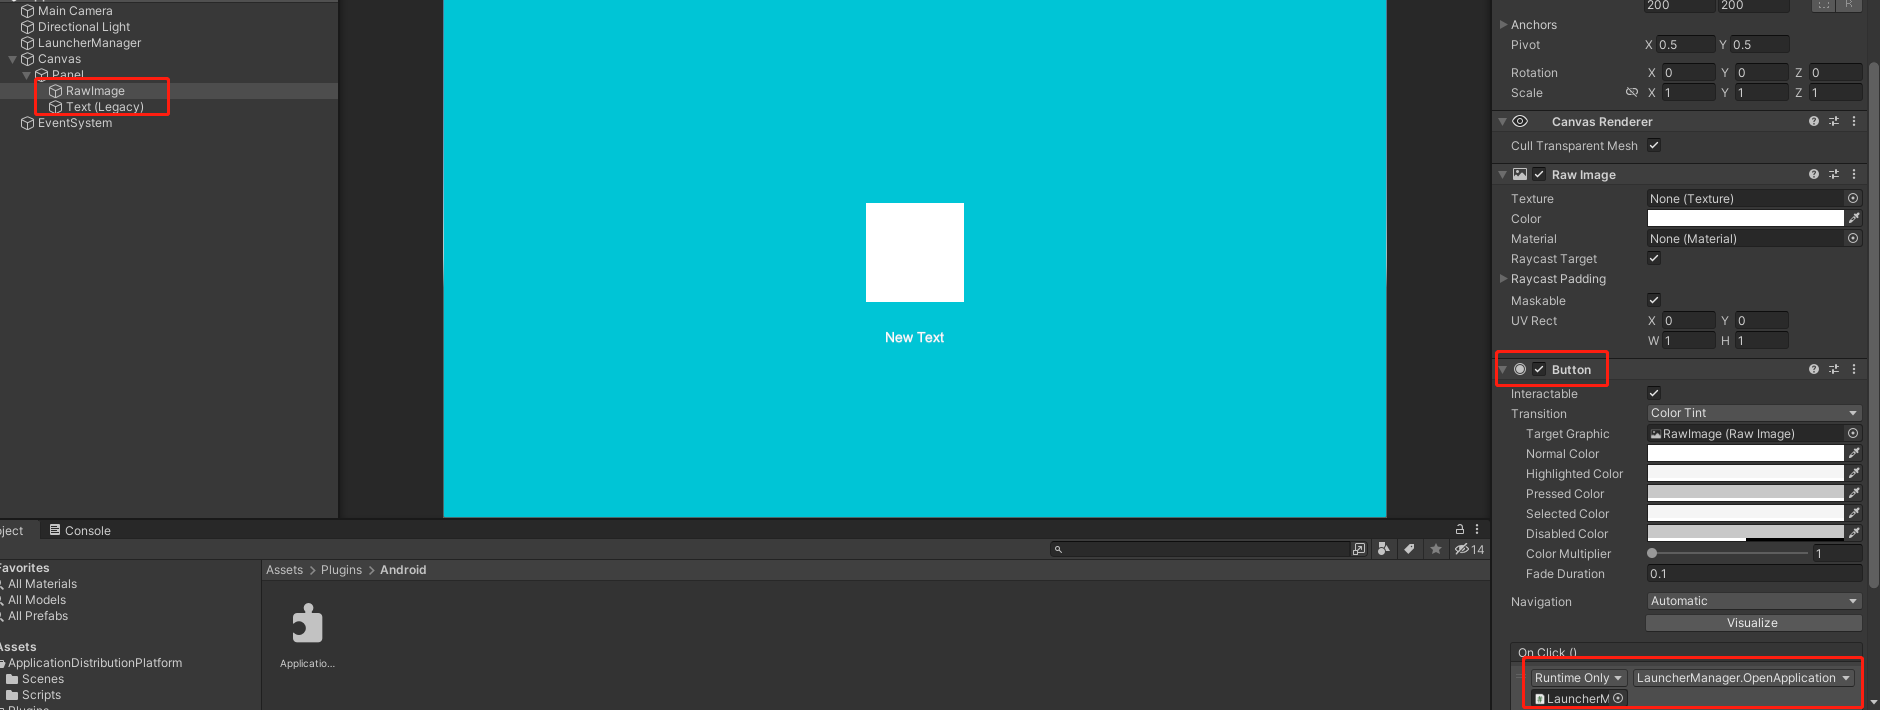
}3. Prueba de llamada
Cree una imagen cruda y un texto en el editor de Unity, el primero se usa para mostrar el ícono de la aplicación y el segundo se usa para mostrar el nombre de la aplicación. Y agregue un componente Botón a RawImage para llamar al método de apertura de la aplicación.