Preparar
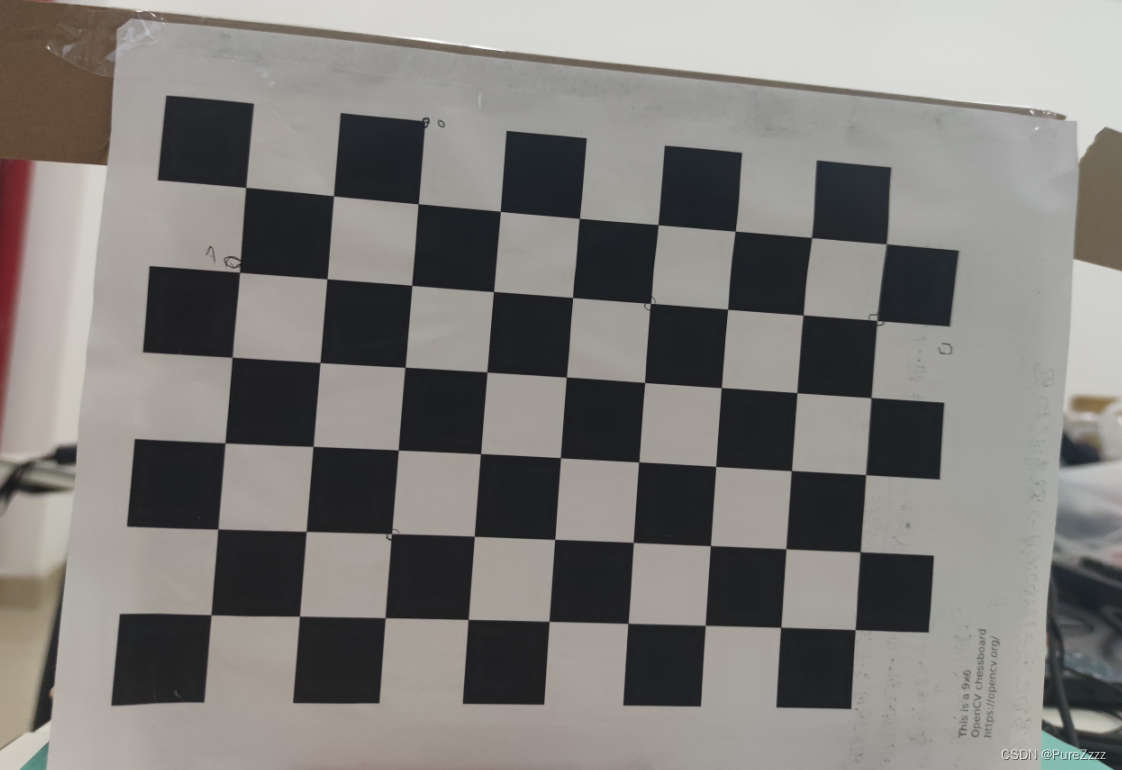
1. Un diagrama de tablero de ajedrez
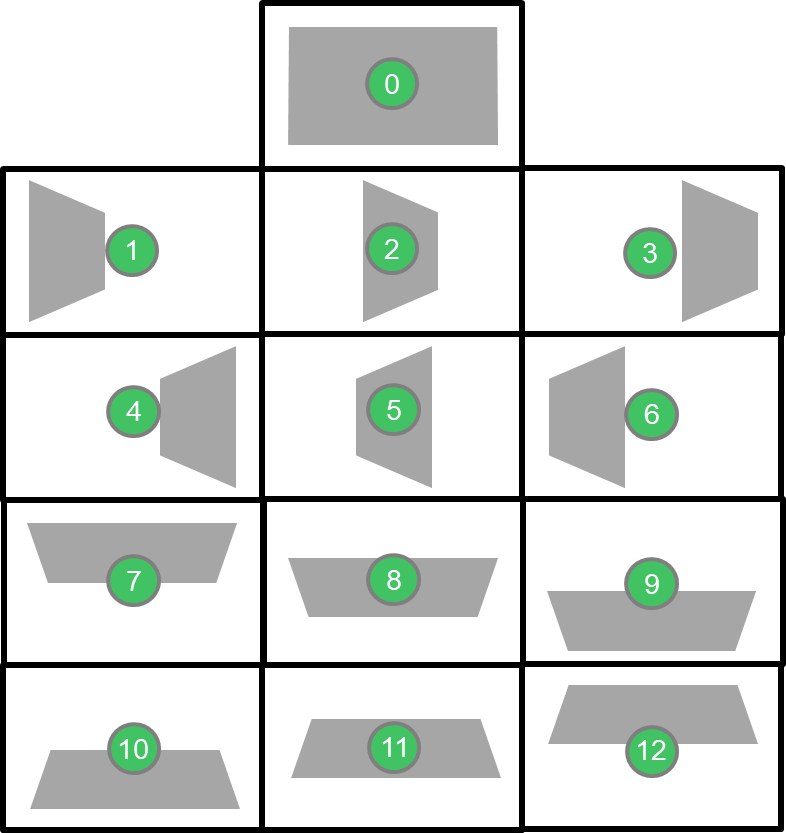
Se puede descargar directamente desde el github oficial de opencv. Este es un tablero de ajedrez con cuadrículas de 10*7, un total de 9*6 puntos de esquina, y cada cuadrícula mide 24 mm . Este tablero de ajedrez se usa en este artículo. Debe imprimirlo en papel A4 para su uso posterior. (También puede configurar el tamaño del tablero de ajedrez usted mismo de acuerdo con el tutorial oficial OpenCV: Crear patrón de calibración )
opencv/patrón.png en 4.x · opencv/opencv · GitHub
2. Una cámara binocular
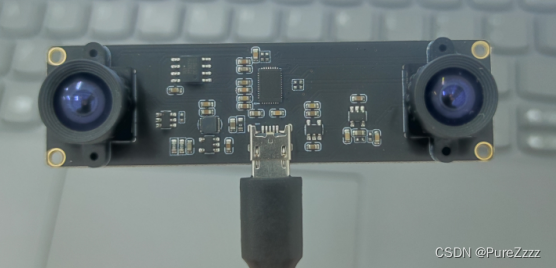
Compré una cámara desconocida en tb, y viene con una herramienta de prueba .exe para un uso simple de la cámara.El efecto es el siguiente
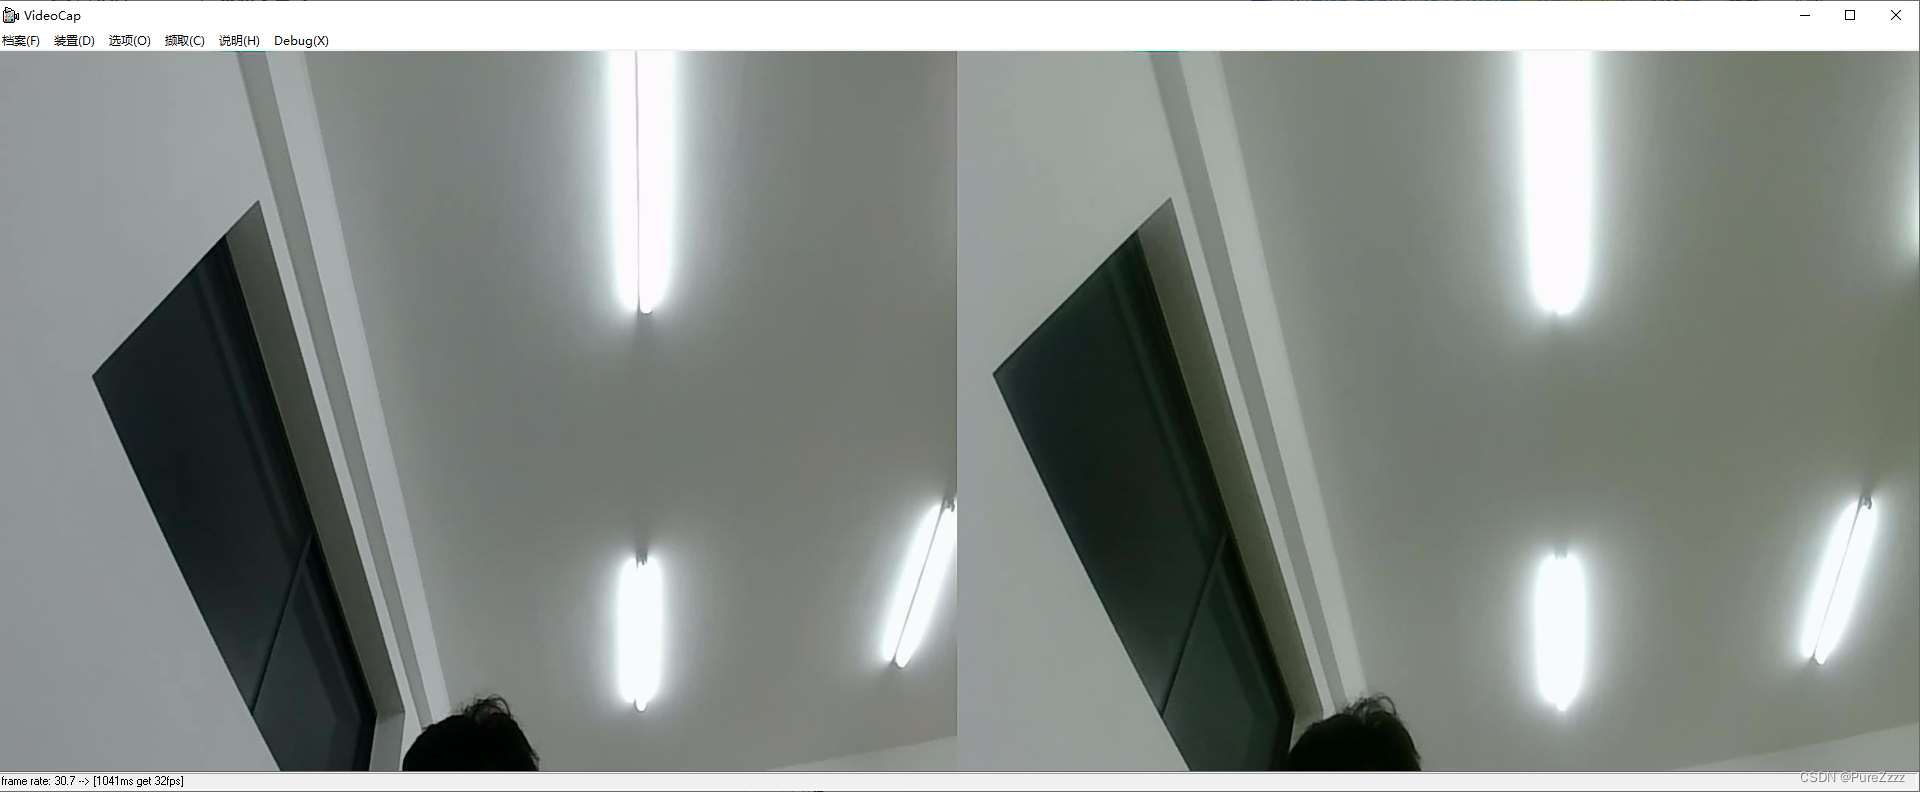
Use opencv para hacer una prueba simple. El portátil que uso comienza desde 1 cuando está conectado a la cámara USB. Aunque esta cámara binocular tiene dos entradas índice = 1 e índice = 2, solo necesita obtener la transmisión de video de índice = 1. Se puede obtener un efecto binocular.
import cv2
cap = cv2.VideoCapture(1)
cap.set(cv2.CAP_PROP_FRAME_WIDTH,1280)
cap.set(cv2.CAP_PROP_FRAME_HEIGHT,480)
while(1):
    _, frame = cap.read()
    assert _, "摄像头获取失败"
    cv2.imshow('img', frame)
    c = cv2.waitKey(1)
    if c == 27:
        cap.release()
        break
La resolución debe ajustarse al ancho correcto antes de abrir. Mi cámara es 1280. Si el ancho está configurado incorrectamente, la imagen binocular no se puede obtener correctamente.
La resolución de la cámara se puede obtener a través del siguiente código, principalmente para obtener el ancho, el ancho de la imagen binocular debe ser la suma del ancho de las dos cámaras
import cv2
cap0 = cv2.VideoCapture(1)
cap1 = cv2.VideoCapture(2)
res0 = [cap0.get(cv2.CAP_PROP_FRAME_WIDTH),cap0.get(cv2.CAP_PROP_FRAME_HEIGHT)]
res1 = [cap1.get(cv2.CAP_PROP_FRAME_WIDTH),cap1.get(cv2.CAP_PROP_FRAME_HEIGHT)]
print(res0)
print(res1)
cap0.release()
cap1.release()
Imagen binocular con resolución correcta (1280*480)

Imagen binocular con resolución incorrecta (2560*480)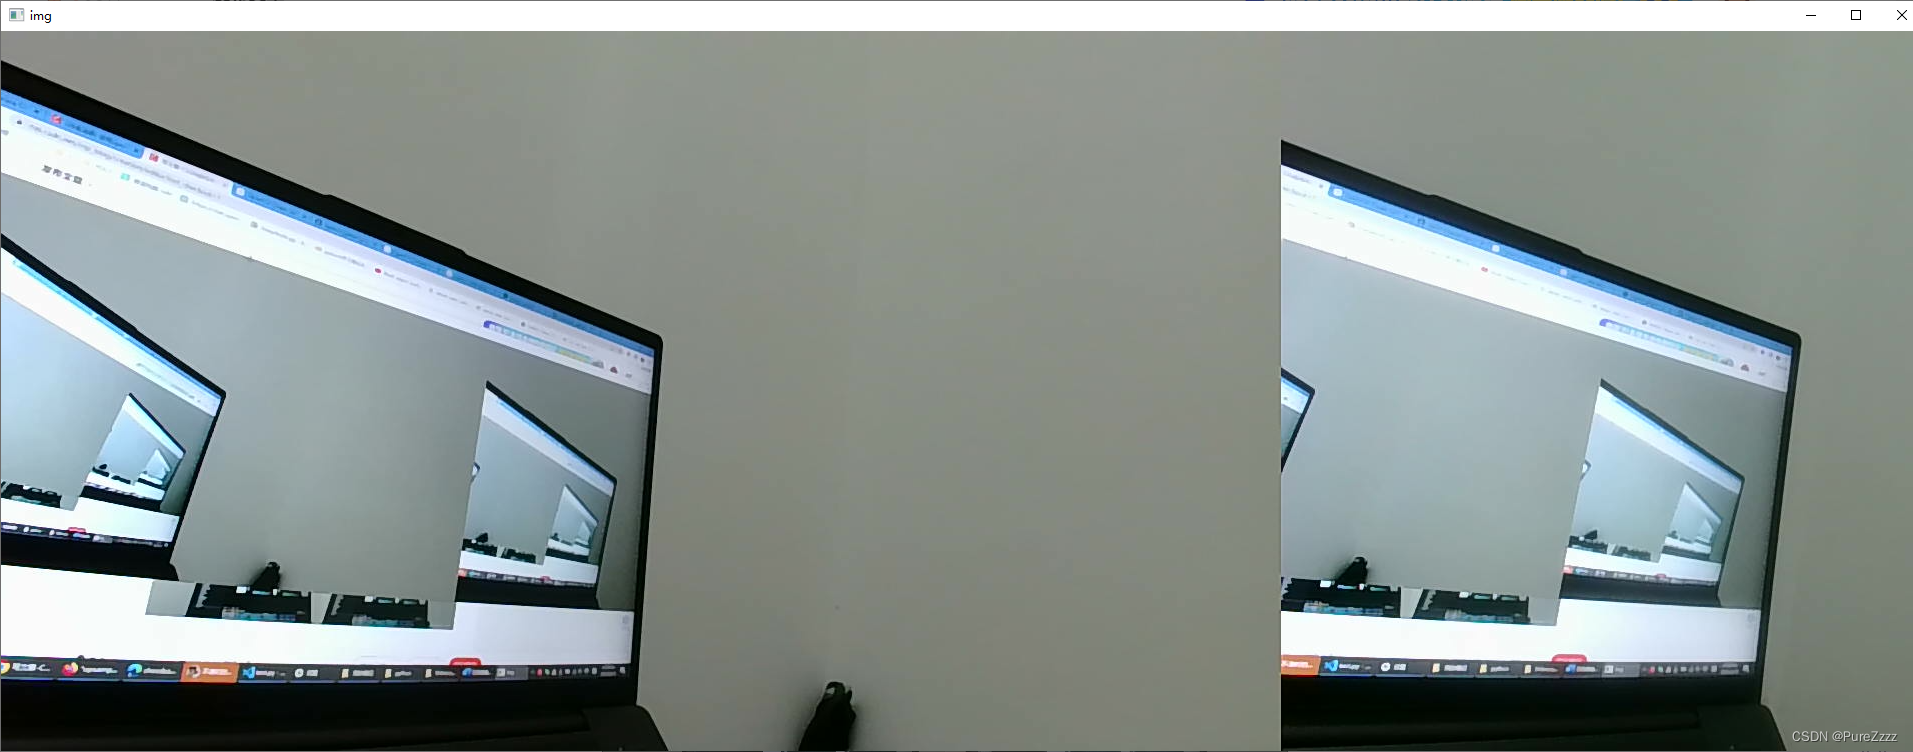
iniciar operación
Toma una foto del tablero de ajedrez primero.
import cv2,os
cap = cv2.VideoCapture(1)
cap.set(cv2.CAP_PROP_FRAME_WIDTH,1280)
cap.set(cv2.CAP_PROP_FRAME_HEIGHT, 480)
# 生成目录
path = './calibration/'
path_l = './calibration/left/'
path_r = './calibration/right/'
os.mkdir(path) if not os.path.exists(path) else None
os.mkdir(path_l) if not os.path.exists(path_l) else None
os.mkdir(path_r) if not os.path.exists(path_r) else None
count = 0
while cap.isOpened():
    ret, frame = cap.read()
    cv2.imshow('img',frame)
    k = cv2.waitKey(1)
    # 按下ESC退出
    if k == 27:
        break
    # 按下空格键暂停
    if k == 32:
        cv2.imshow('img',frame)
        # 再次按下空格保存
        if cv2.waitKey() == 32:
            cv2.imwrite(path + "{}.jpg".format(count), frame)# 保存全图
            cv2.imwrite(path_l + "{}.jpg".format(count), frame[:,0:640])# 保存左图
            cv2.imwrite(path_r + "{}.jpg".format(count), frame[:,640:])# 保存右图
            count += 1
cv2.destroyAllWindows()
cap.release()
Tome al menos 12 o más pares de imágenes según la imagen a continuación para obtener mejores resultados
来源:Calibración estéreo para la mezzanine de doble cámara - Blog - FPGA - element14 Community
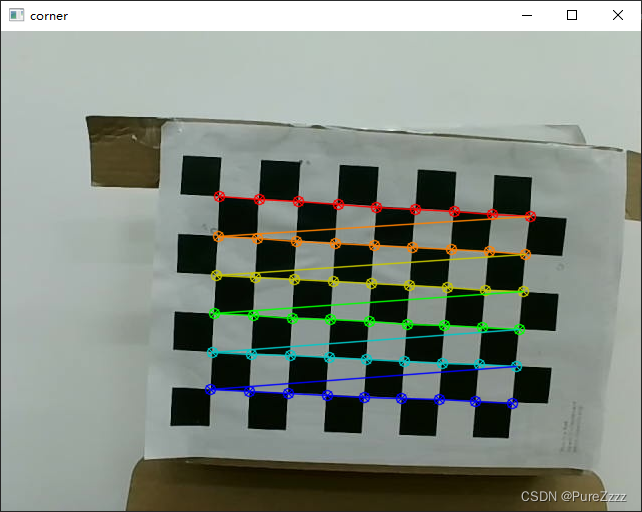
Pruebe el dibujo del punto de esquina del tablero de ajedrez.
import cv2
img = cv2.imread('./calib/left/0.jpg')
img1 = cv2.cvtColor(img,cv2.COLOR_BGR2GRAY)
ret, corner = cv2.findChessboardCorners(img1, (9,6))
ret, corner = cv2.find4QuadCornerSubpix(img1, corner, (7,7))
cv2.drawChessboardCorners(img, (9,6), corner, ret)
cv2.imshow('corner', img)
cv2.waitKey(0)
A continuación, obtenga los parámetros necesarios para la corrección.
import cv2, glob
import numpy as np
'''
获得标定所需参数
'''
# 定义棋盘格的大小
chessboard_size = (9, 6)
# 定义图像分辨率,根据自己相机的分辨率修改
imgsz = (640, 480)
# 定义棋盘格中每个格子的物理大小,自己用尺子量,单位为毫米(mm)
square_size = 24

# 定义棋盘格模板的点的坐标
objp = np.zeros((chessboard_size[0]*chessboard_size[1], 3), np.float32) #生成每个角点三维坐标,共有chessboard_size[0]*chessboard_size[1]个坐标,z轴置0不影响
objp[:, :2] = np.mgrid[0:chessboard_size[0], 0:chessboard_size[1]].T.reshape(-1, 2) * square_size #计算得到每个角点的x,y

# 读取所有棋盘格图像并提取角点
imgpoints_left, imgpoints_right = [], []  # 存储图像中的角点
objpoints = []  # 存储模板中的角点
images = glob.glob('./calibration/right/*.jpg')  # 所有棋盘格图像所在的目录
for fname in images:
    img = cv2.imread(fname)
    gray = cv2.cvtColor(img, cv2.COLOR_BGR2GRAY)
    ret, corners = cv2.findChessboardCorners(gray, chessboard_size, None) #计算corner
    ret, corners = cv2.find4QuadCornerSubpix(gray, corners, (7,7)) #提高角点检测的准确性和稳定性
    if ret == True:
        imgpoints_right.append(corners)
        objpoints.append(objp)

images = glob.glob('./calibration/left/*.jpg')  # 所有棋盘格图像所在的目录
for fname in images:
    img = cv2.imread(fname)
    gray = cv2.cvtColor(img, cv2.COLOR_BGR2GRAY)
    ret, corners = cv2.findChessboardCorners(gray, chessboard_size, None) #计算corner
    ret, corners = cv2.find4QuadCornerSubpix(gray, corners, (7,7)) #提高角点检测的准确性和稳定性
    if ret == True:
        imgpoints_left.append(corners)
'''
开始标定,获得参数
'''
# 标定相机,获得内参和畸变参数
ret, mtx_r, dist_r, rvecs_r, tvecs_r = cv2.calibrateCamera(objpoints, imgpoints_right, gray.shape[::-1], None, None)
ret, mtx_l, dist_l, rvecs_l, tvecs_l = cv2.calibrateCamera(objpoints, imgpoints_left, gray.shape[::-1], None, None)

# 指定迭代次数最大30或者误差小于0.001
term = (cv2.TERM_CRITERIA_EPS + cv2.TERM_CRITERIA_MAX_ITER, 30, 0.001)

# 进行双目相机标定,主要是获得R,T两个矩阵
rotation_matrix, translation_matrix = cv2.stereoCalibrate(
            objpoints, imgpoints_left, imgpoints_right,
            mtx_l, dist_l,
            mtx_r, dist_r,
            imgsz, flags=cv2.CALIB_FIX_INTRINSIC, criteria=term)[5:7]

# 获得矫正矩阵和投影矩阵,用于后续进行图像校正
rect_left, rect_right, \
proj_left, proj_right, \
dispartity, \
ROI_left, ROI_right = cv2.stereoRectify(
            mtx_l, dist_l,
            mtx_r, dist_r,
            imgsz, rotation_matrix, translation_matrix,
            flags=cv2.CALIB_ZERO_DISPARITY, alpha=-1)


'''
打印结果
'''
print('mtx_l = np.array({})'.format(np.array2string(mtx_l, separator=', ', formatter={'int': lambda x: f'{x: 3d}'},prefix='[', suffix=']')))
print('mtx_r = np.array({})'.format(np.array2string(mtx_r, separator=', ', formatter={'int': lambda x: f'{x: 3d}'},prefix='[', suffix=']')))
print('dist_l = np.array({})'.format(np.array2string(dist_l, separator=', ', formatter={'int': lambda x: f'{x: 3d}'},prefix='[', suffix=']')))
print('dist_r = np.array({})'.format(np.array2string(dist_r, separator=', ', formatter={'int': lambda x: f'{x: 3d}'},prefix='[', suffix=']')))
print('R = np.array({})'.format(np.array2string(rotation_matrix, separator=', ', formatter={'int': lambda x: f'{x: 3d}'},prefix='[', suffix=']')))
print('T = np.array({})'.format(np.array2string(translation_matrix, separator=', ', formatter={'int': lambda x: f'{x: 3d}'},prefix='[', suffix=']')))
print('rect_left = np.array({})'.format(np.array2string(rect_left, separator=', ', formatter={'int': lambda x: f'{x: 3d}'},prefix='[', suffix=']')))
print('rect_right = np.array({})'.format(np.array2string(rect_right, separator=', ', formatter={'int': lambda x: f'{x: 3d}'},prefix='[', suffix=']')))
print('proj_left = np.array({})'.format(np.array2string(proj_left, separator=', ', formatter={'int': lambda x: f'{x: 3d}'},prefix='[', suffix=']')))
print('proj_right = np.array({})'.format(np.array2string(proj_right, separator=', ', formatter={'int': lambda x: f'{x: 3d}'},prefix='[', suffix=']')))
print('dispartity = np.array({})'.format(np.array2string(dispartity, separator=', ', formatter={'int': lambda x: f'{x: 3d}'},prefix='[', suffix=']')))
# print('mtx_l = np.array({})'.format(mtx_l))
# print('mtx_r = np.array({})'.format(mtx_r))
# print('dist_l = np.array({})'.format(dist_l))
# print('dist_r = np.array({})'.format(dist_r))
# print('R = np.array({})'.format(rotation_matrix))
# print('T = np.array({})'.format(translation_matrix))
# print('rect_left = np.array({})'.format(rect_left))
# print('rect_right = np.array({})'.format(rect_right))
# print('proj_left = np.array({})'.format(proj_left))
# print('proj_right = np.array({})'.format(proj_right))
# print('dispartity = np.array({})'.format(dispartity))
print('ROI_left = np.array({})'.format(ROI_left))
print('ROI_right = np.array({})'.format(ROI_right))
Obtenga los siguientes parámetros

Se puede copiar directamente para la corrección de imágenes.
prueba
import cv2, glob, os
import numpy as np
def get_corners(imgs, corners):
    for img in imgs:
        # 9x12棋盘有8x11个角点
        ret, c = cv2.findChessboardCorners(img, (9,6))
        assert(ret)
        ret, c = cv2.find4QuadCornerSubpix(img, c, (7,7))
        assert(ret)
        corners.append(c)
mtx_l = np.array([[479.61836296,   0.,         339.91341613],
 [  0.,         478.44413757, 240.61069496],
 [  0.,           0.,           1.,        ]])
mtx_r = np.array([[483.4989366,    0.,         306.98497259],
 [  0.,         482.17064224, 228.91672333],
 [  0.,           0.,           1.        ]])
dist_l = np.array([[ 0.07539615, -0.51291496,  0.00405133, -0.00084347,  0.7514282 ]])
dist_r = np.array([[-1.30834008e-01,  8.25592192e-01,  9.83305297e-04, -7.40611932e-06,  -1.67568022e+00]])
R = np.array([[ 9.99947786e-01, -1.06501500e-03,  1.01632001e-02],
 [ 8.52847758e-04,  9.99782093e-01,  2.08575744e-02],
 [-1.01831991e-02, -2.08478176e-02,  9.99730799e-01]])
T = np.array([[-62.0710667 ],
 [  0.27233791],
 [  0.49530174]])
rect_left = np.array([[ 0.99998384, -0.005285,    0.00209416],
 [ 0.00526285,  0.99993159,  0.01044553],
 [-0.00214922, -0.01043434,  0.99994325]])
rect_right = np.array([[ 0.99995854, -0.00438734, -0.00797926],
 [ 0.00430379,  0.99993606, -0.01045726],
 [ 0.00802463,  0.01042249,  0.99991348]])
proj_left = np.array([[480.3073899,    0.,         322.84606934,   0.,        ],
 [  0.,         480.3073899,  235.60386848,   0.,        ],
 [  0.,           0.,           1.,           0.,        ]])
proj_right = np.array([[ 4.80307390e+02,  0.00000000e+00,  3.22846069e+02, -2.98144281e+04],
 [ 0.00000000e+00,  4.80307390e+02,  2.35603868e+02,  0.00000000e+00],
 [ 0.00000000e+00,  0.00000000e+00,  1.00000000e+00,  0.00000000e+00]])
dispartity = np.array([[ 1.00000000e+00,  0.00000000e+00,  0.00000000e+00, -3.22846069e+02],
 [ 0.00000000e+00,  1.00000000e+00,  0.00000000e+00, -2.35603868e+02],
 [ 0.00000000e+00,  0.00000000e+00,  0.00000000e+00,  4.80307390e+02],
 [ 0.00000000e+00,  0.00000000e+00,  1.61098978e-02, -0.00000000e+00]])
ROI_left = np.array((5, 10, 612, 456))
ROI_right = np.array((14, 5, 626, 475))
img_left = []
img_right = []
corners_left = []
corners_right = []
img_file = glob.glob('./calibration/*.jpg')
imgsize = (640, 480)

for img in img_file:
    frame = cv2.imread(img)
    frame = cv2.cvtColor(frame, cv2.COLOR_BGR2GRAY)
    l = frame[:,0:640]
    r = frame[:,640:]
    img_left.append(l)
    img_right.append(r)
print("获取角点", "left")
get_corners(img_left, corners_left)
print("获取角点", "right")
get_corners(img_right, corners_right)
for i in range(len(img_left)):
    l = img_left[i]
    r = img_right[i]
    # 计算双目校正的矩阵
    R1, R2, P1, P2, Q, validPixROI1, validPixROI2 = cv2.stereoRectify(mtx_l, dist_l, mtx_r, dist_r, imgsize, R, T)
    # 计算校正后的映射关系
    maplx , maply = cv2.initUndistortRectifyMap(mtx_l, dist_l, R1, P1, imgsize, cv2.CV_16SC2)
    maprx , mapry = cv2.initUndistortRectifyMap(mtx_r, dist_r, R2, P2, imgsize, cv2.CV_16SC2)
    # 映射新图像
    lr = cv2.remap(l, maplx, maply, cv2.INTER_LINEAR)
    rr = cv2.remap(r, maprx, mapry, cv2.INTER_LINEAR)
    all = np.hstack((lr,rr))
    # 变换之后和变换之前的角点坐标不一致,所以线不是正好经过角点,只是粗略估计,但偶尔能碰到离角点比较近的线,观察会比较明显
    cv2.line(all, (-1, int(corners_left[i][0][0][1])), (all.shape[1], int(corners_left[i][0][0][1])), (255), 1)
    # 可以看出左右图像y坐标对齐还是比较完美的,可以尝试着打印双目校正前的图片,很明显,左右y坐标是不对齐的
    cv2.imshow('a', all)
    c = cv2.waitKey()
    cv2.destroyAllWindows()
    if c == 27:
        break


print("end")
Este código está tomado de http://t.csdn.cn/uxwLA

Link de referencia:
Proyecto Depther - parte 2: calibrar cámara dual, rectificación de parámetros - edgenoon.ai
OpenCV: Crear patrón de calibración
opencv/patrón.png en 4.x · opencv/opencv · GitHub
Calibración estéreo para la mezzanine de doble cámara - Blog - FPGA - element14 Community