Table of contents
IDEA initializes native library
GitHub generates its own Token value
IDEA shares the project to the GitHub account
Push push the local library to the remote library in IDEA (explain SSH password-free login)
Pull in IDEA to pull the remote library to the local library
Clone clone code to local in IDEA
IDEA integrates Git
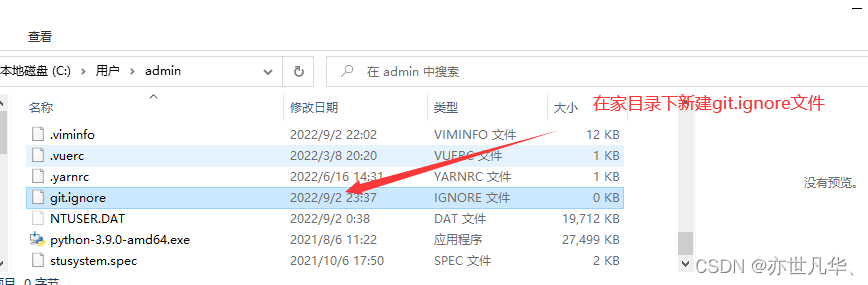
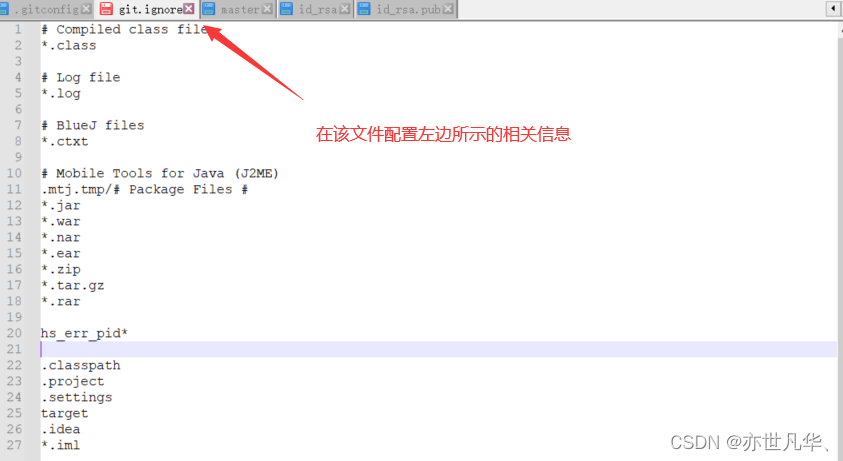
Configure Git to ignore files
Some files in the project have nothing to do with the actual function of the project, do not participate in the deployment and operation of the server, and ignoring them can shield the gap between IDE tools. We can create an ignore file xxx.ignore (the prefix name is recommended to be git.ignore). In principle, the storage location of this file can be anywhere. In order to facilitate the reference of the ~/.gitconfig file, it is recommended to put it in the user's home directory.
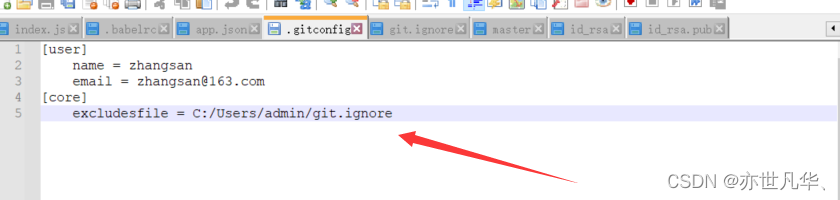
Reference the ignore configuration file in the .gitconfig file (this file is in the Windows home directory). Note: Use "forward slash (/)" here, not "backslash (\)".
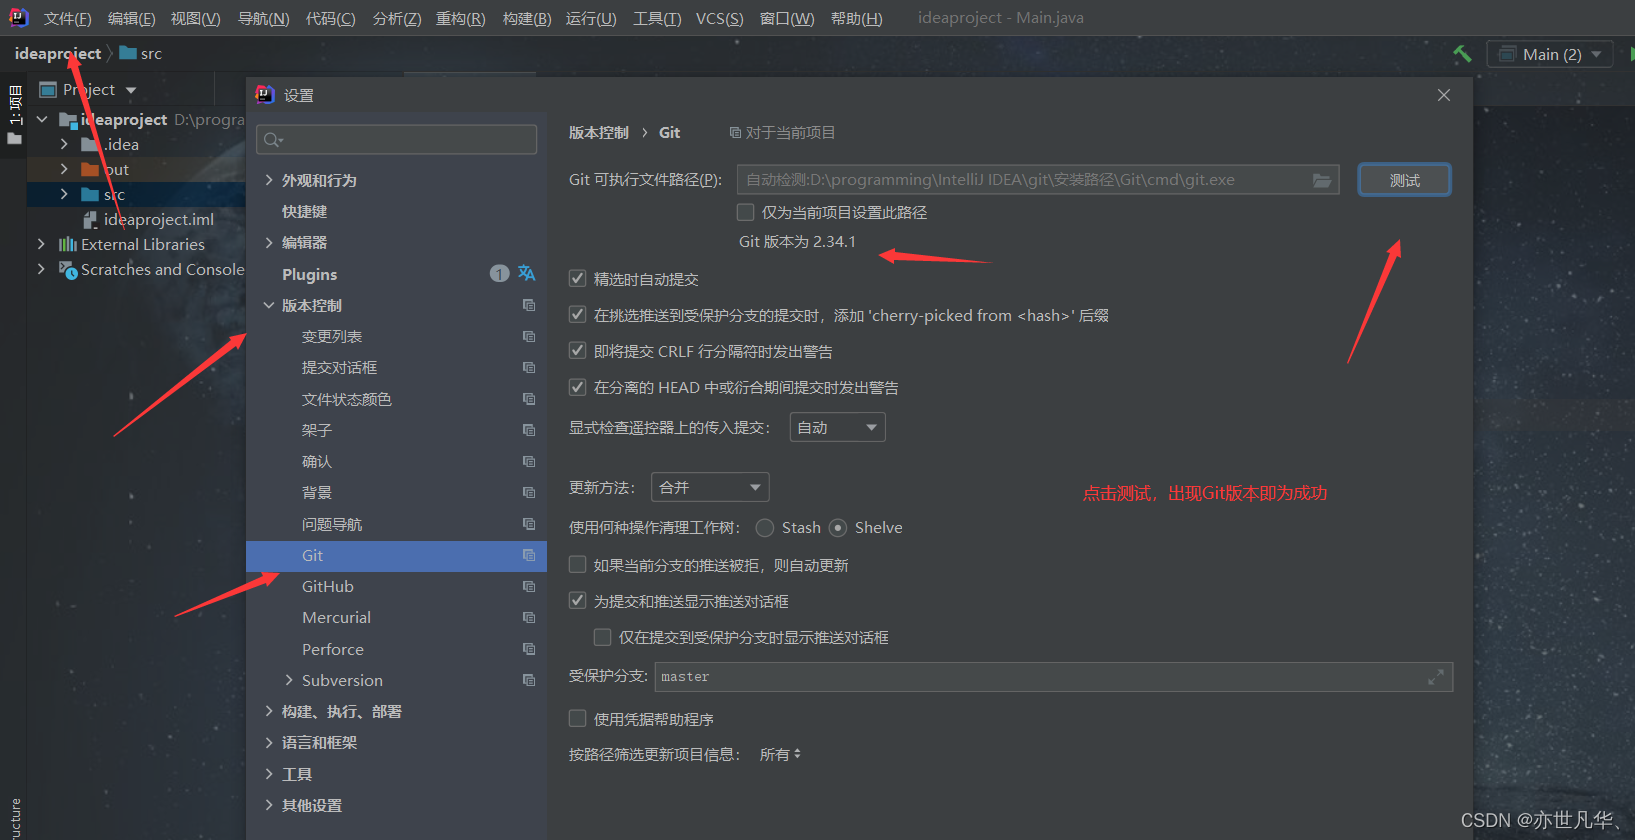
Locate the Git program
Position the Git program in IDEA, as shown in the following figure:
IDEA initializes native library
Create a new Maven project.

Click IDEA's following options to create a Git local library.

After the creation is complete, the .git file will appear in the files of our project. It means that git has taken over our directory file.

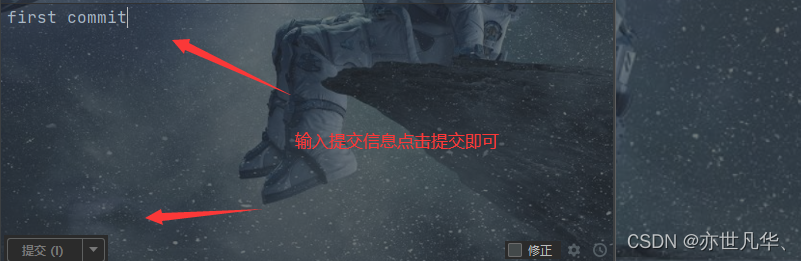
Commit the pom.xml to the staging area.
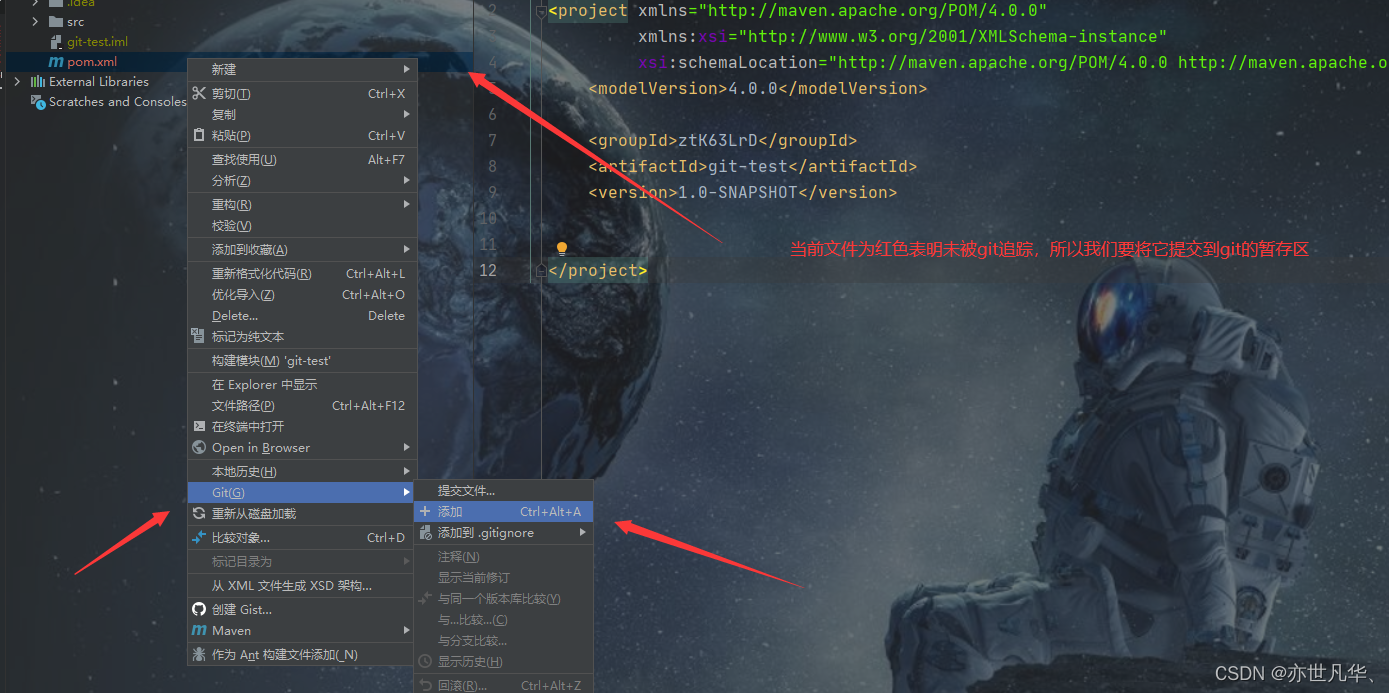
When we write some code, we need to submit the code to the staging area, we can choose to submit the entire project

When we want to submit to the local library, right-click the project, select Git, select the commit directory, and select the file we want to submit to upload the local library.

IDEA switch version
When we modify the code file and submit it to the local library again, IDEA will prompt us the difference between the two code modifications
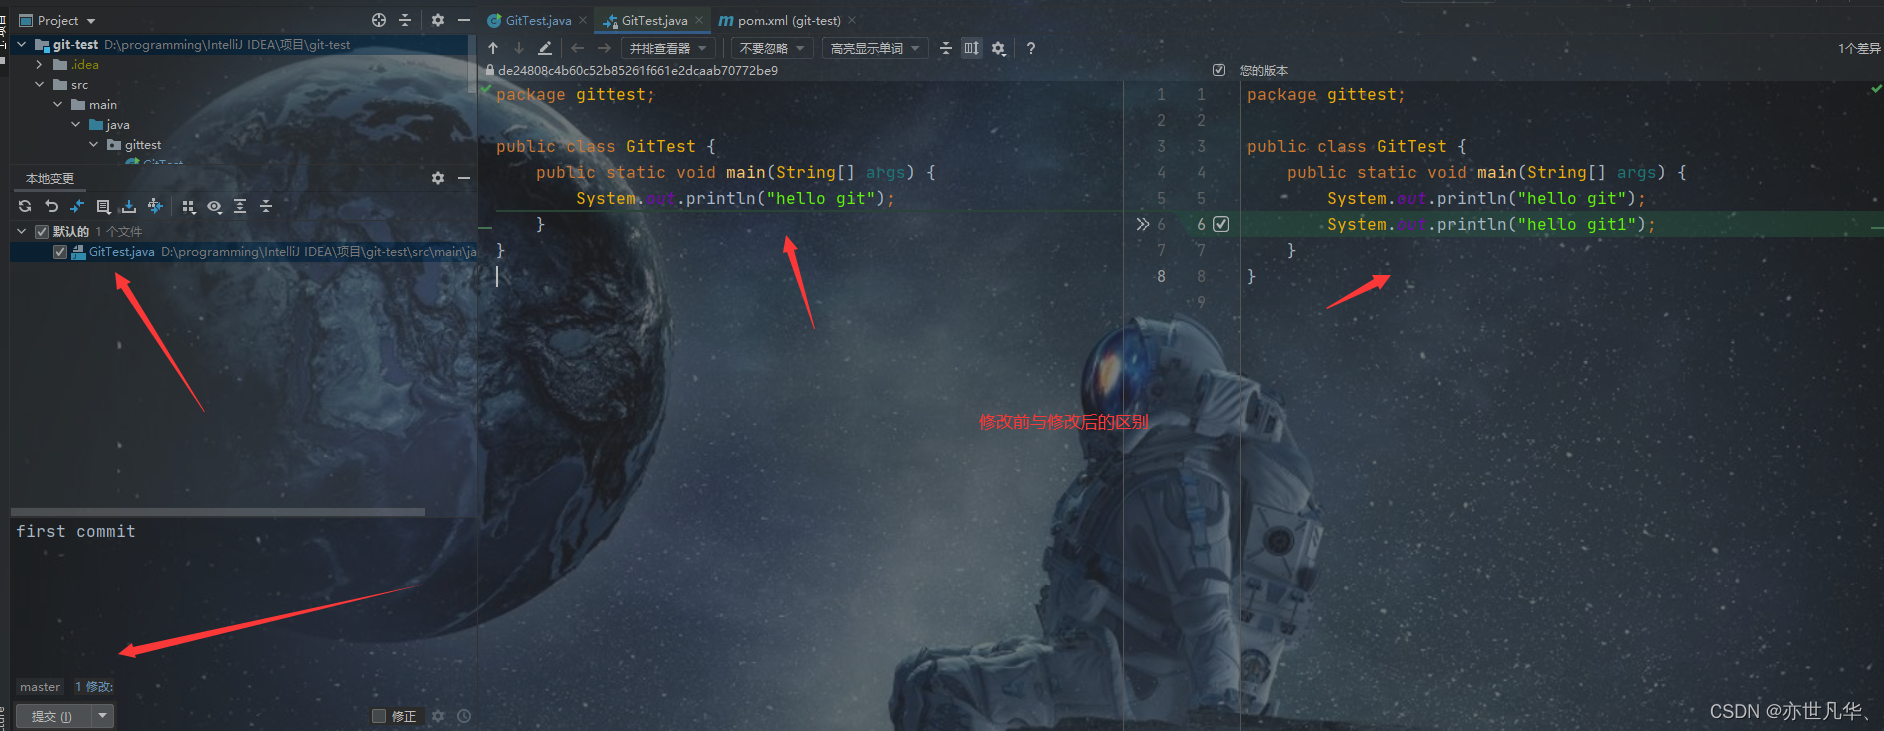
Next, the way to switch versions of IDEA through animation is super simple.

IDEA creates switch branch
When we want to create a branch, we can create a branch by the following methods.
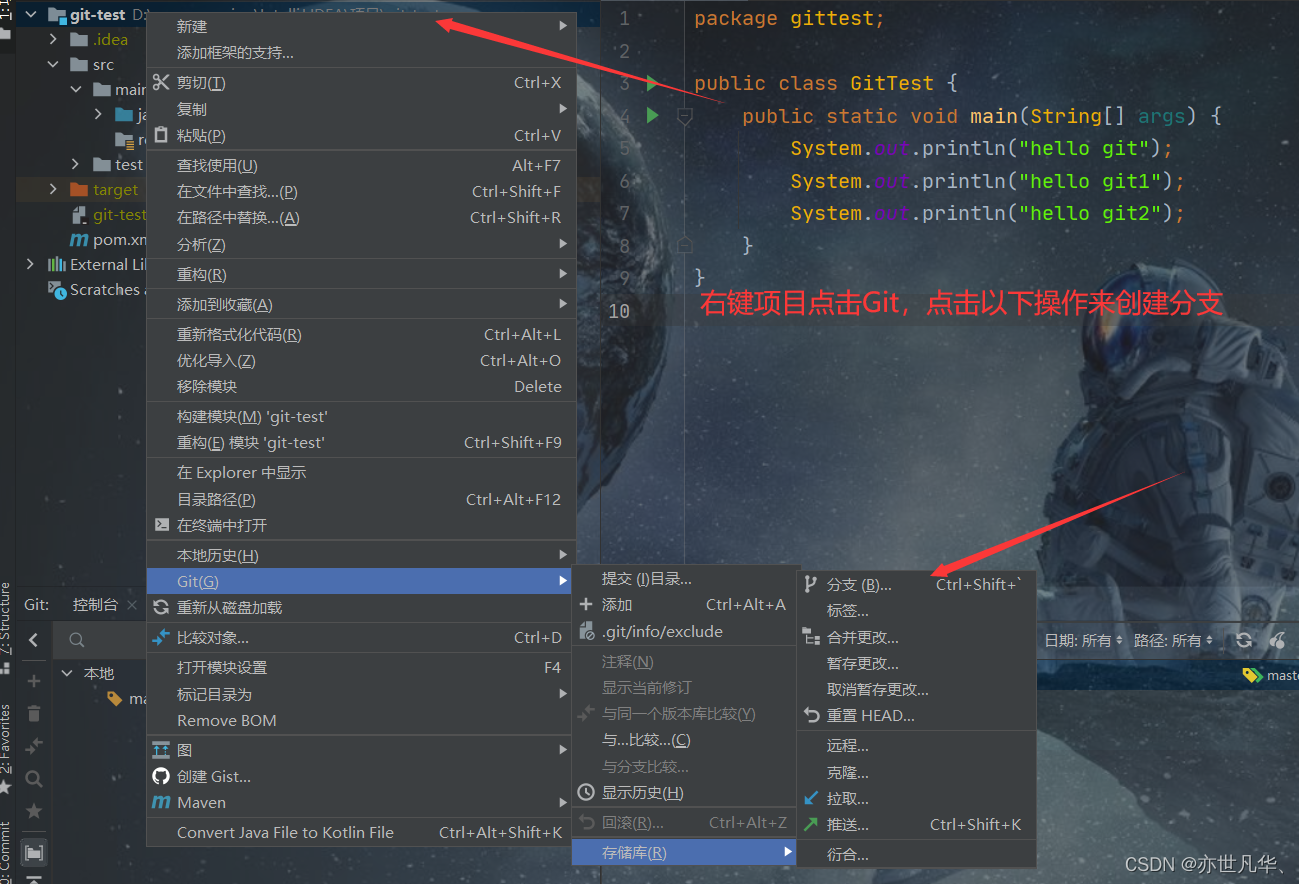
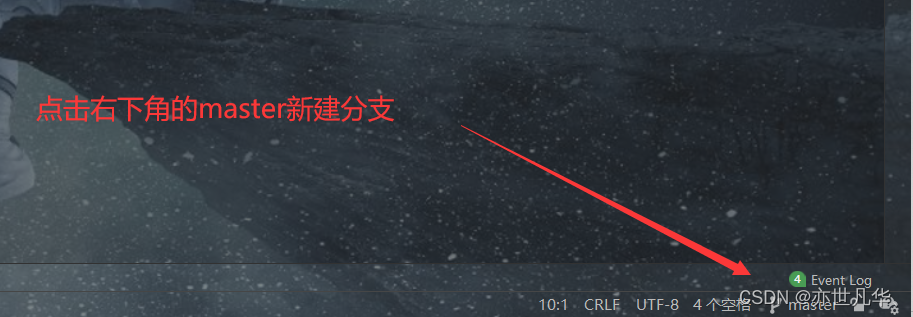
After creating a new branch, switch branches, and click the lower right corner of the above figure to switch.

IDEA merge branches
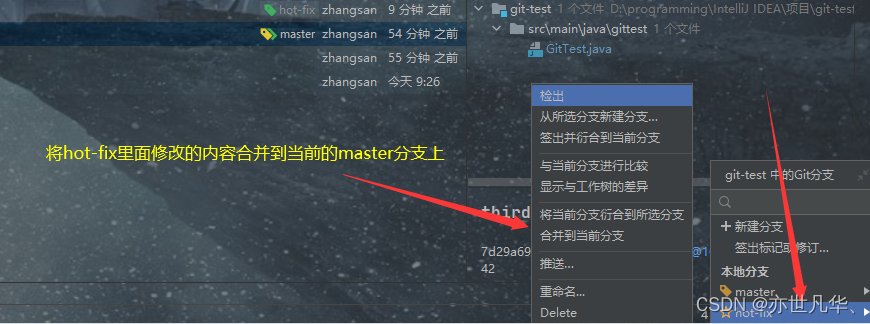
In the lower right corner of the IDEA window, merge the hot-fix branch into the current master branch. If there is no conflict in the code, the branch is directly merged successfully. After the branch is merged successfully, the code is automatically submitted, and there is no need to manually submit the local library.
Normal merge : We first modify the content of the hot-fix branch, and then submit it to the local library. Do a normal merge with master
Conflict merge :
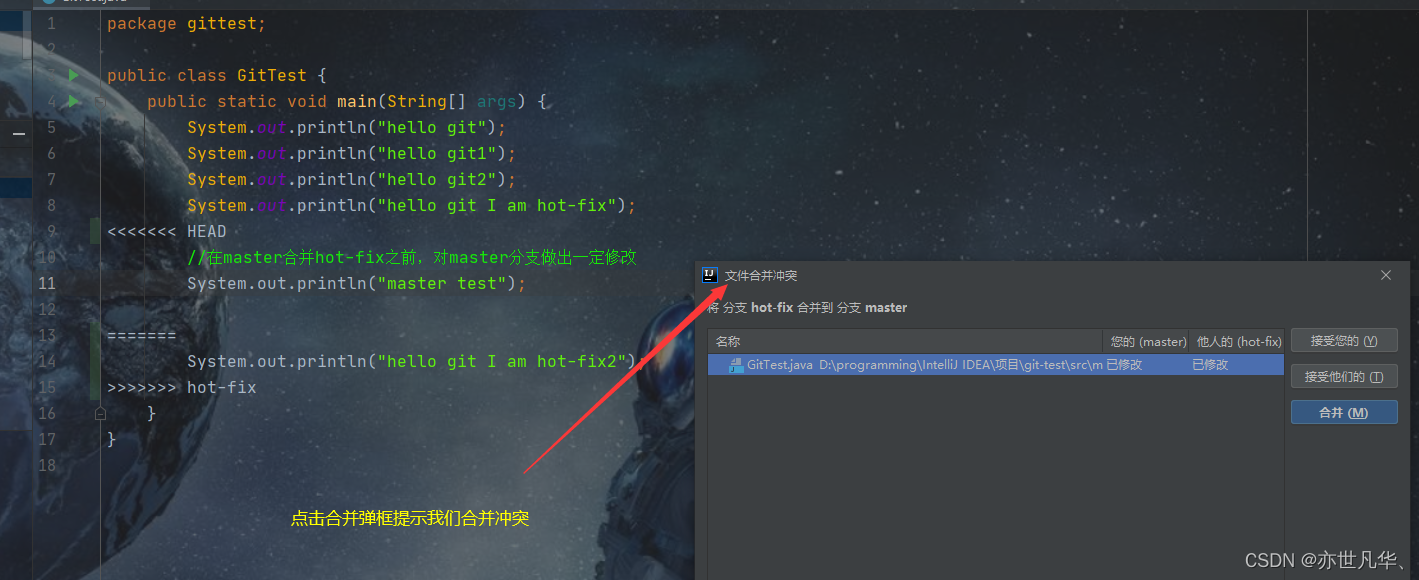
A file merge conflict prompts us to merge manually, and now we do a manual merge.

IDEA integrates GitHub
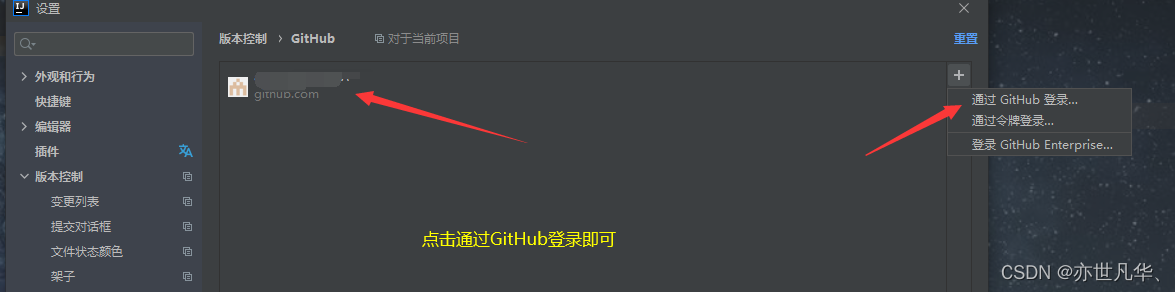
Set up a GitHub account
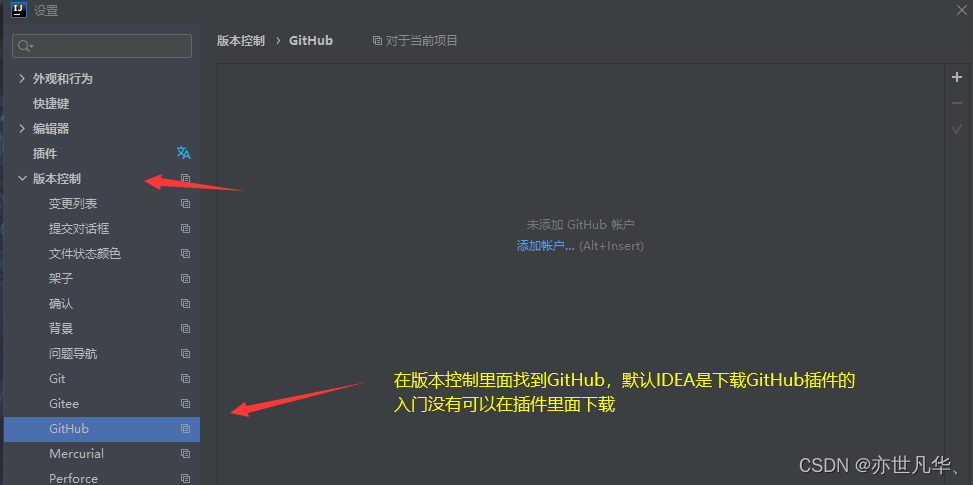
Logging in through GitHub can be subject to network restrictions, log in several times, or log in with a token if unsuccessful.
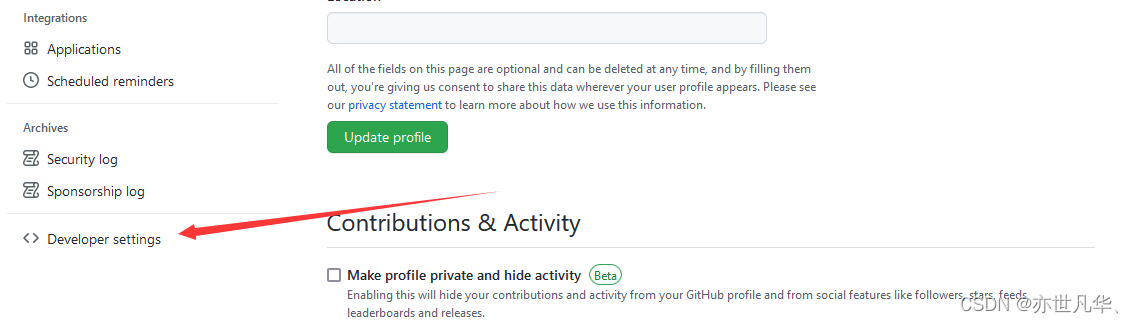
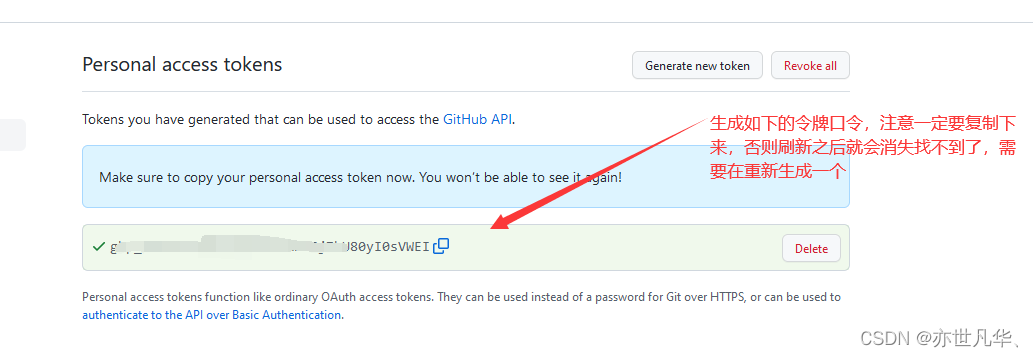
GitHub generates its own Token value
Token login requires your own GitHub to generate your own Token value. The steps to generate the Token are as follows:
Log in to your GitHub account to enter the personal center, and click the following button


Using the token, you can log in to your GitHUb account in IDEA.
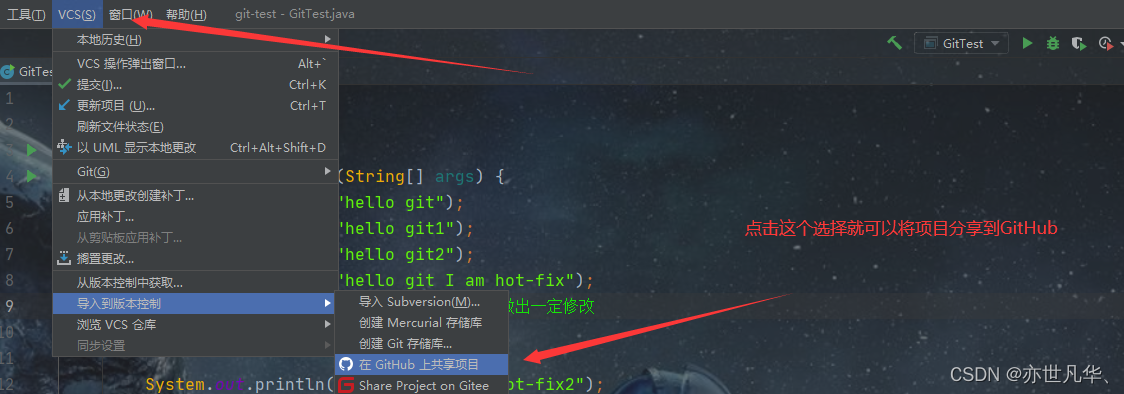
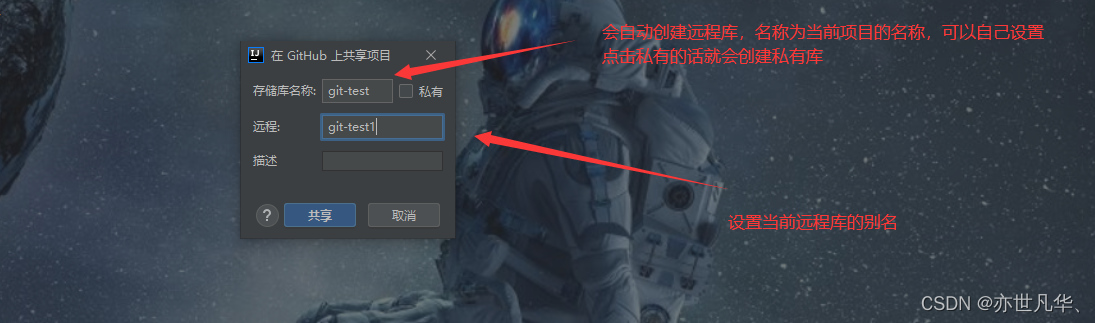
IDEA shares the project to the GitHub account

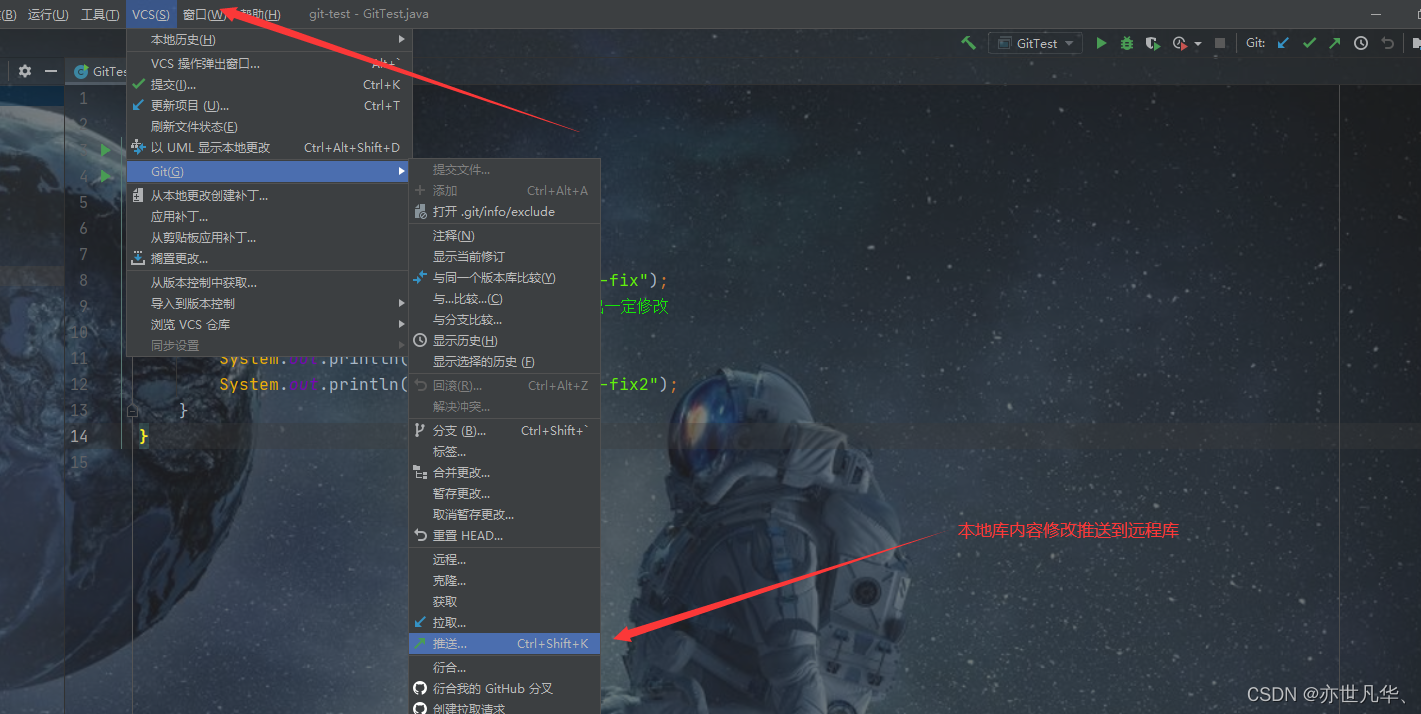
Push push the local library to the remote library in IDEA (explain SSH password-free login)
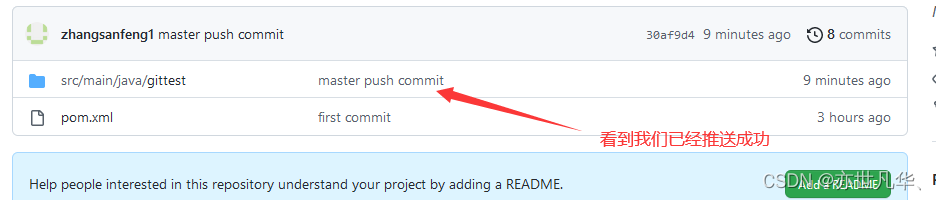
Right-click on the project to push the contents of the current branch to the GitHub remote repository.
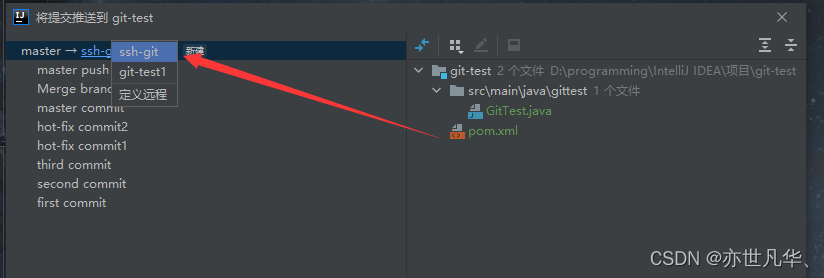
Here is an introduction to ssh to push, so there is not much restriction on the network. Just copy the SSH link in your GitHub.

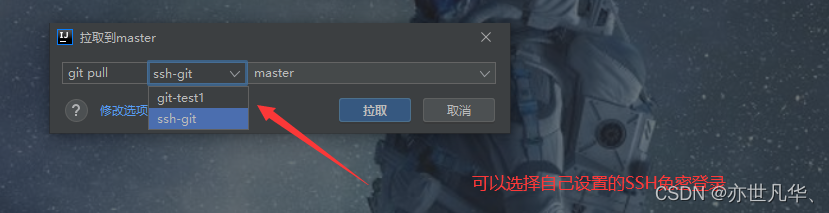
After success, select the ssh-git alias you set by yourself.
Note :
Push is to push the local library code to the remote library. If the version of the local library code is inconsistent with the remote library code, the push operation will be rejected. That is to say, in order to push successfully, you must ensure that the version of the local library is higher than that of the remote library! Therefore, a mature programmer must check the difference between the remote library and the local code before starting to change the local code! If the local code version is outdated, remember to pull the code of the remote library first, update the local code to the latest, and then modify, submit, and push! J
Pull in IDEA to pull the remote library to the local library
We first modify our code in the remote library, and then pull the updated code to our local.

Note :
Pull is to pull the remote warehouse code to the local. If the remote library code is inconsistent with the local library code, it will be merged automatically. If the automatic merge fails, it will also involve manual conflict resolution.
Now pull the remote project in GitHub:


Clone clone code to local in IDEA
Since we have already hosted the code in a remote repository, we can delete the existing IDEA project and clone it from GitHub.
Now we delete the project code in IDEA and then reopen IDEA, as shown below:
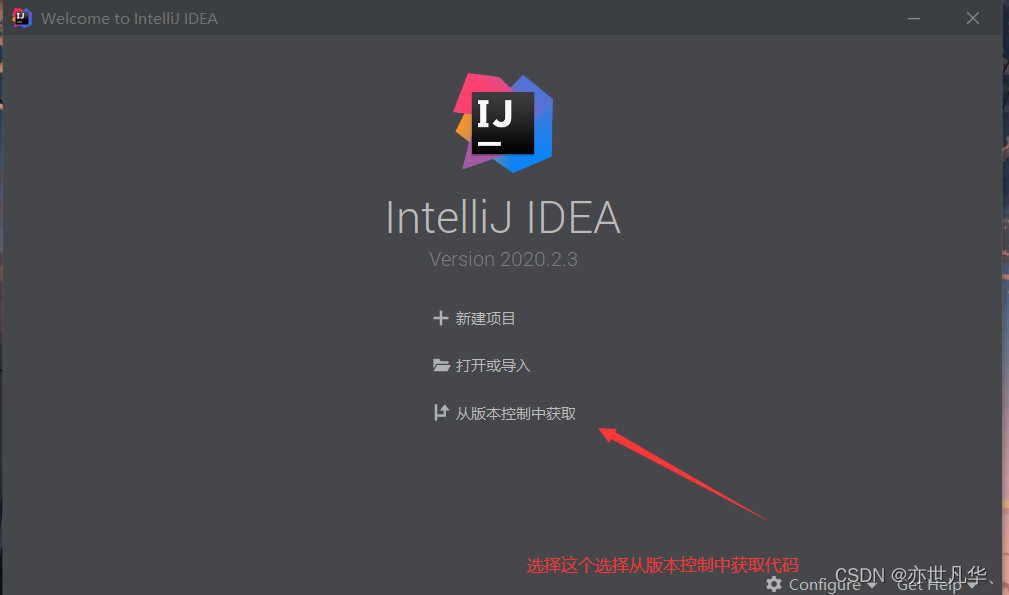
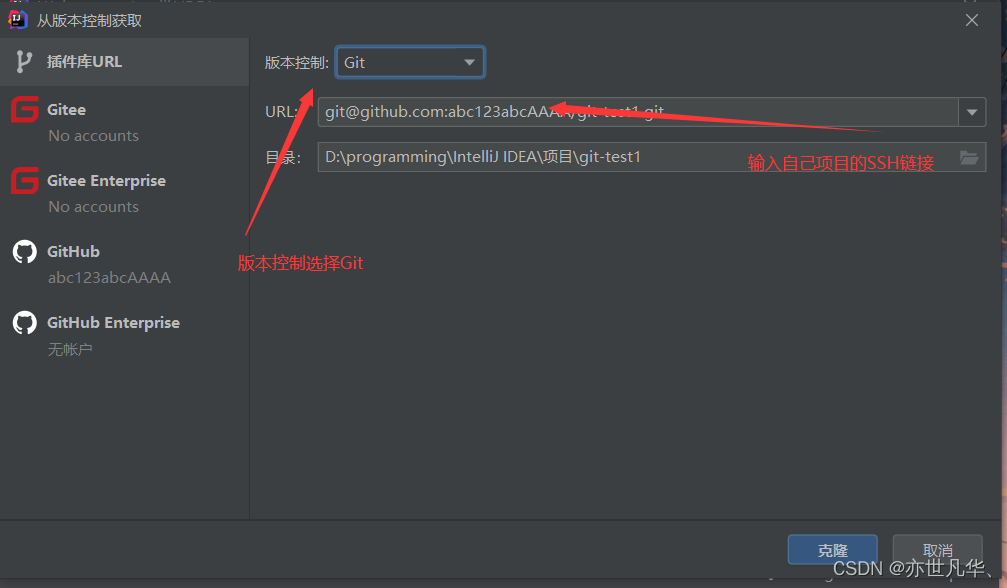
After clicking Clone, IDEA will clone the project code in the remote library to the local one.
