Abstract: MindStudio is a set of AI full-stack development tool platform based on Huawei's self-developed Ascend AI processor. The IDE has many functions and covers a wide range of functions, including network model training, transplantation, application development, reasoning and running. Various tasks such as custom operator development.
This article is shared from the HUAWEI CLOUD community " The whole process of Pytorch offline reasoning using MindStudio ", author: yd_281378454.
1 MindStudio environment construction
This experiment is carried out on MindStudio. Please follow the tutorial to configure the environment and install MindStudio.
MindStudio is a set of AI full-stack development tool platform based on Huawei's self-developed Ascend AI processor. The IDE has many functions and covers a wide range, including network model training, transplantation, application development, inference operation and customization. Operator development and other tasks. In addition to general functions such as project management, compilation, debugging, and running, MindStudio can also perform performance analysis and operator comparison, which can effectively improve the development efficiency of staff. In addition, MindStudio has a remote environment, and the running tasks are realized at the remote end. It does not require high personal equipment at the near end, and the user interaction experience is very good, allowing us to use it anytime, anywhere.
2 VPN installation and configuration
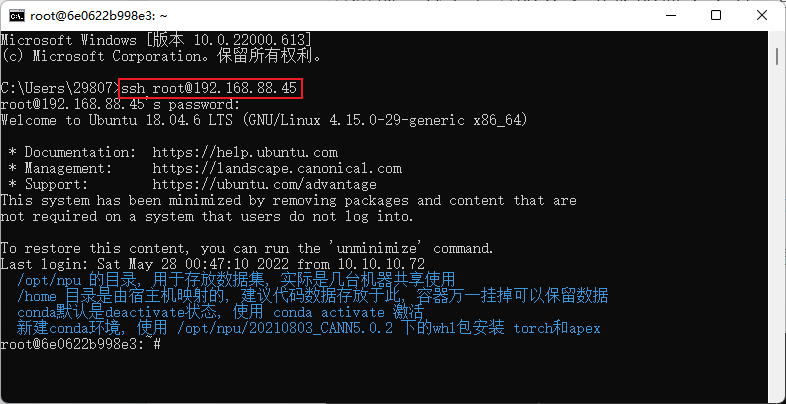
After installing MindStudio, you need to configure the remote environment. Please follow the tutorial to install and configure the VPN client. After installing the VPN, you can use the ssh command in the terminal to test the connection. (This step is to verify whether the network connection is available, it can also be skipped)
3 Create an inference project
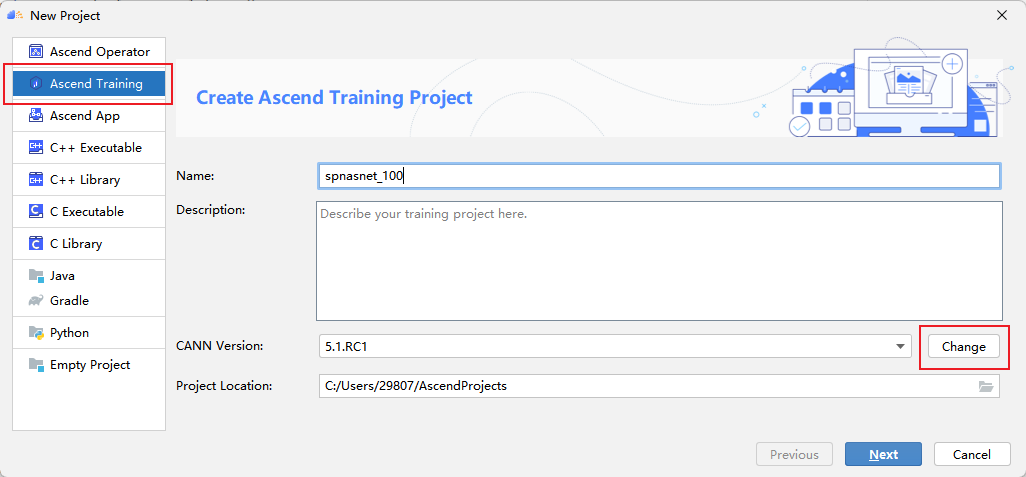
Open MindStudio and click New Project to enter the new project interface. Select Ascend APP. Fill in the project name spnasnet_100. When you create a new training project for the first time, you need to configure the version of CANN. Click Change.
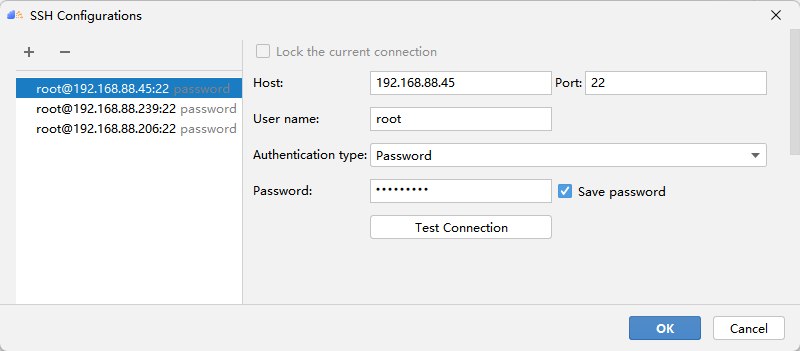
Click + to configure remote connection, and then fill in the IP address, port number, user name and password of your own server according to the options.

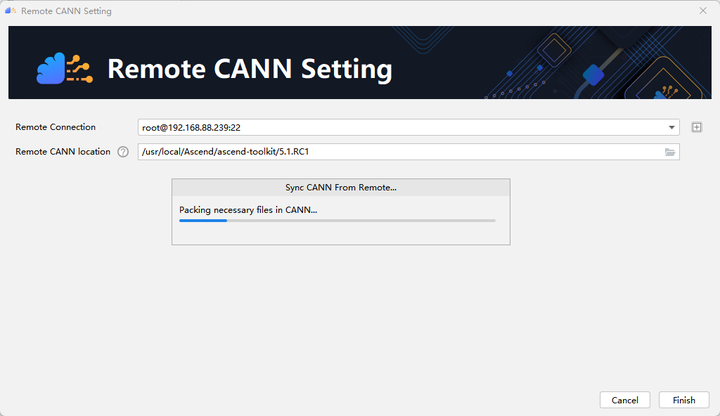
Configure the Remote CANN location. This parameter needs to be filled with the path address of ascend-toolkit on the server. Here, the path of our toolkit is as follows: /usr/local/Ascend/ascend-toolkit/5.1.RC1. Click Finishing to configure. The initial configuration takes a little longer, please be patient.
Click Next and select Pytorch Project.
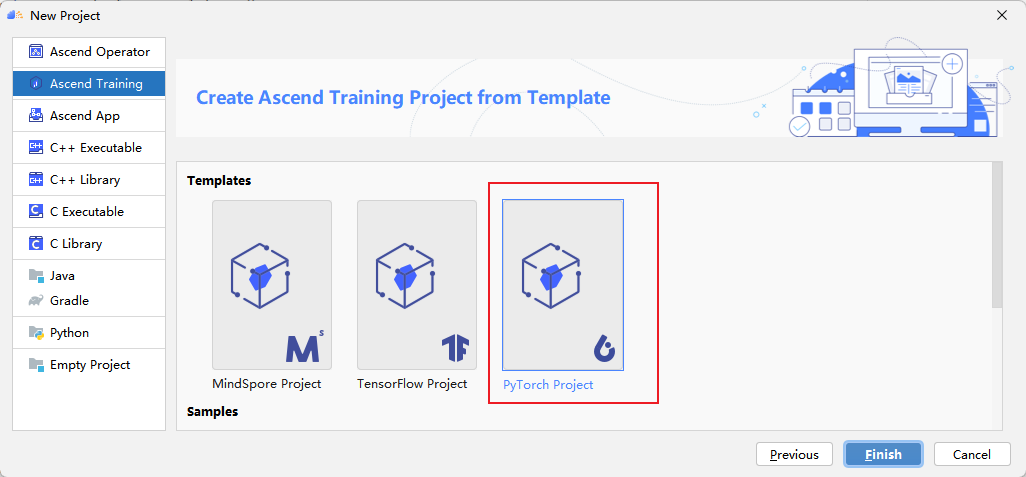
Click Finish to complete the project creation and enter the project main interface.
4 Configure SSH and Deployment
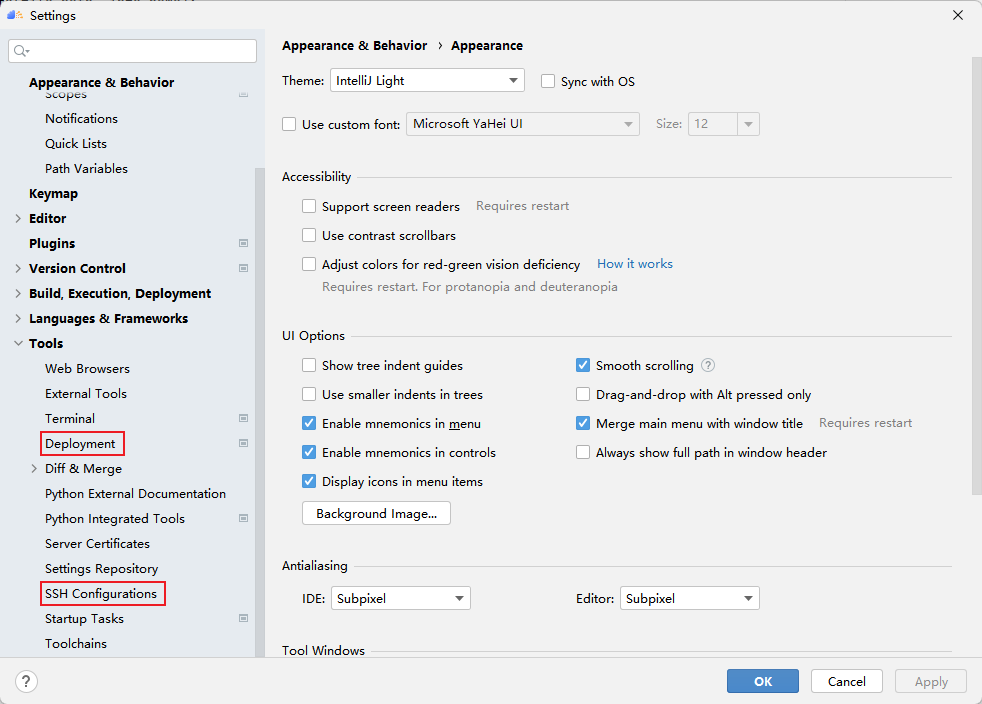
In MindStudio's remote service, the concepts of SSH configuration and Deployment are defined. The former SSH configuration is similar to the concept of Session in MobaxTerm, and users can save the connection configuration of multiple remote servers. The latter Deployment manages the synchronization of local files and remote files during remote development. After configuring the Deployment, we can use the remote python environment just like the local python environment. Click File -> Settings -> Tools, you can see the entry of two settings, the following describes how to configure them.
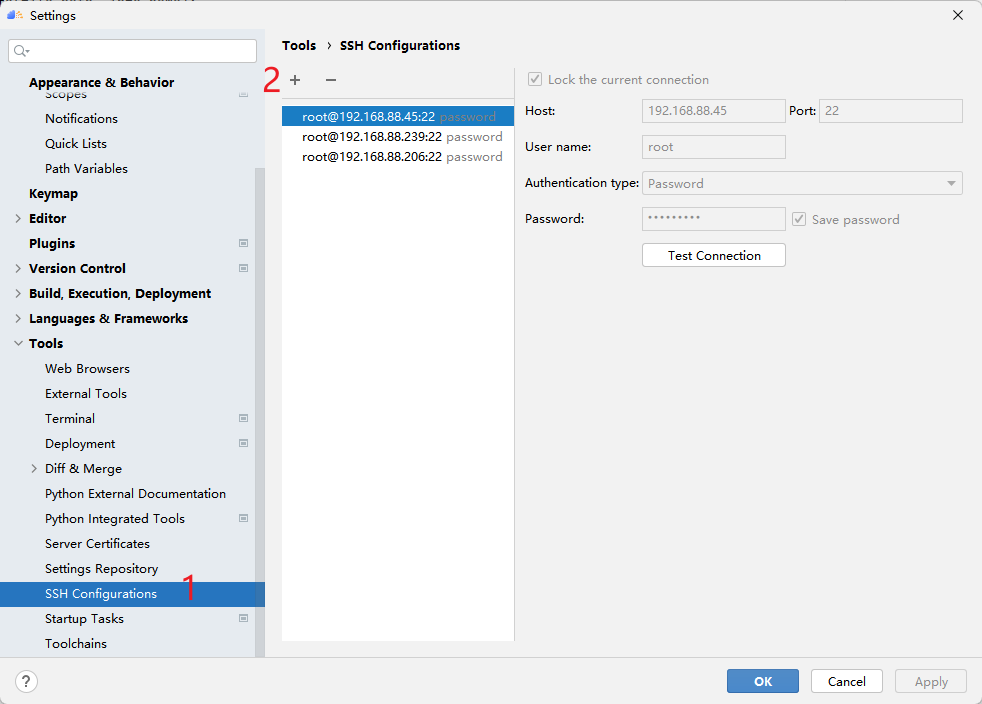
4.1 Configuring SSH
First click SSH Configurations, then click + to configure the remote connection, and then fill in the ip address, port number, user name and password of your server according to the options. After the test is successful, click Apply to save the configuration, and then you can connect with one click!
4.2 Configure Deployment
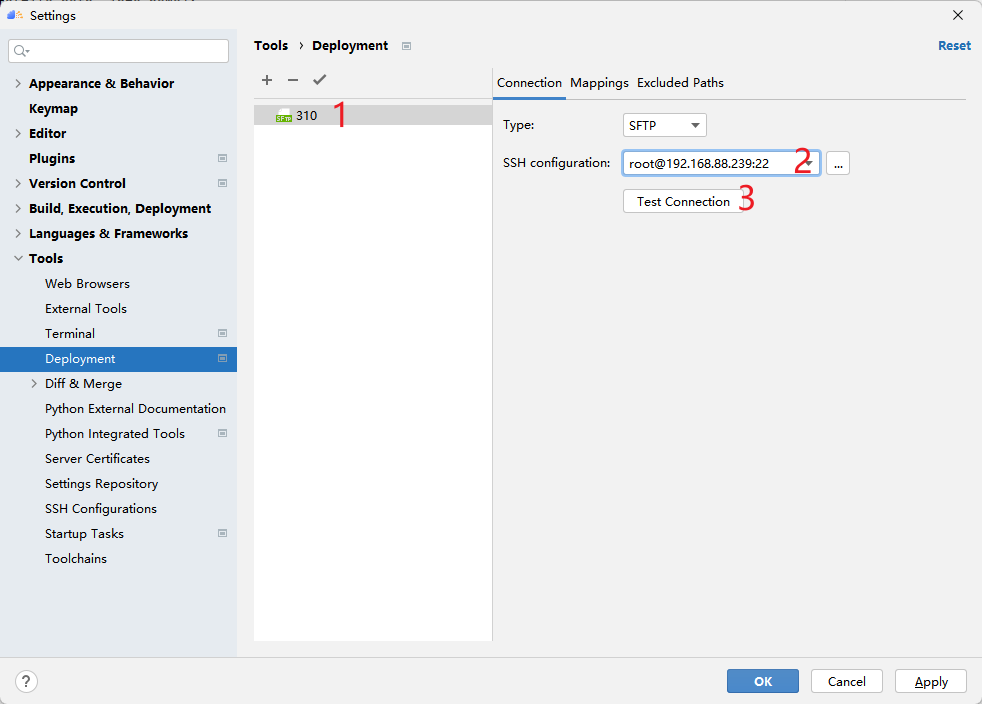
Deployment configuration can connect to remote services more accurately. It needs to select an SSH connection to locate the remote host, and then set the corresponding relationship between the local and remote project directories. Create a new Deployment as shown below.
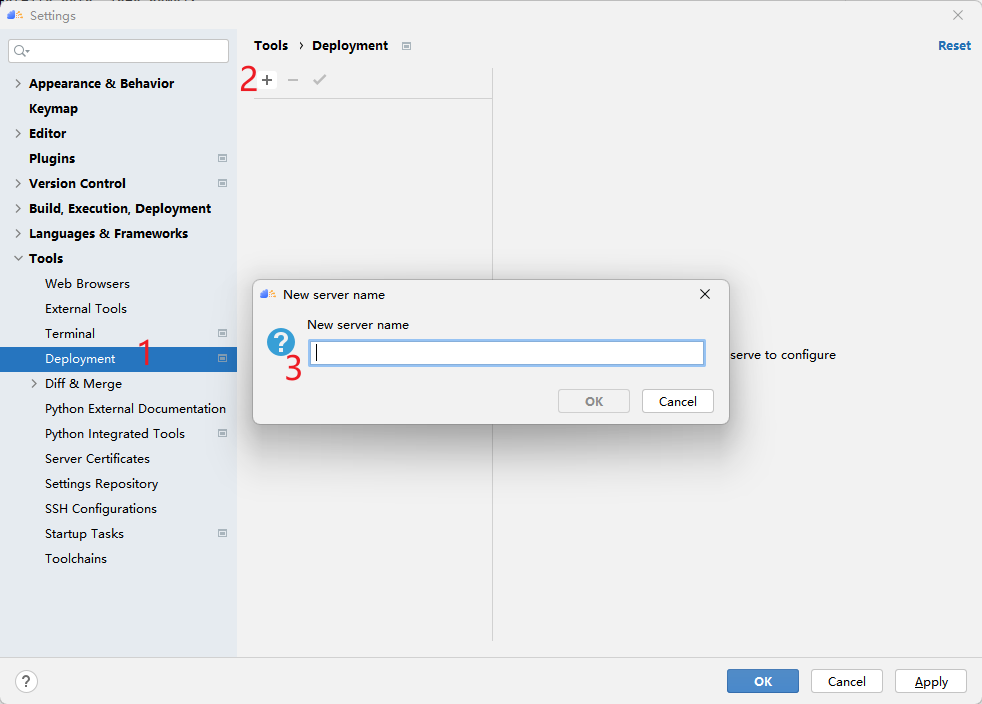
Figure 310 is the name of the Deployment I created, first select which SSH service to connect to, and then test whether the connection is available.
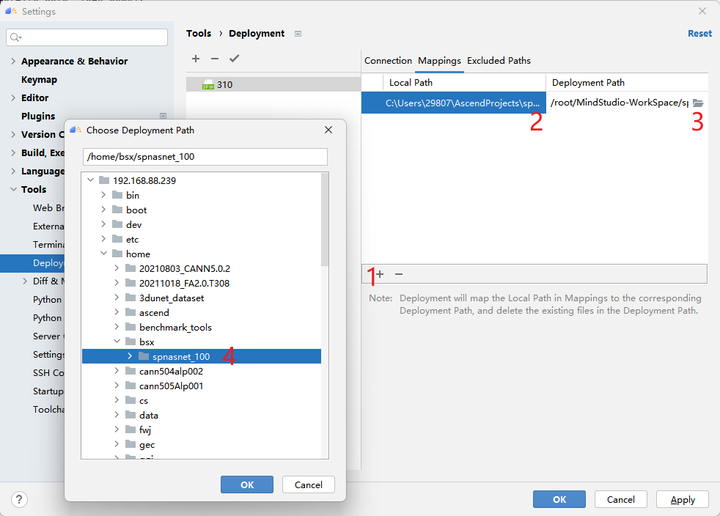
Next, set the project directory mapping relationship, click Mappings, and then select the local project directory and the remote project directory (preferably create a folder in advance). MindStudio will ensure the synchronization of these two directory files when running the code. .
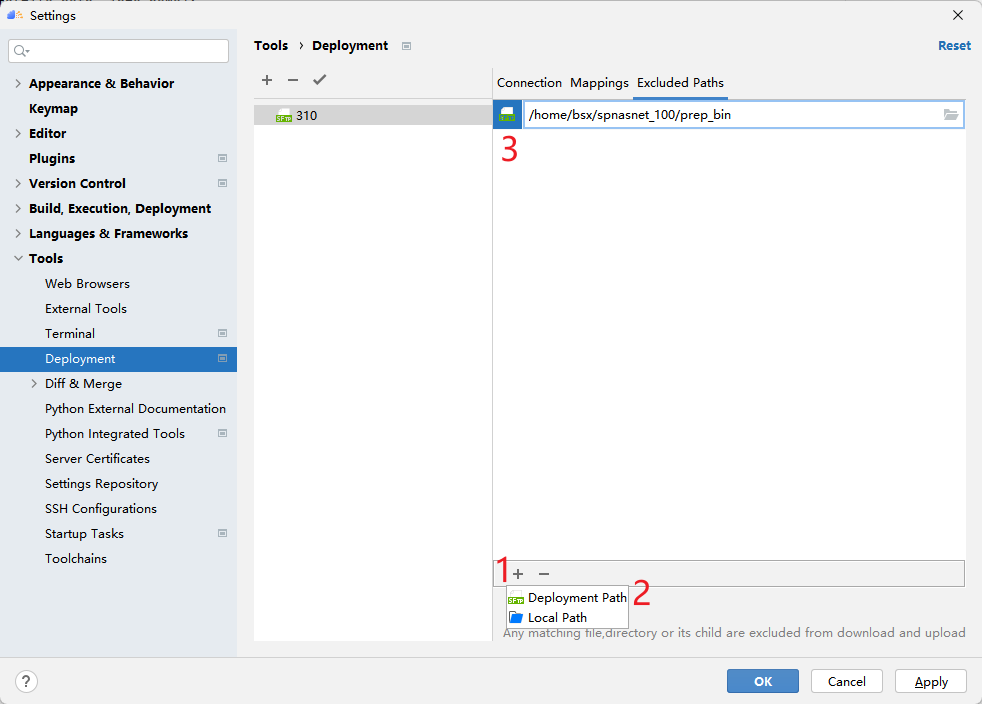
After configuring Mappings, it is recommended to configure Excluded Paths, because MindStudio's default synchronization behavior will keep the files in the corresponding directory of Mappings exactly the same, which means that only remote dataset folders will be deleted (if there is no local dataset). Here I have configured several folders and directories that need to be excluded.
5 Configure the remote python interpreter
Now, the mapping between SSH and Deployment has been configured, but MindStudio does not know the location of the python interpreter. Therefore, the following will describe how to configure the python interpreter.
Click File -> Project Structure->SDKs to see the interface as shown in the figure. Click the + sign to add python SDK and JDK. Only the adding method of Python is demonstrated here.
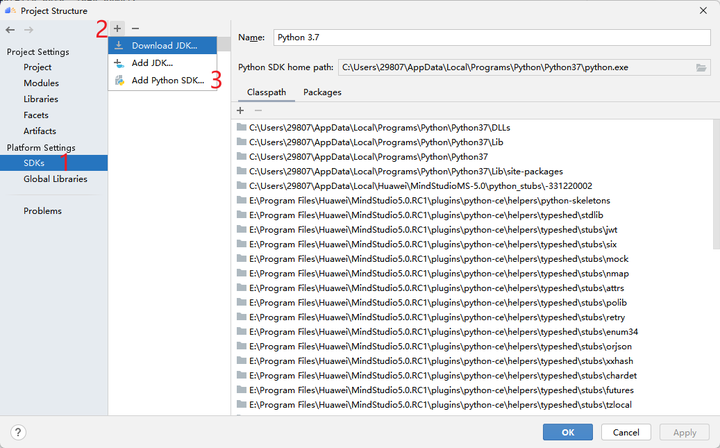
After clicking Add Python SDK, the interface shown in the figure below will pop up. Click SSH Interpreter on the left, as shown in the figure below. First, choose which Deployment to use, which we have just configured. Then select the path to the python interpreter. The path in the figure is automatically detected by MindStudio, but generally you need to find your own Python environment installation directory. If it is a conda environment, you can use which python to find the python installation path.


Then click Project, select the python interpreter just added to MindStudio, and use it as the interpreter used in this project.

6 Dataset Preparation
6.1 Data Preprocessing
After uploading the dataset, execute the preprocess_spnasnet_100_pytorch.py script to generate the preprocessed bin file of the dataset.
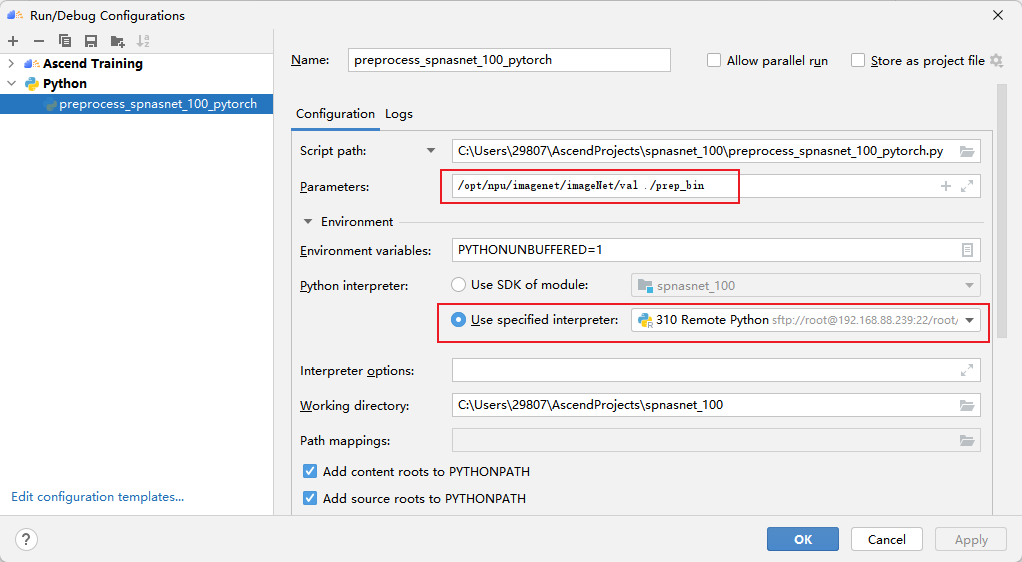
The first parameter is the path where the original data validation set (.jpeg) is located, and the second parameter is the path where the output binary file (.bin) is located. One binary file is generated for each image.
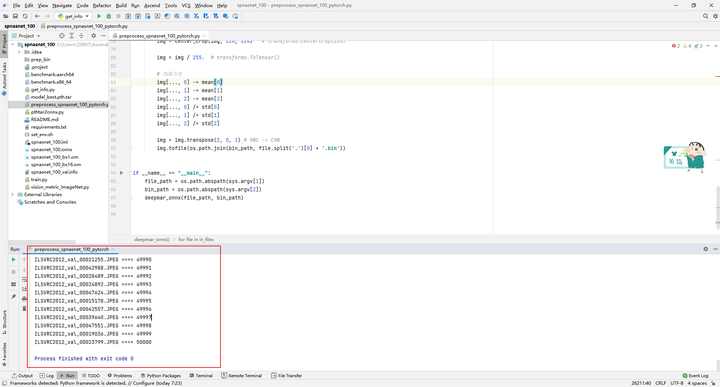
MindStudio will first upload the local file to the remote server. The process of synchronizing the local file to the remote server may be very slow. After the synchronization is completed, the Python code starts to run, and MindStudio will print the output on the console in real time:
6.2 Generate dataset info file
Execute the get_info.py script to generate the dataset information file.
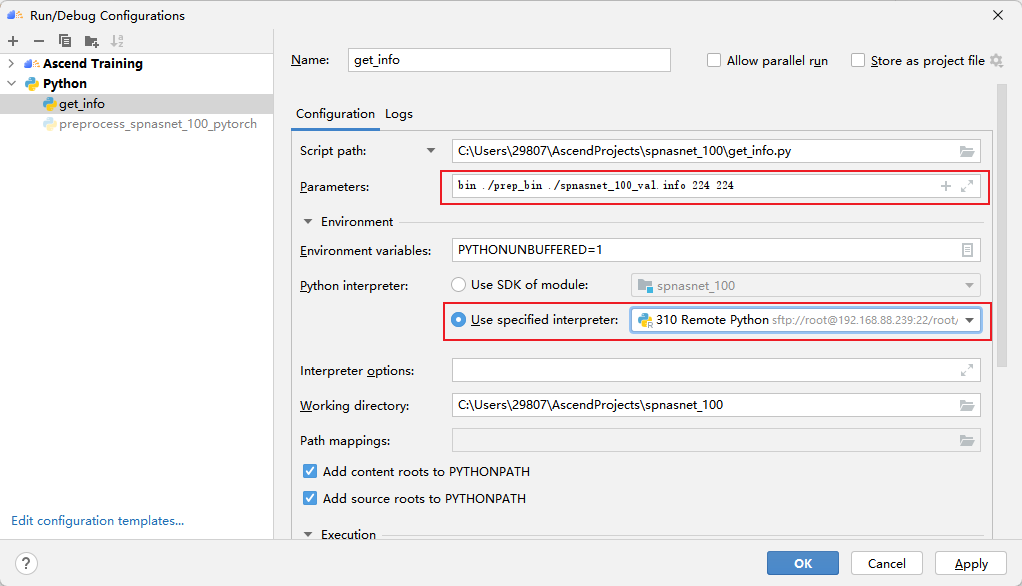
The first parameter is the type of model input, the second parameter is the generated bin file path, the third is the output info file, and the fourth and fifth are the width and height information. Results of the:

7 Model conversion
This model is based on the spnasnet_100 trained by the open source framework PyTorch for model conversion. First use PyTorch to convert the model weight file .pth to a .onnx file, and then use the ATC tool to convert the .onnx file to an offline inference model file .om file.
First get the weights file. Click Link to get the trained spnasnet_100 weight file model_best.pth.tar in the PyTorch open source framework. The download weight file is provided in the source code.
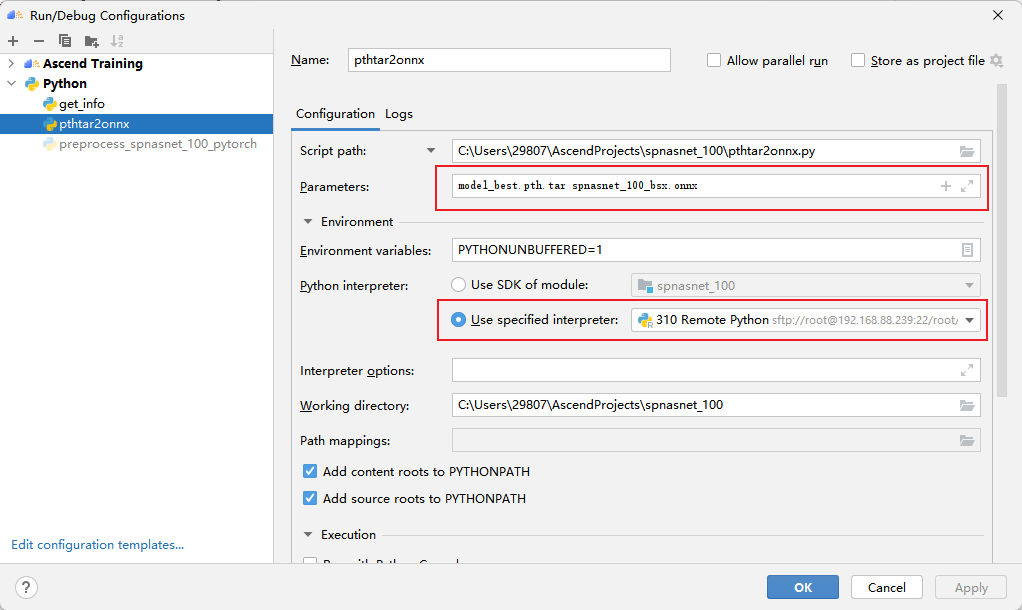
7.1 Export onnx file
Convert .pth files to .onnx files using the pthtar2onnx.py script
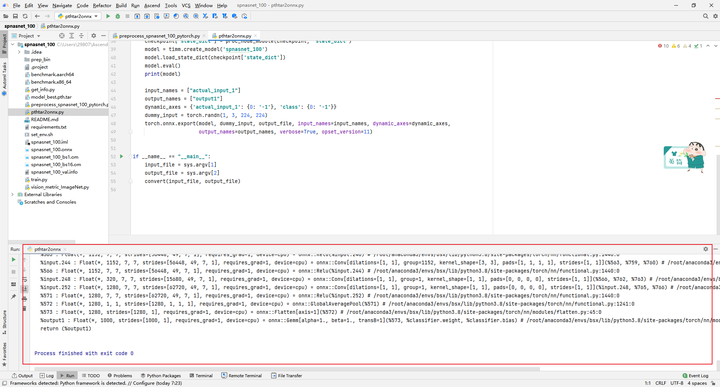
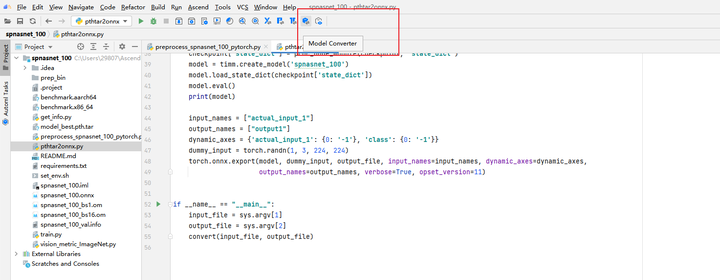
7.2 Export om file
Converting from onnx to om requires the atc tool. MindStudio provides a windowed application of the atc tool, which will automatically generate the atc command according to the user's selection. The entry of Model Converter is shown in the figure:
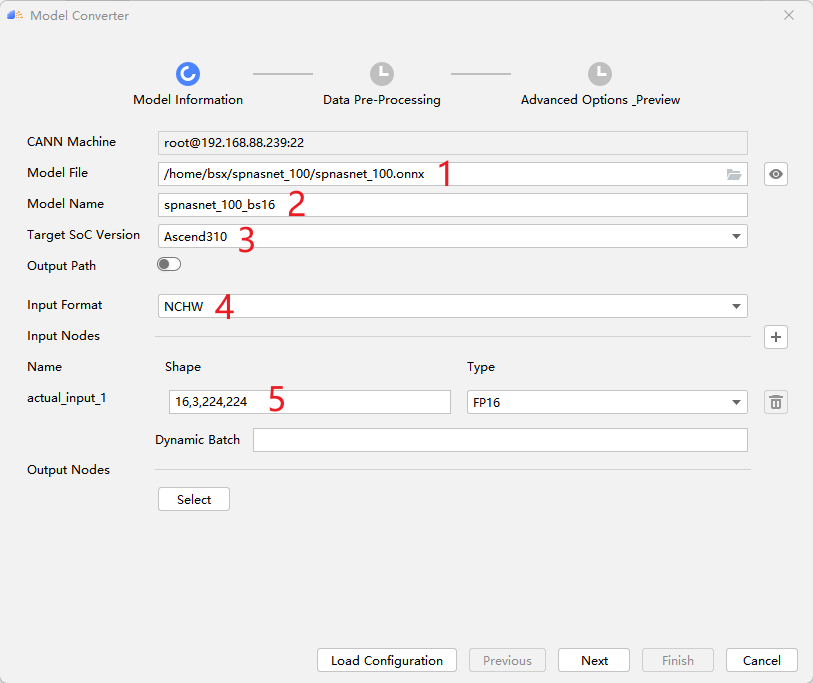
Select information such as onnx model path, model output name, target device, input format and batchsize.
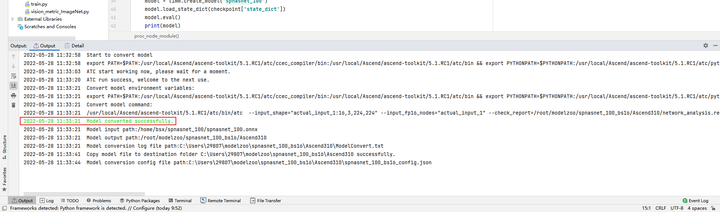
MindStudio automatically generates the following atc command, where the user can do the final verification and click Finish to start the model conversion.
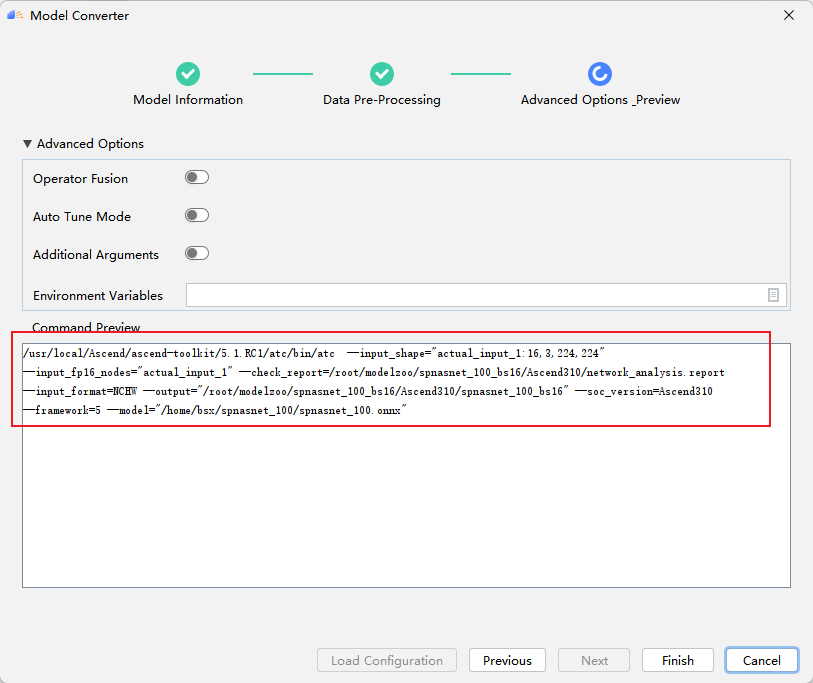
Model conversion succeeded:
8 Model Inference
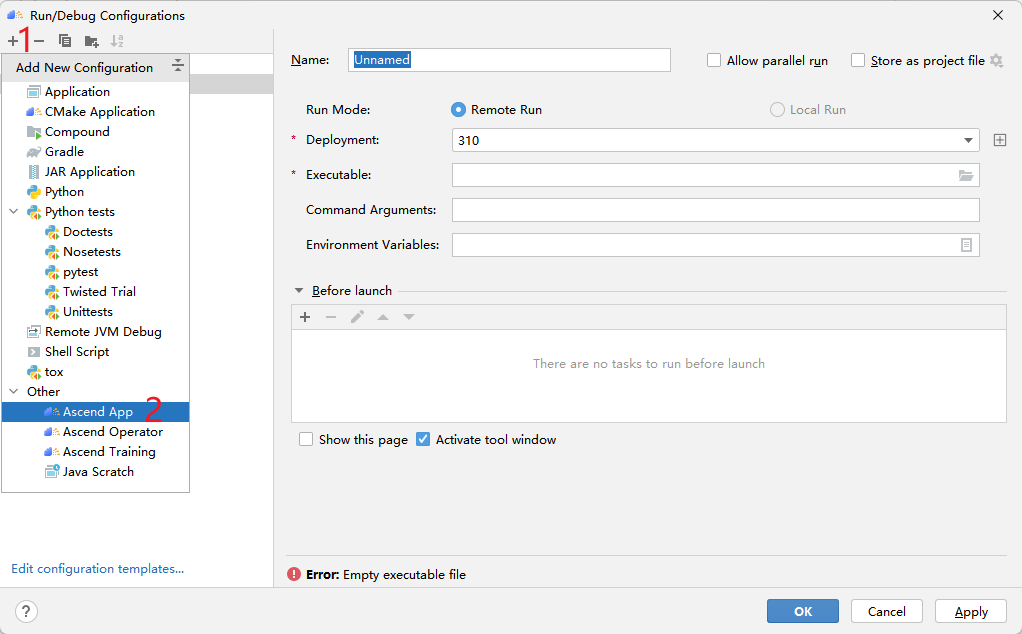
Use benchmark tools for inference. This is different from the previous python script, it belongs to the ACL application in MindStudio, and the application can be created as shown in the figure:
Click the + sign, and then click Ascend App:
Then configure as follows:

For parameter details, please refer to "CANN Inference Benchmark Tool User Guide" . The output after inference is in the current directory result by default.
Results of the:
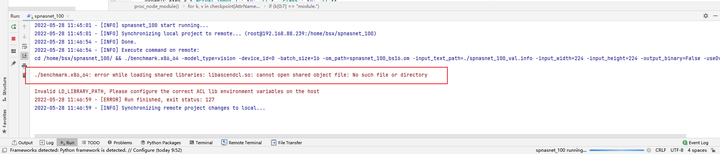
运行出错:error while loading shared libraries: libascendcl.so: cannot open shared object file: No such file or directory.
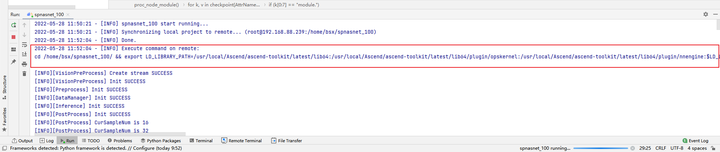
This error is because the environment variables are not configured properly. Because when we run it in the terminal, we generally need to execute it first: source /usr/local/Ascend/ascend-toolkit/set_env.sh, this step can be solved in MindStudio by configuring the environment variables as shown in the figure:
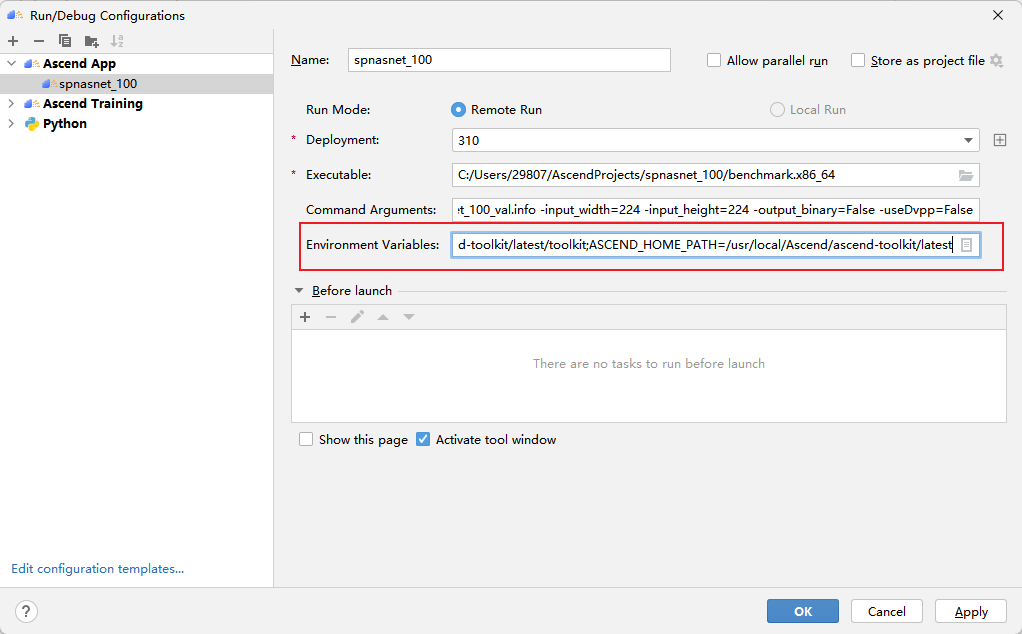
The content of the variable is the content of /usr/local/Ascend/ascend-toolkit/set_env.sh, and readers can copy and use it directly.
LD_LIBRARY_PATH=/usr/local/Ascend/ascend-toolkit/latest/lib64:/usr/local/Ascend/ascend-toolkit/latest/lib64/plugin/opskernel:/usr/local/Ascend/ascend-toolkit/latest/lib64/plugin/nnengine:$LD_LIBRARY_PATH;PYTHONPATH=/usr/local/Ascend/ascend-toolkit/latest/python/site-packages:/usr/local/Ascend/ascend-toolkit/latest/opp/op_impl/built-in/ai_core/tbe:$PYTHONPATH;PATH=/usr/local/Ascend/ascend-toolkit/latest/bin:/usr/local/Ascend/ascend-toolkit/latest/compiler/ccec_compiler/bin:$PATH;ASCEND_AICPU_PATH=/usr/local/Ascend/ascend-toolkit/latest;ASCEND_OPP_PATH=/usr/local/Ascend/ascend-toolkit/latest/opp;TOOLCHAIN_HOME=/usr/local/Ascend/ascend-toolkit/latest/toolkit;ASCEND_HOME_PATH=/usr/local/Ascend/ascend-toolkit/latest
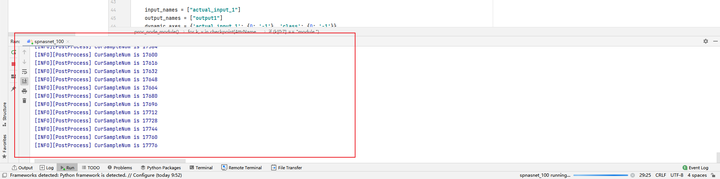
After setting the variables, start the operation again, and you can see in the console that the environment variables will be exported first before executing the benchmark.
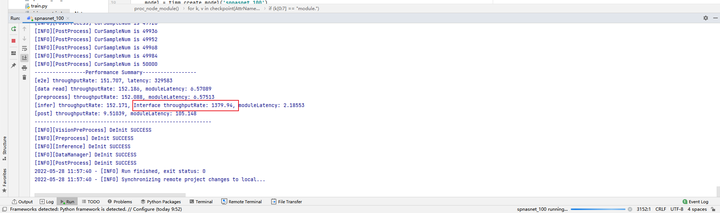
The modified code runs successfully:
You can get batch16 310 single card throughput rate of 1379.94×4 = 5519.76 fps
9 Accuracy Verification
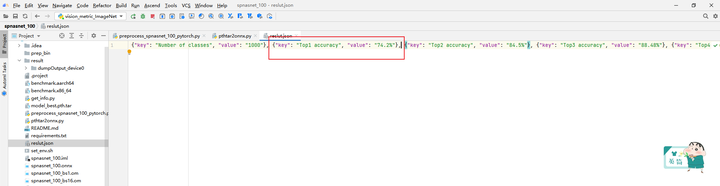
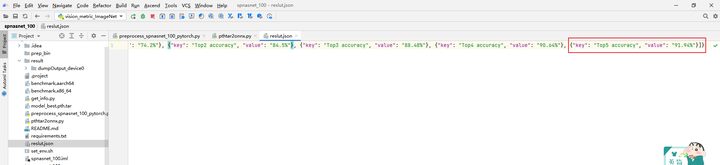
Call the vision_metric_ImageNet.py script to compare it with the dataset label val_label.txt to obtain the Accuracy Top5 data, and save the result in result.json.
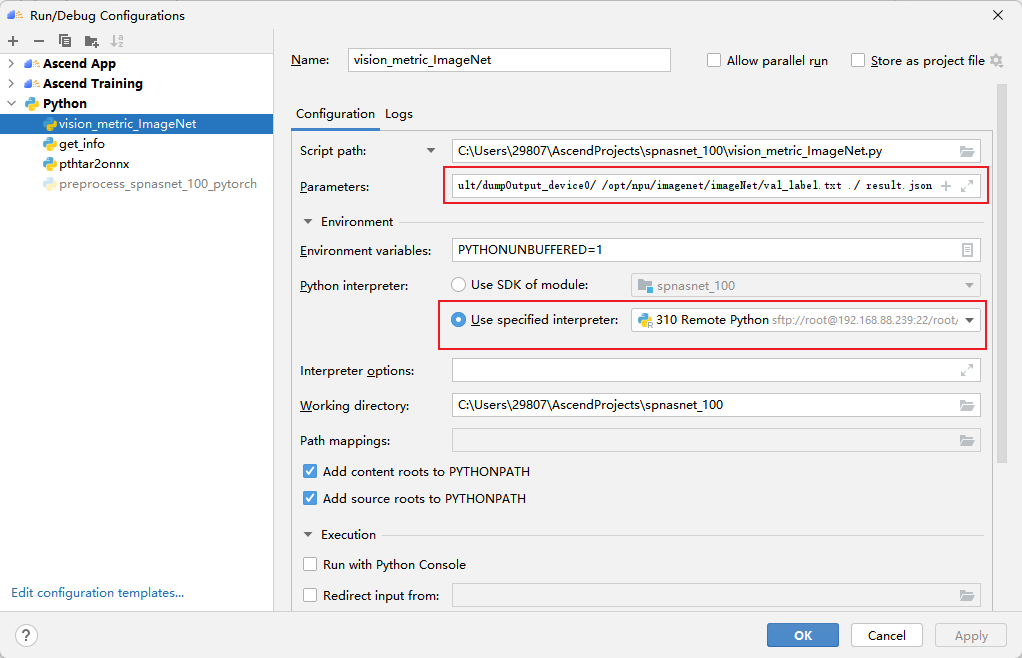
The first parameter is the path where the inference result is generated, the second parameter is the label data, the third parameter is the path of the generated result file, and the fourth parameter is the name of the generated result file.
The obtained accuracy data is as follows: 310 Top1 accuracy is 74.2%, and Top5 accuracy is 91.94%.
Click Follow to learn about HUAWEI CLOUD's new technologies for the first time~