Python llama a la cámara industrial de Haikang para lograr una fotografía continua en tiempo real
Directorio de artículos
Prefacio:
La llamada de cámara de Haikang es simplemente demasiado complicada. Por supuesto, es mucho mejor que Python no pueda llamar a la cámara Point Grey Fly.
Para empaquetar la foto llamada en una categoría, ¿realmente pasé dos días?
Aquí hay un registro simple. Espero darles a todos una parte.
Link de referencia:
Cámara industrial Hikvision Llamada Python para realizar la toma de fotografías.
Usa Python para llamar a la cámara industrial Hikvision y realizar el almacenamiento de imágenes (el problema de adquisición de flujo de datos no se puede resolver)
Establecer de antemano:
- Instale MVS primero, descargue la dirección
- Condición: Python + la carpeta de Python en desarrollo / samples bajo el archivo mvs oficial de Haikang
- Nota: Después de que la cámara esté conectada, no use la aplicación oficial para abrir la cámara; de lo contrario, el código de Python no detectará el dispositivo, el código mostrará un error en Pycharm, la prueba se puede ejecutar y la imagen se puede capturar.
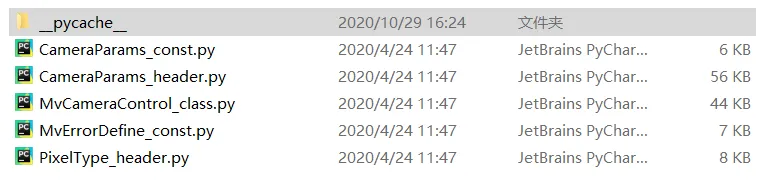
- Necesita agregar la ruta del módulo MvImport:
este es el núcleo de todo el código, el contenido del archivo es el siguiente, puede descargar las rutinas en el MVS:
import sys
sys.path.append("C:\Program Files (x86)\MVS\Development\Samples\Python\MvImport")
Adquisición de flujo de datos de imagen:
save_image2localLa parte de la función es principalmente una conversión del flujo de datos del programa C. No es difícil ver la ruta guardada con cuidado. Img_buff es el flujo de datos de imagen que queremos.
Pero cuando lo imprimo, sigue siendo un tipo de datos C * ubyte, por lo que no se puede leer directamente con python-opencv , es decir, no se puede convertir directamente en una matriz numpy.
Solo se puede almacenar primero y luego leer a través de cv2 para realizar una serie de operaciones de imagen.
file_path es la ruta donde se almacenan nuestras imágenes, puede cambiarla usted mismo. Originalmente, había un botón para ingresar y salir, pero no respondió, así que lo eliminé.
Después de eso, es cerrar el flujo de datos y cerrar la operación de la cámara. Debido a que el blogger no puede leer directamente el flujo de datos y no puede mostrar el video directamente, es imposible saber si los datos son para actualizar la imagen en tiempo real o para obtener la información de la imagen una vez en una operación completa, por lo que mi método es cerrar toda la operación y recopilar los datos una vez, lo cual es muy problemático.
Código:
# -- coding: utf-8 --
from os import times
import cv2
import sys
import numpy as np
import time
from ctypes import *

sys.path.append("C:\Program Files (x86)\MVS\Development\Samples\Python\MvImport")
from MvCameraControl_class import *


class HHV:
    def __init__(self,):

        self.init_cam()

        for i in range(10):
            st = time.time()
            img = self.get_image_array()
            print(img.shape)
            # cv2.imshow("img", img)
            # cv2.waitKey(0)
            # cv2.destroyAllWindows()
            print("st:", time.time()-st)
        self.exit_cam()

    def get_image_array(self):
        self.save_image2local(index=0)
        img = cv2.imread("AfterConvert_RGB0.jpg")
        return img


    def init_cam(self,):
        deviceList = MV_CC_DEVICE_INFO_LIST()
        tlayerType = MV_GIGE_DEVICE | MV_USB_DEVICE
        ret = MvCamera.MV_CC_EnumDevices(tlayerType, deviceList)
        nConnectionNum = 0
        # ch:创建相机实例 | en:Creat Camera Object
        self.cam = MvCamera()
        # ch:选择设备并创建句柄 | en:Select device and create handle
        stDeviceList = cast(deviceList.pDeviceInfo[int(nConnectionNum)],
                            POINTER(MV_CC_DEVICE_INFO)).contents
        ret = self.cam.MV_CC_CreateHandle(stDeviceList)
        # ch:打开设备 | en:Open device
        ret = self.cam.MV_CC_OpenDevice(MV_ACCESS_Exclusive, 0)
        # ch:设置触发模式为off | en:Set trigger mode as off
        ret = self.cam.MV_CC_SetEnumValue("TriggerMode", MV_TRIGGER_MODE_OFF)

        # ch:获取数据包大小 | en:Get payload size
        stParam = MVCC_INTVALUE()
        memset(byref(stParam), 0, sizeof(MVCC_INTVALUE))

        ret = self.cam.MV_CC_GetIntValue("PayloadSize", stParam)

        self.nPayloadSize = stParam.nCurValue

    def save_image2local(self, index=0):
        # ch:开始取流 | en:Start grab image
        ret = self.cam.MV_CC_StartGrabbing()

        stDeviceList = MV_FRAME_OUT_INFO_EX()
        memset(byref(stDeviceList), 0, sizeof(stDeviceList))
        self.data_buf = (c_ubyte * self.nPayloadSize)()

        ret = self.cam.MV_CC_GetOneFrameTimeout(byref(self.data_buf), self.nPayloadSize, stDeviceList, 1000)
        if ret == 0:
            # print ("get one frame: Width[%d], Height[%d], nFrameNum[%d]" % (stDeviceList.nWidth, stDeviceList.nHeight, stDeviceList.nFrameNum))
            nRGBSize = stDeviceList.nWidth * stDeviceList.nHeight * 3
            stConvertParam=MV_SAVE_IMAGE_PARAM_EX()
            stConvertParam.nWidth = stDeviceList.nWidth
            stConvertParam.nHeight = stDeviceList.nHeight
            stConvertParam.pData = self.data_buf
            stConvertParam.nDataLen = stDeviceList.nFrameLen
            stConvertParam.enPixelType = stDeviceList.enPixelType
            stConvertParam.nImageLen = stConvertParam.nDataLen
            stConvertParam.nJpgQuality = 70
            stConvertParam.enImageType = MV_Image_Jpeg
            stConvertParam.pImageBuffer = (c_ubyte * nRGBSize)()
            stConvertParam.nBufferSize = nRGBSize
            # ret = self.cam.MV_CC_ConvertPixelType(stConvertParam)
            # print(stConvertParam.nImageLen)
            ret = self.cam.MV_CC_SaveImageEx2(stConvertParam)
            if ret != 0:
                print ("convert pixel fail ! ret[0x%x]" % ret)
                del self.data_buf
                sys.exit()
            file_path = "AfterConvert_RGB"+str(index)+".jpg"
            file_open = open(file_path.encode('ascii'), 'wb+')
            img_buff = (c_ubyte * stConvertParam.nImageLen)()
            cdll.msvcrt.memcpy(byref(img_buff), stConvertParam.pImageBuffer, stConvertParam.nImageLen)
            file_open.write(img_buff)
        # print ("Save Image succeed!")

    def exit_cam(self,):
        # ch:停止取流 | en:Stop grab image
        ret = self.cam.MV_CC_StopGrabbing()
        if ret != 0:
            print ("stop grabbing fail! ret[0x%x]" % ret)
            del self.data_buf
            sys.exit()
        # ch:关闭设备 | Close device
        ret = self.cam.MV_CC_CloseDevice()
        if ret != 0:
            print ("close deivce fail! ret[0x%x]" % ret)
            del self.data_buf
            sys.exit()

        # ch:销毁句柄 | Destroy handle
        ret = self.cam.MV_CC_DestroyHandle()
        if ret != 0:
            print ("destroy handle fail! ret[0x%x]" % ret)
            del self.data_buf
            sys.exit()

        del self.data_buf


if __name__ == "__main__":

    hhv = HHV()