Apache JMeter is a pure Java open-source software for load testing or performance testing. At first JMeter is designed to stress-test Web applications, this article pull up a container by using Nginx Docker, and then subjected to the pressure of such a measure is the simple example to introduce the use JMeter to stress test process and method.
Preparing the Environment
Apache JMeter overview on the method of installation, the following can be found:
- https://liumiaocn.blog.csdn.net/article/details/101264380
Stress test application ready
In use port 8088 starts a Docker application Nginx local machine (in other ways may also be used), example is shown below:
liumiaocn:~ liumiao$ docker images |grep nginx |grep latest
nginx                                           latest                          e445ab08b2be        2 months ago        126MB
liumiaocn:~ liumiao$ docker run -p 8088:80 -d --name=nginx-test nginx:latest
a80fb1a4fc20627891a6bd7394fd79ae9aefb7dc8cf72c12967bc2673a815308
liumiaocn:~ liumiao$
- 1
- 2
- 3
- 4
- 5
Use the curl command or direct the browser to confirm nginx has been running
liumiaocn:~ liumiao$ curl http://localhost:8088/
<!DOCTYPE html>
<html>
<head>
<title>Welcome to nginx!</title>
<style>
    body {
        width: 35em;
        margin: 0 auto;
        font-family: Tahoma, Verdana, Arial, sans-serif;
    }
</style>
</head>
<body>
<h1>Welcome to nginx!</h1>
<p>If you see this page, the nginx web server is successfully installed and
working. Further configuration is required.</p>

<p>For online documentation and support please refer to
<a href="http://nginx.org/">nginx.org</a>.<br/>
Commercial support is available at
<a href="http://nginx.com/">nginx.com</a>.</p>

<p><em>Thank you for using nginx.</em></p>
</body>
</html>
liumiaocn:~ liumiao$
- 1
- 2
- 3
- 4
- 5
- 6
- 7
- 8
- 9
- 10
- 11
- 12
- 13
- 14
- 15
- 16
- 17
- 18
- 19
- 20
- 21
- 22
- 23
- 24
- 25
- 26
- 27
Use the following steps to prepare test to verify the premise of preparation:
-
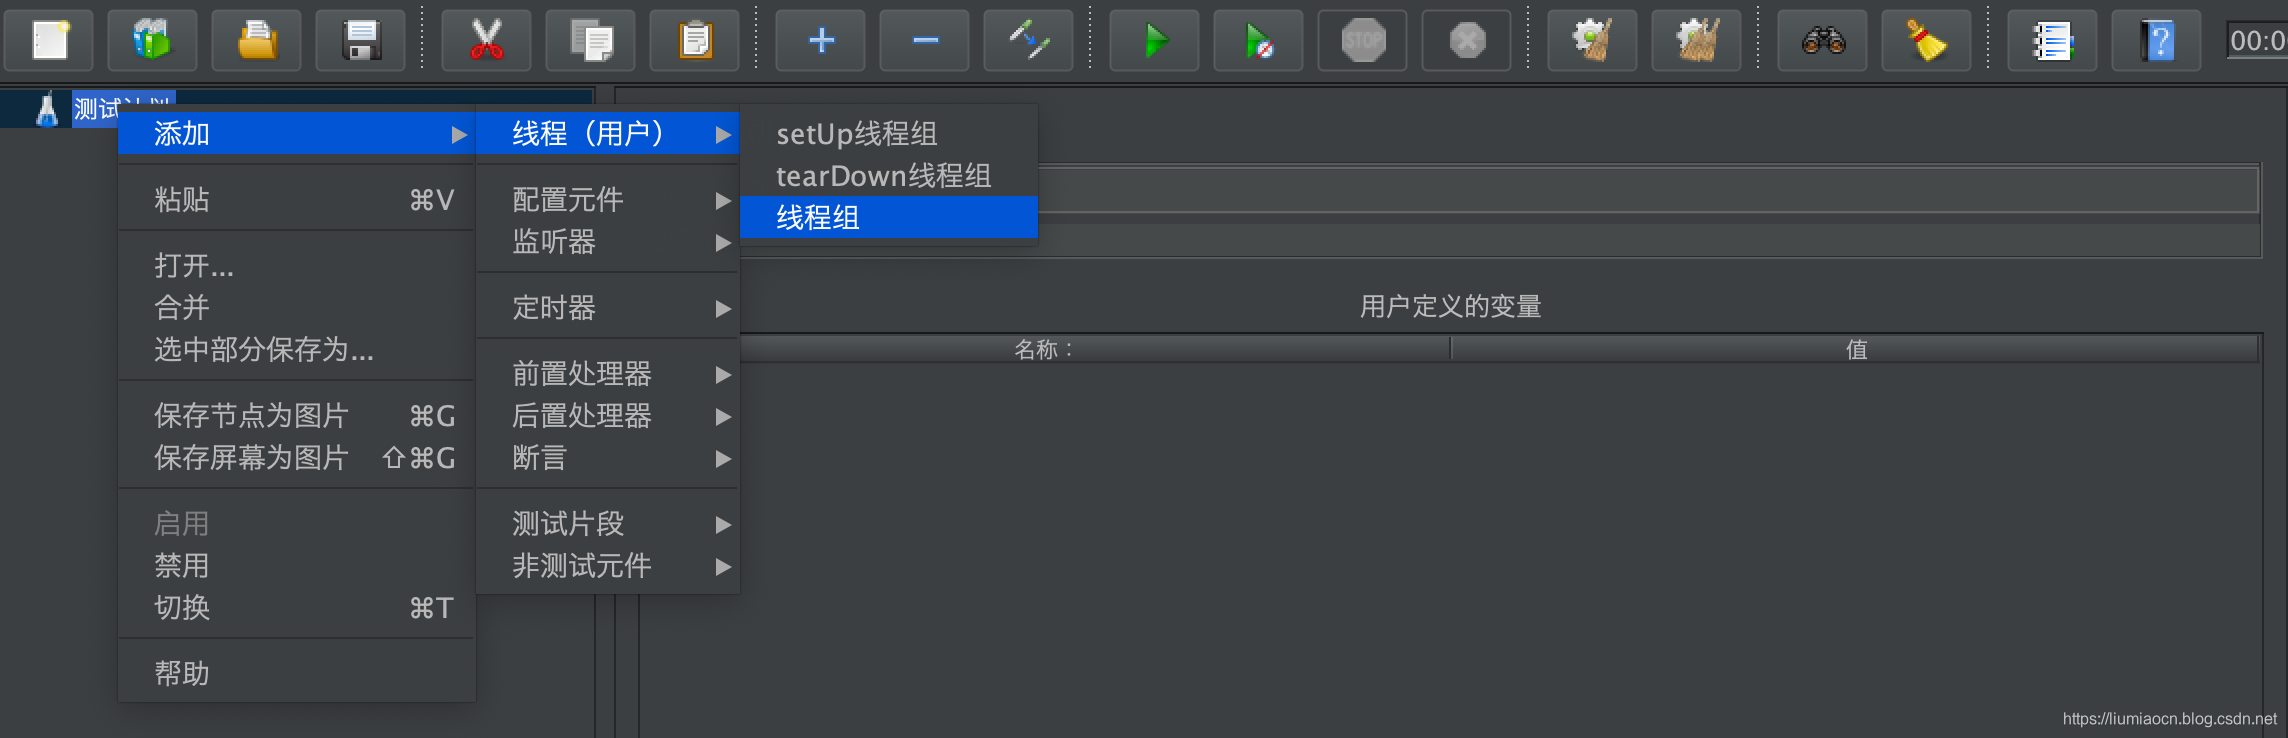
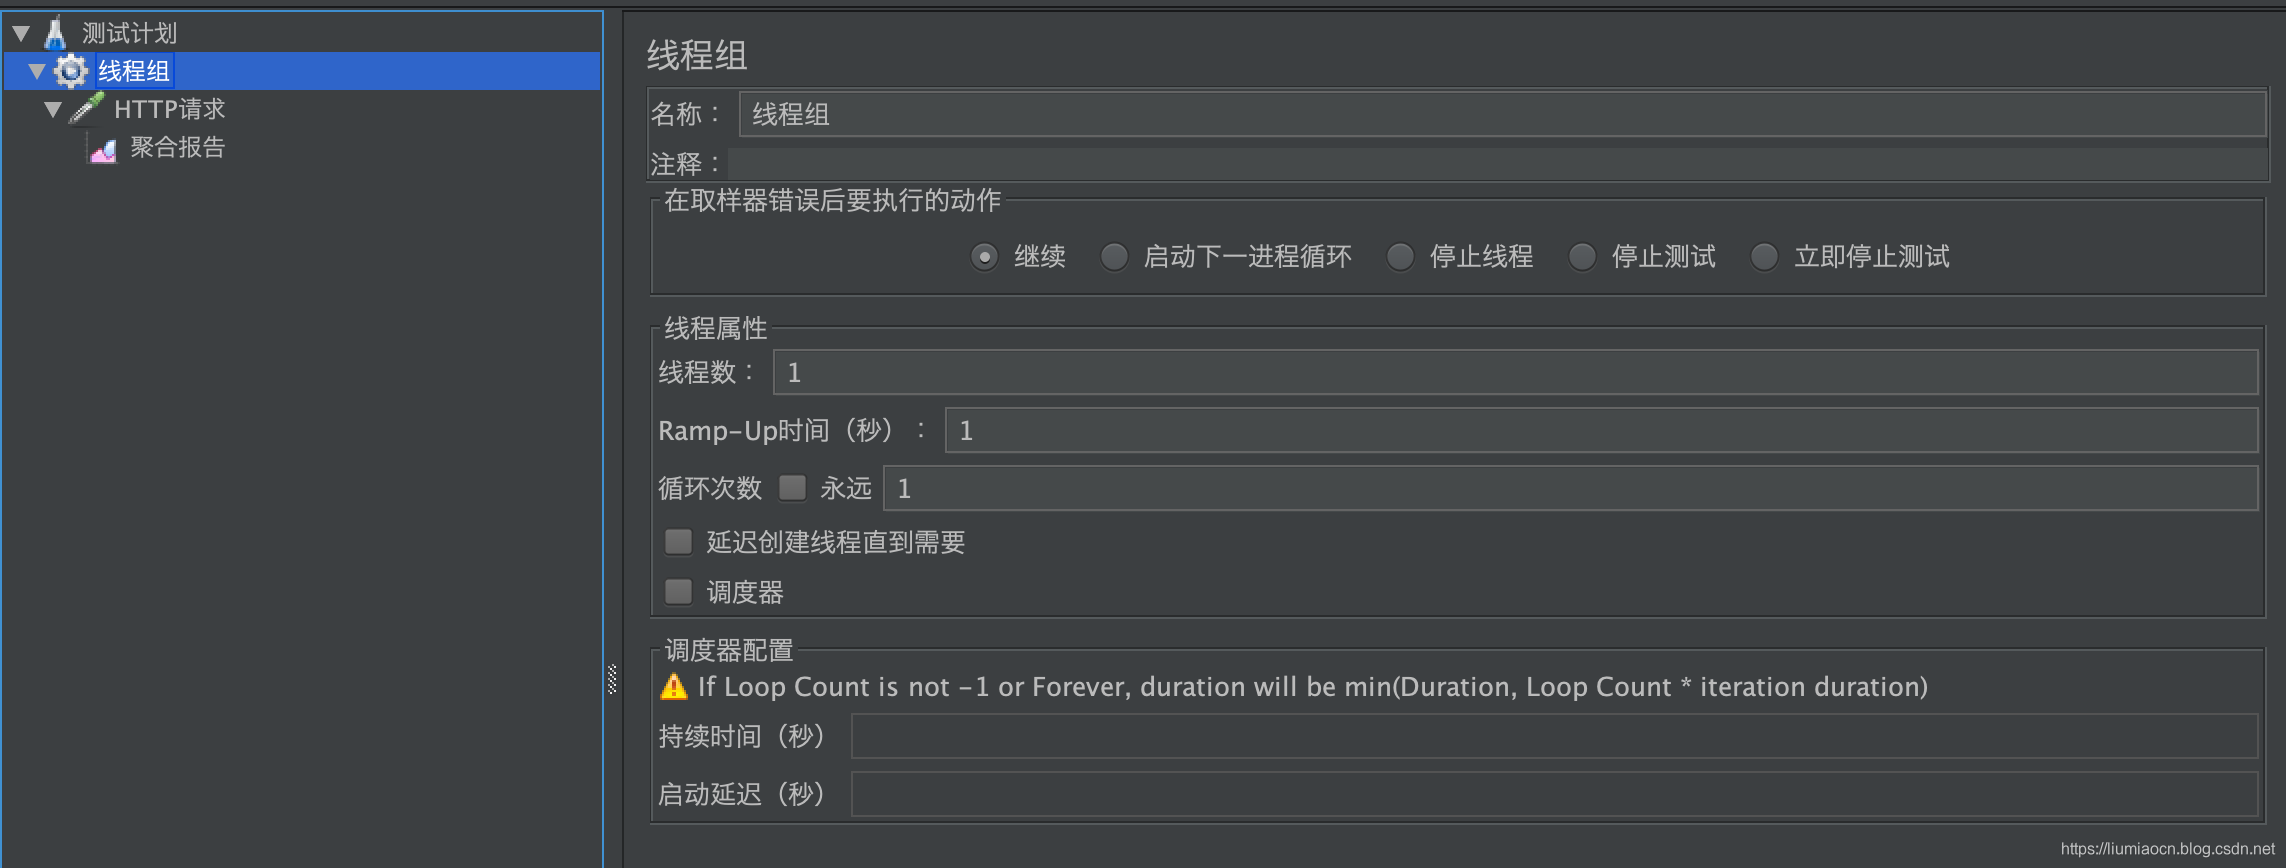
Step 1: Add a thread group in the test program, the information selection menu as shown below:
-
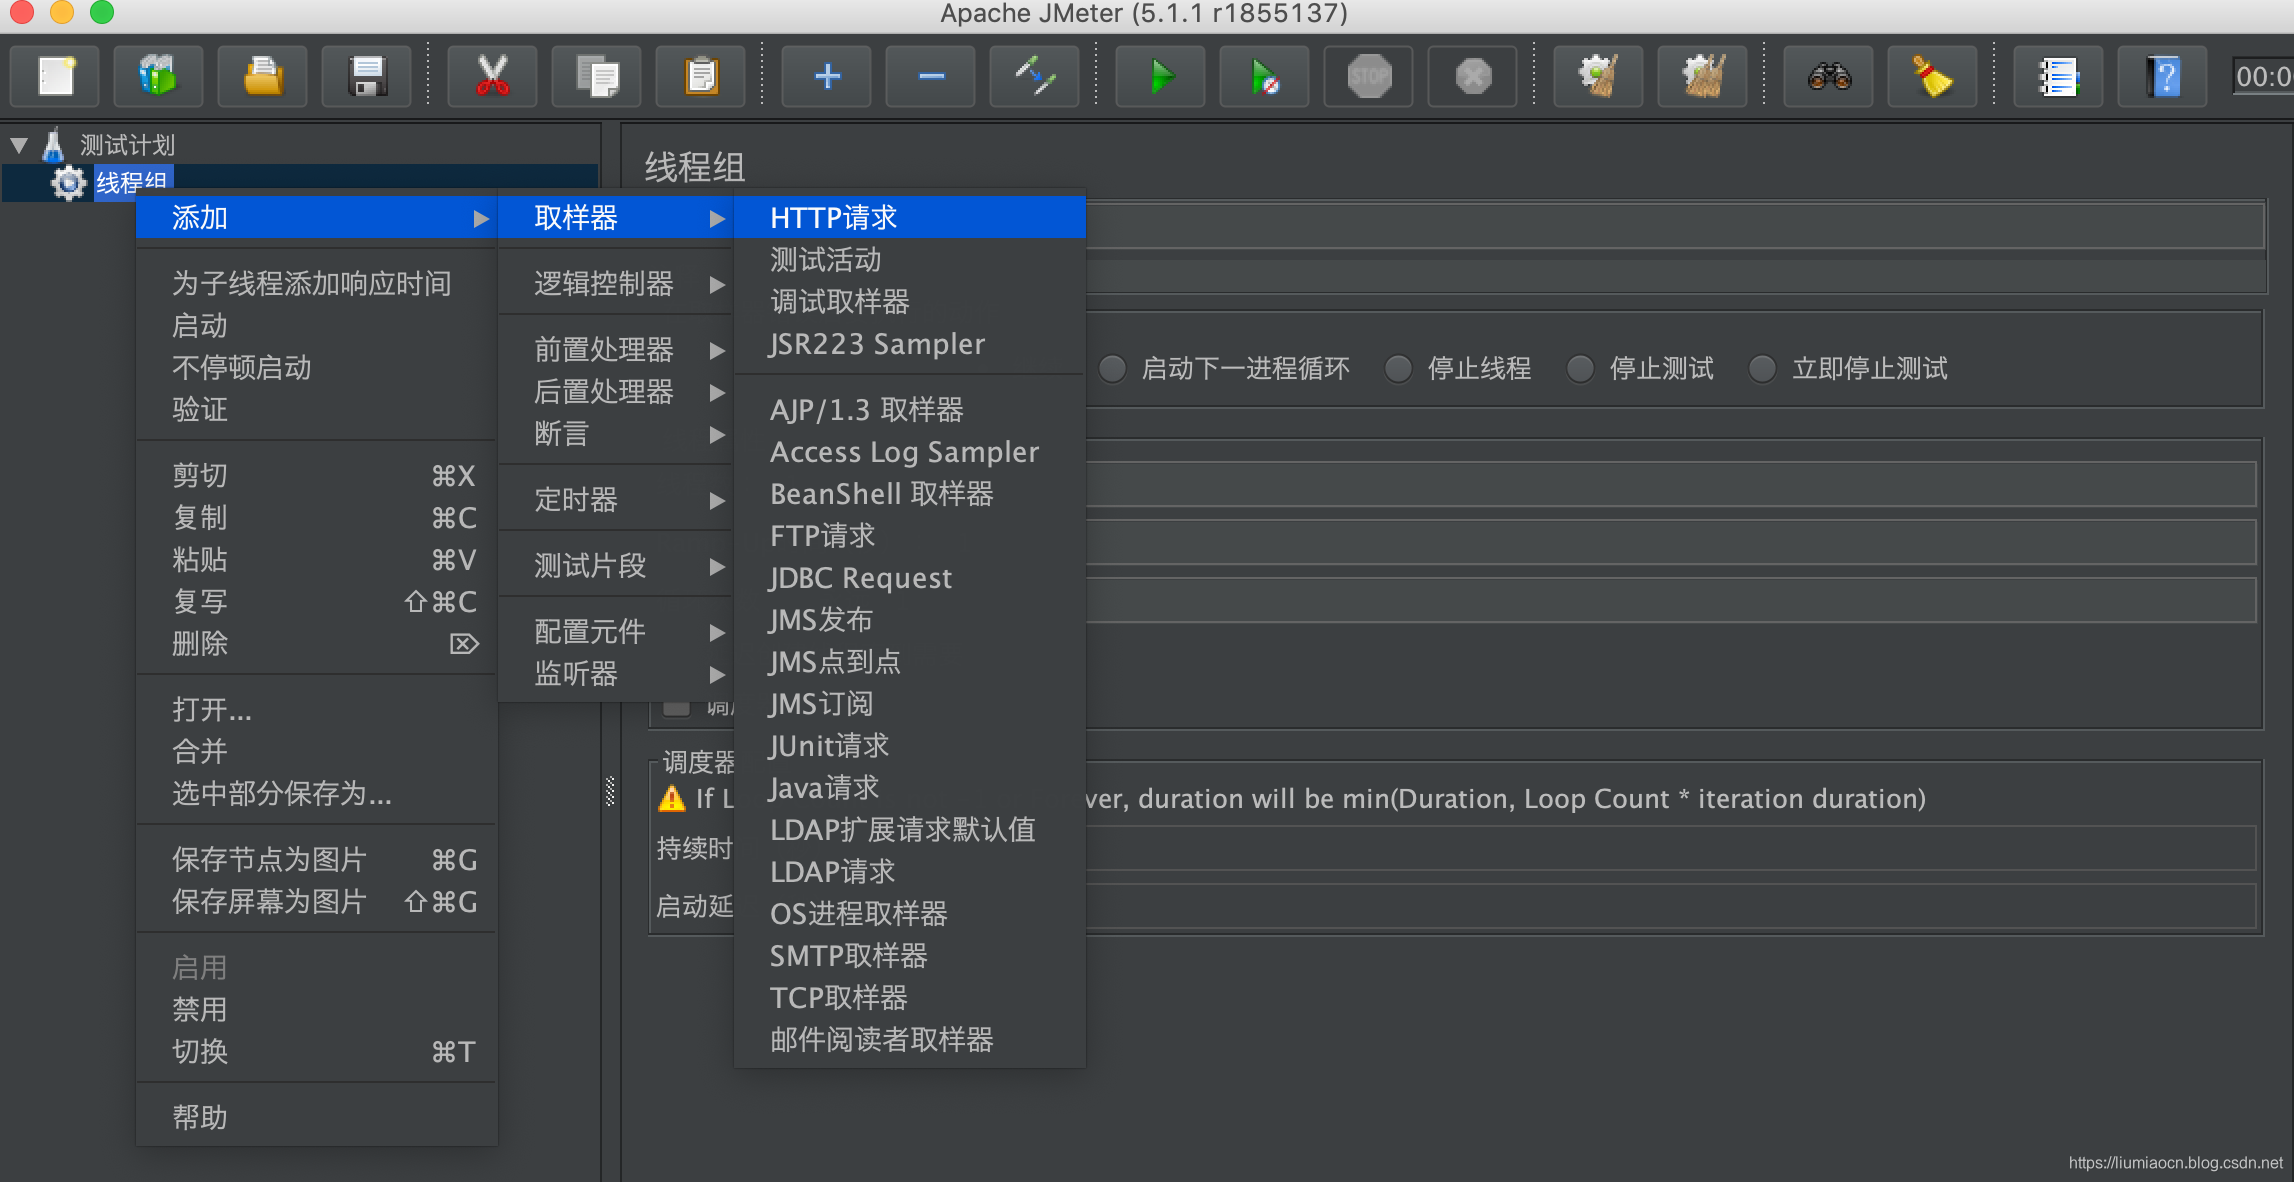
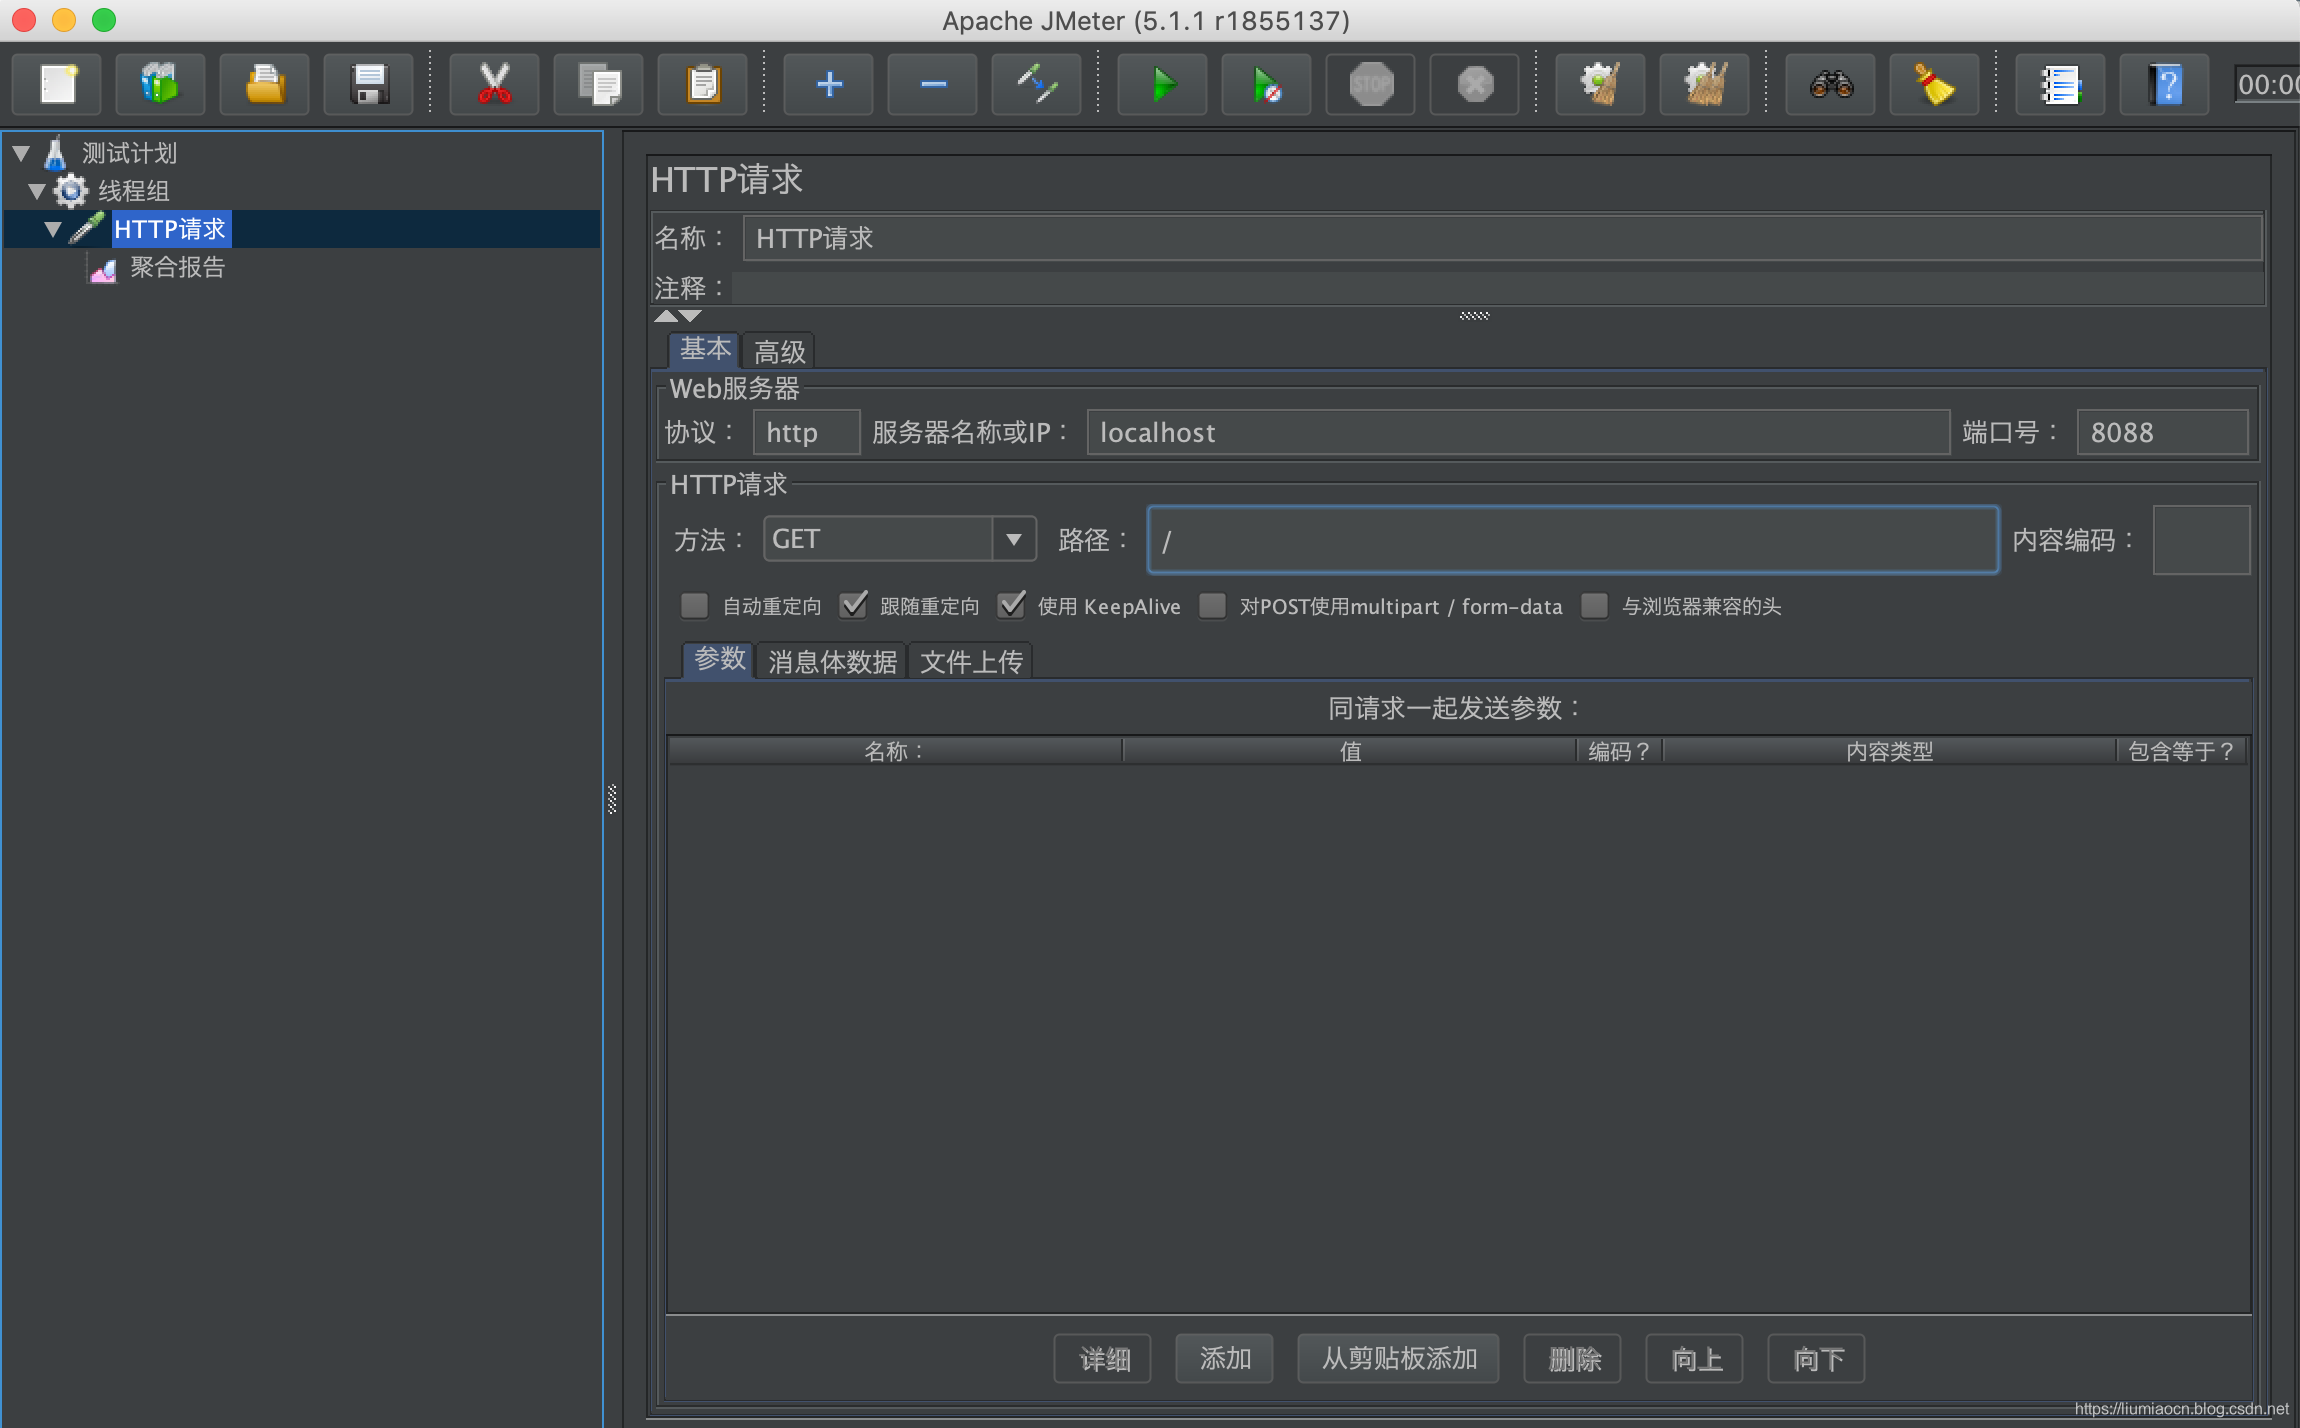
Step 2: Add a sampler HTTP request on a thread group just created, the information selection menu as shown below:
-
Step 3: Adding a polymerization report, select the menu information as shown below:

-
Step 4: Save Test Plan
Click the Save button to save the results test plan as /tmp/nginx-test.jmx -
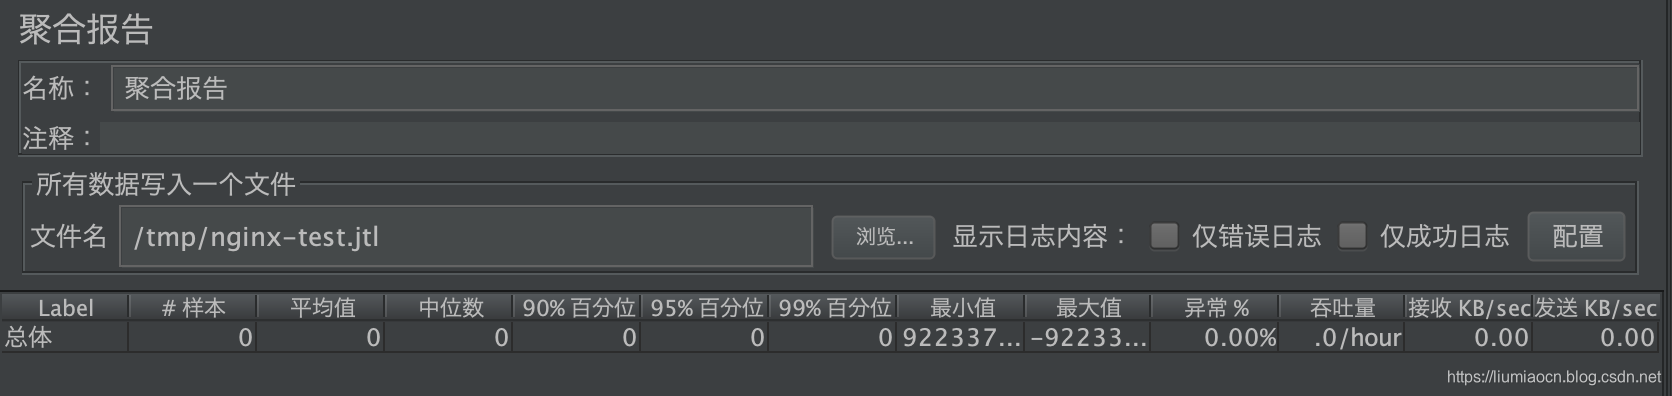
Step 5: file page set jtl polymerization report
set and writes the file path in the polymerization jtl report page: /tmp/nginx-test.jtl
HTTP test
HTTP GET to conduct a successful test, carried out by the JMeter HTTP sampler a GET http: // localhost: 8088 /
Test Setup
HTTP request message is set as follows, the association between the service and nginx, in the present embodiment is set as follows in FIG.
| Setting item | 设定内容 |
|---|---|
| 协议 | http |
| 服务器名称或者ip | localhost |
| 端口号 | 8088 |
| HTT请求/方法 | GET |
| HTTP请求/路径 | / |
详细设定如下图所示:
线程组设定
保持线程组信息为缺省设定即可,设定内容如下所示:
| 设定项 | 设定值 |
|---|---|
| 线程数 | 1 |
| 循环次数 | 1 |
执行&聚合报告
点击绿色的启动按钮开始执行,然后点击聚合报告可以看聚合报告如下所示:
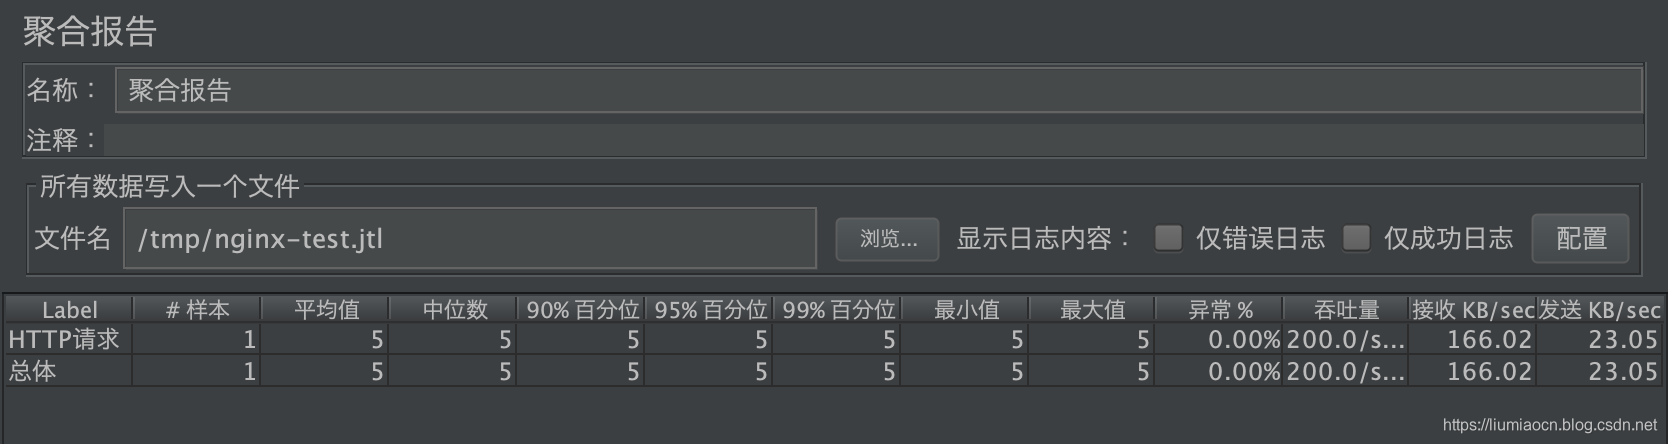
从nginx-test.jtl文件中也可以看到结果的详细信息,可以看到返回的结果200码,以及success字段的true的结果信息,说明这是一次成功的执行,另外在聚合报告中的异常%的结果是0也可以看出这一点。
liumiaocn:tmp liumiao$ cat nginx-test.jtl
timeStamp,elapsed,label,responseCode,responseMessage,threadName,dataType,success,failureMessage,bytes,sentBytes,grpThreads,allThreads,URL,Latency,IdleTime,Connect
1569663931702,5,HTTP请求,200,OK,线程组 1-1,text,true,,850,118,1,1,http://localhost:8088/,5,0,3
liumiaocn:tmp liumiao$
- 1
- 2
- 3
- 4
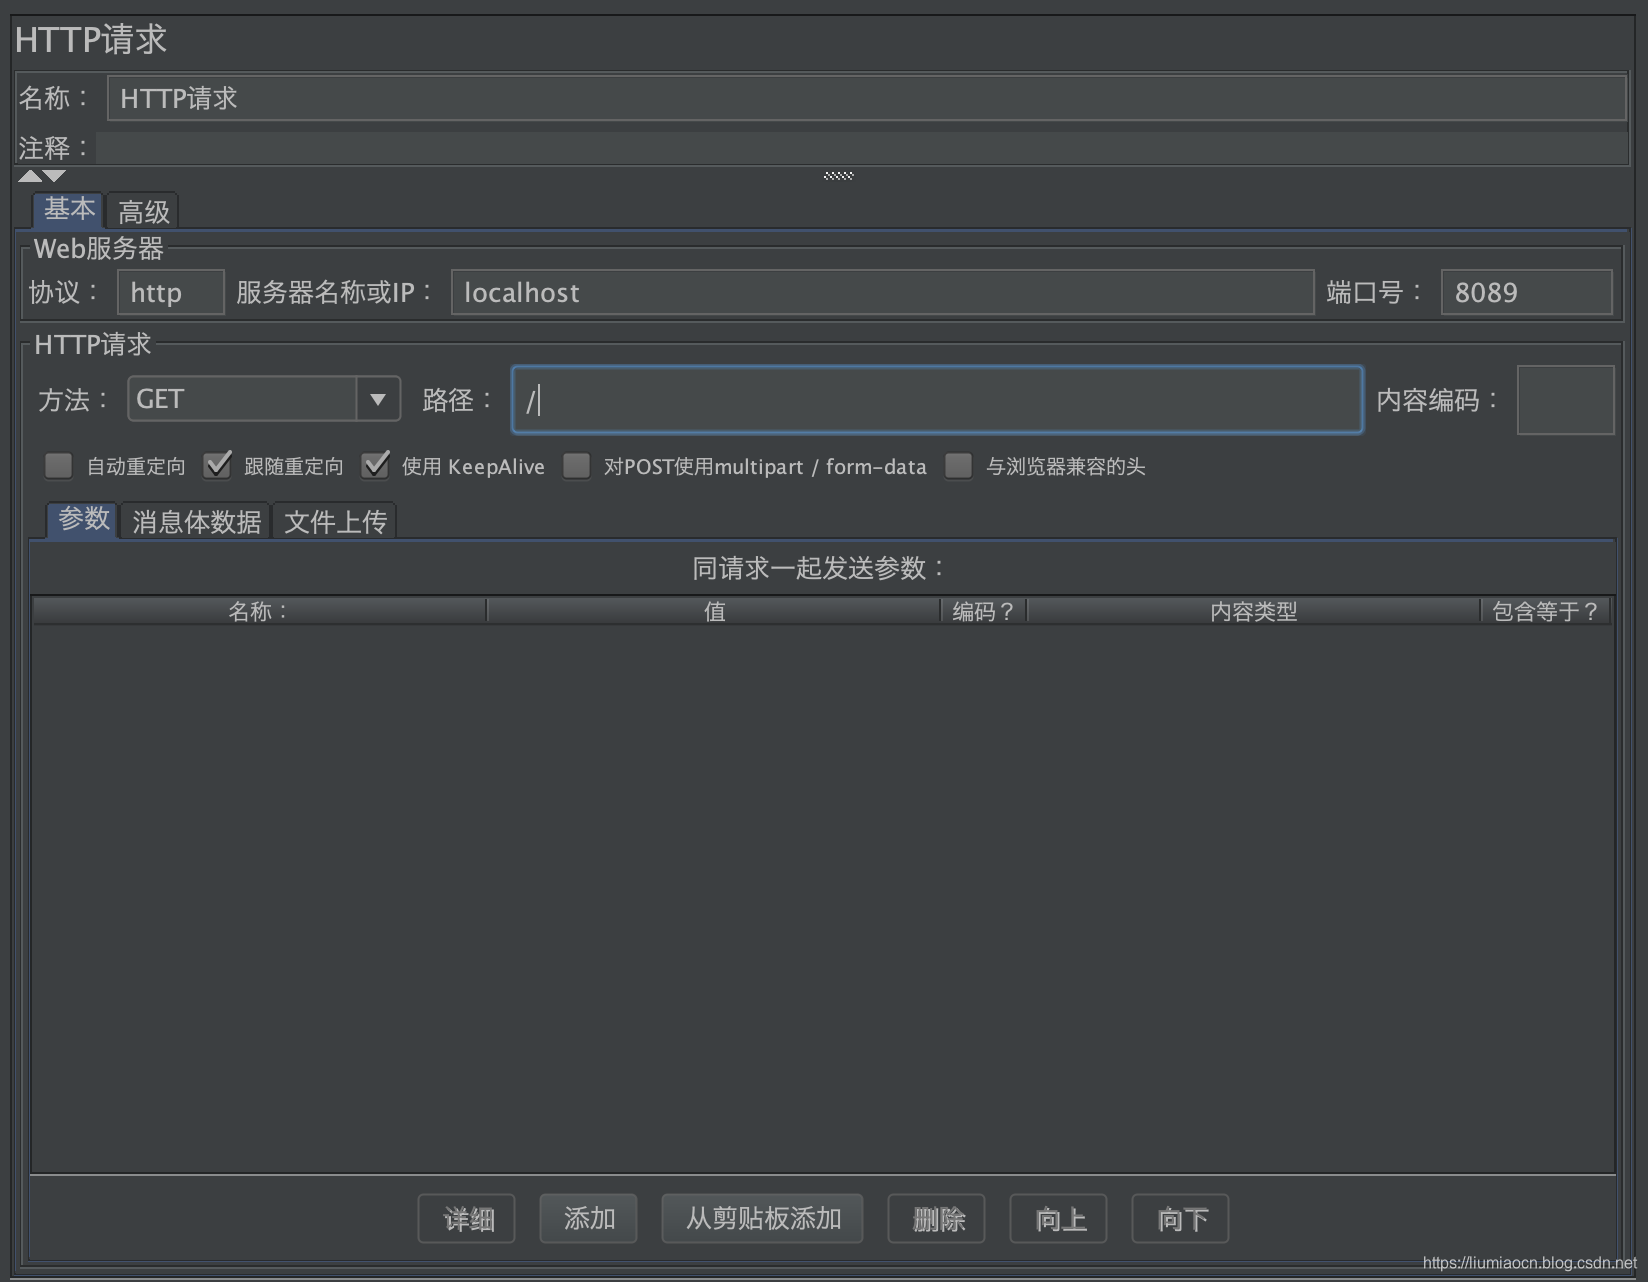
接下来故意修改一下HTTP请求的端口号,改成错误的本地没有HTTP服务的端口号,比如8089,设定示例如下所示:
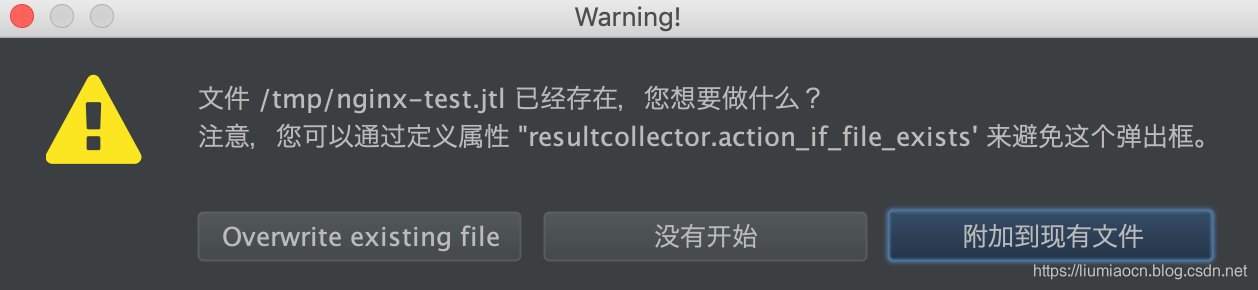
点击绿色的启动按钮开始执行,会提示一个Warning,因为在测试中修改设定,是否还是一个压力测试是需要使用者自己判断的,这里为了演示选择“添加到现有文件”
然后点击聚合报告可以看聚合报告如下所示:
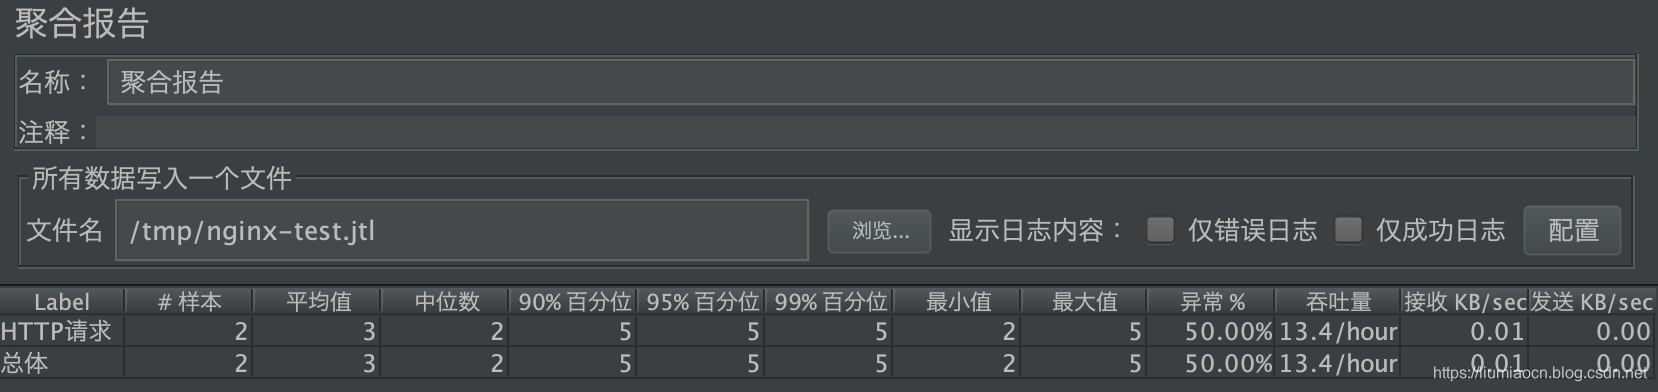
从nginx-test.jtl文件中也可以看到结果的详细信息,Connection refused的错误信息,以及success字段的false的结果信息,说明这是一次失败的执行,另外在聚合报告中的异常%的结果也变成了50%(共计两次取样测试,上一次执行的结果成功,所以异常为50%)也可以看出这一点。
liumiaocn:tmp liumiao$ cat nginx-test.jtl
timeStamp,elapsed,label,responseCode,responseMessage,threadName,dataType,success,failureMessage,bytes,sentBytes,grpThreads,allThreads,URL,Latency,IdleTime,Connect
1569663931702,5,HTTP请求,200,OK,线程组 1-1,text,true,,850,118,1,1,http://localhost:8088/,5,0,3
1569664469242,2,HTTP请求,Non HTTP response code: org.apache.http.conn.HttpHostConnectException,"Non HTTP response message: Connect to localhost:8089 [localhost/127.0.0.1, localhost/0:0:0:0:0:0:0:1] failed: Connection refused (Connection refused)",线程组 1-1,text,false,,2673,0,1,1,http://localhost:8089/,0,0,2
liumiaocn:tmp liumiao$
- 1
- 2
- 3
- 4
- 5
测试报告
- 使用如下命令生成测试报告
执行命令:bin/jmeter -g /tmp/nginx-test.jtl -e -o /tmp/nginx-test-rpt-1 -j /tmp/nginx-rpt.log
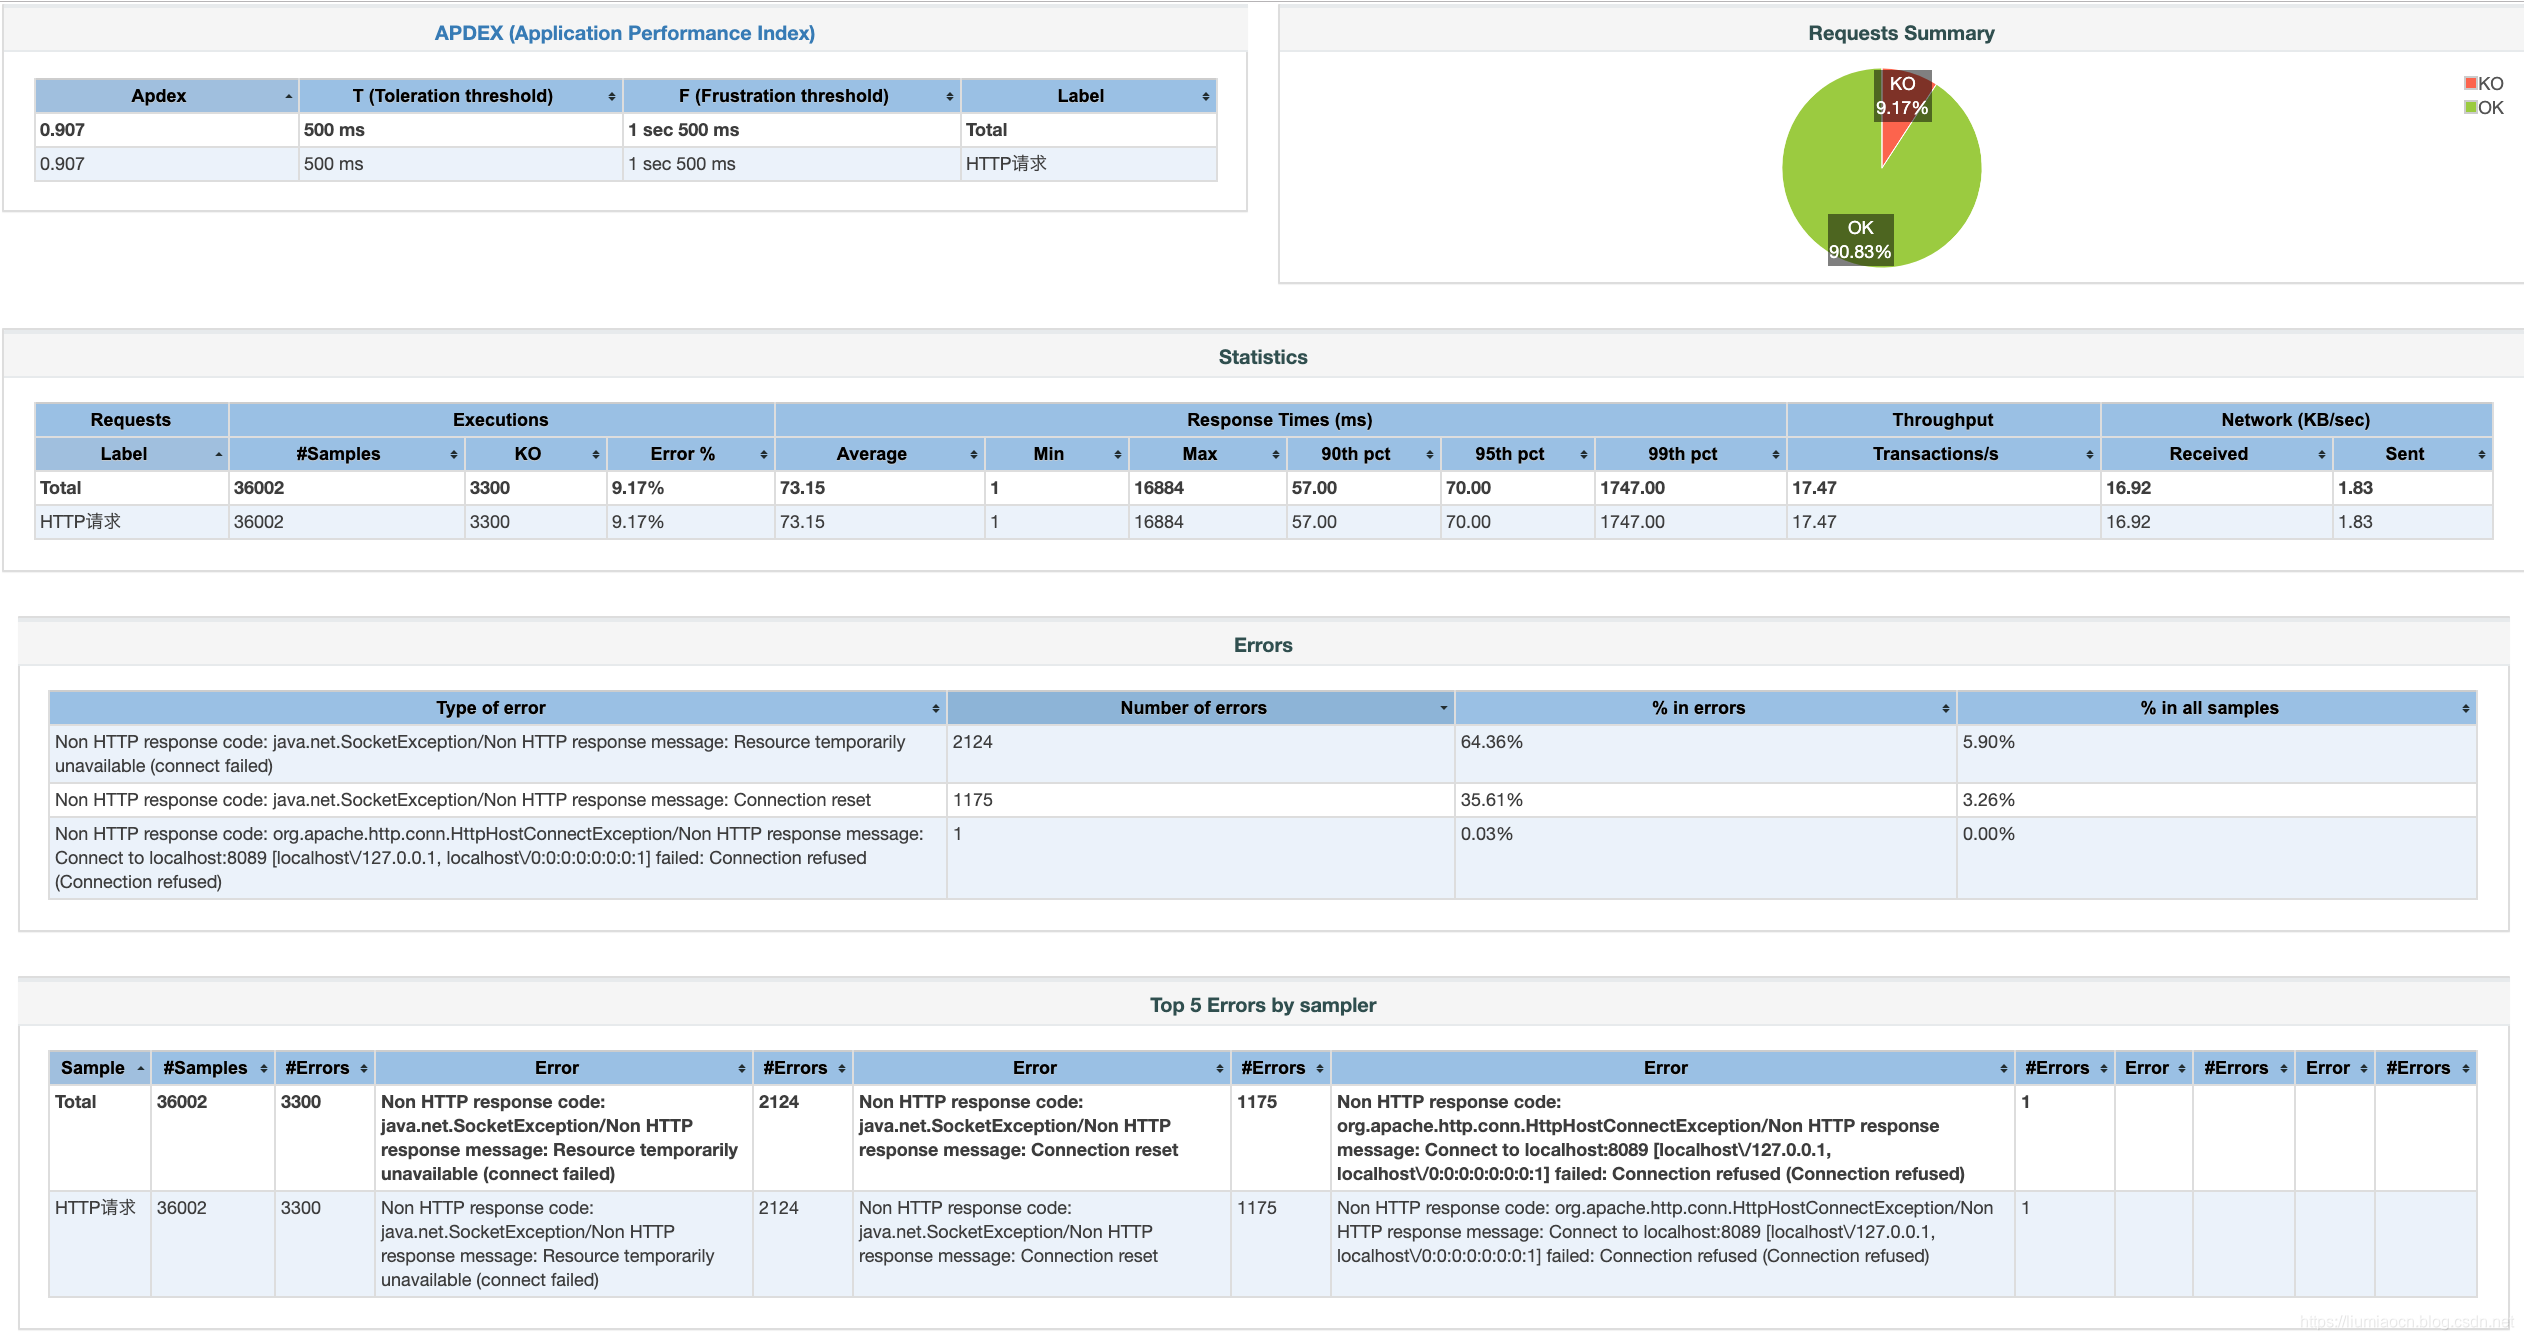
- 测试报告的概要信息如下所示:
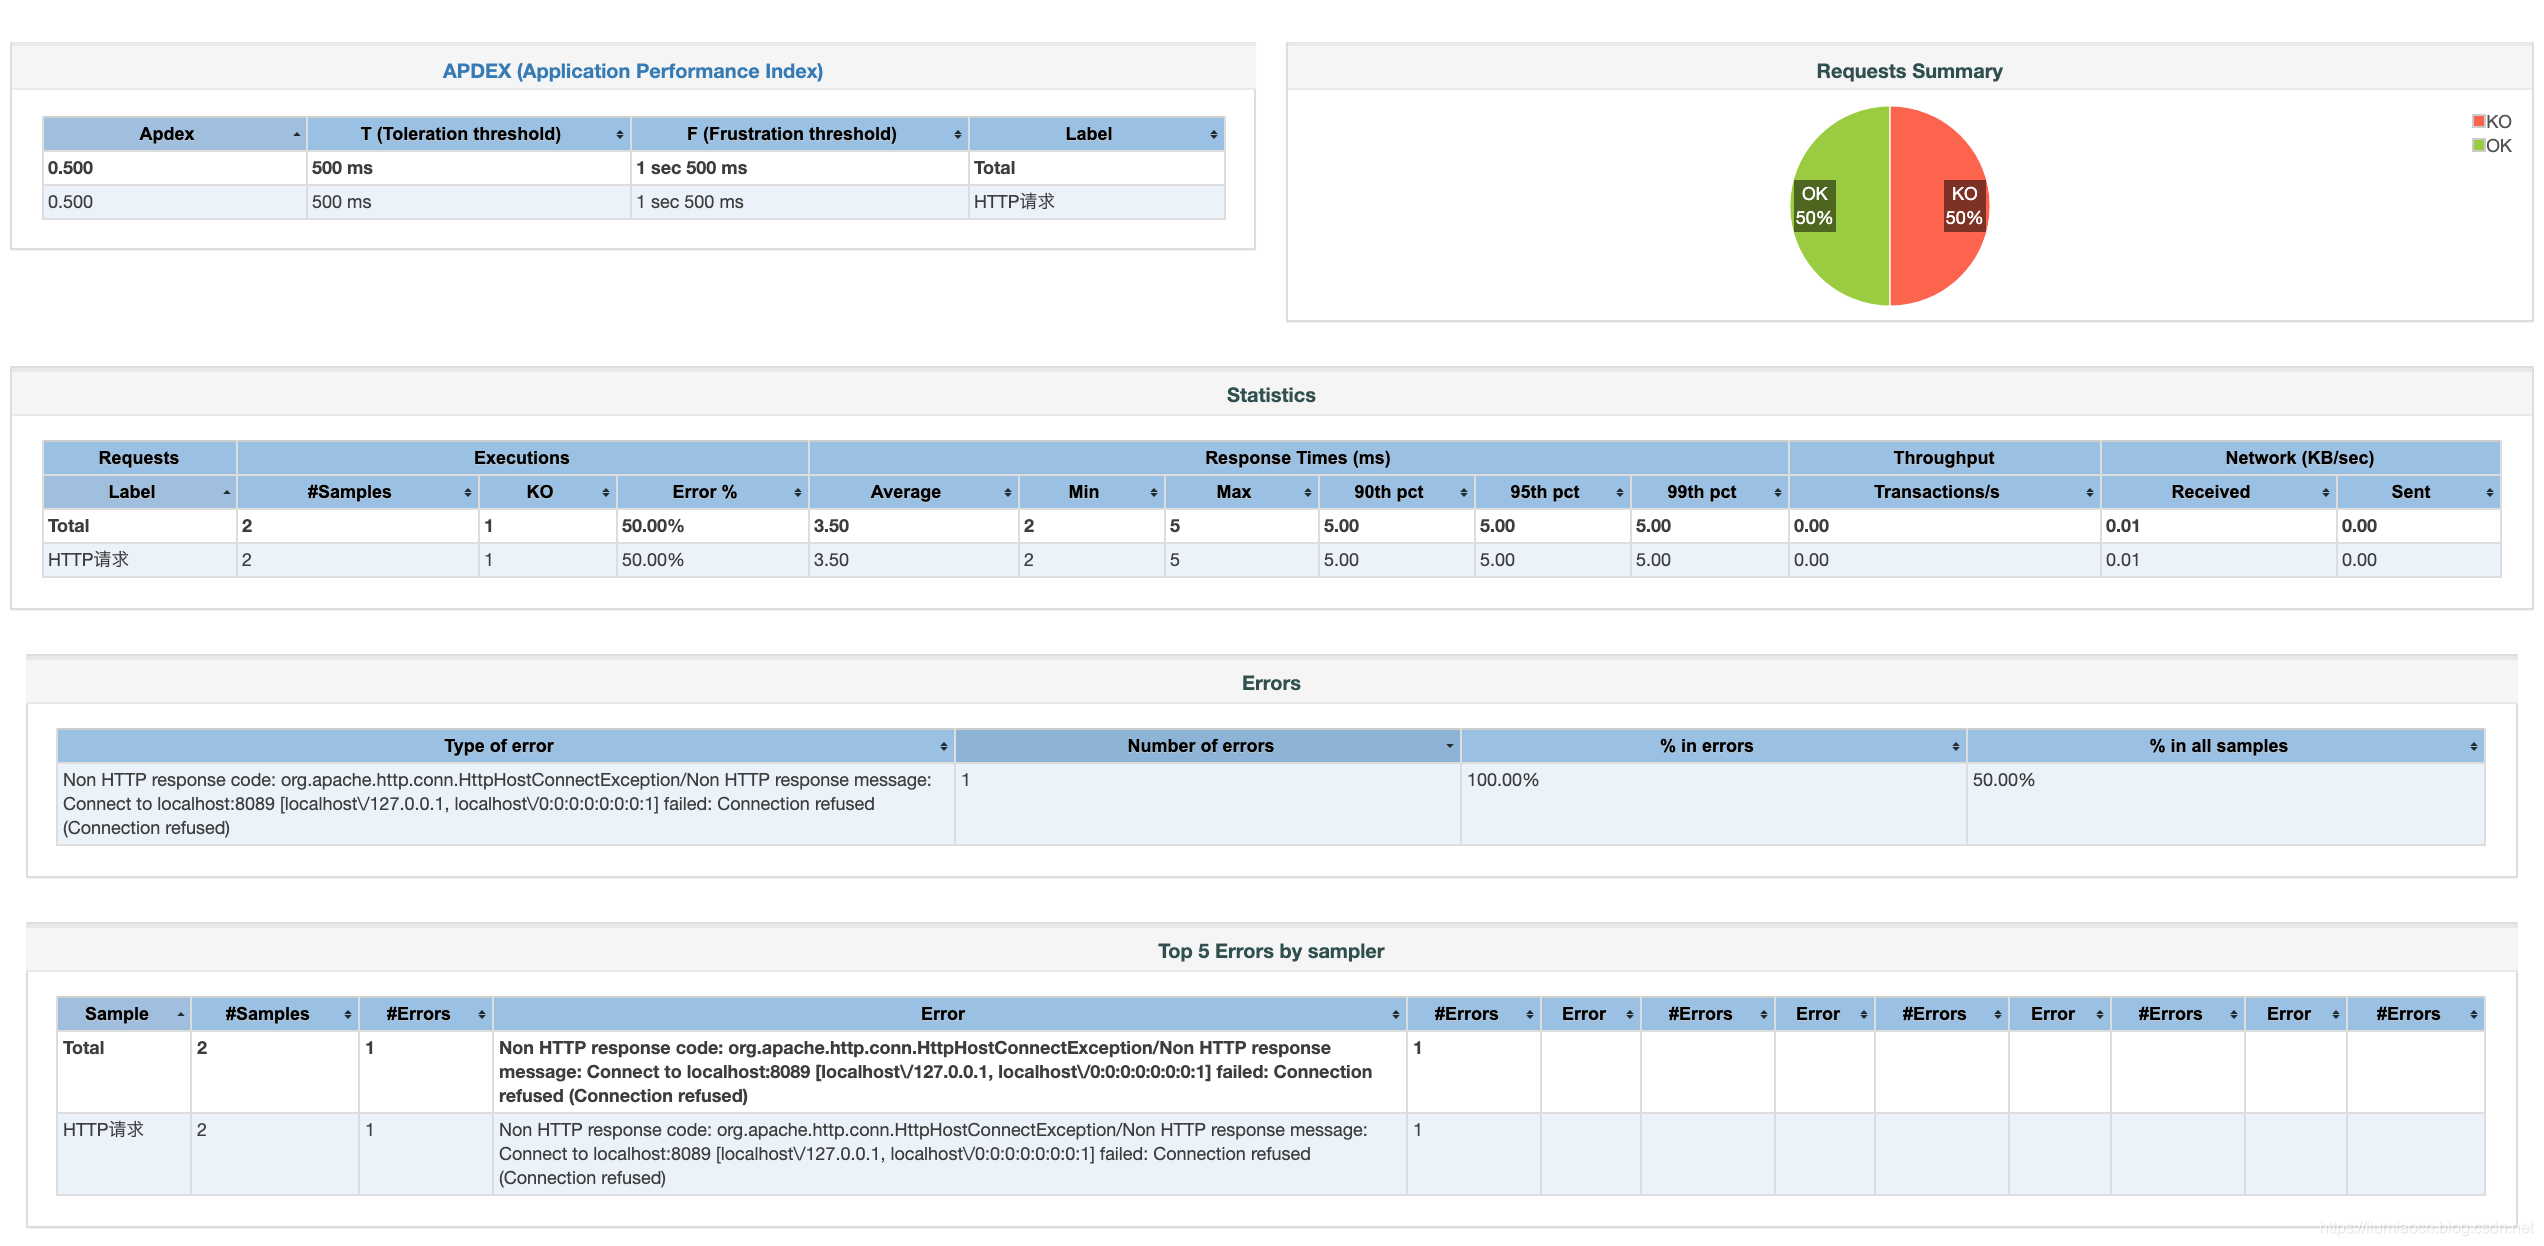
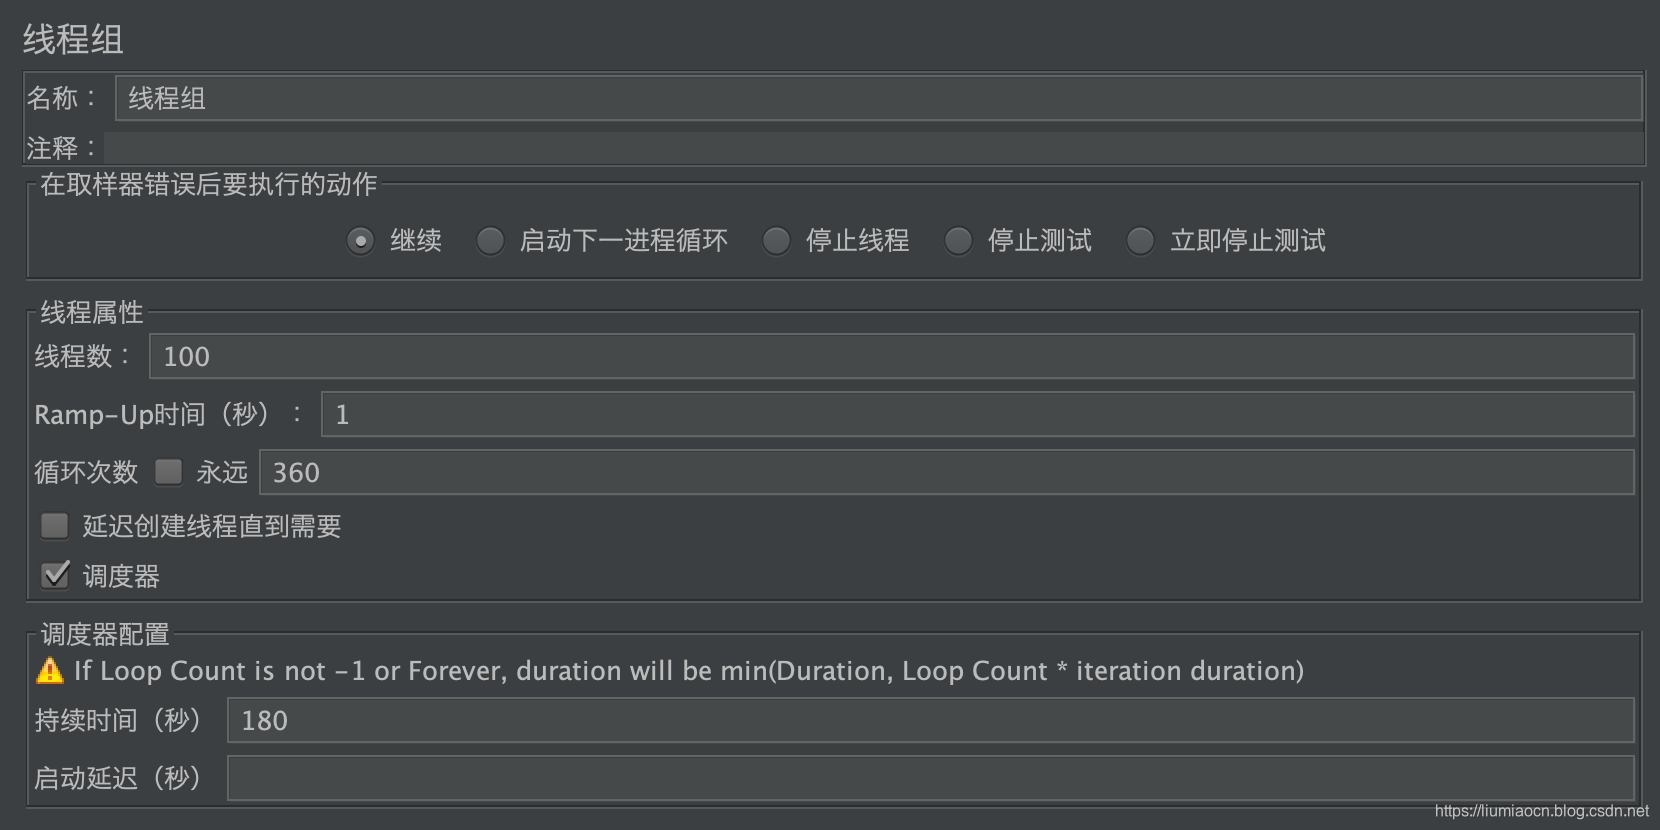
重新将端口号修正为8080,保证HTTP测试能正确执行的基础之上,进行如下压力测试:并发用户数100、循环360次、持续时间180秒的内置HTTP请求验证
设定信息如下:
| 设定项 | 设定值 |
|---|---|
| 线程数 | 100 |
| 循环次数 | 360 |
| 持续时间 | 180s |
Click the green Start button to begin execution, it will prompt a Warning, here to demonstrate still select "Add to existing files"
can be seen and then click Aggregate Report polymerization report is as follows:

you can see the number of samples 36002, as 100 thread group * 360 cycles + the existing two test results, so a total of 36002 times stress test sample, compared to the earlier request to use the built-in Java, using the default settings of nginx, abnormal rate has risen to 9.17% of.
testing report
- Use the following command to generate test reports
Run: bin / jmeter -g /tmp/nginx-test.jtl -e -o / tmp / nginx-test-rpt-2 -j /tmp/nginx-rpt.log
- Summary of the test report is shown below: