Reprinted from https://blog.csdn.net/shusheng0007/article/details/79032807
Why do the test
Writing test has the following benefits:
Ensure that developed app function is correct
New features to ensure development does not affect the original function, that is newly written code does not work properly so that the original code is generated bug
When using test-driven development model, testing helps modular and iterative.
Type of unit test Android
Android unit test two types
Local Unit Testing: This test is run on the development machine JVM. App store in the project src / test / under / java directory, these tests can not be referenced Android Framwork of API. For example you want to test a purely logical functions, can be tested using the local unit.
The meter unit Test: This test is run on the real machine or simulator, can be cited API Android Framwork is stored in the project app / src / androidTest under / java directory.
Why is there both tests, because the byte code compiler is optimized for Android mobile devices, it needs to run on Dalvik special JAVA virtual machine or ART (Android Runtime), it is not directly run on the JVM . It relates to the function-dependent Android Framwork without using a special technique (described later), it is necessary to use test meter unit, the meter unit tests need to install two complete APKS real machine or simulator, respectively, and then start a context , compared to the speed of the local unit testing that is not a bit slow points.
So we certainly hope that you can use as much as possible of the local unit testing, unit testing if there is no dependence on Android, or just some simple reference to the first method to use. Under this scenario may be used in dependence on the Android Mockito be generated. We can also use the open source library Robolectric to make Android code can be run on a common JVM.
Next, how the above described two sensing means
Suppose I have a calculated arithmetic class (example google sample inside) Calculator, this category includes four arithmetic method.
package com.ss007.androidunittestsample;

import static com.google.common.base.Preconditions.checkArgument;

/**
 * A simple calculator with a basic set of operations.
 * /
Public  class Calculator {

    public enum Operator {ADD, SUB, DIV, MUL}

    /**
     * Addition operation
     */
    public double add(double firstOperand, double secondOperand) {
        return firstOperand + secondOperand;
    }

    /**
     * Substract operation
     */
    public double sub(double firstOperand, double secondOperand) {
        return firstOperand - secondOperand;
    }

    /**
     * Divide operation
     */
    public double div(double firstOperand, double secondOperand) {
        checkArgument(secondOperand != 0, "secondOperand must be != 0, you cannot divide by zero");
        return firstOperand / secondOperand;
    }

    /**
     * Multiply operation
     */
    public double mul(double firstOperand, double secondOperand) {
        return firstOperand * secondOperand;
    }
}
We also have an input and results display interface

Local Unit Testing
Since the Calculatorclass has no dependency on the Android, it should preferentially use local test.
Android does not depend on the local test
-
In the module level
build.gradleadd related library reference file// local unit tests depend testImplementation 'junit:junit:4.12' // the Mockito Framework used to simulate the Android framework relies testImplementation 'org.mockito: mockito-core: 1.10.19'
2.
app/src/test/javaCreate a test file in the directoryCalculatorTest, you can also select the function you want to test, then pressCtr+Shift+Tto establish a test file.private Calculator mCalculator; @Before public void setUp() throws Exception{ mCalculator = new Calculator(); } @Test public void div() throws Exception { double resultDiv = mCalculator.div(32d,2d); assertThat(resultDiv, is(equalTo(16d))); } @Test(expected = IllegalArgumentException.class) public void divDivideByZeroThrows() { mCalculator.div(32d,0d); }
例如我们要测试Calculator中的除法这个函数,我们就定义一个或者几个测试函数,主要依赖你要测试的情况,使用@Test来标记,方法里面写断言即可。由于我们在测试函数中使用到了Calculator的实例,所以需要在测试函数执行前,构建出这个实例,这些初始化的工作在setUp函数中完成,这个函数使用@Before标记。
就除法这个函数我们需要测试两种情况。第一正常情况下,除法计算是否正确。第二当除数为0的时候,我们是期望抛出合适的异常的,而不是崩溃。
运行单元测试
运行测试用例可以分为多个维度
单个测试函数,单个测试文件,单个目录下,测试Suite。
最简单的运行方式就是直接Android Studio中选中相应的地方,右键然后选择run...即可,以Suite的方式运行的话首先需要自己将测试文件组织成不同的suite,然后依照自己的需求来运行不同的suite,这种方式更加灵活。
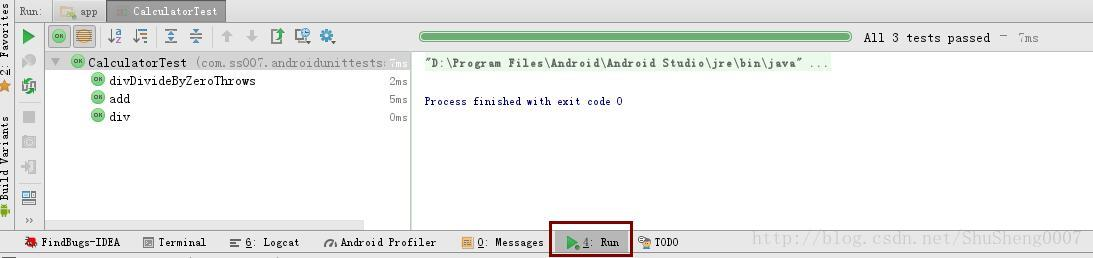
查看运行结果
运行结果在AS的Run窗口,如下图所示
依赖Android的本地测试
依赖Android的本地测试有两种处理方式
- 针对于简单场景,可以使用
Mockito来模拟Android的依赖,例如
@RunWith(MockitoJUnitRunner.class)
public class UnitTestSample {
private static final String FAKE_STRING = "HELLO WORLD";
    @Mock
    Context mMockContext;

    @Test
    public void readStringFromContext_LocalizedString() {
        // 定义R.string.hello_word返回"HELLO WORLD"
        when(mMockContext.getString(R.string.hello_word))
                .thenReturn(FAKE_STRING);
        //ClassUnderTest 我们要测试的类
        ClassUnderTest myObjectUnderTest = new ClassUnderTest(mMockContext);

        // ...when the string is returned from the object under test...
        String result = myObjectUnderTest.getHelloWorldString();

        // ...then the result should be the expected one.
        assertThat(result, is(FAKE_STRING));
    }
}
首先需要使用MockitoJUnitRunner这个类型的Runner,使用@RunWith(MockitoJUnitRunner.class)来标记测试类
然后使用@Mock标记来模拟一个Android依赖。例如Context
关于Mockito的详细使用可以参考Mockito API
针对复杂场景,可以使用开源库Robolectric,通过该库单元测试可以直接运行在JVM上,Robolectric在Android SDK 的类加载过程中对其进行了重写,使其可以运行在JVM上。
-
@RunWith(RobolectricTestRunner.class)
public class MyActivityTest {
  @Test
  public void clickingButton_shouldChangeResultsViewText() throws Exception {
    MyActivity activity = Robolectric.setupActivity(MyActivity.class);

    Button button = (Button) activity.findViewById(R.id.button);
    TextView results = (TextView) activity.findViewById(R.id.results);

    button.performClick();
    assertThat(results.getText().toString()).isEqualTo("Robolectric Rocks!");
   }
}
需要使用
RobolectricTestRunner这个类型的Runner关于更详细的使用请参考Robolectric
- 针对于简单场景,可以使用
为什么要做测试撰写测试有以下好处:
确保开发出来的app功能是正确的保证新增加的功能开发不会影响原来的功能,就是说新写的代码不会使原来正常工作的代码产生bug当采用测试驱动开发模式时,测试有助于模块化和迭代化。Android中的单元测试类型Android中的单元测试有两种类型
本地单元测试:这种测试是运行在开发机器的JVM上的。存放在项目中app/src/test/java目录下,这些测试不能引用Android Framwork 的API。例如你要测试一个纯逻辑的函数,就可以使用本地单元测试。仪表单元测试:这种测试是运行在真机或者模拟器中的,可以引用Android Framwork中的API.存放在项目中app/src/androidTest/java目录下。为什么会出现这两种测试呢,因为Android编译后的字节码是针对移动设备优化的,它需要运行在特殊的JAVA虚拟机上Dalvik或者ART (Android Runtime),是不能直接运行在JVM上的。所以涉及到Android Framwork 依赖的函数如果不采用特殊的技术(稍后介绍),就需要使用 仪表单元测试,仪表单元测试需要安装两个完整的APKS到真机或者模拟器上,然后分别启动一个context,速度相比于本地单元测试那不是慢了一点两点。
那么我们当然希望可以尽可能的使用本地单元测试,如果单元测试没有对Android的依赖,或者只是一些简单的引用使用第一种方法。这种场景下对Android的依赖可以使用Mockito来产生。还有我们可以使用开源库Robolectric来让Android代码可以运行在通用的JVM上。
接下来将介绍如何完成上述的两种单元测假设我有一个算数计算类Calculator(google sample里面的例子),本类包括的加减乘除四个方法。
package com.ss007.androidunittestsample;
import static com.google.common.base.Preconditions.checkArgument;
/** * A simple calculator with a basic set of operations. */public class Calculator {
public enum Operator {ADD, SUB, DIV, MUL}
/** * Addition operation */ public double add(double firstOperand, double secondOperand) { return firstOperand + secondOperand; }
/** * Substract operation */ public double sub(double firstOperand, double secondOperand) { return firstOperand - secondOperand; }
/** * Divide operation */ public double div(double firstOperand, double secondOperand) { checkArgument(secondOperand != 0, "secondOperand must be != 0, you cannot divide by zero"); return firstOperand / secondOperand; }
/** * Multiply operation */ public double mul(double firstOperand, double secondOperand) { return firstOperand * secondOperand; }}12345678910111213141516171819202122232425262728293031323334353637383940我们还有一个输入及结果展示界面
本地单元测试由于Calculator类没有对Android的依赖,所以应当优先使用本地测试。
不依赖Android的本地测试在模块级别的build.gradle文件中添加相关库引用
//本地单元测试依赖testImplementation 'junit:junit:4.12'//Mockito framework 用来模拟Android框架依赖testImplementation 'org.mockito:mockito-core:1.10.19'1234在app/src/test/java目录下建立测试文件CalculatorTest,也可以选中要测试的函数,然后按Ctr+Shift+T建立测试文件。
private Calculator mCalculator;
@Beforepublic void setUp() throws Exception{ mCalculator = new Calculator();}
@Testpublic void div() throws Exception { double resultDiv = mCalculator.div(32d,2d); assertThat(resultDiv, is(equalTo(16d)));}
@Test(expected = IllegalArgumentException.class) public void divDivideByZeroThrows() { mCalculator.div(32d,0d);}1234567891011121314151617例如我们要测试Calculator中的除法这个函数,我们就定义一个或者几个测试函数,主要依赖你要测试的情况,使用@Test来标记,方法里面写断言即可。由于我们在测试函数中使用到了Calculator的实例,所以需要在测试函数执行前,构建出这个实例,这些初始化的工作在setUp函数中完成,这个函数使用@Before标记。就除法这个函数我们需要测试两种情况。第一正常情况下,除法计算是否正确。第二当除数为0的时候,我们是期望抛出合适的异常的,而不是崩溃。
运行单元测试运行测试用例可以分为多个维度单个测试函数,单个测试文件,单个目录下,测试Suite。最简单的运行方式就是直接Android Studio中选中相应的地方,右键然后选择run...即可,以Suite的方式运行的话首先需要自己将测试文件组织成不同的suite,然后依照自己的需求来运行不同的suite,这种方式更加灵活。
查看运行结果运行结果在AS的Run窗口,如下图所示
依赖Android的本地测试依赖Android的本地测试有两种处理方式
针对于简单场景,可以使用Mockito来模拟Android的依赖,例如@RunWith(MockitoJUnitRunner.class)public class UnitTestSample {private static final String FAKE_STRING = "HELLO WORLD"; @Mock Context mMockContext;
@Test public void readStringFromContext_LocalizedString() { // 定义R.string.hello_word返回"HELLO WORLD" when(mMockContext.getString(R.string.hello_word)) .thenReturn(FAKE_STRING); //ClassUnderTest 我们要测试的类 ClassUnderTest myObjectUnderTest = new ClassUnderTest(mMockContext);
// ...when the string is returned from the object under test... String result = myObjectUnderTest.getHelloWorldString();
// ...then the result should be the expected one. assertThat(result, is(FAKE_STRING)); }}123456789101112131415161718192021首先需要使用MockitoJUnitRunner这个类型的Runner,使用@RunWith(MockitoJUnitRunner.class)来标记测试类然后使用@Mock标记来模拟一个Android依赖。例如Context
关于Mockito的详细使用可以参考Mockito API
针对复杂场景,可以使用开源库Robolectric,通过该库单元测试可以直接运行在JVM上,Robolectric在Android SDK 的类加载过程中对其进行了重写,使其可以运行在JVM上。@RunWith(RobolectricTestRunner.class)public class MyActivityTest { @Test public void clickingButton_shouldChangeResultsViewText() throws Exception { MyActivity activity = Robolectric.setupActivity(MyActivity.class);
Button button = (Button) activity.findViewById(R.id.button); TextView results = (TextView) activity.findViewById(R.id.results);
button.performClick(); assertThat(results.getText().toString()).isEqualTo("Robolectric Rocks!"); }}12345678910111213需要使用RobolectricTestRunner这个类型的Runner
关于更详细的使用请参考Robolectric
仪表测试在进行仪表测试之前,先使用Android SDK 管理器下载Android Testing Support Library,Google 为测试优化了这个支持库,测试运行更加快速。这个库包含了用于JUnit4测试的AndroidJUnitRunner以及用于UI测试的API(Espresso和UI Automator)。本文侧重使用Espresso
使用Espresso进行Android仪表单元测试Espresso是Android Testing Support Library中的一个测试框架,用来测试UI交互方面的功能。
Espresso中主要由3个主要组件构成
ViewMatchers:从当前View 层级中获取目标View的一组对象集合。这些对象会作为参数传递到onView函数中来返回目标UI元素。ViewActions:用来模拟用户操作,例如click等动作。这些对象会作为参数传入ViewInteraction.perform()中。ViewAssertions:用来判断目标View的状态是否正确。这些对象会作为参数传入ViewInteraction.check()方法中。
例如
onView(withId(R.id.my_view)) // withId(R.id.my_view) - ViewMatcher .perform(click()) // click() - ViewAction .check(matches(isDisplayed())); //matches(isDisplayed()) - ViewAssertion123配置Espresso在模块级别的build.gradle中添加如下依赖 // 仪表测试依赖 // Force usage of support annotations in the test app, since it is internally used by the runner module. androidTestImplementation 'com.android.support:support-annotations:' + rootProject.supportLibVersion; // Android JUnit Runner androidTestImplementation 'com.android.support.test:runner:' + rootProject.runnerVersion; // JUnit4 Rules androidTestImplementation 'com.android.support.test:rules:' + rootProject.rulesVersion; // Espresso core androidTestImplementation 'com.android.support.test.espresso:espresso-core:' + rootProject.espressoVersion; 123456789在android.defaultConfig里面添加testInstrumentationRunner "android.support.test.runner.AndroidJUnitRunner"
build.gradle 文件的配置完成后,大概像下面这样
apply plugin: 'com.android.application'
android { compileSdkVersion 26 defaultConfig { applicationId "com.ss007.androidunittestsample" minSdkVersion 18 targetSdkVersion 26 versionCode 1 versionName "1.0"
testInstrumentationRunner "android.support.test.runner.AndroidJUnitRunner" } buildTypes { release { minifyEnabled false proguardFiles getDefaultProguardFile('proguard-android.txt'), 'proguard-rules.pro' } }}
dependencies { implementation fileTree(dir: 'libs', include: ['*.jar']) // 仪表测试依赖 // Force usage of support annotations in the test app, since it is internally used by the runner module. androidTestImplementation 'com.android.support:support-annotations:' + rootProject.supportLibVersion; androidTestImplementation 'com.android.support.test:runner:' + rootProject.runnerVersion; androidTestImplementation 'com.android.support.test:rules:' + rootProject.rulesVersion; androidTestImplementation 'com.android.support.test.espresso:espresso-core:' + rootProject.espressoVersion; //本地单元测试依赖 testImplementation 'junit:junit:4.12'
compile 'com.android.support:support-annotations:' + rootProject.supportLibVersion; compile 'com.google.guava:guava:18.0' implementation 'com.android.support:appcompat-v7:26.1.0' implementation 'com.android.support.constraint:constraint-layout:1.0.2'}12345678910111213141516171819202122232425262728293031323334353637配置测试机器关闭设备动画,到开发者模式->开发者选项->绘图下面 关闭三个缩放动画。
编写测试代码例如我们要测试我们的加法函数,输入两个数,然后点击相加按钮。
@RunWith(AndroidJUnit4.class)//标记此类为Android JUnit4类@LargeTest//标记此类执行时间>1s,使用全平台资源public class CalculatorInstrumentationTest { @Rule//包括ActivityTestRule,里面提供了很多测试activity的函数,除此之外还有ServiceTestRule public ActivityTestRule<CalculatorActivity> mActivityRule = new ActivityTestRule<>( CalculatorActivity.class);
@Test public void typeOperandsAndPerformAddOperation() { performOperation(R.id.operation_add_btn, "16.0", "16.0", "32.0"); }
private void performOperation(int btnOperationResId, String operandOne, String operandTwo, String expectedResult) { //在两个 EditText 中输入操作数 onView(withId(R.id.operand_one_edit_text)).perform(typeText(operandOne), closeSoftKeyboard()); onView(withId(R.id.operand_two_edit_text)).perform(typeText(operandTwo), closeSoftKeyboard()); //点击操作按钮,例如相加按钮 onView(withId(btnOperationResId)).perform(click()); //判断结果是否与我们期望的一致 onView(withId(R.id.operation_result_text_view)) .check(matches(withText(expectedResult))); }}12345678910111213141516171819202122232425262728上面的代码完成了输入加数和被加数,然后点击求和按钮,检查结果是否正确的一套操作。
本文源代码下载地址 AndroidUnitTestDemo————————————————版权声明:本文为CSDN博主「ShuSheng007」的原创文章,遵循 CC 4.0 BY-SA 版权协议,转载请附上原文出处链接及本声明。原文链接:https://blog.csdn.net/shusheng0007/article/details/79032807