Share interesting photos on the local computer through cpolar: publish piwigo webpage
Article Directory
foreword
First, deploy a piwigo website on the local computer, and then we will switch to the cpolar settings, use cpolar to establish an intranet penetration data tunnel, and publish the piwigo website on the local computer to the public Internet, so that everyone can pass this A data tunnel to easily access the piwigo website located on the local computer. Now, let's get started.
1. Set up an intranet penetration data tunnel
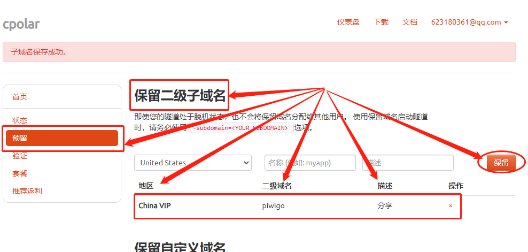
First of all, we need to log in to coplar's official website and set up a blank intranet penetration data tunnel. When setting, we need to fill in a few simple information. The "Region" field can be filled in according to the actual place of use; the "secondary domain name" will be directly displayed on the final piwigo website, so we need to pay attention to the content filled in; and the last "remark" is the description of this data tunnel . After filling in these three items, you can click the "Reserve" button on the right to generate a blank data tunnel.
2. Binding with piwigo website
After completing the configuration of the data tunnel, we can go back to the local computer, open the cpolar client, and bind this data tunnel to the piwigo website. We can find cpolar in the start menu of the local computer, or enter localhost:9200 in the address bar of the browser to directly access the Web-UI interface of cpolar.

3. Fill in key information on the tunnel creation interface
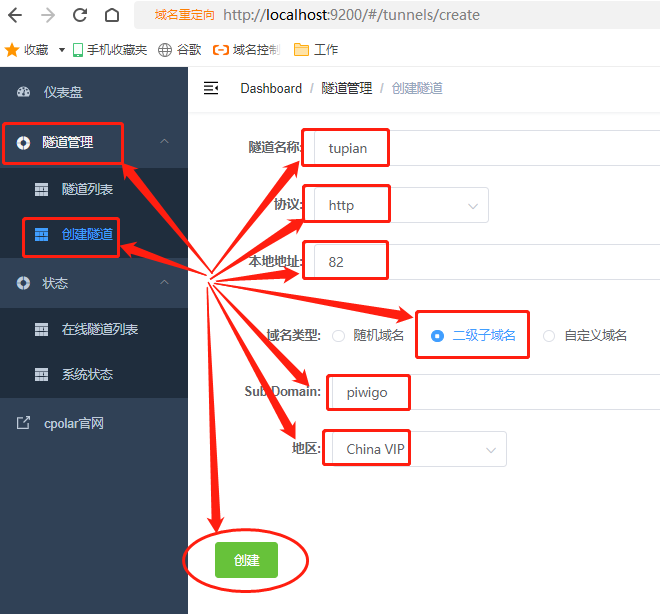
On the left side of cpolar's Web-UI interface, we find the "Create Tunnel" button under the "Tunnel Management" item, and click to enter the setting page for creating a tunnel. On this page, we need to fill in several key information, especially the output port of the local piwigo web page. The specific configuration is:
"Tunnel name", this column is the identification to distinguish the local data tunnel, here we fill in tupian; "Protocol" select "http"; "Local address" is the output port of the local piwigo web page, so fill in the port 82 we set ;In the next "domain name type", we check the "secondary subdomain name". After checking this item, the "Sub Domain" column will appear in the next line. An example is "piwigo"; and the last "region" can be selected according to the actual use location.
After filling in the information, you can click the "Create" button at the bottom of the page to associate the blank data tunnel created on the cpolar official website with the local piwigo webpage.
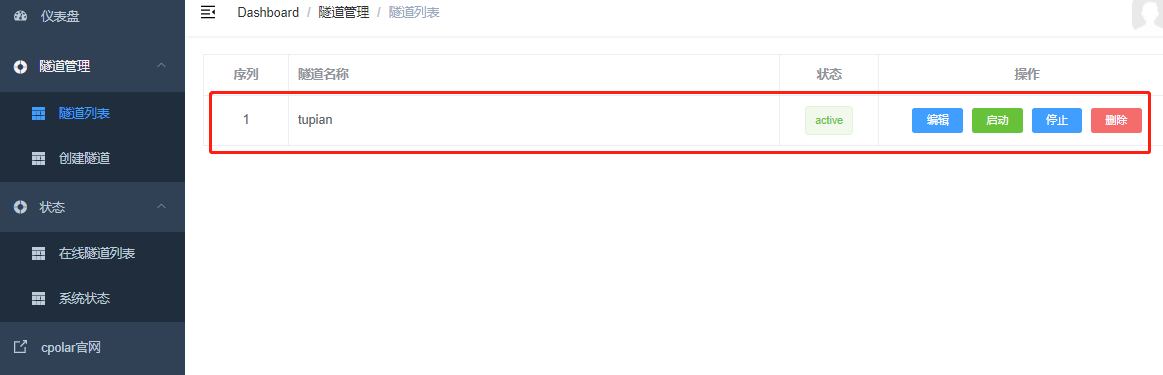
4. The tunnel is created
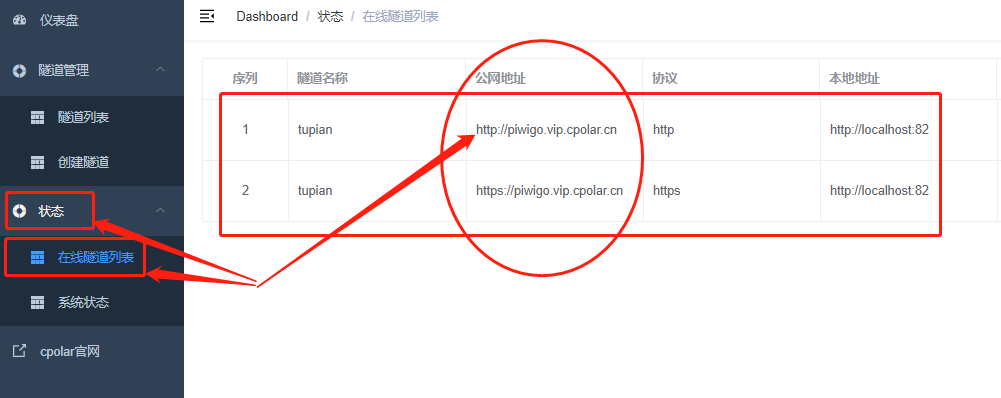
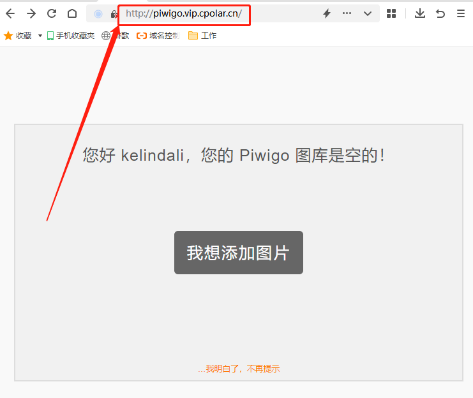
After the tunnel is created, we can find the entrance of this tunnel on the "Online Tunnel List" page under the "Status" item, which is the address of the local piwigo webpage on the public Internet. We can send this address to friends and let them Just visit this URL to see interesting pictures you want to share.
Summarize
After the above introduction, I believe everyone has learned how to use cpolar to create a private photo website. Of course, building a photo website is just one of the many powerful functions of cpolar. The data tunnel created by cpolar can also be applied in more scenarios. If you have any questions about the use of cpolar, please contact us, we will provide you with assistance within our ability. Of course, you are also welcome to join the VIP official group of cpolar to explore the unlimited potential of cpolar together.