Article directory
See the Github link at the end of the article for the code used in this article.
About the PASCAL VOC dataset
The pascal voc data set is about computer vision, a set of data sets with a standard format widely used in the industry. Including image classification, object detection, semantic segmentation and other tasks.
Many deep learning frameworks, such as some models written in Pytorch, can read the data set in this Pascal VOC format by default, which makes it convenient for us to perform various processing and experiments on the data set.
Pascal VOC2012 train/val dataset official download address: http://host.robots.ox.ac.uk/pascal/VOC/voc2012/VOCtrainval_11-May-2012.tar
For more information, see: official website . For downloading more content, please refer to: mirror station (download test set) .
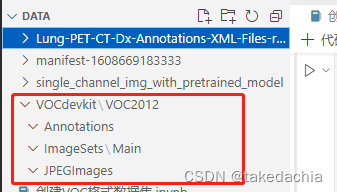
Directory Structure
Its format information (directory structure) is as follows
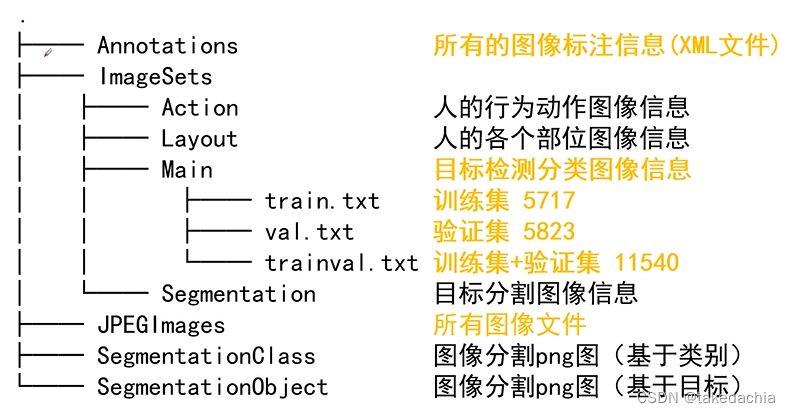
Our target detection mainly uses the above Annotation, JPEGImages, ImageSets/Main folders.
The train.txt under the ImageSets/Main folder contains the pictures included in the training set, which are the file names of the pictures under the JPEGImages folder.
val.txt is a collection of image file names for the validation set.
trainval.txt is a collection of the above two.
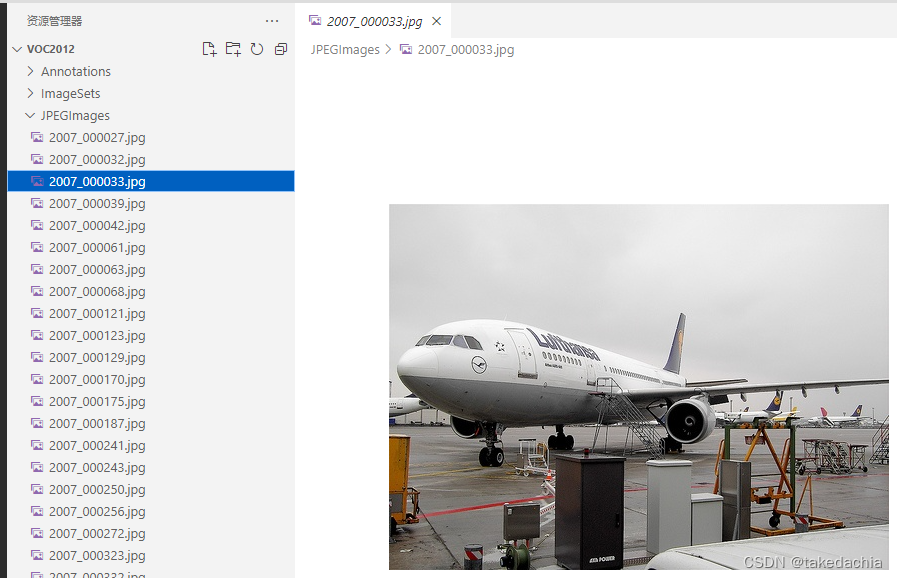
exhibit:
picture
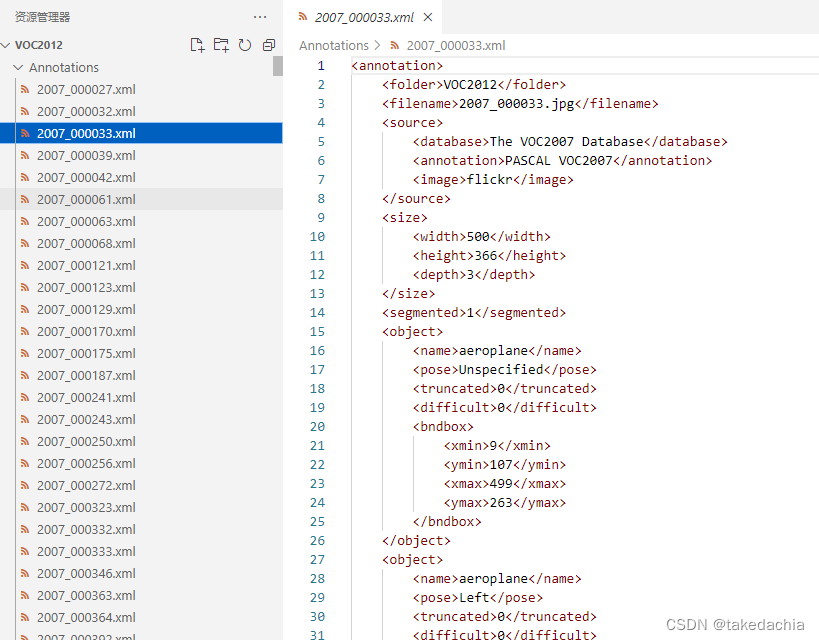
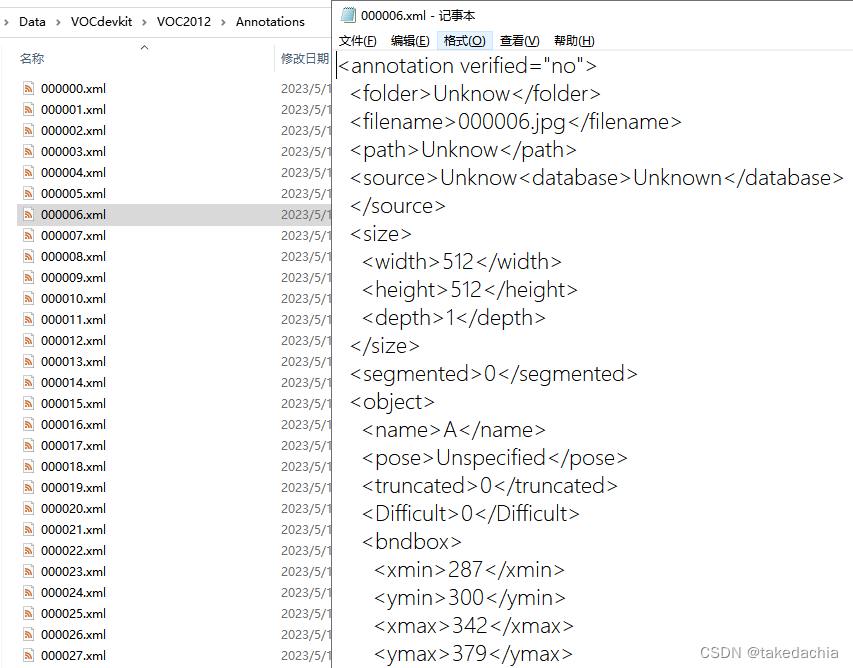
Annotate files.
It can be seen that the format of the annotation file xml is basically the same as the format of the annotation file in the Lung-PET-CT-Dx dataset.
①Create several related directories of VOC dataset
Only related to target detection:
VOCdevkit/VOC2012/Annotation (store xml annotation files)
VOCdevkit/VOC2012/ImageSets/Main (store train.txt, val.txt)
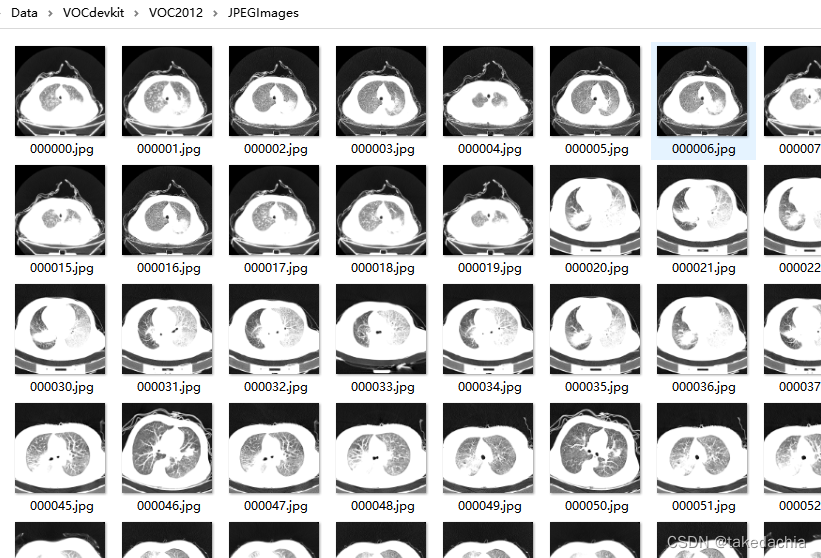
VOCdevkit/VOC2012/JPEGImages (store image files)
In the previous section, we have organized data and created a simple Dataset dataset object.
We have created a corresponding relationship between [dcm image set] and [xml annotation set]. We are trying to re-create a data set in Pascal VOC format, and by the way, we can slim down the data set.
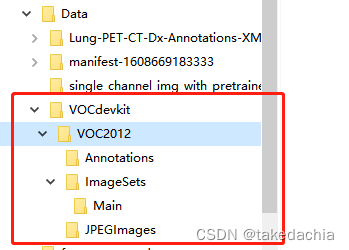
We first create the following directory under the project directory:
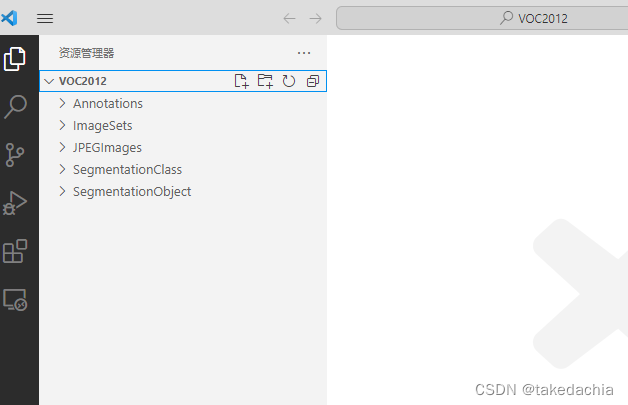
Windows Explorer interface:
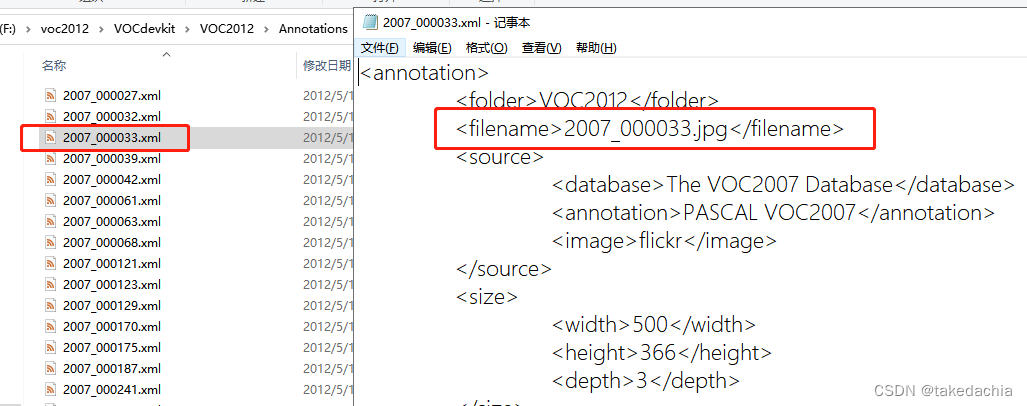
XML file in the form of
We know that in the VOC dataset, all image files exist in the JPEGImages folder and have their own file names.
Under the Annotation folder, the file name of the xml annotation file corresponds to the file name of the picture, and the [filename] item in the xml file corresponds to the file name + extension of the picture.
Our goal is to make Lung-PET-CT-Dx into this form as well.
② Read the pairing relationship between the dcm file and the xml file
This pairing table has been created in the previous article, and the csv file is read directly.
import pydicom
import matplotlib.pyplot as plt
import os
from tqdm import tqdm
import pandas as pd
import numpy as np
import cv2 as cv
from PIL import Image
import xml.etree.ElementTree as ET

xml_file_dataset = pd.read_csv('xml_file_dataset.csv', index_col=0)
xml_file_dataset
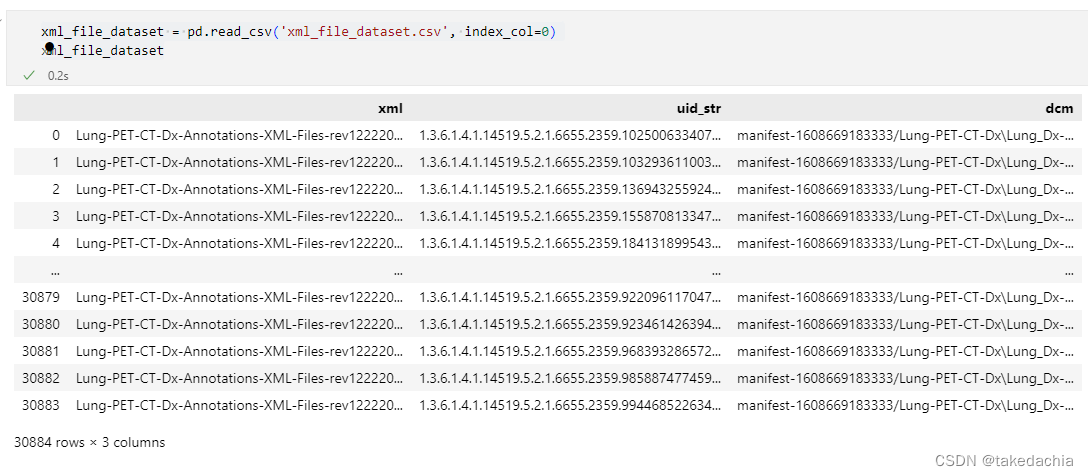
We add a new column and give them new names: numbered from 000000 to 03883.
xml_file_dataset['filename'] = xml_file_dataset.index.values
xml_file_dataset['filename'] = xml_file_dataset['filename'].astype(str)
xml_file_dataset['filename'] = xml_file_dataset['filename'].str.zfill(6)
xml_file_dataset
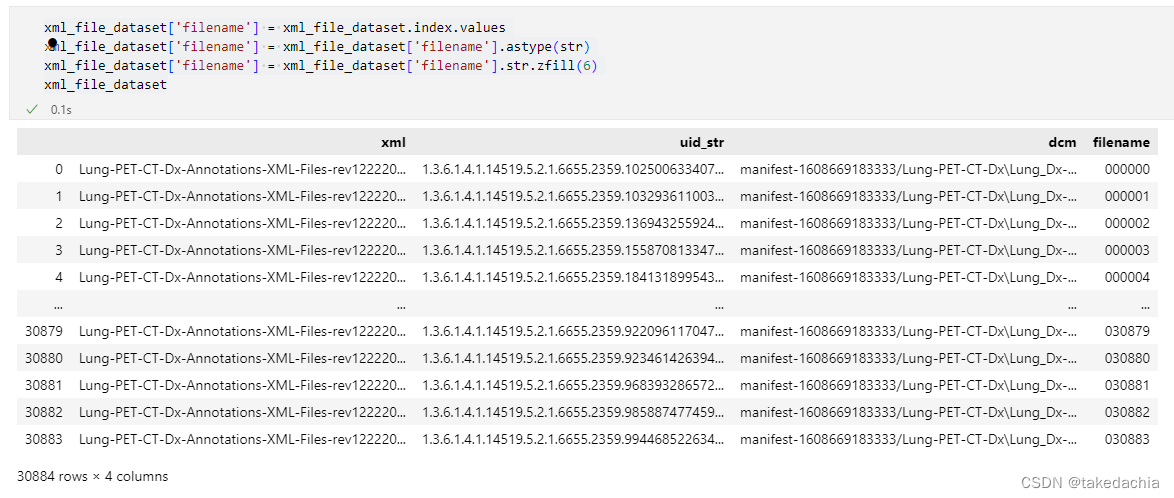
This column filename is the new file name.
③ Create a VOC format dataset
Ideas:
- Write the [filename] tag in the xml file of the xml column into "the name corresponding to the filename column.jpg" (such as: 000000.jpg), and save it as "the corresponding name of the filename column. VOCdevkit/VOC2012/Annotations folder.
- Save the dcm file in the dcm column as "filename column corresponding name.jpg" (eg: 000000.jpg), and save it in the VOCdevkit/VOC2012/JPEGImages folder.
xml_list = xml_file_dataset['xml'].values
dcm_list = xml_file_dataset['dcm'].values
filename_list = xml_file_dataset['filename'].values

# 将xml文件中的[filename]标签写入“filename列对应名称.jpg”(如:000000.jpg),并命名为“ filename列对应名称.xml” (如:000000.xml)保存到 VOCdevkit/VOC2012/Annotations 文件夹下。
def to_switch_xml(xml, filename):
    tree = ET.parse(xml)
    root = tree.getroot()
    sub1 = root.find('filename')
    sub1.text = filename + '.jpg'
    tree.write('./VOCdevkit/VOC2012/Annotations/{}.xml'.format(filename))

# 将dcm文件另存为 “filename列对应名称.jpg”(如:000000.jpg),存到 VOCdevkit/VOC2012/JPEGImages文件夹下。
def to_switch_dcm(dcm, filename):
    img_open=pydicom.read_file(dcm)
    img_array=img_open.pixel_array

    # 将PETCT的三通道格式转成单通道格式
    if len(img_array.shape) == 3:
        img_array = cv.cvtColor(img_array, cv.COLOR_BGR2GRAY)

    img_array = np.array(img_array, dtype=np.float32)
    img = Image.fromarray(img_array)
    img = img.convert('L')
    # quality参数: 保存图像的质量,值的范围从1(最差)到95(最佳)。 默认值为75,使用中应尽量避免高于95的值; 100会禁用部分JPEG压缩算法,并导致大文件图像质量几乎没有任何增益。
    img.save('./VOCdevkit/VOC2012/JPEGImages/{}.jpg'.format(filename), quality=95)
    img.close()
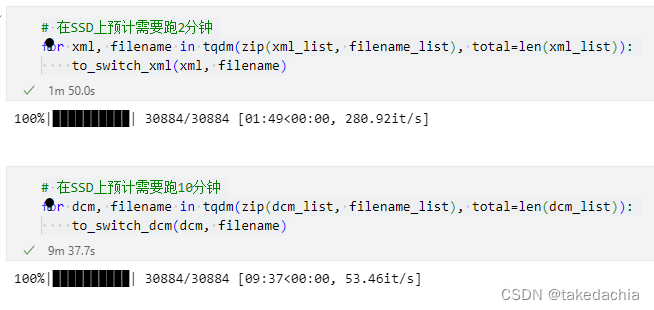
# 在SSD上预计需要跑2分钟
for xml, filename in tqdm(zip(xml_list, filename_list), total=len(xml_list)):
    to_switch_xml(xml, filename)

# 在SSD上预计需要跑10分钟
for dcm, filename in tqdm(zip(dcm_list, filename_list), total=len(dcm_list)):
    to_switch_dcm(dcm, filename)
xml file created successfully:
The image file was successfully created:
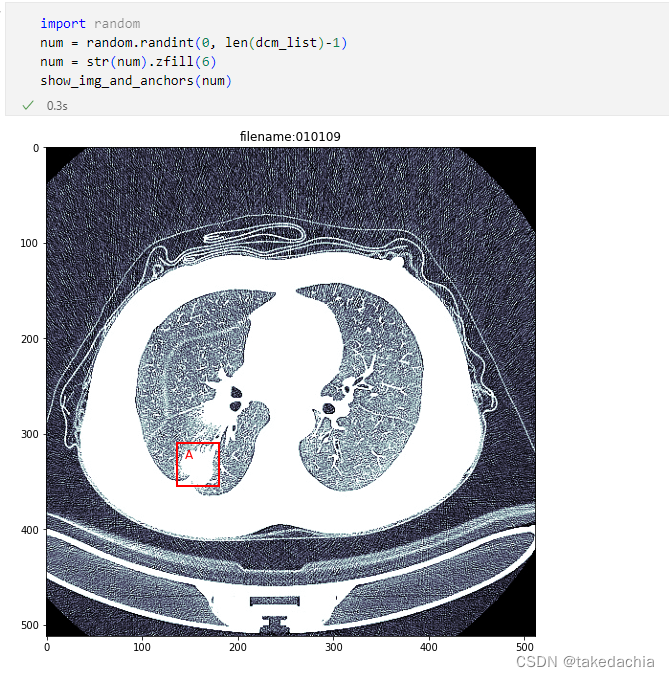
have a test.
(For the detailed code of the test, see the Github address at the end of the article)
④Create training and verification sets
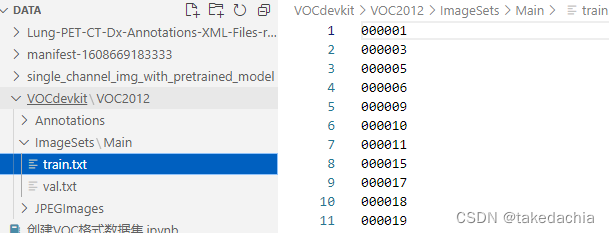
Create train.txt and val.txt under the ImageSets/Main folder
import os
import random

random.seed(0)  # 设置随机种子,保证随机结果可复现

files_path = "./VOCdevkit/VOC2012/Annotations"
assert os.path.exists(files_path), "path: '{}' does not exist.".format(files_path)

val_rate = 0.3  # 设置多少归为验证集

files_name = sorted([file.split(".")[0] for file in os.listdir(files_path)])
files_num = len(files_name)
val_index = random.sample(range(0, files_num), k=int(files_num*val_rate))
train_files = []
val_files = []
for index, file_name in enumerate(files_name):
    if index in val_index:
        val_files.append(file_name)
    else:
        train_files.append(file_name)

try:
    train_f = open("./VOCdevkit/VOC2012/ImageSets/Main/train.txt", "x")
    eval_f = open("./VOCdevkit/VOC2012/ImageSets/Main/val.txt", "x")
    train_f.write("\n".join(train_files))
    eval_f.write("\n".join(val_files))
except FileExistsError as e:
    print(e)
    exit(1)
Created successfully!
The code used in this article: My Github