Burn system image
1. Preparation
- 1. Material preparation
- card reader
- SD card
- Raspberry Pi 3B or 4B
- 2. Software preparation
- Raspberry Pi Imager (or Win32DiskImager) is used to burn the image.
- Download link: Raspberry Pi Imager
- Download link: Win32DiskImager
- Memory card formatting tool (SDFormatter).
- Download link: SDFormatter
- Raspberry Pi system image
- Raspberry Pi official image
- Download link: official link
- custom mirror
- Raspberry Pi official image
- Raspberry Pi Imager (or Win32DiskImager) is used to burn the image.
- 3. Prepare the given software and hardware, download the burning tool, formatting tool, and system image, and click to install it on the computer, then you can proceed to the next step.
2. Burn image
2.1 Format memory card
Before starting to write the image, we need to format the memory card to FAT32 format to write the image.
- Open the format software (as shown below) and press the format button.
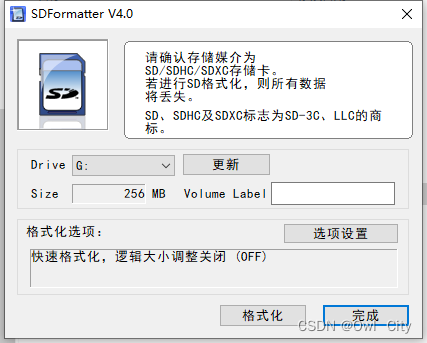
- Click Format to pop up the following box, click OK.

- If the error format fails, just press the format again.

- Formatting is successful as shown in the figure below.

2.2 Burn image (Raspberry Pi Imager)
- The official download tool Raspberry Pi Imager is more convenient to use. The specific interface is as follows

- After clicking
选择操作系统, the following interface will pop up. The latest version of the official image is the image selected in the red box.

You can also choose a custom image here, and pull the page to the bottom, as shown in the figure below, you can see使用自定义镜像the button. Here you can also erase the SD card and format it as FAT32.
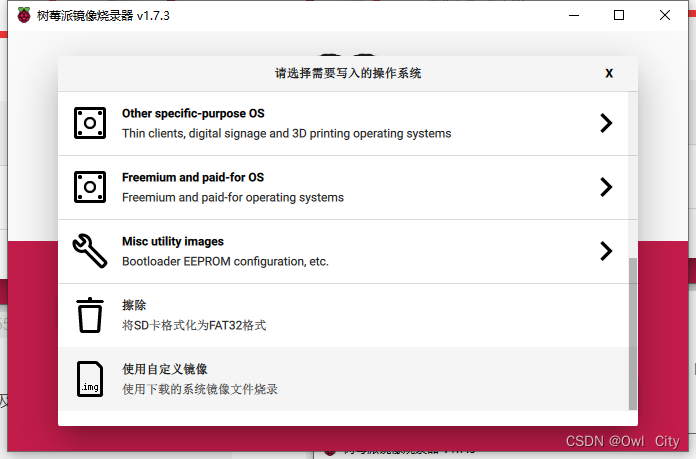
- Click
Raspberry Pi OS(other)to choose to install the 64bit version, the lite version (no desktop) and the official image of the previous version of the Raspberry Pi.

- After the selection is completed, the following interface will appear.
- official mirror

- custom mirror

- official mirror
- Next, select the SD card. Remember not to choose the wrong one here. If you choose the wrong SD card to burn, the rest of the SD card data will be damaged and unusable (don’t ask how you know it, it’s painful to understand!)

- After selecting the operating system and SD card, some configuration needs to be done. Click the
高级设置button in the lower right corner to configure the initial user name of the image and the hotspot name and password of WIFI (only the official image list is available, and the custom image should be used with caution). Then configure the language and country.


- After configuring as above, click
烧录the button. Wait for the write to complete.

- Burning is complete, you're done!
2.3 Burn image (Win32DiskImager)
- Open this software, select the system img that needs to be downloaded, and select the drive letter of the SD card. You can’t make a mistake here, otherwise it will be formatted, as shown in the figure below.
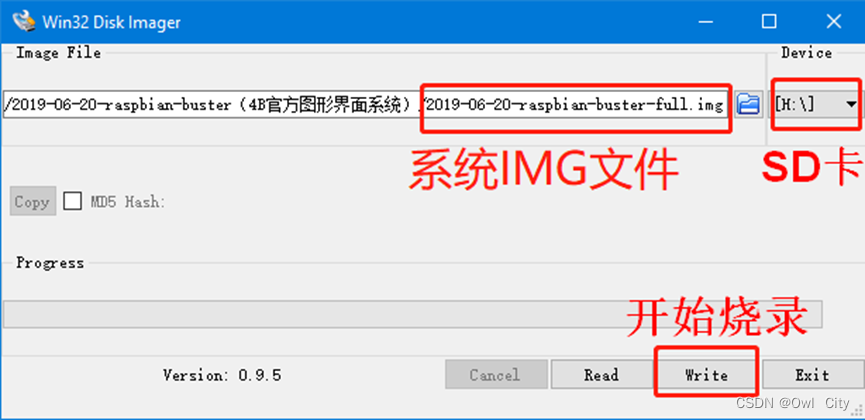
- Select Write to burn, wait for the burning to complete, unplug the SD card, insert the Raspberry Pi and power on, the system will automatically complete the installation.
- Note that after the burning is completed, the win system may prompt the user to format because it cannot recognize the Linux partition format. Do not click format at this time! Don't click format! Don't click format! Just click cancel. If format is clicked, the Raspberry Pi will fail to boot due to the loss of system files, and the IMG image file needs to be burned again.