1, the experimental environment
OS: 1 Taiwan Windows Server 2012 R2
configuration: 2-core CPU, 2G RAM, 60G disk
IP: 192.168.218.XX
2, Hyper-V installation
1) "Server Manager" on the task bar -> "Add Roles and Features" 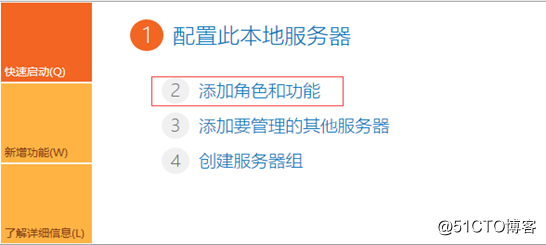
2) direct "Next" 
3) Role-based or feature-based installation -> Next 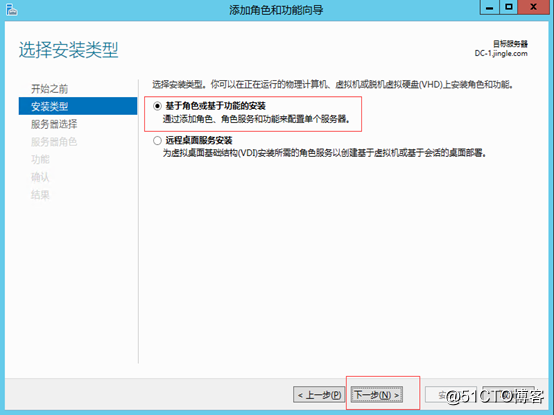
4) Select the server from the server pool -> Next 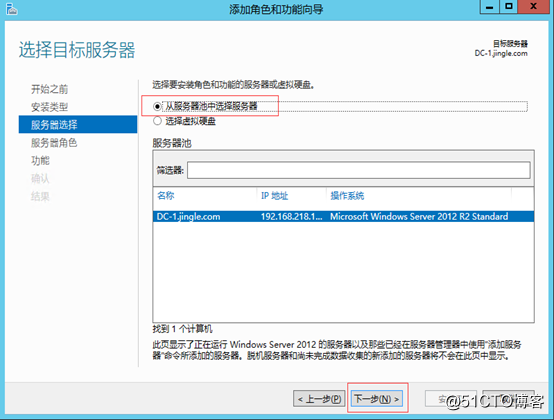
5) check the tool and Hyper-v 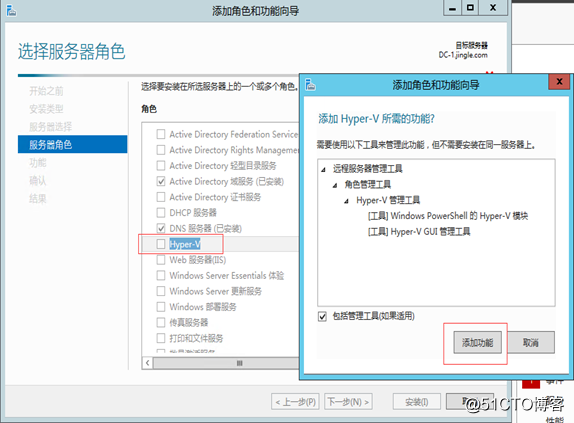
6) Hyper-V, then the "Next" 
7) The default "next" 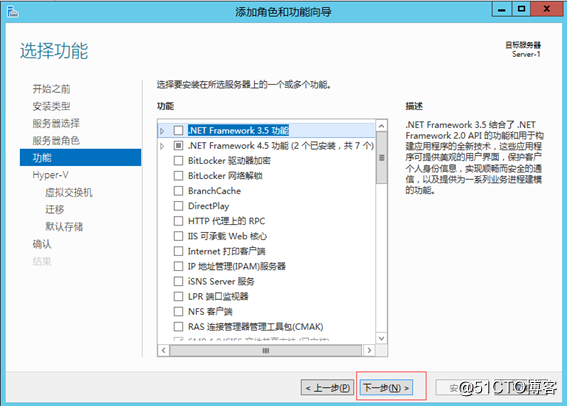
8) Next 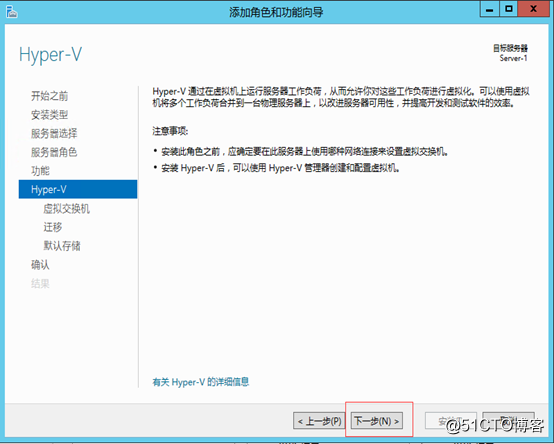
9) check card, the next step 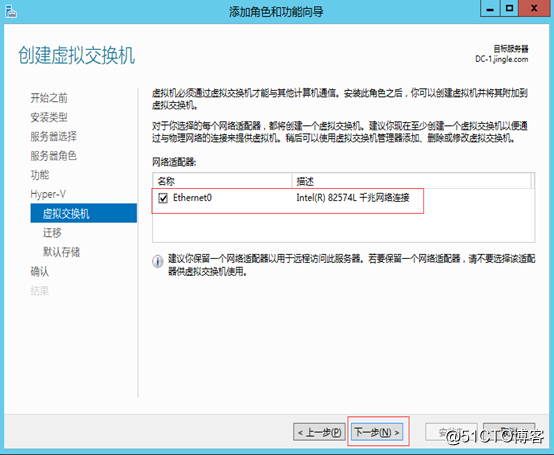
10) allows live migration, the next step 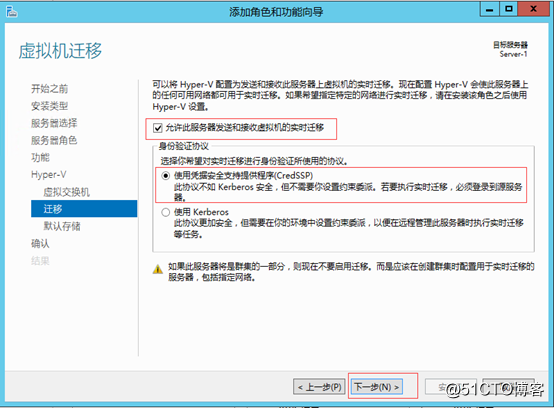
11) custom "file storage location" 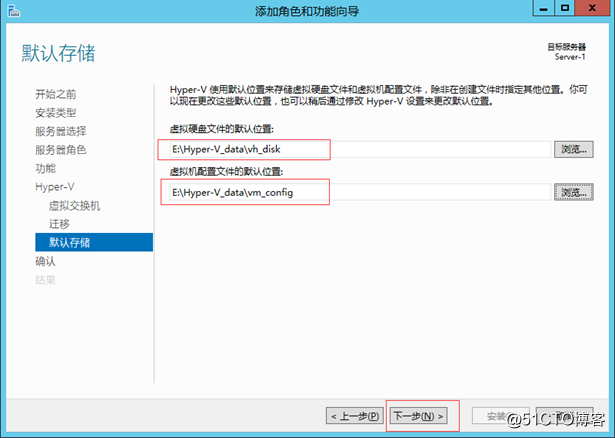
12) automatically restart, the installation 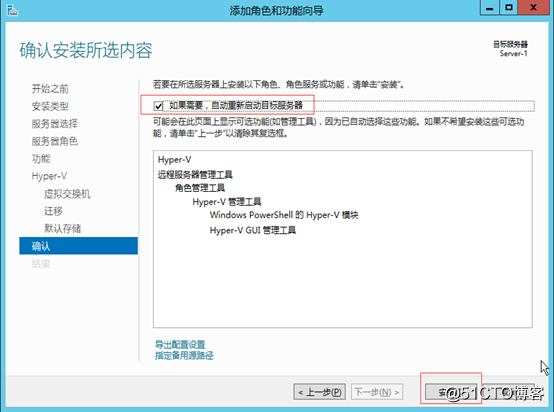
13) in the installation process, the server will automatically restart installed 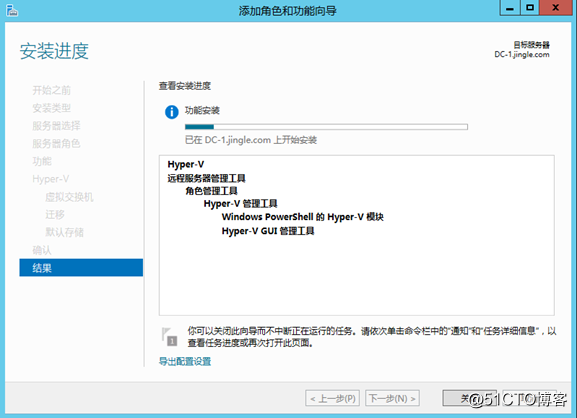
14) server is restarted following screen displays, close to 
15) server Manager -> hyper- V, represents a hyper-v installed 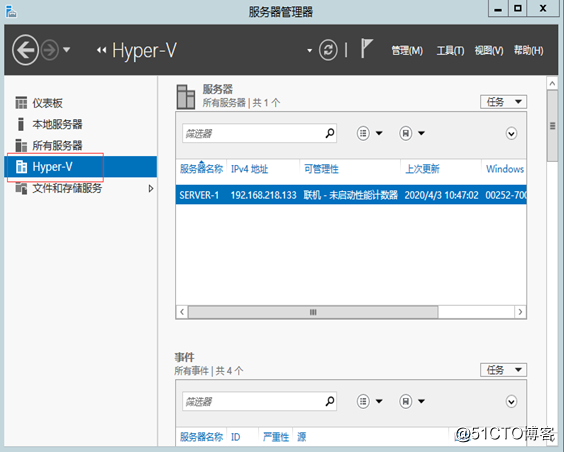
16) tools -> Hyper-V Manager, using Hyper-V Manager to manage Hyper-V services 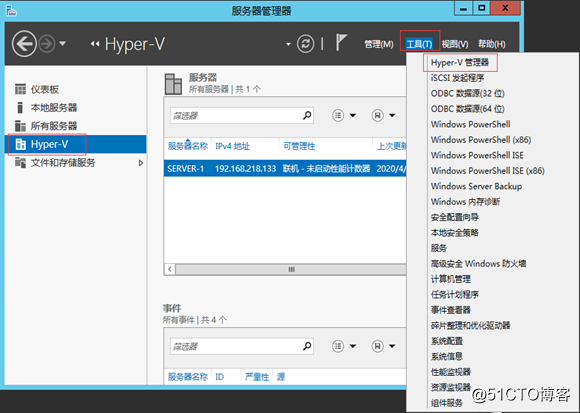
. 17) Hyper-V Manager operating page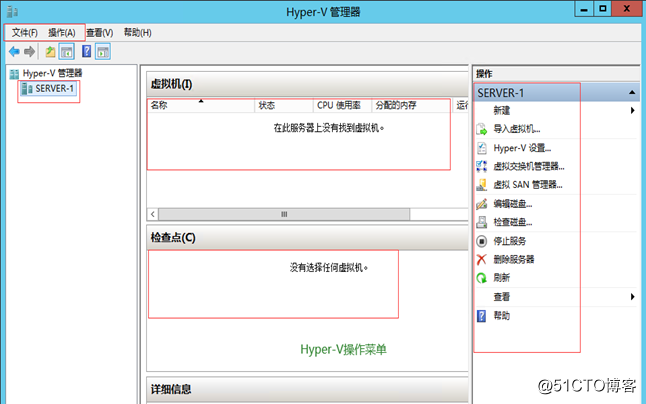
So far, Hyper-V, even if the installation is complete