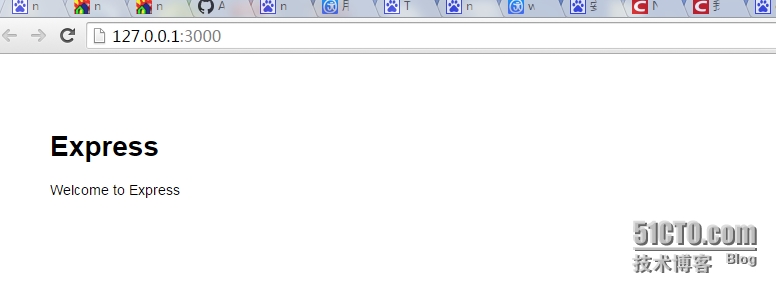
|
1
2
3
|
app.get(
'/user/:username'
,
function
(req, res) {
res.send(
'user: '
+ req.params.username);
});
|
|
1
2
|
$ npm install -g express
//全局安装
$ npm install -g express -generator
//这段命令可别忘了,不然会提示“express命令找不
|
|
1
|
express -e microblog
//即ejs,-j(即jade)(Express 4.0出来之后老的命令改变了)
|
|
1
2
|
cd
microblog
//microblog
为前面创建工程的文件夹
npm
install
|
|
1
|
npm start
|
|
1
2
3
4
5
6
7
8
9
10
11
12
13
14
15
16
17
18
19
20
21
22
23
24
25
26
27
28
29
30
31
32
33
34
35
36
37
38
39
40
41
42
43
44
45
46
47
48
49
50
51
52
53
54
55
56
57
58
59
60
|
var
express = require(
'express'
);
var
path = require(
'path'
);
var
favicon = require(
'serve-favicon'
);
var
logger = require(
'morgan'
);
var
cookieParser = require(
'cookie-parser'
);
var
bodyParser = require(
'body-parser'
);
var
routes = require(
'./routes/index'
);
var
users = require(
'./routes/users'
);
var
app = express();
// view engine setup
app.set(
'views'
, path.join(__dirname,
'views'
));
app.set(
'view engine'
,
'ejs'
);
// uncomment after placing your favicon in /public
//app.use(favicon(path.join(__dirname, 'public', 'favicon.ico')));
app.use(logger(
'dev'
));
app.use(bodyParser.json());
app.use(bodyParser.urlencoded({ extended:
false
}));
app.use(cookieParser());
app.use(express.static(path.join(__dirname,
'public'
)));
app.use(
'/'
, routes);
app.use(
'/users'
, users);
// catch 404 and forward to error handler
app.use(
function
(req, res, next) {
var
err =
new
Error(
'Not Found'
);
err.status = 404;
next(err);
});
// error handlers
// development error handler
// will print stacktrace
if
(app.get(
'env'
) ===
'development'
) {
app.use(
function
(err, req, res, next) {
res.status(err.status || 500);
res.render(
'error'
, {
message: err.message,
error: err
});
});
}
// production error handler
// no stacktraces leaked to user
app.use(
function
(err, req, res, next) {
res.status(err.status || 500);
res.render(
'error'
, {
message: err.message,
error: {}
});
});
module.exports = app;
|
-
basepath:基础地址,通常用于res.redirect()跳转
-
views:视图文件目录,存放模版文件
-
view engine:视图模版引擎
-
view options:全局视图参数对象
-
view catch : 启用视图缓存
-
case sensitive routes:路径是否区分大小写
-
strict routing:严格路径,启用后不会忽略路径末尾的 "/"
-
jsonp callback:开启透明的jsonp支持
|
1
2
|
app.use(
'/'
, routes);
app.use(
'/users'
, users);
|
|
1
2
3
4
5
6
7
8
9
10
11
12
|
/**
* Get port from environment and store in Express.
*/
var
port = normalizePort(process.env.PORT ||
'3000'
);
app.set(
'port'
, port);
.
.
.
/**
* Listen on provided port, on all network interfaces.
*/
server.listen(port);
|
|
1
2
3
4
5
6
7
|
var
express = require(
'express'
);
var
router = express.Router();
/* GET home page. */
router.get(
'/'
,
function
(req, res, next) {
res.render(
'index'
, { title:
'Express'
});
});
module.exports = router;
|
|
1
2
|
<
h1
><%= title %></
h1
>
<
p
>Welcome to <%= title %></
p
>
|
|
1
|
app.use(
'/hello'
, routes);
|
|
1
2
3
|
router.get(
'/hello'
,
function
(req, res, next) {
res.send(
'The time is '
+
new
Date().toString());
});
|


