上一篇:Pigeon的一次调用服务端发生了什么
前面介绍了Pigeon请求调用的过程,那么Pigeon的服务是如何被调用方感知的呢,我们知道通常RPC都会有一个注册中心,以保存服务测的信息(ip,port等等),这样客户端就可以通过注册中心去拿到服务的信息,来完成请求的调用。那一起来看下Pigeon服务的注册和发现机制是如何实现的。
服务的注册
首先,我们来看下服务的注册机制。
在Pigeon中主要使用了@Reference和@Service注解,用来标志服务调用方接口和服务提供方实现类,而对这两个注解进行拦截处理的类是AnnotationBean类,这里是通过实现了Spring的BeanPostProcessor接口来完成处理的(Pigeon相关的@Service类扫描和其BeanDefinition的封装实通过实现了BeanFactoryPostProcessor接口实现的),看下postProcessAfterInitialization方法实现:
public Object postProcessAfterInitialization(Object bean, String beanName) throws BeansException {
		// 先判断要注入相关属性的Bean是否在指定的注解扫描包下
		Class<?> beanClass = AopUtils.getTargetClass(bean);
		if (beanClass == null || !isMatchPackage(beanClass.getName())) {
			return bean;
		}

		// 判断类定义中是否存在@Service注解
		Service service = beanClass.getAnnotation(Service.class);
		if (service != null) {
			// 如果未自定义接口,则用当前beanClass
			Class serviceInterface = service.interfaceClass();
			if (void.class.equals(service.interfaceClass())) {
				serviceInterface = ServiceConfigUtils.getServiceInterface(beanClass);
			}
			if (serviceInterface == null) {
				serviceInterface = beanClass;
			}

			// 初始化ProviderConfig和ServerConfig,完成服务提供者配置和服务器配置的初始化
			ProviderConfig<Object> providerConfig = new ProviderConfig<Object>(serviceInterface, bean);
			providerConfig.setService(bean);
			providerConfig.setUrl(service.url());
			providerConfig.setVersion(service.version());
			providerConfig.setSharedPool(service.useSharedPool());
			providerConfig.setActives(service.actives());

			ServerConfig serverConfig = new ServerConfig();
			serverConfig.setPort(getDefaultPort(service.port()));
			serverConfig.setSuffix(service.group());
			serverConfig.setAutoSelectPort(service.autoSelectPort());
			providerConfig.setServerConfig(serverConfig);

			// 注册服务提供者,启动服务器,发布服务,完成pigeon提供方调用初始化
			ServiceFactory.addService(providerConfig);
		}

		// 解析bean中方法和属性是否包含Reference,完成bean作为服务调用方的依赖注入。
		postProcessBeforeInitialization(bean, beanName);
		return bean;
	}
这里我们关系的是注册过程,即ServiceFactory.addService(),进去看下它的最终触发的实现
public void doAddService(ProviderConfig providerConfig) {
        try {
            // 检查服务名
            checkServiceName(providerConfig);
            // 发布指定版本服务,同时解析服务方法
            ServicePublisher.addService(providerConfig);
            // 启动netty RPC服务器,作为服务提供方供调用方调用服务
            ServerConfig serverConfig = ProviderBootStrap.startup(providerConfig);
            // 更新serverConfig
            providerConfig.setServerConfig(serverConfig);
            // 实际发布服务,会将服务注册到注册中心,供调用方发现调用
            ServicePublisher.publishService(providerConfig, false);
        } catch (Throwable t) {
            throw new RpcException("error while adding service:" + providerConfig, t);
        }
    }
其中在添加解析服务中,主要进行了以下流程:
判断是否配置了版本, 如果配置了,生成带版本的urlWithVersion,更新key=urlWithVersion的服务,同时如果大于key=url的对应服务版本,会用新版本覆盖默认url版本
如果服务实现了InitializingService接口,调用实现的initialize方法
调用ServiceMethodFactory.init(url)方法,用来初始化调用ServiceMethodFactory的ServiceMethodCache:遍历ServicePublisher的所有服务提供类,建立ServiceMethodCache,存储该类下所有满足要求的方法和方法id的映射关系
首先会忽略掉Object和Class的所有方法
过滤方法后,判断是否需要压缩,根据url+"#"+方法名的方式进行hash。
代码如下
public static <T> void addService(ProviderConfig<T> providerConfig) throws Exception {
    if (logger.isInfoEnabled()) {
        logger.info("add service:" + providerConfig);
    }
    String version = providerConfig.getVersion();
    String url = providerConfig.getUrl();
    // 默认版本,直接以url为key
    if (StringUtils.isBlank(version)) {
        serviceCache.put(url, providerConfig);
    } else {
        // urlWithVersion = url + "_" + version
        String urlWithVersion = getServiceUrlWithVersion(url, version);
        if (serviceCache.containsKey(url)) {
            // 如果已经存在,覆盖服务
            serviceCache.put(urlWithVersion, providerConfig);
            ProviderConfig<?> providerConfigDefault = serviceCache.get(url);
            String defaultVersion = providerConfigDefault.getVersion();
            // 如果默认服务存在默认版本,并且小于当前版本,用当前版本服务更新默认服务版本
            if (!StringUtils.isBlank(defaultVersion)) {
                if (VersionUtils.compareVersion(defaultVersion, providerConfig.getVersion()) < 0) {
                    serviceCache.put(url, providerConfig);
                }
            }
        } else {
            // 将当前版本设为指定版本服务和默认版本服务
            serviceCache.put(urlWithVersion, providerConfig);
            // use this service as the default provider
            serviceCache.put(url, providerConfig);
        }
    }
    // 如果服务实现了InitializingService接口,调用实现的initialize方法
    T service = providerConfig.getService();
    if (service instanceof InitializingService) {
        ((InitializingService) service).initialize();
    }
    // 解析接口自定义方法,根据方法名,参数等相关信息记录方法
    ServiceMethodFactory.init(url);
}

// ServiceMethodFactory.init(url);方法实现如下:
public static void init(String url) {
    getServiceMethodCache(url);
}
// 具体调用了
public static ServiceMethodCache getServiceMethodCache(String url) {
    // 是否存在指定url的ServiceMethodCache
    ServiceMethodCache serviceMethodCache = methods.get(url);
    if (serviceMethodCache == null) {
        // 获取指定url的providerConfig
        Map<String, ProviderConfig<?>> services = ServicePublisher.getAllServiceProviders();
        ProviderConfig<?> providerConfig = services.get(url);
        if (providerConfig != null) {
            Object service = providerConfig.getService();
            Method[] methodArray = service.getClass().getMethods();
            serviceMethodCache = new ServiceMethodCache(url, service);
            // 遍历指定url的所有服务方法
            for (Method method : methodArray) {
                // 忽略掉Object和Class的所有方法
                if (!ingoreMethods.contains(method.getName())) {
                    method.setAccessible(true);
                    serviceMethodCache.addMethod(method.getName(), new ServiceMethod(service, method));

                    if (isCompact) {
                        // 压缩url,方法名等调用所需信息
                        int id = LangUtils.hash(url + "#" + method.getName(), 0, Integer.MAX_VALUE);
                        ServiceId serviceId = new ServiceId(url, method.getName());
                        ServiceId lastId = CompactRequest.PROVIDER_ID_MAP.putIfAbsent(id, serviceId);
                        // 检查如果存在相同id服务方法,抛异常
                        if (lastId != null && !serviceId.equals(lastId)) {
                            throw new IllegalArgumentException("same id for service:" + url + ", method:"
                                    + method.getName());
                        }
                    }

                }
            }
            // 更新缓存
            methods.put(url, serviceMethodCache);
        }
    }
    return serviceMethodCache;
}
服务的启动主要是指netty服务端接口监听开启,请求处理线程池初始化及启动(处理请求调用链的线程池),代码如下:

这里我们重点看下服务的发布方法ServicePublisher.publishService主要逻辑
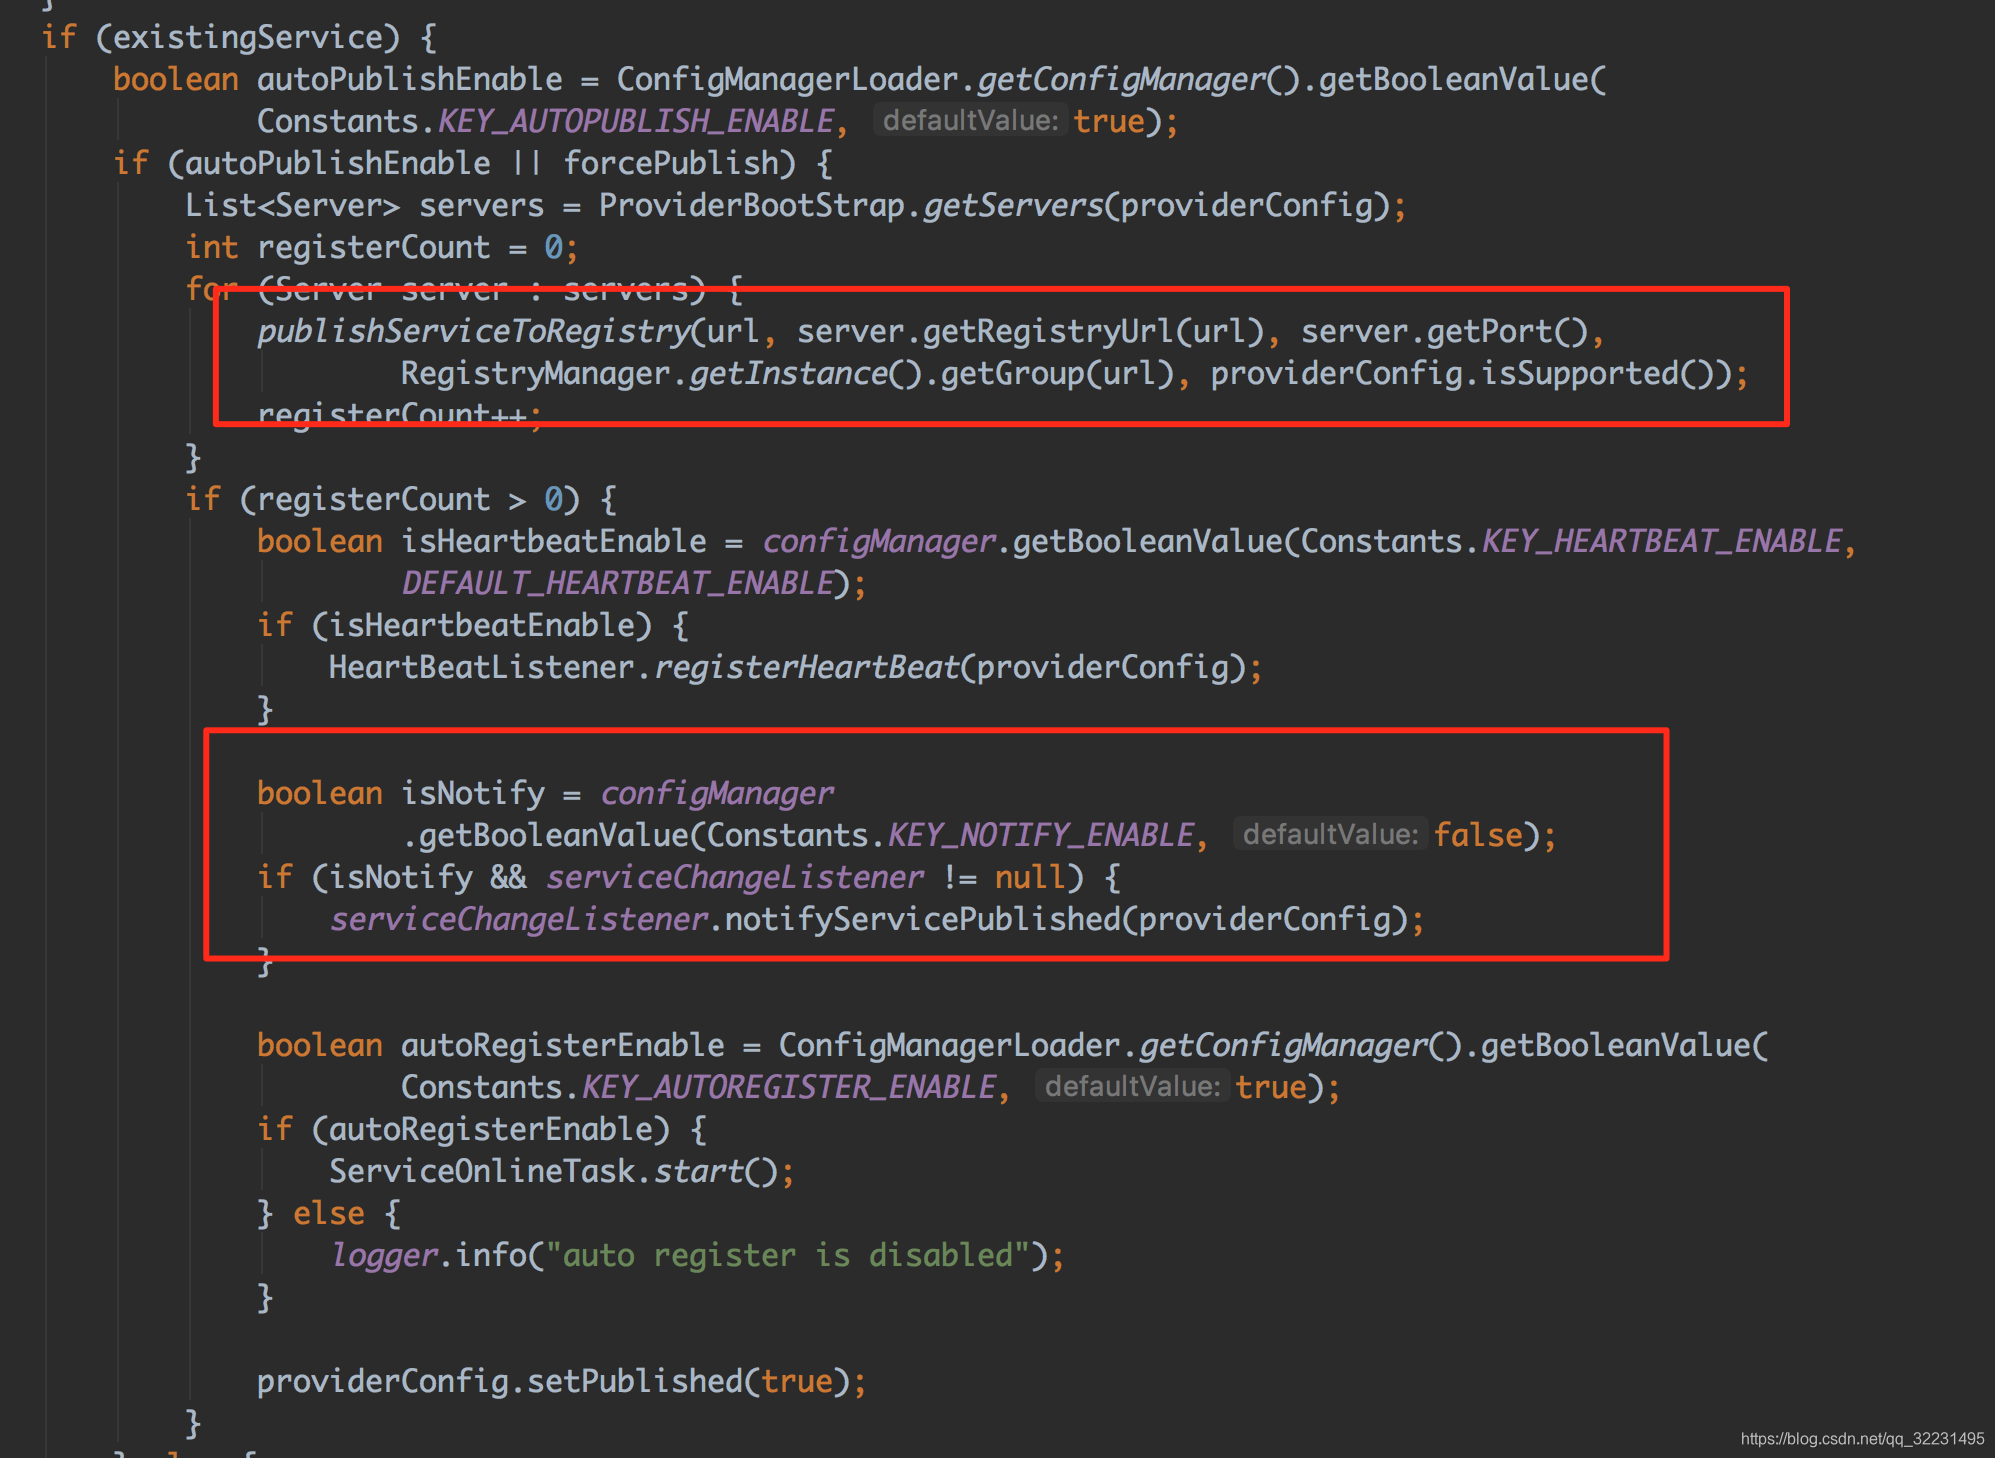
如果服务需要注册,这里调用了publishServiceToRegistry方法去注册服务,通过在ZK上创建一个持久节点完成注册,然后通知服务变化。
待补充
