这里通过namespace的方法来实现,其他的没成功。
添加依赖
<dependency>
      <groupId>com.alibaba.boot</groupId>
      <artifactId>nacos-config-spring-boot-starter</artifactId>
</dependency>
添加命名空间
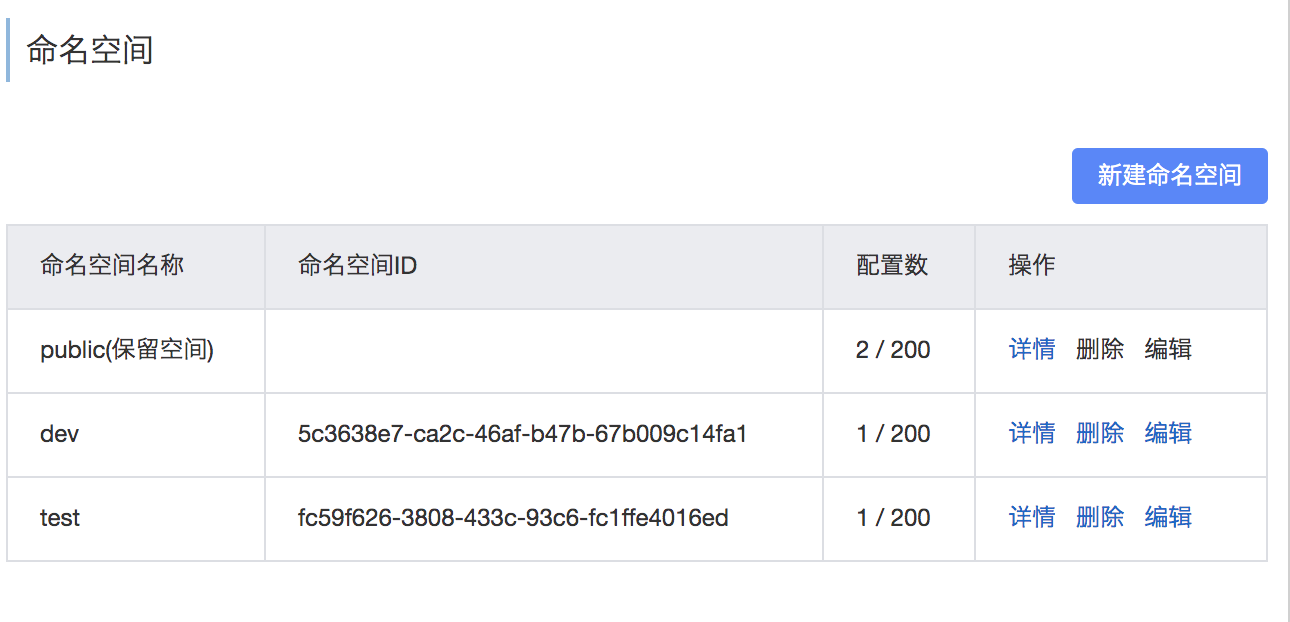
新建几个配置文件,比如
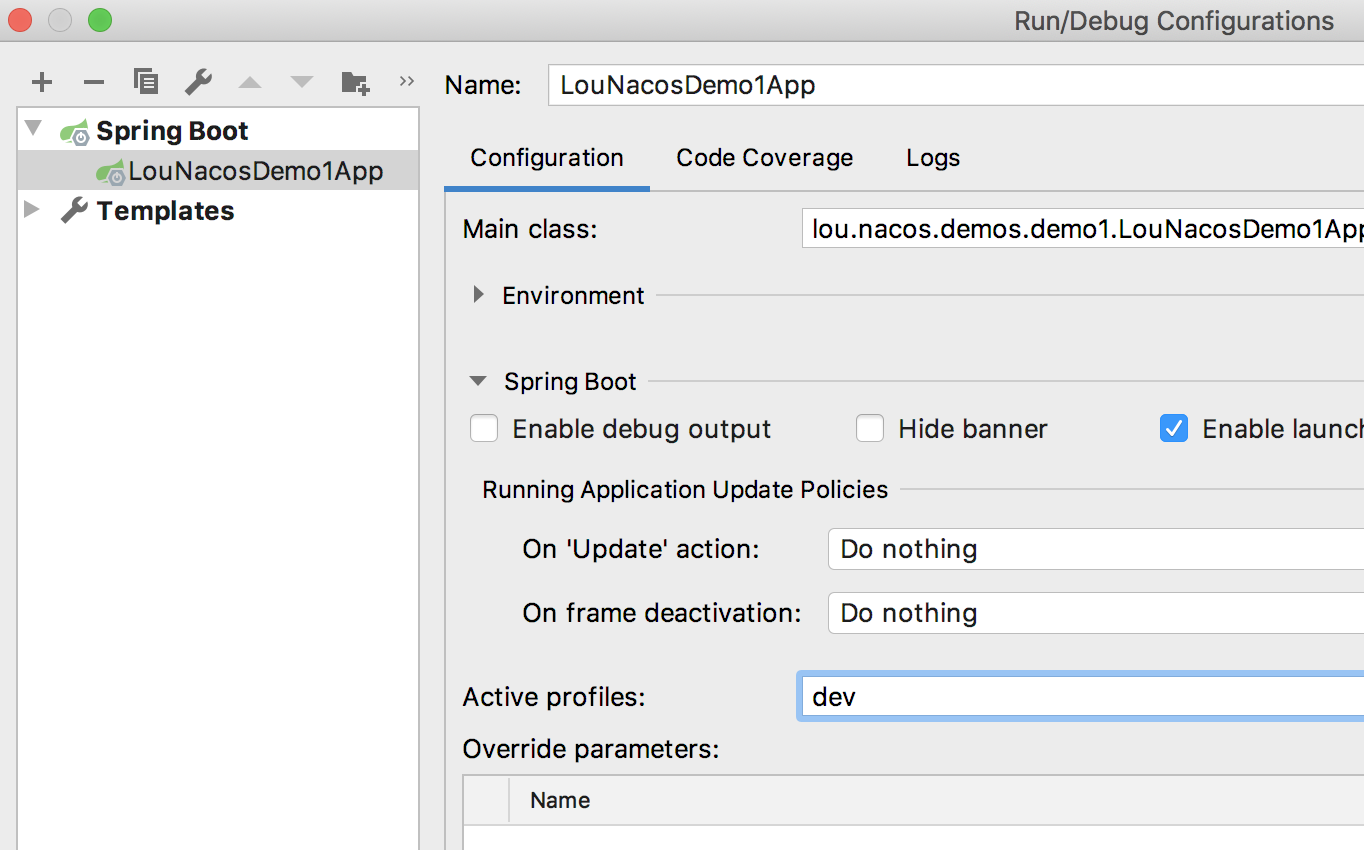
application-dev.yaml和application-test.yam,里面指定不同的namespaceserver: port: 8081 nacos: config: server-addr: 127.0.0.1:8848 namespace: 5c3638e7-ca2c-46af-b47b-67b009c14fa1启动的时候指定active的profile.
代码就能调用了
@SpringBootApplication
@RestController
//@NacosPropertySource(dataId = "lou-nacos-demo-config",autoRefreshed = true)
//这里不用指定上面source
public class LouNacosDemo1App {
    public static void main(String[] args) {
        SpringApplication.run(LouNacosDemo1App.class,args);
    }
    @NacosValue("${userName:aaa}")
    private String userName;

    @GetMapping("hello")
    public String hello(){
        return "hello world";
    }

    @GetMapping("userName")
    public String getUserName(){
        return userName;
    }
}