1. pom.xml
shiro并没有提供对应的Starter,而是使用的shiro-spring,其它的依赖都是辅助
<dependency>
    <groupId>org.springframework.boot</groupId>
    <artifactId>spring-boot-starter-data-jpa</artifactId>
</dependency>
<dependency>
    <groupId>org.springframework.boot</groupId>
    <artifactId>spring-boot-starter-thymeleaf</artifactId>
</dependency>
<dependency>
    <groupId>org.springframework.boot</groupId>
    <artifactId>spring-boot-starter-web</artifactId>
</dependency>
<dependency>
    <groupId>mysql</groupId>
    <artifactId>mysql-connector-java</artifactId>
    <scope>runtime</scope>
</dependency>

<dependency>
    <groupId>org.apache.shiro</groupId>
    <artifactId>shiro-spring</artifactId>
    <version>1.4.0</version>
</dependency>
2. application.yml
spring:
    datasource:
      url: jdbc:mysql://localhost:3306/test
      username: root
      password: root123
      driver-class-name: com.mysql.jdbc.Driver

    jpa:
      database: mysql
      show-sql: true
      hibernate:
        ddl-auto: update
        naming:
          strategy: org.hibernate.cfg.DefaultComponentSafeNamingStrategy
      properties:
         hibernate:
            dialect: org.hibernate.dialect.MySQL5Dialect

    thymeleaf:
       cache: false
       mode: LEGACYHTML5
    mvc:
      static-path-pattern: /static/**
3. entity
用户-角色-权限,权限也是一种资源resource。
一个用户可以拥有多个角色,同一个角色也可以赋给多个用户,所以是多对多关心,多对多需要中间表,多对多使用@ManyToMany标注,中间表使用@JoinTable来标注,使用joinColumns来指定连接列的名称,使用inverseJoinColumns来指定被连接的列的名称。
用户 UserInfo
@Entity
public class UserInfo implements Serializable {
    @Id
    @GeneratedValue
    private Integer uid;

    @Column(unique =true)
    private String username;
    private String name;
    private String password;
    private String salt;
    // //用户状态,0:创建未认证(比如没有激活,没有输入验证码等等)--等待验证的用户 , 1:正常状态,2:用户被锁定.
    private byte state;

    @ManyToMany(fetch= FetchType.EAGER)//立即从数据库中进行加载数据;
    @JoinTable(name = "SysUserRole",
        joinColumns = { @JoinColumn(name = "uid") },
        inverseJoinColumns ={@JoinColumn(name = "roleId") })
    private List<SysRole> roleList;

    // Getter & Setter
}
角色 SysRole
@Entity
public class SysRole {
    @Id
    @GeneratedValue
    private Integer id;
    // 角色标识程序中判断使用,如"admin",这个是唯一的:
    private String role;
    private String description;
    private Boolean available = Boolean.FALSE;

    @ManyToMany(fetch= FetchType.EAGER)
    @JoinTable(name="SysRolePermission",
        joinColumns={@JoinColumn(name="roleId")},
        inverseJoinColumns={@JoinColumn(name="permissionId")})
    private List<SysPermission> permissions;

     // 如果需要的话,用于查询某个角色都分配给了哪些用户
     // 注意:当前的@JoinTable和UserInfo中的@JoinTable的name是一致的,但是joinColumns和inverseJoinColumns正好相反。
    @ManyToMany
    @JoinTable(name="SysUserRole",
        joinColumns={@JoinColumn(name="roleId")},
        inverseJoinColumns={@JoinColumn(name="uid")})
    private List<UserInfo> userInfos;

    // Getter & Setter
}
权限 SysPermission
@Entity
public class SysPermission implements Serializable {
@Id
@GeneratedValue
private Integer id;
private String name;
// 资源类型:一般分 菜单和按钮
@Column(columnDefinition="enum('menu','button')")
private String resourceType;
private String url;
//权限字符串,menu例子:role:*,button例子:role:create,role:update,role:delete,role:view
private String permission;
private Long parentId;
private String parentIds;
private Boolean available = Boolean.FALSE;
@ManyToMany
@JoinTable(name="SysRolePermission",
joinColumns={@JoinColumn(name="permissionId")},
inverseJoinColumns={@JoinColumn(name="roleId")})
private List<SysRole> roles;
// Getter & Setter
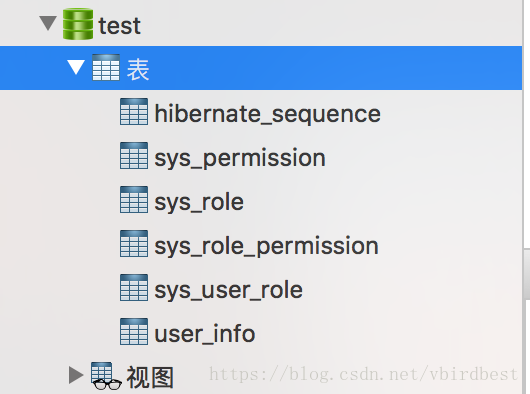
} 运行应用程序,会自动生成数据库表,表名和列名是按照驼峰转下划线的风格
- 用户表: user_info,
- 角色表: sys_role,
- 权限表: sys_permission,
- 用户角色中间表: sys_user_role,
- 角色权限中间表: sys_role_permission
4. sql 插入数据
插入一个admin用户,密码123456
插入三个角色:管理员、VIP会员、test
插入三个权限(资源): 每个资源包含 资源类型(菜单或按钮)、权限标识符(一般是模块:操作这种格式)、url地址
角色-权限:管理员角色中有用户管理、用户添加、用户删除三个权限
用户-角色:admin用户拥有管理员角色,有用户管理、用户添加、用户删除三个权限
插入用户数据
INSERT INTO `user_info` (`uid`,`username`,`name`,`password`,`salt`,`state`) VALUES ('1', 'admin', '管理员', 'd3c59d25033dbf980d29554025c23a75', '8d78869f470951332959580424d4bf4f', 0);

INSERT INTO `sys_role` (`id`,`available`,`description`,`role`) VALUES (1,0,'管理员','admin');
INSERT INTO `sys_role` (`id`,`available`,`description`,`role`) VALUES (2,0,'VIP会员','vip');
INSERT INTO `sys_role` (`id`,`available`,`description`,`role`) VALUES (3,1,'test','test');

INSERT INTO `sys_permission` (`id`,`available`,`name`,`parent_id`,`parent_ids`,`permission`,`resource_type`,`url`) VALUES (1,0,'用户管理',0,'0/','userInfo:view','menu','userInfo/userList');
INSERT INTO `sys_permission` (`id`,`available`,`name`,`parent_id`,`parent_ids`,`permission`,`resource_type`,`url`) VALUES (2,0,'用户添加',1,'0/1','userInfo:add','button','userInfo/userAdd');
INSERT INTO `sys_permission` (`id`,`available`,`name`,`parent_id`,`parent_ids`,`permission`,`resource_type`,`url`) VALUES (3,0,'用户删除',1,'0/1','userInfo:del','button','userInfo/userDel');

INSERT INTO `sys_role_permission` (`permission_id`,`role_id`) VALUES (1,1);
INSERT INTO `sys_role_permission` (`permission_id`,`role_id`) VALUES (2,1);
INSERT INTO `sys_role_permission` (`permission_id`,`role_id`) VALUES (3,2);

INSERT INTO `sys_user_role` (`role_id`,`uid`) VALUES (1,1);
5. dao
public interface UserInfoDao extends CrudRepository<UserInfo,Long> {
    public UserInfo findByUsername(String username);
}
6. service
public interface UserInfoService {
    public UserInfo findByUsername(String username);
}
@Service
public class UserInfoServiceImpl implements UserInfoService {
@Resource
private UserInfoDao userInfoDao;
@Override
public UserInfo findByUsername(String username) {
return userInfoDao.findByUsername(username);
}
}7.config
AuthorizingRealm
public class MyShiroRealm extends AuthorizingRealm {

    @Resource
    private UserInfoService userInfoService;

    /**
     * 授权:SimpleAuthorizationInfo用于存储用户的所有角色(Set<String> roles)和所有权限(Set<String> stringPermissions)信息
     * 当执行某个方法时,方法上会有权限注解,例如@RequiresPermissions("userInfo:add"),
     * 此时就会去找AuthorizationInfo中的stringPermissions是否包含userInfo:add,如果包含就继续处理,
     * 如果不包含则跳转到shiro配置的为授权的地址
     * @param principals
     * @return
     */
    @Override
    protected AuthorizationInfo doGetAuthorizationInfo(PrincipalCollection principals) {
        SimpleAuthorizationInfo authorizationInfo = new SimpleAuthorizationInfo();
        UserInfo userInfo  = (UserInfo)principals.getPrimaryPrincipal();

        for(SysRole role : userInfo.getRoleList()){
            authorizationInfo.addRole(role.getRole());
            for(SysPermission p : role.getPermissions()){
                authorizationInfo.addStringPermission(p.getPermission());
            }
        }
        return authorizationInfo;
    }

    /**
     * 认证
     * 主要是用来进行身份认证的,也就是说验证用户输入的账号和密码是否正确。
     * 当用户登录时会执行
     * @throws AuthenticationException
     */
    @Override
    protected AuthenticationInfo doGetAuthenticationInfo(AuthenticationToken token)
            throws AuthenticationException {
        String username = (String)token.getPrincipal();
        //实际项目中,这里可以根据实际情况做缓存,如果不做,Shiro自己也是有时间间隔机制,2分钟内不会重复执行该方法
        UserInfo userInfo = userInfoService.findByUsername(username);
        if(userInfo == null){ return null; }

        SimpleAuthenticationInfo authenticationInfo = new SimpleAuthenticationInfo(
                userInfo, //用户名
                userInfo.getPassword(), //密码
                ByteSource.Util.bytes(userInfo.getCredentialsSalt()),//salt=username+salt
                getName()  //realm name
        );
        return authenticationInfo;
    }
}
ShiroConfig
@Configuration
public class ShiroConfig {
    @Bean
    public ShiroFilterFactoryBean shiroFilter(SecurityManager securityManager) {
        ShiroFilterFactoryBean shiroFilterFactoryBean = new ShiroFilterFactoryBean();
        shiroFilterFactoryBean.setSecurityManager(securityManager);
        // 设置登录的路径,如果不设置默认会自动寻找Web工程根目录下的"/login.jsp"页面
        shiroFilterFactoryBean.setLoginUrl("/login");

        // 设置登录成功后要跳转的链接
        shiroFilterFactoryBean.setSuccessUrl("/index");

        //设置访问没有权限跳转到的界面;
        shiroFilterFactoryBean.setUnauthorizedUrl("/403");


        // 过滤器链,拦截的顺序是按照配置的顺序来的
        Map<String,String> filterChainDefinitionMap = new LinkedHashMap<String,String>();
        // 配置不会被拦截的路径,一般静态资源都不需要拦截,anon代表匿名的不需要拦截的资源,这里的静态资源的匹配模式配置成/static/**,
        // 如果配置成这样需要配置一些spring.mvc.static-path-pattern=/static/**
        filterChainDefinitionMap.put("/static/**", "anon");
        // 登出路径使用logout拦截器
        filterChainDefinitionMap.put("/logout", "logout");
        //<!-- 过滤链定义,从上向下顺序执行,一般将/**放在最为下边 -->:这是一个坑呢,一不小心代码就不好使了;
        //<!-- authc:所有url都必须认证通过才可以访问; anon:所有url都都可以匿名访问-->
        filterChainDefinitionMap.put("/**", "authc");
        shiroFilterFactoryBean.setFilterChainDefinitionMap(filterChainDefinitionMap);

        return shiroFilterFactoryBean;
    }

    /**
     * 凭证匹配器
     * (由于我们的密码校验交给Shiro的SimpleAuthenticationInfo进行处理了)
     */
    @Bean
    public HashedCredentialsMatcher hashedCredentialsMatcher(){
        HashedCredentialsMatcher hashedCredentialsMatcher = new HashedCredentialsMatcher();
        hashedCredentialsMatcher.setHashAlgorithmName("md5");//散列算法:这里使用MD5算法;
        hashedCredentialsMatcher.setHashIterations(2);//散列的次数,比如散列两次,相当于 md5(md5(""));
        return hashedCredentialsMatcher;
    }

    @Bean
    public MyShiroRealm myShiroRealm(){
        MyShiroRealm myShiroRealm = new MyShiroRealm();
        myShiroRealm.setCredentialsMatcher(hashedCredentialsMatcher());
        return myShiroRealm;
    }


    @Bean
    public SecurityManager securityManager(){
        DefaultWebSecurityManager securityManager =  new DefaultWebSecurityManager();
        securityManager.setRealm(myShiroRealm());
        return securityManager;
    }

    /**
     *  开启shiro aop注解支持.
     *  使用代理方式;所以需要开启代码支持;
     * @param securityManager
     * @return
     */
    @Bean
    public AuthorizationAttributeSourceAdvisor authorizationAttributeSourceAdvisor(SecurityManager securityManager){
        AuthorizationAttributeSourceAdvisor authorizationAttributeSourceAdvisor = new AuthorizationAttributeSourceAdvisor();
        authorizationAttributeSourceAdvisor.setSecurityManager(securityManager);
        return authorizationAttributeSourceAdvisor;
    }

    @Bean(name="simpleMappingExceptionResolver")
    public SimpleMappingExceptionResolver createSimpleMappingExceptionResolver() {
        SimpleMappingExceptionResolver r = new SimpleMappingExceptionResolver();
        Properties mappings = new Properties();
        mappings.setProperty("DatabaseException", "databaseError");//数据库异常处理
        mappings.setProperty("UnauthorizedException","403");
        r.setExceptionMappings(mappings);  // None by default
        r.setDefaultErrorView("error");    // No default
        r.setExceptionAttribute("ex");     // Default is "exception"
        //r.setWarnLogCategory("example.MvcLogger");     // No default
        return r;
    }
}
8. controller
HomeController
@Controller
public class HomeController {
    @RequestMapping({"/","/index"})
    public String index(){
        return"/index";
    }

    /**
     * 登录时先执行Realm中的认证方法,然后再执行登录方法
     * @param request
     * @param map
     * @return
     * @throws Exception
     */
    @RequestMapping("/login")
    public String login(HttpServletRequest request, Map<String, Object> map) throws Exception{
        // 登录失败从request中获取shiro处理的异常信息。
        // shiroLoginFailure:就是shiro异常类的全类名.
        String exception = (String) request.getAttribute("shiroLoginFailure");
        String msg = "";
        if (exception != null) {
            if (UnknownAccountException.class.getName().equals(exception)) {
                System.out.println("UnknownAccountException -- > 账号不存在:");
                msg = "UnknownAccountException -- > 账号不存在:";
            } else if (IncorrectCredentialsException.class.getName().equals(exception)) {
                System.out.println("IncorrectCredentialsException -- > 密码不正确:");
                msg = "IncorrectCredentialsException -- > 密码不正确:";
            } else if ("kaptchaValidateFailed".equals(exception)) {
                System.out.println("kaptchaValidateFailed -- > 验证码错误");
                msg = "kaptchaValidateFailed -- > 验证码错误";
            } else {
                msg = "else >> "+exception;
                System.out.println("else -- >" + exception);
            }
        }

        map.put("msg", msg);

        // 此方法不处理登录成功,由shiro进行处理, 应为会在shiro中配置登录成功需要跳转的界面

        return "/login";
    }

    @RequestMapping("/403")
    public String unauthorizedRole(){
        return "403";
    }
}
UserInfoController
@Controller
@RequestMapping("/userInfo")
public class UserInfoController {

    /**
     * 用户查询
     */
    @RequestMapping("/userList")
    @RequiresPermissions("userInfo:view")// 查看用户信息的权限
    public String userInfo(){
        return "userInfo";
    }

    /**
     * 用户添加
     */
    @RequestMapping("/userAdd")
    @RequiresPermissions("userInfo:add")// 添加用户的权限
    public String userInfoAdd(){
        return "userInfoAdd";
    }

    /**
     * 用户删除
     */
    @RequestMapping("/userDel")
    @RequiresPermissions("userInfo:del")// 删除用户呢的权限
    public String userDel(){
        return "userInfoDel";
    }
}
9. html
403.html
<!DOCTYPE html>
<html lang="en">
<head>
    <meta charset="UTF-8">
    <title>403</title>
</head>
<body>
<h3>403没有权限</h3>
</body>
</html>
index.html
<!DOCTYPE html>
<html lang="en">
<head>
    <meta charset="UTF-8">
    <title>index</title>
</head>
<body>
<h1>index</h1>
</body>
</html>
login.html
<!DOCTYPE html>
<html xmlns:th="http://www.thymeleaf.org">
<head>
    <meta charset="UTF-8">
    <title>Login</title>
</head>
<body>
错误信息:<h4 th:text="${msg}"></h4>
<form action="" method="post">
    <p>账号:<input type="text" name="username" value="admin"/></p>
    <p>密码:<input type="text" name="password" value="123456"/></p>
    <p><input type="submit" value="登录"/></p>
</form>
</body>
</html>
userInfo.html
<!DOCTYPE html>
<html lang="en">
<head>
    <meta charset="UTF-8">
    <title>UserInfo</title>
</head>
<body>
<h3>用户查询界面</h3>
</body>
</html>
userInfoAdd.html
<!DOCTYPE html>
<html lang="en">
<head>
    <meta charset="UTF-8">
    <title>Add</title>
</head>
<body>
<h3>用户添加界面</h3>
</body>
</html>
userInfoDel.html
<!DOCTYPE html>
<html lang="en">
<head>
    <meta charset="UTF-8">
    <title>Del</title>
</head>
<body>
<h3>用户删除界面</h3>
</body>
</html>
10. test
编写好后就可以启动程序,访问http://localhost:8080/userInfo/userList页面,由于没有登录就会跳转到http://localhost:8080/login页面。登录之后就会跳转到index页面,登录后,直接在浏览器中输入http://localhost:8080/userInfo/userList访问就会看到用户信息。上面这些操作时候触发MyShiroRealm.doGetAuthenticationInfo()这个方法,也就是登录认证的方法。
登录admin账户,访问:http://127.0.0.1:8080/userInfo/userAdd显示用户添加界面,访问http://127.0.0.1:8080/userInfo/userDel显示403没有权限。上面这些操作时候触发MyShiroRealm.doGetAuthorizationInfo()这个方面,也就是权限校验的方法。
修改admin不同的权限进行测试
相关博客:
https://blog.csdn.net/catoop/article/details/50520958
http://www.ityouknow.com/springboot/2017/06/26/springboot-shiro.html