安装VTN协调器操作步骤
第一步:到官网下载VTN协调器安装包 :distribution.vtn-coordinator-6.5.2-bin.tar.bz2
官网下载地址:
第二步:在root目录下解压,将vtn协调器安装到 /usr/local/vtn 目录下
tar -C/ -jxvf distribution.vtn-coordinator-6.5.2-bin.tar.bz2
如果解压报错,请检查系统是否安装了 bzip2,安装命令如下:
yum -y install bzip2
第三步:安装VTN协调器所需的其他应用程序
yum install perl-Digest-SHA uuid libxslt libcurl unixODBC
wget http://dl.fedoraproject.org/pub/epel/6/i386/epel-release-6-8.noarch.rpm
rpm -Uvh epel-release-6-8.noarch.rpm
yum install json-c
第四步:安装PostgreSQL数据库
yum install https://download.postgresql.org/pub/repos/yum/9.5/redhat/rhel-7-x86_64/pgdg-centos95-9.5-2.noarch.rpm第五步:安装PostgreSQL需要的包
yum install postgresql95-server postgresql95-contrib postgresql95-odbc
注意:
VTN协调器支持PostgreSQL版本大于9.1,目前测试9.5 请确保安装PostgreSQL版本>=9.1
官网下载地址:http://yum.postgresql.org
如果您在安装PostgreSQL rpm时遇到任何问题,请参考OpenSSL_Problems查询来解决常见问题。
第六步:为VTN协调器配置数据库
/usr/local/vtn/sbin/db_setup
第七步:启动vtn协调器
/usr/local/vtn/bin/vtn_start
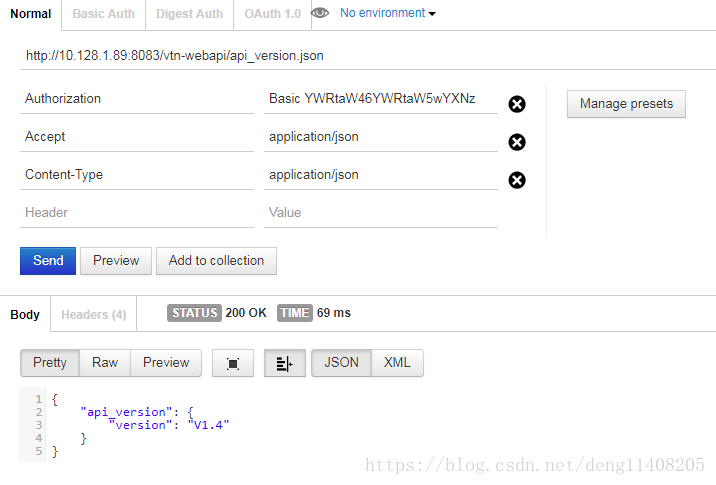
第八步:测试vtn协调器
1.下面的命令应该产生这样的响应,以确保成功安装。
curl -X GET -H 'content-type: application/json' -u admin:adminpass \
    http://<VTN_COORDINATOR_IP_ADDRESS>:8083/vtn-webapi/api_version.json
返回结果
{"api_version":{"version":"VX.X"}}第九步:停止vtn协调器
/usr/local/vtn/bin/vtn_stop亲测结果如下图,安装成功!