一、什么是Spring-Boot:
随着Spring 4新版本的发布,Spring Boot这个新的子项目得到了广泛的关注,因为不管是Spring 4官方发布的新闻稿还是针对首席架构师Adrian Colyer的专访,都对这个子项目所带来的生产率提升赞誉有加。
Spring Boot充分利用了JavaConfig的配置模式以及“约定优于配置”的理念,能够极大的简化基于Spring MVC的Web应用和REST服务开发。
Spring 4倡导微服务的架构,针对这一理念,近来在微博上也有一些有价值的讨论,如这里和这里。微服务架构倡导将功能拆分到离散的服务中,独立地进行部署,Spring Boot能够很方便地将应用打包成独立可运行的JAR包,因此在开发模式上很契合这一理念。目前,Spring Boot依然是0.5.0的里程碑版本,因此相关的文档尚不完善,本文将会以一个简单的样例来介绍基于这个项目的开发过程。
二、添加Spring-Boot 支持jsp 和rest的POM
| <?xml version="1.0" encoding="UTF-8"?> <project xmlns="http://maven.apache.org/POM/4.0.0" xmlns:xsi="http://www.w3.org/2001/XMLSchema-instance" xsi:schemaLocation="http://maven.apache.org/POM/4.0.0 http://maven.apache.org/xsd/maven-4.0.0.xsd"> <modelVersion>4.0.0</modelVersion> <parent>
扫描二维码关注公众号,回复:
5145765 查看本文章

<groupId>org.springframework.boot</groupId> <artifactId>spring-boot-samples</artifactId> <version>1.2.0.BUILD-SNAPSHOT</version> </parent> <artifactId>Activity</artifactId> <packaging>war</packaging> <name>Activity</name> <description>Activity</description> <url>http://projects.spring.io/spring-boot/</url> <organization> <name>Pivotal Software, Inc.</name> <url>http://www.spring.io</url> </organization> <properties> <start-class>com.activity.SampleWebJspApplication</start-class> </properties> <dependencies> <dependency> <groupId>dom4j</groupId> <artifactId>dom4j</artifactId> <version>1.6.1</version> </dependency> <dependency> <groupId>net.sf.json-lib</groupId> <artifactId>json-lib</artifactId> <version>2.4</version> <classifier>jdk15</classifier> </dependency> <dependency> <groupId>org.springframework.boot</groupId> <artifactId>spring-boot-starter-web</artifactId> </dependency> <dependency> <groupId>org.springframework.boot</groupId> <artifactId>spring-boot-starter-tomcat</artifactId> <scope>provided</scope> </dependency> <dependency> <groupId>org.apache.tomcat.embed</groupId> <artifactId>tomcat-embed-jasper</artifactId> <scope>provided</scope> </dependency> <dependency> <groupId>javax.servlet</groupId> <artifactId>jstl</artifactId> </dependency> <dependency> <groupId>org.springframework.boot</groupId> <artifactId>spring-boot-starter-test</artifactId> <scope>test</scope> </dependency> </dependencies> <build> <plugins> <plugin> <groupId>org.springframework.boot</groupId> <artifactId>spring-boot-maven-plugin</artifactId> </plugin> <plugin> <groupId>org.apache.maven.plugins</groupId> <artifactId>maven-surefire-plugin</artifactId> <configuration> <useSystemClassLoader>false</useSystemClassLoader> </configuration> </plugin> </plugins> </build> </project> |
三、新建Maven项目--webapp(略过)
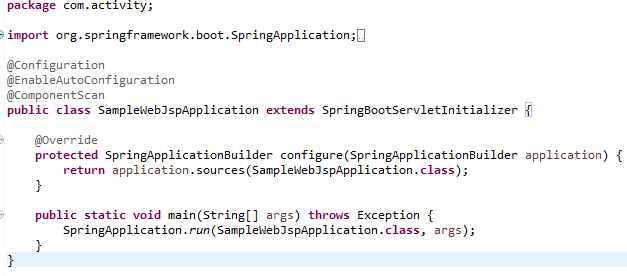
四、添加配置Main类
| package com.activity; import org.springframework.boot.SpringApplication; import org.springframework.boot.autoconfigure.EnableAutoConfiguration; import org.springframework.boot.builder.SpringApplicationBuilder; import org.springframework.boot.context.web.SpringBootServletInitializer; import org.springframework.context.annotation.ComponentScan; import org.springframework.context.annotation.Configuration; @Configuration @EnableAutoConfiguration //本人表示,一定要有这个标签(不然,你会吃亏的) @ComponentScan public class SampleWebJspApplication extends SpringBootServletInitializer { @Override protected SpringApplicationBuilder configure(SpringApplicationBuilder application) { return application.sources(SampleWebJspApplication.class); } public static void main(String[] args) throws Exception { SpringApplication.run(SampleWebJspApplication.class, args); } } |
五,加入application.properties到src/main/resources (这里映射了jsp路径和定义一些消息)
| spring.view.prefix: /WEB-INF/jsp/ spring.view.suffix: .jsp application.message: Hello Phil |
这样基本就可以了。接下来测试RestControl和Control
@Resetcontrol 用于返回对象,会自动格式化为JSON
@Control会返回jsp页面
六,定义返回JSON数据
| package com.activity.action; import java.util.Date; import org.springframework.web.bind.annotation.RequestMapping; import org.springframework.web.bind.annotation.RequestMethod; import org.springframework.web.bind.annotation.RequestParam; import org.springframework.web.bind.annotation.RestController; import com.activity.model.bean; import com.activity.model.tasker; @RestController public class demo { @RequestMapping(value="/greeting") public tasker test(@RequestParam String id) { tasker e = new tasker(); e.setTaskerId(id); e.setBegin_time(new Date()); e.setEnd_time(new Date()); e.setTargetUrl("baidu.com"); e.setType("123123"); e.setOperation("1,2,3,4,5,6"); return e; } @RequestMapping(value="/account") public bean test_two() { bean b = new bean(); b.setId("111"); b.setMobiPhone("shaoyongyang"); b.setPassWord("helloworld"); b.setUserName("bianbian"); return b; } @RequestMapping(value="/admin",method=RequestMethod.GET) public String doView () { return "index.jsp"; } } |
七,返回jsp对象
| package com.activity.action; import java.util.Date; import java.util.Map; import javax.servlet.http.HttpServletRequest; import org.springframework.beans.factory.annotation.Value; import org.springframework.stereotype.Controller; import org.springframework.web.bind.annotation.RequestMapping; import org.springframework.web.bind.annotation.RequestMethod; import org.springframework.web.servlet.ModelAndView; import com.activity.service.infoService; @Controller public class InfoController { private HttpServletRequest request ; private infoService infoService ; public infoService getInfoService() { return infoService; } public void setInfoService(infoService infoService) { this.infoService = infoService; } /*** * @author shaoyongyang * @since 2014年10月9日 13:29:21 * 主页 * **/ @Value("${application.message:Hello World}") private String message = "Hello World"; @RequestMapping("/index") public String index(Map<String, Object> model) { model.put("time", new Date()); model.put("message", this.message); return "index"; /***当返回index字符串,会自动去WEB-INF JSP路径寻找index.jsp*/ } /*** * @author shaoyongyang * @since 2014-10-13 13:47:46 * 例子流程 * **/ @RequestMapping(value="example") public ModelAndView example(HttpServletRequest request) { return new ModelAndView("index.jsp"); } } |
至此。OVER!!!
上传几张图片吧。
主要配置文件。
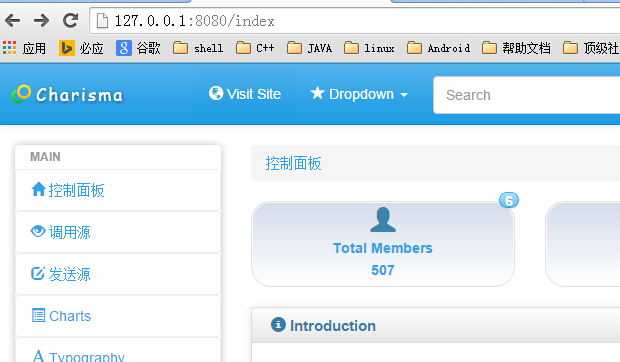
启动成功显示:

浏览器:

没办法。图片不能大于200K。
至此,Over。。。。。
再分享一下我老师大神的人工智能教程吧。零基础!通俗易懂!风趣幽默!还带黄段子!希望你也加入到我们人工智能的队伍中来!https://blog.csdn.net/jiangjunshow