前言
本文使用tensorflow下的ssdlite-mobilenet v2物体检测模型,并转换为tflite模型,并完成测试
1. 安装 TensorFlow Object Detection API
1.1 下载tensorflow-master和models-master
下载地址分别为https://github.com/tensorflow/tensorflow和https://github.com/tensorflow/models
1.2 安装依赖项、编译工具
sudo pip install matplotlib pillow lxml jupyter protobuf-compiler python-tk python3-tk1.3 使用proto编译
cd models/research/
protoc object_detection/protos/*.proto --python_out=.
1.4 添加环境变量
在.bashrc中添加环境变量,路径根据实际情况补充完整,然后source更新环境变量
export PYTHONPATH=$PYTHONPATH:/.../models/research:/.../models/research/slim
1.5 测试models是否安装成功:
python object_detection/builders/model_builder_test.py返回OK则OK

2. TF Record格式数据准备
使用label-image标注工具对样本进行标注,得到VOC格式数据。将所有的图片放入images/文件夹,标注得到的xml文件保存到merged_xml/文件夹内,并新建文件夹Annotations/。

2.1 训练集划分
新建train_test_split.py把xml数据集分为了train 、test、 validation三部分,并存储在Annotations文件夹中,train为训练集占76.5%,test为测试集10%,validation为验证集13.5%,train_test_split.py代码如下:
import os
import random
import time
import shutil

xmlfilepath=r'merged_xml'
saveBasePath=r"./Annotations"

trainval_percent=0.9
train_percent=0.85
total_xml = os.listdir(xmlfilepath)
num=len(total_xml)
list=range(num)
tv=int(num*trainval_percent)
tr=int(tv*train_percent)
trainval= random.sample(list,tv)
train=random.sample(trainval,tr)
print("train and val size",tv)
print("train size",tr)
# print(total_xml[1])
start = time.time()
# print(trainval)
# print(train)
test_num=0
val_num=0
train_num=0
# for directory in ['train','test',"val"]:
#         xml_path = os.path.join(os.getcwd(), 'Annotations/{}'.format(directory))
#         if(not os.path.exists(xml_path)):
#             os.mkdir(xml_path)
#         # shutil.copyfile(filePath, newfile)
#         print(xml_path)
for i  in list:
    name=total_xml[i]
            # print(i)
    if i in trainval:  #train and val set
    # ftrainval.write(name)
        if i in train:
            # ftrain.write(name)
            # print("train")
            # print(name)
            # print("train: "+name+" "+str(train_num))
            directory="train"
            train_num+=1
            xml_path = os.path.join(os.getcwd(), 'Annotations/{}'.format(directory))
            if(not os.path.exists(xml_path)):
                os.mkdir(xml_path)
            filePath=os.path.join(xmlfilepath,name)
            newfile=os.path.join(saveBasePath,os.path.join(directory,name))
            shutil.copyfile(filePath, newfile)

        else:
            # fval.write(name)
            # print("val")
            # print("val: "+name+" "+str(val_num))
            directory="validation"
            xml_path = os.path.join(os.getcwd(), 'Annotations/{}'.format(directory))
            if(not os.path.exists(xml_path)):
                os.mkdir(xml_path)
            val_num+=1
            filePath=os.path.join(xmlfilepath,name)
            newfile=os.path.join(saveBasePath,os.path.join(directory,name))
            shutil.copyfile(filePath, newfile)
            # print(name)
    else:  #test set
        # ftest.write(name)
        # print("test")
        # print("test: "+name+" "+str(test_num))
        directory="test"
        xml_path = os.path.join(os.getcwd(), 'Annotations/{}'.format(directory))
        if(not os.path.exists(xml_path)):
            os.mkdir(xml_path)
        test_num+=1
        filePath=os.path.join(xmlfilepath,name)
        newfile=os.path.join(saveBasePath,os.path.join(directory,name))
        shutil.copyfile(filePath, newfile)
            # print(name)

# End time
end = time.time()
seconds=end-start
print("train total : "+str(train_num))
print("validation total : "+str(val_num))
print("test total : "+str(test_num))
total_num=train_num+val_num+test_num
print("total number : "+str(total_num))
print( "Time taken : {0} seconds".format(seconds))
2.2 xml文件转换为csv中间文件,新建csvdata/目录存放生成的csv文件,代码如下:
import os
import glob
import pandas as pd
import xml.etree.ElementTree as ET
def xml_to_csv(path):
xml_list = []
for xml_file in glob.glob(path + '/*.xml'):
tree = ET.parse(xml_file)
root = tree.getroot()
# print(root)
print(root.find('filename').text)
for member in root.findall('object'):
value = (root.find('filename').text,
int(root.find('size')[0].text), #width
int(root.find('size')[1].text), #height
member[0].text,
int(member[4][0].text),
int(float(member[4][1].text)),
int(member[4][2].text),
int(member[4][3].text)
)
xml_list.append(value)
column_name = ['filename', 'width', 'height', 'class', 'xmin', 'ymin', 'xmax', 'ymax']
xml_df = pd.DataFrame(xml_list, columns=column_name)
return xml_df
def main():
for directory in ['train','test','validation']:
xml_path = os.path.join(os.getcwd(), 'Annotations/{}'.format(directory))
# image_path = os.path.join(os.getcwd(), 'merged_xml')
xml_df = xml_to_csv(xml_path)
# xml_df.to_csv('whsyxt.csv', index=None)
xml_df.to_csv('csvdata/tf_{}.csv'.format(directory), index=None)
print('Successfully converted xml to csv.')
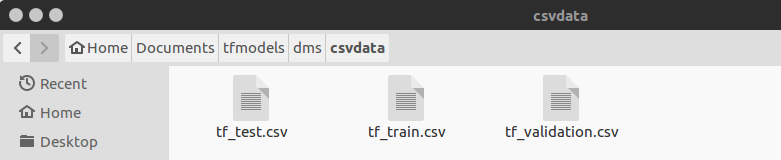
main()在csvdata/文件夹下生成训练、验证和测试的csv格式文件:
2.3 由csv格式数据生成tf record格式数据,新建generate_tfrecord.py脚本,并新建tfdata/文件夹,代码如下:
from __future__ import division
from __future__ import print_function
from __future__ import absolute_import

import os
import io
import pandas as pd
import tensorflow as tf

from PIL import Image
from object_detection.utils import dataset_util
from object_detection.utils import label_map_util
from collections import namedtuple

flags = tf.app.flags
flags.DEFINE_string('csv_input', '', 'Path to the CSV input')
flags.DEFINE_string('images_input', '', 'Path to the images input')
flags.DEFINE_string('output_path', '', 'Path to output TFRecord')
flags.DEFINE_string('label_map_path', '', 'Path to label map proto')
FLAGS = flags.FLAGS


def split(df, group):
    data = namedtuple('data', ['filename', 'object'])
    gb = df.groupby(group)
    return [data(filename, gb.get_group(x)) for filename, x in
            zip(gb.groups.keys(), gb.groups)]


def create_tf_example(group, label_map_dict, images_path):
    with tf.gfile.GFile(os.path.join(
        images_path, '{}'.format(group.filename)), 'rb') as fid:
        encoded_jpg = fid.read()
    encoded_jpg_io = io.BytesIO(encoded_jpg)
    image = Image.open(encoded_jpg_io)
    width, height = image.size

    filename = group.filename.encode('utf8')
    image_format = b'jpg'
    xmins = []
    xmaxs = []
    ymins = []
    ymaxs = []
    classes_text = []
    classes = []
    for index, row in group.object.iterrows():
        xmins.append(row['xmin'] / width)
        xmaxs.append(row['xmax'] / width)
        ymins.append(row['ymin'] / height)
        ymaxs.append(row['ymax'] / height)
        classes_text.append(row['class'].encode('utf8'))
        classes.append(label_map_dict[row['class']])

    tf_example = tf.train.Example(features=tf.train.Features(feature={
        'image/height': dataset_util.int64_feature(height),
        'image/width': dataset_util.int64_feature(width),
        'image/filename': dataset_util.bytes_feature(filename),
        'image/source_id': dataset_util.bytes_feature(filename),
        'image/encoded': dataset_util.bytes_feature(encoded_jpg),
        'image/format': dataset_util.bytes_feature(image_format),
        'image/object/bbox/xmin': dataset_util.float_list_feature(xmins),
        'image/object/bbox/xmax': dataset_util.float_list_feature(xmaxs),
        'image/object/bbox/ymin': dataset_util.float_list_feature(ymins),
        'image/object/bbox/ymax': dataset_util.float_list_feature(ymaxs),
        'image/object/class/text': dataset_util.bytes_list_feature(classes_text),
        'image/object/class/label': dataset_util.int64_list_feature(classes),
    }))
    return tf_example


def main(_):
    writer = tf.python_io.TFRecordWriter(FLAGS.output_path)
    label_map_dict = label_map_util.get_label_map_dict(FLAGS.label_map_path)
    images_path = FLAGS.images_input
    examples = pd.read_csv(FLAGS.csv_input)
    grouped = split(examples, 'filename')
    for group in grouped:
        tf_example = create_tf_example(group, label_map_dict, images_path)
        writer.write(tf_example.SerializeToString())

    writer.close()
    output_path = FLAGS.output_path
    print('Successfully created the TFRecords: {}'.format(output_path))


if __name__ == '__main__':
    tf.app.run()
用法:
python generate_tfrecord.py \
--csv_input=./csvdata/tf_train.csv \
--images_input=images \
--output_path=./tfdata/train.record \
--label_map_path=./label_map.pbtxt
类似地依次生成训练、验证和测试数据集:

3. 模型训练
3.1 创建label_map.pbtxt
item {
  name: "face"
  id: 1
  display_name: "face"
}
item {
  name: "telephone"
  id: 2
  display_name: "telephone"
}
item {
  name: "cigarette"
  id: 3
  display_name: "cigarette"
}
根据自己训练的类别进行修改。
3.2 配置pipeline.config,到models/research/object_detection/samples/configs/文件夹下将ssd_mobilenet_v2_coco.config拷贝到训练文件夹下,修改内容主要是:①总类别数;②tfrecord文件的路径,包括训练集、验证集等路径;③label_map的路径;也可以设置网络的各种学习参数,如:batch_size,学习率和退化率,训练的总步数等。
# SSDLite with Mobilenet v2 configuration for MSCOCO Dataset.
# Users should configure the fine_tune_checkpoint field in the train config as
# well as the label_map_path and input_path fields in the train_input_reader and
# eval_input_reader. Search for "PATH_TO_BE_CONFIGURED" to find the fields that
# should be configured.

model {
  ssd {
    num_classes: 3
    box_coder {
      faster_rcnn_box_coder {
        y_scale: 10.0
        x_scale: 10.0
        height_scale: 5.0
        width_scale: 5.0
      }
    }
    matcher {
      argmax_matcher {
        matched_threshold: 0.5
        unmatched_threshold: 0.5
        ignore_thresholds: false
        negatives_lower_than_unmatched: true
        force_match_for_each_row: true
      }
    }
    similarity_calculator {
      iou_similarity {
      }
    }
    anchor_generator {
      ssd_anchor_generator {
        num_layers: 6
        min_scale: 0.2
        max_scale: 0.95
        aspect_ratios: 1.0
        aspect_ratios: 2.0
        aspect_ratios: 0.5
        aspect_ratios: 3.0
        aspect_ratios: 0.3333
      }
    }
    image_resizer {
      fixed_shape_resizer {
        height: 300
        width: 300
      }
    }
    box_predictor {
      convolutional_box_predictor {
        min_depth: 0
        max_depth: 0
        num_layers_before_predictor: 0
        use_dropout: false
        dropout_keep_probability: 0.8
        kernel_size: 3
        use_depthwise: true
        box_code_size: 4
        apply_sigmoid_to_scores: false
        conv_hyperparams {
          activation: RELU_6,
          regularizer {
            l2_regularizer {
              weight: 0.00004
            }
          }
          initializer {
            truncated_normal_initializer {
              stddev: 0.03
              mean: 0.0
            }
          }
          batch_norm {
            train: true,
            scale: true,
            center: true,
            decay: 0.9997,
            epsilon: 0.001,
          }
        }
      }
    }
    feature_extractor {
      type: 'ssd_mobilenet_v2'
      min_depth: 16
      depth_multiplier: 1.0
      use_depthwise: true
      conv_hyperparams {
        activation: RELU_6,
        regularizer {
          l2_regularizer {
            weight: 0.00004
          }
        }
        initializer {
          truncated_normal_initializer {
            stddev: 0.03
            mean: 0.0
          }
        }
        batch_norm {
          train: true,
          scale: true,
          center: true,
          decay: 0.9997,
          epsilon: 0.001,
        }
      }
    }
    loss {
      classification_loss {
        weighted_sigmoid {
        }
      }
      localization_loss {
        weighted_smooth_l1 {
        }
      }
      hard_example_miner {
        num_hard_examples: 3000
        iou_threshold: 0.99
        loss_type: CLASSIFICATION
        max_negatives_per_positive: 3
        min_negatives_per_image: 3
      }
      classification_weight: 1.0
      localization_weight: 1.0
    }
    normalize_loss_by_num_matches: true
    post_processing {
      batch_non_max_suppression {
        score_threshold: 1e-8
        iou_threshold: 0.6
        max_detections_per_class: 100
        max_total_detections: 100
      }
      score_converter: SIGMOID
    }
  }
}

train_config: {
  batch_size: 24
  optimizer {
    rms_prop_optimizer: {
      learning_rate: {
        exponential_decay_learning_rate {
          initial_learning_rate: 0.004
          decay_steps: 800720
          decay_factor: 0.95
        }
      }
      momentum_optimizer_value: 0.9
      decay: 0.9
      epsilon: 1.0
    }
  }
  #fine_tune_checkpoint: "PATH_TO_BE_CONFIGURED/model.ckpt"
  fine_tune_checkpoint_type:  "detection"
  # Note: The below line limits the training process to 200K steps, which we
  # empirically found to be sufficient enough to train the pets dataset. This
  # effectively bypasses the learning rate schedule (the learning rate will
  # never decay). Remove the below line to train indefinitely.
  num_steps: 20000
  data_augmentation_options {
    random_horizontal_flip {
    }
  }
  data_augmentation_options {
    ssd_random_crop {
    }
  }
}

train_input_reader: {
  tf_record_input_reader {
    input_path: "tfdata/train.record"
  }
  label_map_path: "label_map.pbtxt"
}

eval_config: {
  num_examples: 8000
  # Note: The below line limits the evaluation process to 10 evaluations.
  # Remove the below line to evaluate indefinitely.
  max_evals: 10
}

eval_input_reader: {
  tf_record_input_reader {
    input_path: "tfdata/val.record"
  }
  label_map_path: "label_map.pbtxt"
  shuffle: false
  num_readers: 1
}
3.3 训练
将object_detection/下的model_main拷到训练文件夹下,运行脚本开始训练:
python model_main.py \
--model_dir=models_trained \
--pipeline_config_path=ssdlite_mobilenet_v2_zyl.config
训练过程使用tensorboard进行监测:
tensorboard --logdir==./models_trained/打开链接即可看到训练过程的数据可视化结果
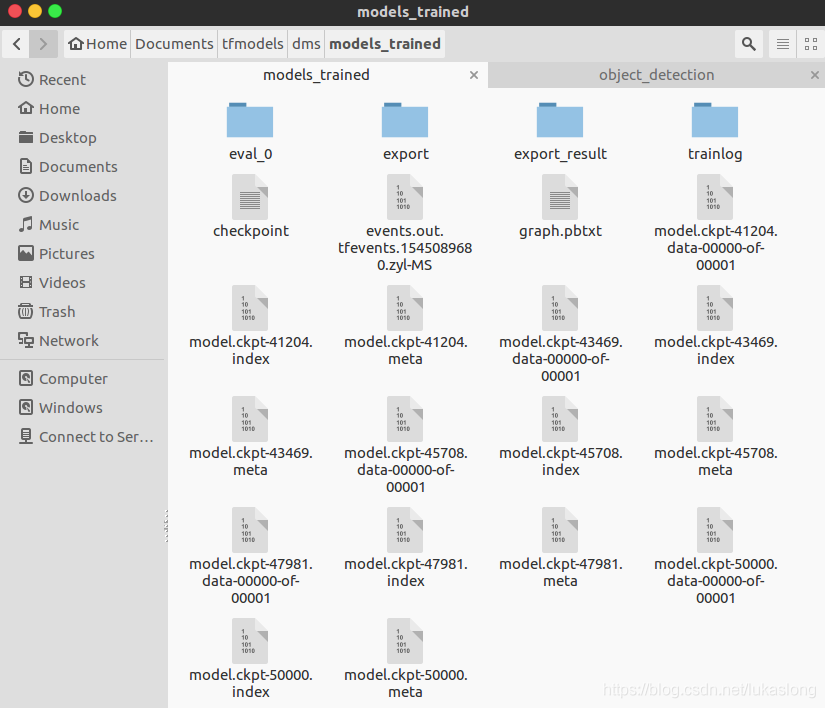
3.3 训练结果
生成一堆models.ckpt-xxx的文件,不同数字代表不同时刻保存的过程文件。使用export_inference_graph.py(在object detection目录下)导出pb文件:
python export_inference_graph.py \
--pipeline_config_path=ssdlite_mobilenet_v2_zyl.config \
--trained_checkpoint_prefix=models_trained/model.ckpt-30000 \
--output_directory models_trained/exported_result
3.4 测试pb模型:
import tensorflow as tf
import cv2
import os
import time
import numpy as np
from object_detection.utils import label_map_util
from object_detection.utils import visualization_utils as vis_util

videofile='/home/zyl/Documents/caffe/examples/MobileNet-SSD/videos/20180813140109903.avi'
cap=cv2.VideoCapture(videofile)
MODEL_NUM_CLASSES=3
MODEL_LABEL_MAP ='/home/zyl/data/dms_tf/label_map.pbtxt'
MODEL_PB='/home/zyl/data/dms_tf/model2/export_result/frozen_inference_graph.pb'

# read graph model
with tf.gfile.GFile(MODEL_PB,'rb') as fd:
    _graph=tf.GraphDef()
    _graph.ParseFromString(fd.read())
    tf.import_graph_def(_graph,name='')

# get the default graph model
detection_graph=tf.get_default_graph()

# read labelmap
label_map=label_map_util.load_labelmap(MODEL_LABEL_MAP)
categories=label_map_util.convert_label_map_to_categories(label_map,MODEL_NUM_CLASSES)
category_index=label_map_util.create_category_index(categories)

with tf.Session(graph=detection_graph) as sess:
    while(cap.isOpened()):
        ret,frame=cap.read()
        frame_np_expanded=np.expand_dims(frame,axis=0)
        image_tensor = detection_graph.get_tensor_by_name('image_tensor:0')
        boxes = detection_graph.get_tensor_by_name('detection_boxes:0')
        scores = detection_graph.get_tensor_by_name('detection_scores:0')
        classes = detection_graph.get_tensor_by_name('detection_classes:0')
        num_detections = detection_graph.get_tensor_by_name('num_detections:0')
        t1=time.time()
        (boxes,scores,classes,num_detections)=sess.run([boxes,scores,classes,num_detections], \
        feed_dict={image_tensor:frame_np_expanded})

        vis_util.visualize_boxes_and_labels_on_image_array(frame,np.squeeze(boxes),
        np.squeeze(classes).astype(np.int32),np.squeeze(scores),category_index,
        use_normalized_coordinates=True,line_thickness=6)
        t2=time.time()
        print('FPS:',1/(t2-t1))
        cv2.imshow('MobilenetTF',frame)
        if cv2.waitKey(1)&0xff ==27:
            break
    cap.release()
4. 生成TF Lite模型
4.1 先冻结模型,即将变量用常量替代(上一步frozen的pb模型直接转换会报错,需使用export_tflite_ssd_graph.py进行优化后再转换)。将object_detection/export_tflite_ssd_graph.py拷贝到训练目录,运行:
python export_tflite_ssd_graph.py \
    --pipeline_config_path=ssdlite_mobilenet_v2_zyl.config \
    --trained_checkpoint_prefix=models_trained/model.ckpt-50000 \
    --output_directory=models
生成冻结后的模型,再转换为对应的TF Lite模型,包括float类型的(模型更大,更准确)和量化后uint8类型的模型(模型更小,但准确率不高)
float32型:
bazel-bin/tensorflow/lite/toco/toco \
--input_file=/home/zyl/Documents/tfmodels/dms/models/tflite_graph.pb \
--input_format=TENSORFLOW_GRAPHDEF  \
--output_format=TFLITE  \
--output_file=/home/zyl/Documents/tfmodels/dms/models/litefloat_zyl.tflite \
--inference_type=FLOAT \
--input_arrays=normalized_input_image_tensor \
--output_arrays='TFLite_Detection_PostProcess','TFLite_Detection_PostProcess:1','TFLite_Detection_PostProcess:2','TFLite_Detection_PostProcess:3' \
--input_shapes=1,300,300,3 \
--mean_values=128 \
--std_dev_values=128 \
--default_ranges_min=0 \
--allow_custom_ops
uint8量化:
bazel-bin/tensorflow/lite/toco/toco \
--graph_def_file=/home/zyl/data/dms_tf/model1/tflite_graph.pb 、
--output_file=/home/zyl/data/dms_tf/model1/tflite_model/model1.tflite \
--input_shapes=1,300,300,3 \
--input_arrays=normalized_input_image_tensor \
--output_arrays='TFLite_Detection_PostProcess','TFLite_Detection_PostProcess:1','TFLite_Detection_PostProcess:2','TFLite_Detection_PostProcess:3' \
--inference_type=QUANTIZED_UINT8 \
--mean_values=128 \
--std_dev_values=128 \
--default_ranges_min=0 \
--default_ranges_max=6 \
--change_concat_input_ranges=False \
--allow_custom_ops
这里的toco工具可选择事先变异好,也可直接运行脚本python lite/toco/toco.py
5. 树莓派平台编译
1-3部分主要参考了http://www.cnblogs.com/White-xzx/p/9503203.html 和 https://www.jianshu.com/p/86894ccaa407
4部分参考了https://blog.csdn.net/aslily1234/article/details/84840885