做为旋转编码器学习过程的记录,原理就不详细介绍了,网上有很多。
先上一张时序图
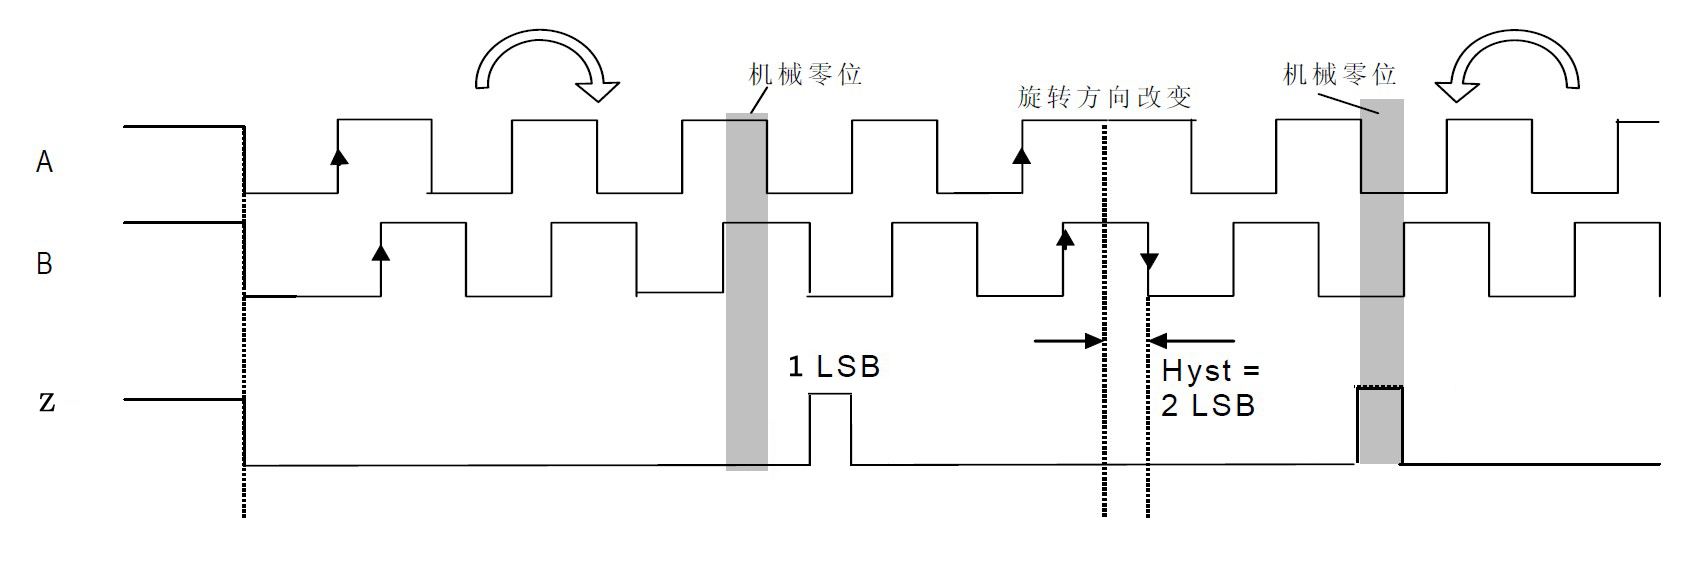
正常旋转时显示
顺时针时序
CLK:1 DT:1
CLK:1 DT:0
CLK:0 DT:0
CLK:0 DT:1
CLK:1 DT:1
逆时针时序
CLK:1 DT:1
CLK:0 DT:1
CLK:0 DT:0
CLK:1 DT:0
CLK:1 DT:1
用网上找的程序测试发现会出现错误编码,于是自己修理一下检测方法,对整个时序进行检查,错误解决。
程序通过串口输出旋转方向和按键。
//旋转编码器测试 Rotaryencoder
int CLKbtn = 12;
int DTbtn = A2;
int SWbtn = A1;
int oldA = LOW;
int oldB = LOW;
bool lastButtonStatus = false;
unsigned char check = 0x00;
void setup()
{
  Serial.begin(9600);
  pinMode(CLKbtn, INPUT);
  pinMode(DTbtn, INPUT);
  pinMode(SWbtn, INPUT);
  digitalWrite(SWbtn, HIGH);//连接按钮的引脚设为上拉
}
void loop()
{
  int newA = digitalRead(CLKbtn);
  int newB = digitalRead(DTbtn);
  int SW = digitalRead(SWbtn);

  //按键检测
  bool buttonStatus = !digitalRead(SWbtn);//高电平时未按下,状态为false
  if (buttonStatus != lastButtonStatus)
  {
    delay(20);//去抖动
    if (buttonStatus != lastButtonStatus)
    {
      Serial.println(buttonStatus ? "pressed" : "released");
      lastButtonStatus = buttonStatus;//保存当前状态
    }
  }
  //旋转检测
  if (newA != oldA || newB != oldB)//变化时
  {
    check = (check << 2) + (newA << 1) + newB; //将变化的时序按位放入,用于对比。
    if (newA == HIGH && newB == HIGH)//旋转结束
    {
      if (check == 0x87) //顺时针 10 00 01 11
        Serial.println("顺时针");
      else if (check == 0x4B) //逆时针 01 00 10 11
        Serial.println("逆时针");
      else
      {
        Serial.println("error");
      }
    }
    oldA = newA;
    oldB = newB;
  }
}